

Introduction
Concrete typically needs days to reach surface dryness and weeks to fully cure, depending on mix, thickness, and climate.
The guide walks through expected timelines, material considerations, and practical steps to promote proper curing and avoid common mistakes.
Key takeaways
- Choose product with appropriate strength, water ratio, and cure type for project.
- Plan mixing: measure ratios, mix thoroughly in clean container, avoid clumps.
- Drying times vary with environment; target curing for at least 7 days.
- Environmental factors, slab thickness, and moisture affect set; plan accordingly.
- Mistake #4: improper mixing of compounds; stirs, ratios, and additives must match specs.
- Safety, cost, and DIY vs pro: assess risks, ventilation, PPE, and budgeting.
Table of Contents
- Introduction
- Key takeaways
- Materials and Mixes: Choosing the Right Product for Your Project
- Step-by-Step Process: From Inspection to Final Cure
- Environmental and Site Factors That Change Drying Times
- Common Mixing and Application Mistakes — How to Avoid Them
- Safety, Cost, and DIY vs Professional Considerations
- Troubleshooting, Visual Checkpoints, and Post-Install Care
- Mistake #4: improper mixing of compounds
- Conclusion
- FAQ
Materials and Mixes: Choosing the Right Product for Your Project
Choosing the right material changes how fast you can work and how strong the finished surface will be. Ready-mix or bagged concrete work for slabs and patches, while self-leveling compounds, polyurethane foam leveling, and rapid-set mixes fit different timing and leveling needs.
Think about project size, substrate conditions, and how much level you need before you start. Check the label for cure times and mix instructions, and watch for compatibility with reinforcement, bleed water, or sealers. If in doubt, check the label or datasheet and use a quick prep checklist to avoid common mistakes.
Tools and Materials Checklist
Use this checklist before starting any concrete project to ensure you have everything needed for a smooth process.
- Mixing tools: Use mixers or buckets; confirm they’re clean and in good working order. Skipping prep can lead to mixing issues.
- Trowels and floats: Check for sharp edges and proper size; dull trowels cause uneven surfaces.
- Forms and stakes: Ensure forms are straight and level, stakes secure. Loose forms result in leaks and waste.
- Reinforcement materials: Confirm rebar or mesh is the right gauge and length; improper reinforcement leads to cracking.
- Curing compound: Have enough for full coverage; skipping can cause drying cracks.
- PPE gear: Gloves, safety glasses, respirator; missing PPE risks injury.
Quick rule: Always check tools and materials before starting to avoid delays or mistakes.
Material Specs and How They Affect Cure
The type of concrete you choose impacts how long it takes to cure, its strength, and resistance to cracking and staining.
- Cement type: Use Type I for general projects; look for high compressive strength ratings. Wrong cement can lead to weak bonds or excessive shrinkage.
- Water-cement ratio: Lower ratios mean stronger concrete; check mix instructions carefully. Too much water results in weaker, more porous concrete.
- Admixtures: Use retarders for hot days; confirm compatibility with other materials. Incorrect admixtures can cause setting issues or weaken the final product.
- Aggregate size: Larger aggregates are better for structural strength; check specs match project needs. Inappropriate aggregate sizes lead to weak spots and uneven surfaces.
Misusing these properties can result in cracking, staining, or a weak bond between layers.
Step-by-Step Process: From Inspection to Final Cure
We’ll lay out the full sequence from site inspection through final cure, so you know what comes first and what comes last. You’ll set acceptable tolerances for flatness, level, and surface finish and line up roles, tools, and safety. We’ll outline prep, mixing, placement, finishing, curing, and post-cure checks in a practical, logical order.
Following this order helps catch problems early and avoids rework. It ties workmanship to real checks like substrate readiness, moisture, and ambient conditions so you don’t guess. The plan gives you a clear path to coordinate crews and tools and know when it’s safe to seal or coat after cure.
Step-by-Step Process
This checklist covers the entire process from site inspection to final curing, ensuring no steps are missed.
- Inspect Site: Check substrate condition and drainage. Confirm no cracks or contaminants. Mistakes here lead to weak concrete.
- Clear Area: Remove debris and level ground. Lay down formwork securely. Improper clearance causes uneven pours.
- Prepare Mix: Measure materials precisely, mix thoroughly without overwatering. Check for proper consistency. Incorrect ratios weaken concrete.
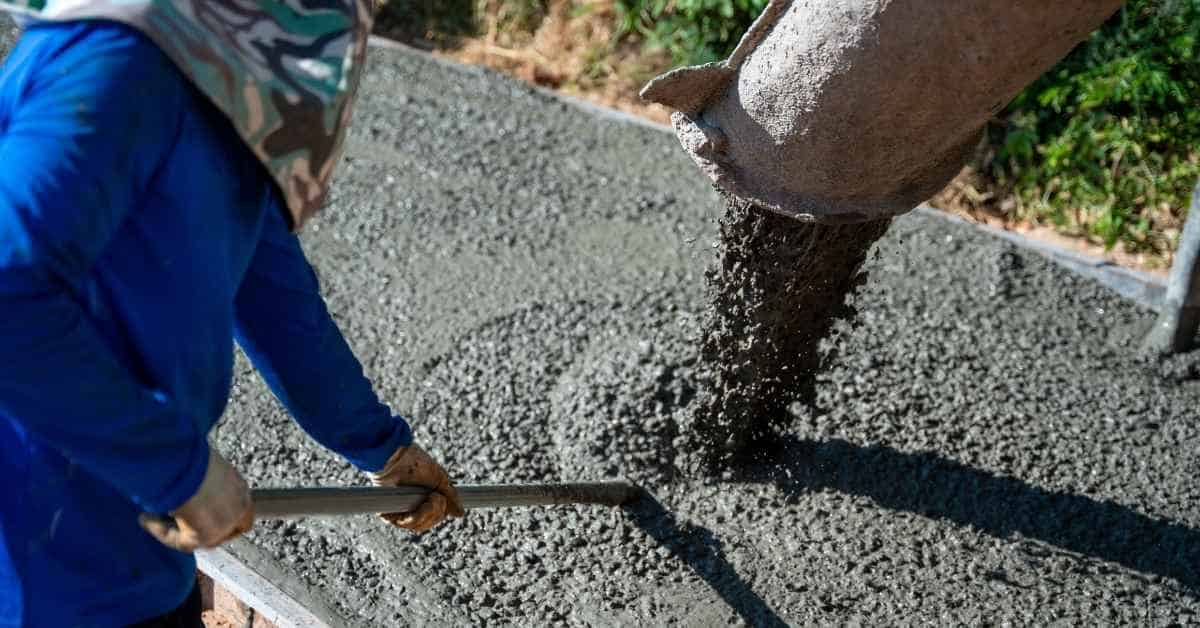
- Pour Concrete: Start pouring from one end and work towards the other. Use a screed to level it out evenly. Uneven pours lead to cracks.
- Consolidate Properly: Vibrate to remove air bubbles but avoid over-vibrating. Check for voids or honeycombing. Air pockets weaken the concrete.
- Finish Surface: Float and trowel as needed, timing is crucial. Avoid dusting by keeping surface moist. Dusting leads to weak surfaces.
- Cure Concrete: Apply curing compound or cover with plastic immediately after finishing. Maintain moisture for at least 7 days. Skipping this step causes cracking and weakening.
- Check Cure Quality: Test hardness using a concrete test hammer. Look for cracks, dusting, or other defects. Failing to check can lead to structural issues.
- Clean Up Tools: Wash tools thoroughly and store them properly. Dispose of waste responsibly. Improper cleanup leads to fines and hazards.
Quick rule: Follow each step carefully, from inspection through final cure, to ensure a strong and durable concrete finish.
Pre-project Inspections and Prep Work
This checklist ensures your site is ready for pouring before you start mixing the concrete.
- Check Substrate: Ensure it’s clean, dry, and free of cracks. Use a broom to sweep away debris. Dirt or cracks weaken bond.
- Verify Drainage: Confirm proper slope for water runoff. Check for low spots that could cause pooling. Poor drainage leads to cracking.
- Inspect Rebar/Mesh: Ensure it’s properly placed and tied off securely. No gaps or overlaps allowed. Inadequate reinforcement weakens concrete.
- Apply Bonding Agent: Use a brush or roller to apply evenly over substrate if needed. Let dry before pouring. No bonding agent causes delamination.
- Construct Forms: Build forms securely and level them out. Check for leaks with water test. Insecure forms lead to spills.
- Check Tools Readiness: Ensure all tools are clean, sharp, and ready to use. Have backup supplies on hand. Tool failure delays work.
- Review Permits: Confirm all necessary permits are in place before starting work. Check local regulations. No permit leads to fines.
- Set Up Safety Gear: Wear gloves, safety glasses, and hard hats. Have first aid kit nearby. Safety gear prevents injuries.
Quick rule: Always inspect and prep thoroughly before pouring concrete to avoid costly mistakes later on.
Mixing, Placing, and Finishing Best Practices
This checklist ensures proper mixing ratios, placement techniques, and finishing methods for a strong concrete finish.
- Measure Materials Accurately: Use scales or measuring cups to get the right mix. Avoid overwatering. Incorrect ratios weaken concrete.
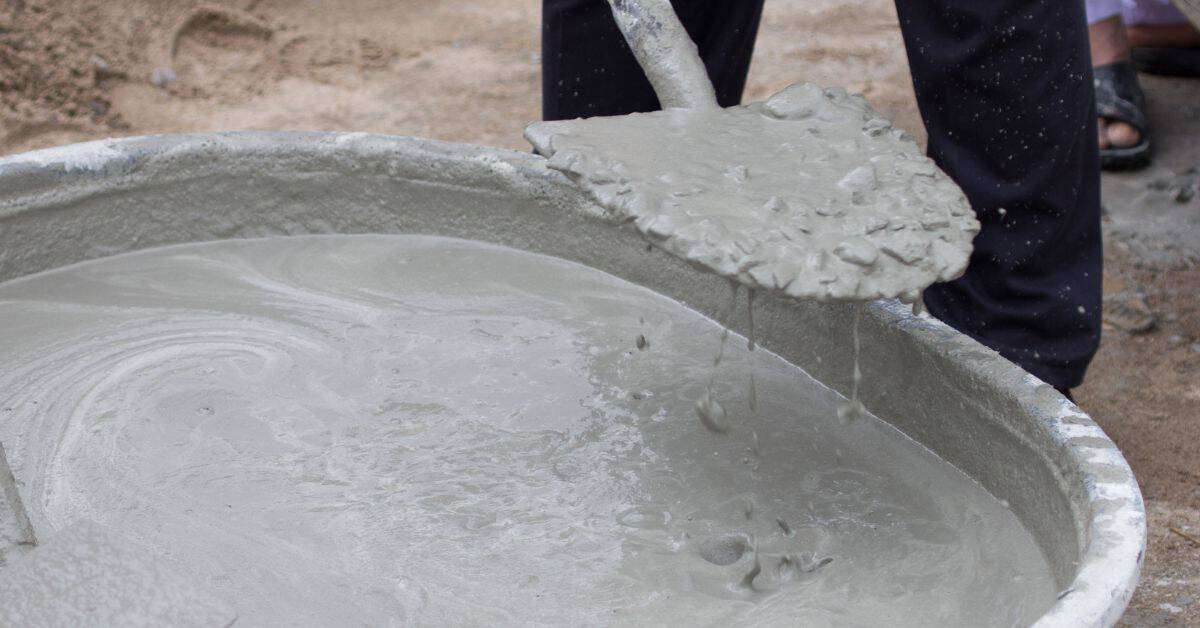
- Mix Thoroughly: Mix until all materials are evenly distributed without clumps. Check for proper consistency. Uneven mixing leads to weak spots.
- Pour Evenly: Start pouring from one end and work towards the other. Use a screed to level it out evenly. Uneven pours lead to cracks.
- Vibrate Properly: Vibrate to remove air bubbles but avoid over-vibrating. Check for voids or honeycombing. Air pockets weaken the concrete.
- Float and Trowel Timely: Float immediately after screeding, then trowel as needed. Avoid dusting by keeping surface moist. Dusting leads to weak surfaces.
- Control Joints Properly: Install control joints at regular intervals to prevent cracking. Use a grooving tool for clean lines. No joints lead to random cracks.
- Avoid Cold Joints: Pour continuously or use plastic sheeting between pours to avoid cold joints. Check for proper curing before resuming work. Cold joints weaken the concrete structure.
- Keep Surface Moist: Use a spray bottle to keep surface moist during finishing and curing stages. Avoid over-wetting which can cause cracking. Drying too fast leads to shrinkage cracks.
Quick rule: Follow these steps carefully for proper mixing, placing, and finishing to ensure a strong and durable concrete finish.
Curing Methods and When to Start Them
This checklist ensures proper curing methods are used immediately after pouring to maximize strength and durability.
- Wet Curing: Cover surface with plastic sheeting or burlap soaked in water. Maintain moisture for at least 7 days. No wet curing leads to cracking.
- Curing Compound: Apply a thin layer of curing compound immediately after finishing. Follow manufacturer instructions for coverage and timing. Skipping this step causes drying cracks.
- Misting System: Set up misting system to keep surface moist during curing period. Monitor humidity levels closely. Dry conditions lead to shrinkage cracks.
- Cover with Straw Mats: Lay down straw mats or other porous materials to retain moisture and protect from UV rays. Check for proper coverage daily. UV exposure weakens concrete surface.
- Maintain Temperature: Keep curing area at a consistent temperature between 50-90°F (10-32°C). Avoid extreme heat or cold. Temperature extremes cause rapid drying and cracking.
- Check for Cracks Daily: Inspect surface daily during curing period for any signs of cracks or defects. Address issues immediately if found. Neglecting checks leads to structural problems.
- Monitor Humidity Levels: Use a hygrometer to monitor humidity levels closely. Maintain at least 60% relative humidity. Lack of moisture causes drying cracks.
- Protect from Wind and Sun: Shield curing concrete from direct sunlight and strong winds using tarps or other protective coverings. Check for proper coverage daily. Wind and sun exposure weaken surface strength.
Quick rule: Start curing methods immediately after finishing to ensure proper moisture retention and prevent drying cracks.
Environmental and Site Factors That Change Drying Times
Environmental and site factors affect drying and curing differently. Temperature, humidity, wind, sun exposure, and substrate temperature can speed up or slow down these phases, so monitor conditions and adjust plans.
This matters because it helps you plan safer, better finishes. Practical checks—time to touch, surface firmness, and surface heat—plus simple controls like shading, windbreaks, or gentle airflow help you stay on track; use a thermometer, hygrometer, and moisture meter to gauge conditions and compare to the product guidance.
Cold-Weather and Hot-Weather Strategies
In cold weather, concrete can take longer to set due to slower chemical reactions. Use accelerators or heated enclosures to speed up the process safely. In hot weather, high temperatures accelerate surface drying but can lead to premature shrinkage or cracking. Retarders help slow down setting times in heat.
Before starting work, check safety thresholds like minimum and maximum temperature limits for pouring concrete. Cold weather might require a minimum ambient air temp of 40°F (4°C), while hot days may need shade or windbreaks to prevent rapid surface drying.
Always monitor the conditions closely with thermometers and hygrometers. Adjust your curing methods as needed, such as using plastic sheeting in cold weather or misting systems in heat to keep moisture levels consistent.
How Moisture and Substrate Conditions Impact Results
The substrate’s moisture content can significantly affect how concrete cures. Wet substrates slow down the curing process, while dry ones speed it up. Ensure the ground is properly prepared before pouring.
Use a moisture meter to test the substrate’s moisture level before laying concrete. This helps prevent issues like poor adhesion or seal failures later on. Control evaporation rates by covering the slab with plastic sheeting or using curing compounds.
Maintain consistent humidity levels around the concrete during curing. High humidity slows down drying, allowing for better hydration and strength development. Keep an eye on surface heat too; it can indicate uneven moisture loss leading to cracks.
Common Mixing and Application Mistakes — How to Avoid Them
Common mistakes show up fast: improper mix ratios, overwatering, poor surface prep, and skipping inspections. Use the label or datasheet as your guide and recheck batch consistency every time. Fix surface prep and rebatch if you spot drift.
Why it matters: even small mix errors affect strength, shrinkage, and setting time, and overwatering makes a weak surface. Good prep—clean, damp surface, dust removal, moisture check, proper profiling—prevents debonding and cracking. Stick to a simple inspection rhythm and follow the manufacturer instructions for curing; stop and reassess if you see red flags.
Improper Mixing and Consistency Problems
Mixing concrete is like baking a cake; the recipe matters. If you don’t follow the manufacturer’s water ratios, your mix won’t set properly. Too much water makes it weak, too little and it’s hard to work with.
Check the consistency of your batch by doing a slump test. Put in three inches of concrete into a cone mold and let it drop. If it slumps more than an inch or two, you’ve got too much water. A good mix should hold its shape when you remove the cone.
If you notice cracks or weak spots during curing, chances are your mix was off. Always double-check your ratios and mixing times before pouring. It’s a small step that can save big headaches later on.
Rushing the Cure and Other Time-Related Errors
Curing concrete takes time, but rushing it leads to weak spots and cracks. Here are common mistakes to avoid:
- Early loading: Wait until the concrete has fully cured before putting weight on it.
- Too soon joint cutting: Joints need to be cut when the concrete is still plastic but not yet set, usually 4-6 hours after pouring.
- Late joint cutting: If you wait too long, the slab will crack instead of following your cuts.
- Skipping inspections: Regular checks ensure everything is going as planned and catch issues early.
Plan ahead to respect curing windows. It’s better to be patient than deal with costly repairs later on.
Safety, Cost, and DIY vs Professional Considerations
Safety comes first on every slab project. Wear proper PPE, keep good ventilation, and handle chemicals and admixtures with care; plan for spill procedures and eye-wash readiness. Costs matter and influence whether you DIY or hire a pro, so match the job to the risk and prep work.
Assess the project scope and required skills to know if you can mix, prep, and level confidently. If you’re unsure about structural concerns or exterior slabs or when a consistent finish and curing are critical, hiring a pro can save time and reduce risk.
Cost and Time Trade-offs by Method
Choosing the right method for your concrete project involves balancing cost and time. Fast-setting mixes, for example, can save you days but come with a higher upfront price tag. Foam leveling compounds are another option that reduces prep work but costs more than traditional methods.
If you’re on a tight budget, DIY-friendly materials like basic cement and admixtures might be your best bet. But remember, these often require more time and effort to apply correctly. For instance, mixing concrete accurately takes practice and patience—skimping here can lead to costly mistakes down the line.
When deciding whether to spend extra for professional-grade materials or services, consider long-term benefits like durability and maintenance ease. While DIY methods might seem cheaper initially, they could end up costing more in repairs over time if not done right. So weigh your options carefully based on your project’s specific needs and constraints.
Ultimately, the decision boils down to how much you’re willing to invest upfront versus long-term savings and hassle reduction. For many homeowners, the extra cost of professional-grade materials or hiring a pro is justified by peace of mind and better results.
When to Call a Pro — Risk and Warranty Factors
There are times when calling in the pros is not just convenient but necessary. If you’re dealing with structural slabs, complex grading issues, or poor subsurface conditions, professional expertise can prevent costly mistakes and ensure your project meets building codes.
Large exterior slabs also pose unique challenges that DIYers often struggle to handle alone. Professionals have the equipment and experience to tackle these jobs efficiently without compromising quality. They know how to manage tricky site conditions like uneven terrain or unstable soil, which are critical for long-term stability.
Another key factor is warranty coverage. Many manufacturers offer warranties on their products that require professional installation to be valid. This means if you do the work yourself and something goes wrong later, you might not be covered under any warranty agreements. So always check with your supplier about these requirements before starting a project.
To find reliable contractors, ask for referrals from friends or family who have done similar projects recently. Look at their previous work samples and reviews online to gauge their quality and reliability. Once you’ve chosen a contractor, make sure they provide detailed estimates upfront along with clear timelines and warranty terms so there are no surprises down the road.
Troubleshooting, Visual Checkpoints, and Post-Install Care
Start with a visual check: tack-free surface, even color, no surface bloom or powdery residue, and a consistent look from multiple angles.
Then do a simple knife/pin probe to test surface hardness and look for cracking patterns, delamination, or shrinkage near joints.
Notice curling, honeycombing, or efflorescence and map likely causes such as curing, mix, or contamination.
Address defects promptly with appropriate remedies, and know when to escalate to grinding, patching, or releveling.
Establish proper curing conditions, protect the slab from early traffic, and plan sealing and maintenance to prevent recurrence.
Keep notes for warranty or contractor recourse and check product labels or manufacturer instructions for guidance.
Visual Checkpoints by Timeframe
Use this checklist at key intervals to ensure your concrete is drying properly and catch issues early.
- 24 hours: Surface should be tack-free. Look for uniform color without blooming or residue. If skipped, surface may remain soft and prone to damage.
- 7 days: Check for fine cracks that indicate shrinkage. Use a pin probe to test hardness; surface should feel firm but not overly hard. Missing this step can lead to premature wear.
- 28 days: Inspect for wide cracks, delamination (peeling), or curling. Surface should be smooth and free of honeycombing. Skipping this check risks long-term structural issues.
Quick rule: Regular checks prevent small problems from becoming major defects.
Repair Options for Common Failures
Choose the right fix based on defect severity and location. Quick fixes can save time, but severe issues may need more extensive work.
- Hairline cracks: Use epoxy or polyurethane crack sealant. Failing to address minor cracks early can lead to larger structural problems.
- Delamination: Grind out and patch affected areas with a slurry fill. Ignoring delamination can cause further damage, requiring full slab replacement.
- Mild curling or warping: Apply an overlay for leveling and protection. Overlooking this step may result in uneven surfaces and increased wear.
Quick rule: Address minor issues promptly to prevent bigger repairs later on.
Mistake #4: improper mixing of compounds
Improper mixing means you don’t follow the right ratios, you add ingredients in the wrong order, or you stop mixing too soon, and all of that changes the slurry from what you need into something inconsistent, stiff, or watery. That sloppy approach shows up as poor workability, uneven cure, and weak spots, and it bites both traditional concrete and self-leveling products where you expect a smooth, uniform finish.
To keep it predictable, you must choose the right cement type, aggregates, water, and admixtures, measure them precisely, track each batch, and avoid cross-contamination between different products. Follow the correct sequence, mix at a steady speed for the recommended time, and use a drum mixer or paddle mixer to minimize air pockets and ensure even dispersion. Temperature, water content, and pot life matter, so watch ambient temp and water temp and be prepared to remix or rebatched if the mix starts to go off; these on-site realities save you a call-back. Safety considerations include proper ventilation, mask use, and keeping ready-munged products separate to avoid accidental cross-contact.
Verify materials and ratios before mixing
The right mix of cement, aggregates, water, and admixtures is crucial for a strong, durable concrete slab. Any deviation can lead to cracking, staining, or weak bonding.
- Cement type: Use the specified grade; check batch numbers. Wrong type leads to poor strength and curing issues.
- Agregate size: Follow manufacturer specs closely. Incorrect sizes cause uneven distribution leading to weak spots.
- Water content: Measure accurately with a gauge or scale. Too much water makes concrete too runny, reducing strength.
- Admixtures: Add as per instructions; avoid cross-contamination. Substituting can alter set time and weaken the bond.
- Batch tracking: Keep records of each batch for quality control. Helps trace issues back to specific batches or materials.
Mixing order, technique, and equipment for consistent results
The sequence in which you add ingredients and the mixing method can significantly impact the quality of your concrete. Proper techniques prevent lumps, segregation, or air pockets.
- Water first: Add water to drum mixer before dry materials. This ensures uniform wetting and prevents clumping.
- Powder next: Slowly add cement and aggregates; mix thoroughly. Rapid addition can cause uneven distribution leading to weak spots.
- Additives last: Incorporate admixtures carefully at the end. Incorrect timing affects performance and curing time.
- Mixer speed: Use recommended RPM settings for your mixer. Too fast causes air entrainment; too slow leads to segregation.
- Mix duration: Mix until uniform color, no streaks or lumps. Over-mixing can weaken the concrete by breaking down aggregates.

Conclusion
You now have a practical path to a durable, safe concrete job. Protecting people, the surface, and your investment starts with the right mix, proper inspection, and timely curing.
Check that you chose the correct product for the project, verify measurements and mixing ratios, set the pour temperature and site conditions within safe ranges, and follow the cure timeline. After mixing, pour or place methodically, finish cleanly, and monitor environmental factors that can speed or slow drying. Finish with a proper cure plan and clear post-install care steps, then test a small area first if you’re trying something new.
Common mistakes to avoid are rushing the mix, skipping the safety gear, and ignoring environmental conditions that affect drying times. Always read product labels, wear gloves and eye protection, and keep moisture and temperature in check. If you see cracking, frost, or detaching edges, pause, re-evaluate, and don’t push through—these signs mean you should pause and fix before it hardens further.
If the project is large, complex, or outdoor under unpredictable weather, it makes sense to call a professional rather than push on. A pro can confirm product compatibility, optimize cure conditions, and handle edging, joints, and drainage with confidence. With the right checks and a disciplined approach, you’ll finish strong and move on to the next job without fear of costly reversals.
FAQ
How long does it take for concrete to dry to a hard surface?
Expect the top to feel dry to the touch in 24 to 48 hours. Full cure takes about 28 days, but you can use the space for light tasks earlier if the surface is set. Temperature and humidity will change those times.
What factors affect drying time?
Temperature, humidity, airflow, and slab thickness are the big ones. Slower rates happen in cold or damp conditions; hotter days speed up the surface but not the core. The mix, finish, and whether a vapor barrier was used also matter.
Can I speed up drying safely?
There are no magic tricks. Keep the area warm and dry with good airflow. Don’t rush by using heat lamps on fresh concrete or adding water—that can cause cracks and weak spots.
What mistakes slow down the cure?
Pouring too thick, sealing or covering too soon, and walking on it too early all slow curing. Overworking the surface or finishing too soon can trap moisture and cause problems later.