
Introduction
Concrete temperature control on small pours means managing the mix, the form, and the environment so the concrete cures steadily instead of drying too fast and cracking. In hot weather that means watching concrete temperature, shading the pour, keeping materials cool, and adjusting timing and water carefully. Think like a foreman: plan the pour when it’s coolest and have helpers and tools ready.
High heat speeds initial set and increases shrinkage stress, so the goal is to slow surface drying and avoid big temperature swings between the top and the middle of the slab. Practical tricks include cooling the mix and aggregates, using sun and wind barriers, moist curing, and finishing techniques that reduce surface disturbance; check product labels and local recommendations for any specific temperatures or curing times. If you’re unsure about a product or local limits, check the concrete supplier’s instructions or local building rules before you pour.
Key takeaways
- Plan pours for coolest part of day and shade critical surfaces when possible.
- Use chilled water or ice in the mix only if allowed by code.
- Cover freshly placed concrete to reduce temperature rise and surface cracking risk.
- Monitor temperature with a reliable meter and document readings consistently.
- Avoid rapid finishing; use techniques that minimize heat buildup and optimize set.
- Safety: wear PPE, manage hot surfaces, and stop if conditions exceed limits.
Table of Contents
- Introduction
- Key takeaways
- Why Hot Weather Matters for Small Concrete Pours
- Pre-Pour Planning and Scheduling
- Mix Design and Material Strategies for Hot Conditions
- On-Site Cooling and Environmental Controls
- Moisture Retention and Curing Methods That Prevent Surface Cracks
- Placement and Finishing Best Practices in Hot Weather
- Safety, Monitoring, and Temperature Measurement
- Common Mistakes, Cost-Benefit of Prevention, and a DIY Checklist
- Conclusion
- FAQ
Why Hot Weather Matters for Small Concrete Pours
High ambient heat speeds surface evaporation and accelerates slump loss, which makes small pours sensitive to rapid setting and plastic shrinkage. Thermal differentials between a hot surface and a cooler core increase internal stresses and raise the chance of cracking during the first hours and days.
These effects change setting time and early-age strength development and can reduce long-term performance if finishing or curing is rushed. Check local standards and supplier recommendations for allowable concrete and surface temperatures, and consult product data sheets or manufacturer instructions for temperature limits and curing durations.
Common heat-related failure modes
High temperatures on small pours can cause several issues. The most common are:
Plastic Shrinkage: As water evaporates from the surface, it leaves behind a dry layer that shrinks and cracks.
Thermal Cracking: Heat causes the surface to set faster than the core, creating thermal differentials that lead to cracking.
Rapid Set Times: Hot weather speeds up setting time, which can make it hard to finish the concrete properly.
Surface Defects: These include crazing, mapping, and scaling, all of which reduce the durability of the surface.
How small pours behave differently than large pours
Small pours have a larger surface area to volume ratio. This means they:
Heat up and cool down faster: Quick temperature changes can lead to thermal cracking.
Evaporate water quicker: The smaller the pour, the more exposed the concrete is to the sun and wind, leading to rapid water loss.
Require careful finishing timing: Because they set faster, small pours need to be finished at just the right time to prevent defects.
Long-term durability impacts
Improper heat management on small pours can lead to long-term issues. These include:
Increased Permeability: Rapid drying and cracking allow water and other liquids to penetrate the concrete, leading to freeze-thaw damage.
Reduced Compressive Strength: Premature drying and rushed finishing can lead to lower strength than designed.
Premature Deterioration: All these factors combined can cause the concrete to deteriorate faster than expected, leading to costly repairs or replacements.
Pre-Pour Planning and Scheduling
Pick the coolest, most stable window in the forecast and plan deliveries and crew arrival to hit that window just-in-time. Early morning or late afternoon often works best, but verify short- and medium-range forecasts for heat spikes or storms that would force a change.
Coordinate truck staging, formwork, rebar, and tools so nothing holds the concrete on-site longer than necessary, and assign a compact crew with clear roles to speed placement. Prepare contingency steps—delay, accelerate, or reschedule—and document thresholds so everyone knows when to act.
Picking the optimal time and weather window
Timing is crucial for small concrete pours, especially in hot weather. Aim for early morning or late afternoon when temperatures are cooler.
Morning pours: Start before sunrise to beat the heat. The concrete sets slower initially but picks up as the day warms.
Evening pours: Begin around 4 pm, finishing just after sunset. This way, the concrete has time to set and cool overnight.
Monitor short-term forecasts for heat spikes or wind. Wind can dry out the surface too quickly, causing cracks. If a storm’s brewing, delay the pour until conditions improve.
Crew sizing and workflow sequencing for small pours
For small pours, fewer hands might seem logical. But more crew members can reduce exposure time to heat.
Lean crew: A smaller team works faster, minimizing the time spent in hot conditions. Assign tasks efficiently to keep everyone moving.
Tighten workflow sequencing: Place and finish concrete quickly to prevent it from setting too fast or too slow due to heat. This improves placement and finishing success.
Rotate crew members if possible. This gives everyone a chance to cool off and reduces the risk of heat-related issues.
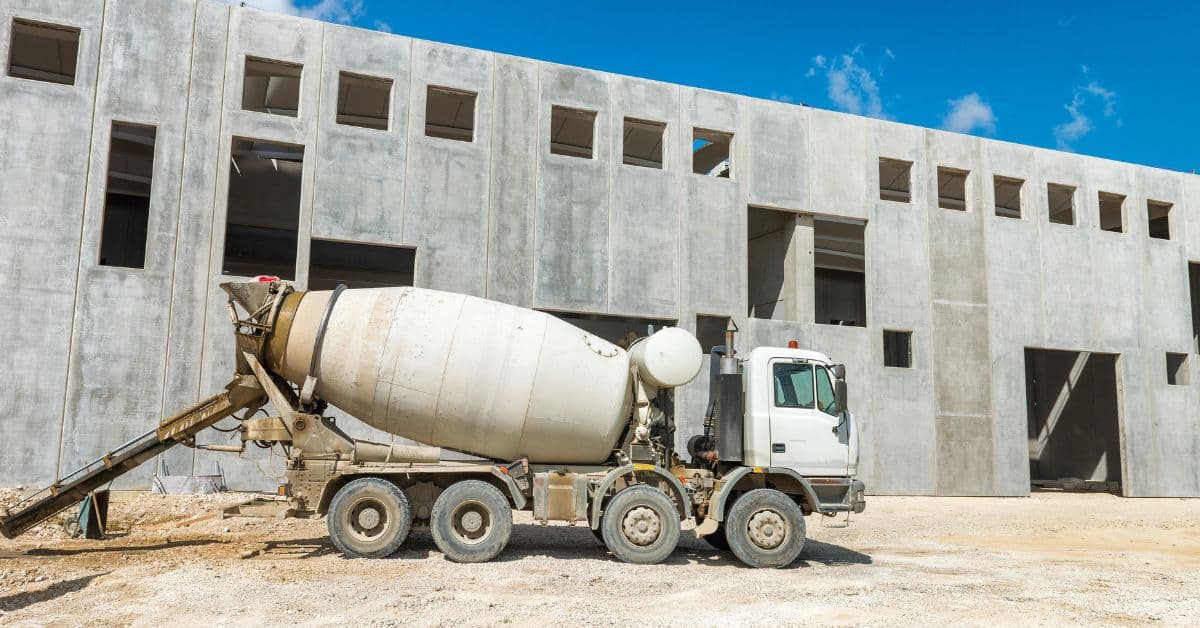
Delivery, mixing, and on-site timing
Minimize transport time to keep concrete temperatures down. Order ready-mix from a local plant for faster delivery.
Avoid warm truck mixes: Ask the supplier to chill the aggregates or use colder water in hot weather. This slows temperature rise and extends setting time.
Confirm batching and delivery times with your supplier. Align it with your chosen pour window to ensure fresh, cool concrete arrives on-site.
Set up rapid-placement and finishing protocols. Once the concrete starts setting, work quickly but carefully to prevent heat-related issues.
Mix Design and Material Strategies for Hot Conditions
Work with your supplier to lower heat of hydration and control workability using appropriate cement types, SCMs, and a careful water-cement balance while still meeting strength requirements. Ask for product data sheets to confirm compatibility, dosage limits, and expected effects on setting and early strength.
Specify set-retarding and water-reducing admixtures where useful, and confirm admixture interactions (air entrainment, retarders, accelerators) with the supplier. Monitor aggregate moisture and adjust batching to avoid adding excess water on-site; keep on-site temperature checks to decide if mix adjustments are needed before placement.
Admixtures and additives to control setting and strength
Admixtures are your secret weapons in hot weather. They help you manage setting time, workability, and early strength.
Set retarders give you extra time before concrete sets. Use them when temperatures are high, or pours are small. Follow the manufacturer’s instructions for dosage. They won’t hurt your final strength much.
Water reducers cut down on water needed without losing slump. This helps control heat of hydration and shrinkage. Again, stick to the supplier’s guidelines.
Some admixtures also stabilize hydration. They help concrete maintain strength even when it’s hot. Check with your supplier for recommendations.
Temperature control via mix components
Mixing water, aggregates, and cement all play a part in keeping temperatures down.
Use cool mixing water. It’s cheaper than ice and slows down the setting process. Just make sure it’s clean and free of contaminants.
Keep your aggregates shaded before mixing. This helps prevent them from heating up the mix. And don’t add extra water to compensate for evaporation. It just makes things worse.
Less cement means less heat too. So, use a lower water-cement ratio if you can. But remember, you still need enough cement for strength.
Material specs and standards to verify
Before you change your mix, check these material specs to avoid surprises.
- Cement type: Type I or II cement is usually fine. But if it’s really hot, consider using low heat of hydration cements. They’re more expensive but worth it in hot weather.
- Admixture compatibility: Make sure your admixtures play nice with each other and with any air-entraining agents you’re using. Ask your supplier if you’re not sure.
- Local building codes: Some areas have specific rules for concrete mixes in hot weather. Check with your local building department to make sure you’re compliant.
- ACI recommendations: The American Concrete Institute has guidelines for mix proportions and admixtures. Follow them if you can. They’ve been around the block a few times.
- Aggregate grading: Well-graded aggregates pack better, reducing voids and improving strength. Ask your supplier for their grading curve. Avoid fines-heavy or coarse aggregates in hot weather.
- Aggregate cleanliness: Dirty aggregates can cause all sorts of problems. Make sure yours are clean before mixing. A quick rinse might be needed.
- Water quality: Clean water is crucial. Don’t use water with too much sediment, salts, or other contaminants. It’ll mess up your mix and could cause cracking later on.
On-Site Cooling and Environmental Controls
Use sunshades, temporary windbreaks, and fabric barriers to reduce radiant heat and drafts over the pour area, placing them so they shade both the forms and staging piles. For small pours, portable fans and targeted misting can lower surface temperature but must be used carefully to avoid creating a sheen or washing cement paste.
Consider chilled water or ice in the mix following supplier guidance and practical limits; confirm with the batch plant how much ice or cold water is acceptable. Set decision points for deploying temporary cooling gear and inspect placement areas frequently so cooling stays effective without compromising the mix.
Shading, wind control, and sun orientation
Placing tarps, canopies, or portable wind barriers strategically around your pour site can significantly reduce direct sunlight and wind-driven evaporation. Here’s how:
North-facing shade: In the Northern Hemisphere, place shades on the north side to block morning sun. In the Southern Hemisphere, it’s the south side.
Windbreaks: Set up portable wind barriers or use existing structures like fences or walls to protect your pour from strong winds that can cause rapid evaporation and surface cracking.
Cooling the mix and tools
Chilling water, adding ice, or using chilled aggregates can help lower concrete temperature. Here are some options:
- Chilled water: Ask your supplier to provide chilled water for mixing. Ideal temp: 60-70°F (15-21°C).
- Ice: Add small ice pieces to the mix, but avoid large chunks that could cause cold spots and weaken concrete.
- Chilled aggregates: If possible, use chilled sand and gravel. Confirm with your supplier for safe handling and storage.
- Chillers: Rent or buy portable concrete chillers to cool the mix before pouring. They can lower temp by 20-30°F (11-17°C).
- Tool cooling: Use insulated tool bags or coolers for storing tools like trowels and levels to keep them from heating up in hot weather.
Portable equipment and practical setups
For small projects, consider these portable cooling options:
- Shade frames: Rent or buy lightweight, easy-to-assemble shade structures to protect your pour from direct sunlight.
- Misting systems: Rent or purchase misting fans that create a fine water mist to cool the area. Ideal for small jobs and easy setup/teardown.
- Portable chillers: Rent or buy portable concrete chillers for larger projects where chilling the mix is necessary. They can be pricey but are essential in extreme heat.
- Fans: Use portable fans to create airflow and help evaporative cooling, but avoid blowing directly onto the pour as it can cause surface cracking.
- Tents: Set up temporary tents or canopies around your pour site for added shade. Ensure they’re secure and won’t blow away in wind.
Moisture Retention and Curing Methods That Prevent Surface Cracks
Immediate protection after finishing preserves hydration: evaporation retarders, curing compounds, wet coverings, and continuous moist curing each work differently and suit different situations on small pours. Choose a method that matches your finish and access constraints and verify product instructions for application timing and coverage.
Apply protection as soon as bleed water dissipates and maintain it for the period recommended by the product data sheet or local practice to prevent rapid moisture loss. For tricky sites, combine methods—temporary wet coverings plus a curing compound or regular wetting—and monitor surface moisture to adjust frequency or reapply coverings as needed.
Choosing the right curing method for small pours
The first step in protecting your concrete is choosing the right curing method. Here’s a quick rundown:
Curing Compound: A liquid applied after finishing, it forms a thin film to retain moisture. It’s easy to apply but can be messy and may stain if not removed.
Plastic Sheeting: Laid over the surface, it traps moisture. It’s cheap but can be tricky to keep in place on windy days or tight pours.
Wet Burlap: Soaked in water and laid over the concrete, it provides continuous moist curing. It’s labor-intensive but effective.
Continuous Misting: A fine spray keeps the surface wet. It’s ideal for large pours but may require special equipment for small ones.
Timing and duration of curing actions
Applying protection too early or late can hinder curing. Here’s when to act:
Apply protection as soon as the concrete has been finished and begins to set (initial set). Follow product guidelines for reapplication intervals.
Maintain protection until the concrete reaches final set. In hot weather, this could be 3-7 days. Check local codes for minimum curing durations.
Quick rule: If in doubt, err on the side of longer curing to prevent cracks.
Visual checkpoints for successful curing
Regular checks ensure your concrete is curing properly. Use this checklist:
- Loss of Sheen: When the surface loses its glossy appearance, it’s starting to cure.
- No Cracks: Inspect for hairline cracks that could worsen with time.
- Moist Surface: The concrete should feel damp to the touch. If it’s dry, reapply protection.
- Consistent Color: Uniform color indicates even curing. Dark patches may indicate areas where water has evaporated too quickly.
- No Shrinkage Cracks: These are narrow cracks that form as the concrete shrinks during drying.
- No Efflorescence: A white, powdery deposit can indicate excessive moisture loss or poor curing.
- No Discoloration: Uneven color may suggest areas where protection was inadequate.
- Consistent Temperature: Hot spots can cause uneven curing and cracking. Use an infrared thermometer to check.
Quick rule: If you notice any of these issues, take corrective action immediately to prevent cracks.
Placement and Finishing Best Practices in Hot Weather
Set a tight, step-by-step timeline from placement through final finish to limit overworking and avoid working on a mix that’s already stiffening. Coordinate placement, screeding, and initial texturing so each pass happens quickly but with enough time to avoid tearing the surface.
Time control joints so they’re cut early enough to control shrinkage but not while the surface is still unstable; match jointing timing to the observed set rate. Maintain surface moisture during finishing—use misting or light wetting where appropriate—and avoid excessive trowel pressure that forces out paste and promotes cracking.
Avoiding overworking and surface tears
Excessive troweling or delay can dry the surface, leading to tears and weakened concrete. Here’s how to avoid these mistakes:
- Minimize trowel passes: Too many passes can remove too much moisture, drying out the surface.
- Time your finishing: Work quickly but efficiently. Don’t rush, but don’t linger either.
- Use right tools: For small pours, use a magnesium or aluminum trowel for better control and less weight.
- Avoid delay between passes: Keep the surface moist by minimizing time between finishing steps.
Remember, it’s about balance – not too much, not too little. Find your rhythm and stick to it.
Control joints and timing to limit random cracking
In hot weather, concrete sets faster and shrinks more. Control joints help manage this shrinkage and prevent random cracks.
When to place control joints: Strike them when the surface is still plastic but starting to set – usually 2-4 hours after pouring. Too early, they won’t hold; too late, they’ll crack.
Before pouring, mark and prepare joint locations: Use a straight edge or jointing tool to mark out where you want your joints. This ensures they’re even and properly spaced.
Timing is key here. Too early, the concrete won’t hold; too late, it’ll crack. Find that sweet spot and stick to it.
Rapid edging, grooving, and texturing tips
In hot weather, quick work is key. Here’s how to edge, groove, and texture your concrete efficiently:
Use multiple crew members: Assign one person to each task – one for edging, one for grooving, etc. This speeds up the process.
Edge early: Get those edges smooth and even as soon as possible. It’s easier when the concrete is still soft.
Light broom finish: For small pours, a light broom finish can help reduce surface stresses. Use a stiff-bristled broom and work it gently across the surface.
Remember, speed without care leads to mistakes. But with careful coordination and quick, efficient movements, you’ll have your concrete finished in no time.
Safety, Monitoring, and Temperature Measurement
Protect the crew from heat exposure with scheduled breaks, hydration planning, shade or cool-down areas, and a brief heat-safety talk before work starts; follow local occupational guidance for heat stress precautions. Assign someone to log worker rest and hydration intervals so safety doesn’t get lost in the rush to finish.
Measure ambient air and concrete surface temperatures with appropriate tools—infrared thermometers for surface checks and a contact probe for internal readings—and take readings at set intervals: pre-pour, mid-pour, and periodically afterward. Record readings and set action thresholds that trigger cooling measures, mix adjustments, or a halt to placement as needed.
Worker safety and heat illness prevention
Hot weather pours put your crew at risk of heat-related illnesses. Keep them safe with these steps:
Hydration: Encourage regular water breaks. OSHA recommends at least one cup (8 oz) of water every 15-20 minutes.
Shade and cooldown: Set up shaded rest areas. Allow workers to cool down when temperatures soar.
PPE: Use light-colored, loose-fitting clothing and hard hats with neck shades. Ensure everyone wears sunscreen and takes breaks from PPE as needed.
Emergency response: Train your crew on heat illness symptoms and first aid. Have a plan to get sick workers to medical help quickly.
Measuring and recording temperatures during the pour
Monitoring temps helps prevent cracks. Here’s what you need:
Use a digital thermometer for mix temp (immersion type). An infrared thermometer works well for surface readings.
Take readings at the start, mid-pour, and hourly. Log temps to track trends and inform curing choices.
Measure ambient air temp too. It affects concrete’s set rate. Keep it below 90°F (32°C) if possible.
When to stop or delay a pour
Know when to halt a pour to prevent issues. Here are signs to watch for:
Unmanageable set rate: If concrete sets too fast (under 2 hours), it’s hard to finish and can crack.
Unsafe conditions: Stop if temps exceed 104°F (40°C) at any depth, or if wind speeds exceed 5 mph (8 km/h).
Evaporation control: If you can’t maintain a consistent moisture level in the concrete, delay the pour until conditions improve.
Common Mistakes, Cost-Benefit of Prevention, and a DIY Checklist
Frequent errors include adding excess water, poor scheduling that leaves concrete sitting in the heat, and inadequate curing after finishing—each raises the risk of surface cracking and weakened concrete. Preventative steps like shade, cooling, and proper curing have upfront cost and effort but often avoid costly repairs or remediation later.
Use a concise pre-pour checklist: forecast window, delivery time, crew assignments, mix specs, cooling/curing supplies, and temperature logging plan, and document everything with timestamps and photos. Watch for quick trouble signs—rapid slump loss, visible plastic shrinkage, or surface drying—and act with the checklist items you prepared.
Top mistakes to avoid on small hot-weather pours
Before you start your small concrete pour in hot weather, review this checklist to avoid common pitfalls.
- Adding extra water: More water doesn’t make the job easier. It weakens the mix and increases the risk of cracks.
- Delaying finishing: Rushing through the finish can lead to surface tears and improper curing.
- Skipping joint planning: Not placing control joints properly can cause random cracking.
- Insufficient surface protection: Without proper coverings, your pour is at risk of plastic shrinkage and rapid evaporation.
- Improper water-cement ratio: Using the wrong ratio weakens the concrete’s strength and durability.
- Rushing form removal: Removing forms too early can cause curling or cracking.
- Poor curing: Inadequate curing leads to weakened strength and increased risk of cracks.
- Mis-timed additions (accelerators/retarders): Adding these at the wrong time can throw off the setting process.
Quick rule: Always follow your mix design and plan ahead to avoid these costly mistakes.
Cost comparison: prevention vs. repair
Understanding the costs of prevention versus repair can help you make informed decisions for your small pours.
- Shade and cooling: Estimated at $50-$200, it’s cheaper than patching ($100-$500).
- Curing compounds/blankets: Around $30-$100 per square foot, less than resurfacing ($50-$150 per square foot).
- Small chiller or admixtures: About $200-$800, much cheaper than premature replacement ($1000+).
- Labor for repair: Often higher than prevention due to specialized skills and time.
Quick rule: Always estimate local prices and compare costs to make the best decision for your project.
Tools and materials checklist for a successful small pour
Before you start mixing, gather these tools and materials to ensure a successful small pour in hot weather.
- Protective coverings: Tarps, shade cloth, or curing blankets to protect the pour from sun and wind.
- Measuring devices: Tape measure, level, and thermometer for accurate mix design and temperature control.
- Curing supplies: Curing compounds, sprays, or membranes to maintain moisture.
- Finishing tools: Float, trowel, and edger for proper finishing and texturing.
- PPE (Personal Protective Equipment): Safety glasses, gloves, and hard hat for worker safety.
Quick rule: Always verify quantities with project size and supplier advice to avoid running out mid-pour.
Conclusion
Hot weather makes small pours crack if you rush or skip critical steps. Stay focused on safety, proper curing, and keeping the concrete within a workable temperature range to protect long-term durability and appearance.
Ensure you check the forecast and the pour plan, confirm material and water temperatures, prep shade or wind breaks, assemble cooling and curing methods, and have a clear finishing and protection plan in place. Do the checks in roughly this order: verify schedule, verify temps, set up cooling and moisture retention, place and finish with control, and then monitor until curing is complete. Keep the plan simple and document any deviations as you go.
Common mistakes to avoid are pouring in the hottest part of the day, skipping moisture retention or curing steps, and ignoring temperature readings or finishing too soon. Safety rules are non‑negotiable: wear eye and skin protection, measure temperatures accurately, and never work near live edges or wet concrete that can cause slips. If the project feels beyond your comfort level, or the job is larger or more critical than a small DIY pad, call a professional for guidance or help—there’s no cost in avoiding a crack or a failed finish. If you stay disciplined, you’ll get a solid, crack-free surface that lasts.
FAQ
What is the ideal temperature range for pouring concrete?
Check the concrete mix label or manufacturer instructions for the recommended range. Air temperature, slab temperature, and mix temperature all matter. Don’t guess—use the documented range and adjust if conditions push outside it.
How does heat affect curing and crack risk?
Heat speeds up curing and drives moisture away, which increases shrinkage cracks. Keep the concrete moist and manage the temperature around the pour. If you see hotspots, address them as soon as possible per product guidance.
What tools or methods help control temperature on a small pour?
Use shade, wind breaks, and reflective barriers to reduce heat gain. Consider cool or tempered water within manufacturer limits, and follow their instructions for any cooling additives. Do not rely on guesswork—use approved methods and materials per labels and local rules.
Timing considerations for 最佳浇注时间 (best pouring time) in hot weather?
Pour when the conditions are cooler, typically early in the day or near sunset, if allowed by local rules and site constraints. Plan around forecasted temperatures and planned curing methods. Always verify with the project specs and local guidance before committing to a time.