
Introduction
Choose the right concrete mix for your project to get the best results and value.
This article guides you on what to buy, what to skip, and why, with practical tips, real-world examples, and simple rules of thumb you can apply on site.
Key takeaways
- Choose concrete grade and mix type based on load, exposure, and cure.
- Understand types: general purpose, reinforced, high-performance, and fast-setting are distinct.
- Additives can modify set time and workability; use sparingly and test.
- Follow mixing and placement: proper water ratio, timely placement, and proper curing.
- Check moisture, aggregate cleanliness, and air content for durability and performance.
- Budget by project scale and include contingency for testing and repairs.
Table of Contents
- Introduction
- Key takeaways
- Quick guide: Choosing the right concrete for your project
- Types of concrete and how they differ
- Concrete additives and admixtures: what to use and what to avoid
- Mixing, placement, and curing best practices
- Quality, durability, and testing — what to check
- Safety, tools, and materials checklist
- Cost comparison and budgeting for different concrete options
- Common mistakes and how to avoid them
- Conclusion
- FAQ
Quick guide: Choosing the right concrete for your project
Choosing the right concrete comes down to your project type, the anticipated load, exposure conditions, budget, and timeline. Start with a simple flow: describe the job, note the exposure and load, and pick normal-strength, reinforced, or a specialty mix, then add additives if needed. For common projects, follow clear guidelines: driveways usually need a durable, workhorse mix; foundations require moisture and strength considerations; patios and slabs balance workability and curing time; repairs should match the surrounding mix.
This matters because the wrong mix wastes time and money and can lead to cracks, moisture issues, or premature wear. Exposure and environment drive durability decisions, so consider freeze-thaw, moisture, and chemical exposure when choosing a mix. Check strength, workability, curing, and compatibility with your setup, and always consult local code requirements and the manufacturer’s guidelines for the exact product you pick.
Project profiles (driveway, foundation, patio, walkway, repair)
For a driveway, go with normal-strength concrete, typically around 4000 psi. This mix can handle the heavy loads of cars and trucks without cracking easily.
A foundation needs reinforced concrete, usually at least 5000 psi to support the weight of your house and resist soil pressure. If you’re pouring a basement wall or footing, consult a pro for proper reinforcement and waterproofing techniques.
Patios and walkways can use normal-strength concrete too, but consider adding fiber or epoxy coatings if they’ll see lots of foot traffic or chemical exposure like from salt in winter. A 3000 psi mix is usually sufficient here.
For repairs, match the existing concrete strength as closely as possible. If you’re patching a driveway crack, use a pre-mixed repair compound for quick and easy application. For larger jobs, consult a pro to ensure long-term durability.
When to DIY vs. hire a contractor
If your project is straightforward like pouring a small patio or repairing minor cracks in an existing slab, you can probably handle it yourself with the right tools and knowledge from this guide.
However, if you’re dealing with complex foundations, large slabs, or anything involving structural integrity, hire a pro. They know local building codes and have the experience to ensure your work meets safety standards.
Safety is key—don’t risk injury by attempting jobs that require heavy machinery or working at heights without proper training. A contractor will also handle permits and inspections, saving you time and potential headaches down the road.
Remember, doing it right the first time saves money in repairs later on. If you’re unsure about your skills or the project scope, err on the side of caution and bring in a professional.

Types of concrete and how they differ
Concrete comes in a few main kinds. Portland cement-based mixes are the standard, with ready-mix, pre-mixed bagged concrete, high-performance (HPC) mixes, and lightweight options in the mix. Each is made differently and fits different jobs, from bearing structures to non-structural slabs and interior floors to exterior sidewalks.
Choose by project size, exposure, finish, budget, and timeline. Be mindful of the practical limits, like quality control differences between bagged and ready-mix, transport and placement challenges, and cure needs. Always check product labels and manufacturer instructions for mix, cure, and any additives to avoid trouble later.
Portland cement, ready-mix, and bag mixes explained
When it comes to concrete, you have three main options: Portland cement-based mixes, ready-mix trucked in, or pre-mixed bagged concrete. Each has its own pros and cons depending on your project needs.
Portland cement: This is the base ingredient for all concrete mixes. You mix it with water and aggregates like sand and gravel to create a custom blend. It’s great for small jobs where you need precise control over the mix ratio, but it requires more labor and equipment than other options.
Ready-mix: This is pre-made at a plant and delivered in trucks straight to your site. Ready-mix is ideal for large projects like foundations or driveways because it’s consistent in quality and can be tailored with additives for specific needs, such as faster curing times or higher strength.
Bagged concrete: Pre-mixed bagged concrete comes ready-to-use right out of the package. It’s convenient for small jobs like patios or steps where you don’t need a lot of material. However, it’s more expensive per pound and can be harder to work with in large quantities.
Specialty mixes: air-entrained, fiber-reinforced, high-strength, and lightweight
For specific project needs, specialty concrete mixes offer unique benefits. Air-entrained mixes add tiny bubbles to improve durability in freeze-thaw cycles. Fiber-reinforced mixes include short fibers that enhance crack resistance.
High-strength: These mixes are designed for heavy loads and structural integrity, making them perfect for foundations or beams where strength is critical. They often have higher compressive strengths than standard concrete but may take longer to cure.
Lightweight: Lightweight concrete uses expanded aggregate like perlite or vermiculite to reduce the overall weight of the structure. It’s ideal for roof decks or walls in areas with load-bearing restrictions, though it can be more challenging to place and finish due to its lower density.
Concrete additives and admixtures: what to use and what to avoid
Admixtures are additives you mix into concrete to tweak workability, set time, and durability. The big categories are plasticizers/superplastizers, accelerators, retarders, air-entraining agents, corrosion inhibitors, and fibers; each has its own job and trade-off. Know what each does so you don’t misuse them on a pour.
Use them to get the right slump, control set in cold weather, or slow drying for long pours. They can interact with cement types, supplementary cementitious materials, pigments, and sealers, so check compatibility and start small. Always follow the label and consider a test batch to confirm finish quality and pumpability.
How admixtures affect performance and cost
Admixtures can make a big difference in how your concrete performs, but they also come with costs. For example, plasticizers improve workability by making the mix easier to pour and spread without adding water, which helps maintain strength. But they don’t come cheap—expect to pay more for better performance.
Accelerators speed up setting time, great for cold weather pours when you need concrete to set faster. However, if you use too much, it can weaken the final product or cause cracking. Retarders do the opposite; they delay setting time, which is handy for long pours where you might run out of daylight before finishing.
Air-entraining agents are crucial in areas with freeze-thaw cycles because they create tiny air bubbles that help prevent damage from expanding ice. But adding too much can reduce strength and durability. Corrosion inhibitors protect against rusting rebar, but again, use them sparingly to avoid weakening the concrete.
When deciding whether an admixture is worth it, weigh the benefits against potential drawbacks and costs. For DIY projects, stick with basic additives unless you have a specific need or are working in challenging conditions like extreme cold or high humidity.
Dangerous or unnecessary additives to skip
Avoid using additives that can cause more harm than good. For instance, some contractors might suggest using too much accelerator to speed up curing time in cold weather. This is risky because it can weaken the concrete and lead to cracking.
Another common mistake is adding unknown powders or liquids from hardware stores without knowing their effects on your mix. These products often lack proper testing and could contain harmful chemicals that damage your concrete over time.
Fibers are great for reinforcing, but too much can clog pumps and make the mix hard to work with. Stick to recommended dosages—overdoing it won’t give you better results and might cause problems during placement.
Always opt for reputable admixtures from trusted manufacturers that come with clear instructions on dosage and compatibility. If in doubt, consult a professional before adding anything new to your mix.
Mixing, placement, and curing best practices
Mixing concrete correctly starts with choosing bagged or site-mix, getting the right consistency, and adding water or additives carefully. Then pour, consolidate, and finish in proper sequence, and finish with curing methods suited to the day’s temp and humidity. Don’t skip jointing, edging, or screeding, and plan timing so the surface isn’t ruined by early-set.
Understanding these steps helps you avoid cracks, honeycombing, and weak spots. This section helps you anticipate slow changes, check the mix on the truck or bag, and choose a curing method that matches weather, so your project stays strong.
Proper mixing ratios and water control
The key to a strong, durable concrete mix is getting the right balance of ingredients. Start with your bagged or site-mixed concrete and add water carefully. A good rule of thumb is to aim for a water-to-cement ratio between 0.45 and 0.60. Too much water weakens the concrete, while too little makes it hard to work.
To measure accurately, use a gauge or measuring container marked in liters or gallons. Mix your concrete slowly until you reach the desired consistency. If it’s too wet, add more dry mix; if it’s too stiff, add just enough water but no more than 10% of the original amount. Overwatering can lead to cracking and reduced strength.
Signs of over-watered concrete include excessive bleeding (watery surface) or a weak set after curing. Under-watered concrete is hard to work with and may not fill forms properly, leading to voids and honeycombing. Always check your mix by hand—when it feels like clay but doesn’t stick to your tools, you’re in the right range.
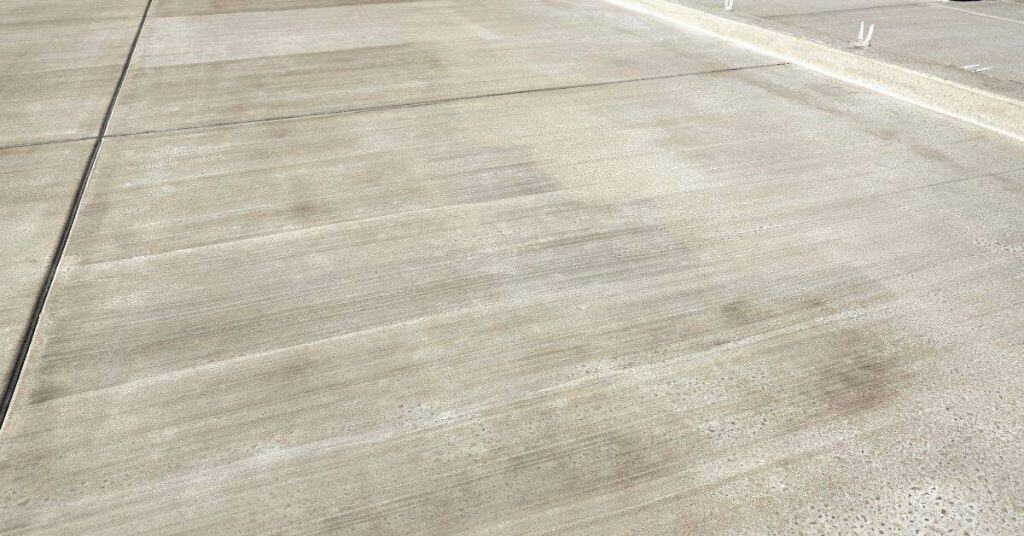
Curing techniques and timing for strength/durability
The curing process is crucial for developing concrete’s full strength. Proper curing involves keeping the mix moist and protected from harsh conditions until it reaches its specified compressive strength, typically 28 days after pouring. Use wet curing methods like misting or covering with plastic sheeting to maintain moisture.
Alternatively, apply a curing compound, which forms a protective film over the surface without needing constant watering. This is especially useful in dry climates where evaporation rates are high. Ensure that curing lasts for at least 7 days for standard mixes and up to 28 days for more demanding projects like foundations.
Poor curing can lead to reduced strength, cracking, and a shorter lifespan of the concrete structure. In cold weather, protect your work with insulated blankets or heating pads to prevent freezing before the concrete sets. Conversely, in hot weather, shade your project area to avoid rapid drying that could cause surface cracks.

Quality, durability, and testing — what to check
Quality indicators tell you if the concrete mix will perform as expected. Key markers you should check are compressive strength targets, slump or workability, air content for durability, and how the aggregate is graded. On site, do quick tests like the slump and watch cylinder samples cure, and log results so you can compare batches from the supplier.
Lab testing is worth pursuing when on site checks aren’t enough—high performance needs, critical structural parts, or mixed batches with potential quality concerns. Talk with suppliers in plain language about what to test, including cylinder strength, curing conditions, air-void analysis, and aggregate gradation, and use simple references like ACI/ASTM guidance to frame the conversation. Also focus on batching tolerance, moisture corrections, aggregate consistency, and temperature effects so you stay in control from delivery to finish.
Visual and tactile checkpoints during install
Use this checklist while placing and finishing concrete to ensure quality.
- Segregation: Look for uneven mix. Confirm by checking for large aggregate clumps or water pooling on surface; avoid.
- Bleed water: Check for excess moisture. Confirm by observing clear water rising to top; address with proper curing techniques.
- Cold joints: Inspect for gaps between pours. Confirm by looking for visible breaks in concrete; fix immediately.
- Proper consolidation: Ensure compaction. Confirm by tapping sides of forms and checking for soundness; avoid honeycombing.
Quick rule: Regular checks prevent common defects.
Longevity and maintenance considerations
Use this checklist to ensure your concrete lasts long and stays in good condition.
- Exposure: Assess environmental factors. Confirm by checking for UV, freeze-thaw cycles; use sealers if needed.
- Reinforcement: Ensure proper placement. Confirm by inspecting reinforcement cover thickness; avoid corrosion.
- Jointing: Properly place control joints. Confirm by measuring spacing and depth; prevent cracking.
- Sealers: Apply as needed. Confirm by testing surface absorption; protect from wear.
Quick rule: Regular maintenance extends lifespan.
Safety, tools, and materials checklist
Safety starts with your PPE and careful handling of cement and concrete, so plan ahead, inspect equipment, and keep the work area clear of clutter before you mix or move any material. Put on gloves, eye and face protection, impervious clothing, and a respirator when mixing or handling dry cement, follow the package guidance for skin contact and washing, and set aside a dedicated space to rinse and dispose of waste. Work in a well-ventilated area or outdoors, use dust control practices, and pace yourself with ergonomic breaks during mixing, pouring, and dragging materials to avoid fatigue and slips.
Store bags and additives securely, away from heat sources and moisture, with clear labeling and a simple system for returning unused material to its container to minimize spills. Keep a concise tools and materials checklist on hand: mixer, trowel, wheelbarrow, mixing pail, gloves, respirator, plus Portland cement, sand, gravel, and water, and note safety considerations on each item; check the label or datasheet for any special handling instructions. Getting these basics right saves skin, lungs, and back, helps you avoid messy cleanup, and keeps your project moving forward without guesswork.
PPE and safe handling practices
Before you start mixing or pouring concrete, always review this checklist to ensure safety.
- Gloves on: Wear gloves when handling cement to avoid skin burns. Check they fit snugly without gaps.
- Eyes protected: Use goggles or a face shield to prevent dust and splashes from entering your eyes. Confirm lenses are clear and unscratched.
- Dust mask on: Wear a respirator when mixing dry cement to avoid inhaling harmful silica dust. Ensure it fits snugly around the nose and mouth.
- Clothing covered: Wear long sleeves, pants, and boots to protect your skin from chemical burns. Confirm all clothing is made of non-absorbent materials like PVC or rubber.
- No bare hands: Avoid touching wet concrete with bare skin; it can cause severe irritation. Always wash immediately if contact occurs.
- Mixing area ventilated: Work in a well-ventilated space to prevent inhalation of dust and fumes. Confirm there’s no buildup of harmful gases or vapors.
- Lifting with care: Use proper lifting techniques, such as bending at the knees, to avoid back injuries. Ensure you lift within your strength limits.
- Wheelbarrow ready: Have a wheelbarrow on hand for transporting materials and concrete mix. Confirm it’s in good working condition without cracks or leaks.
Quick rule: Always wear PPE before handling any cement or concrete to prevent skin burns, inhalation hazards, and physical injuries.
Essential tools and optional extras
This checklist will help you gather the right tools for your concrete project before you start mixing or pouring.
- Mixer ready: Ensure a power mixer is available to blend materials efficiently. Confirm it’s clean, charged, and operational.
- Trowel sharp: Have a steel trowel on hand for smoothing the surface of fresh concrete. Check that the blade is straight and free from nicks or dents.
- Bull float handy: Use this tool to create a smooth, even finish after screeding. Confirm it’s clean and in good condition with no cracks.
- Screed board set: A long, straight board for leveling the concrete surface. Ensure it’s perfectly level and free from warps or bends.
- Curing materials stocked: Have plastic sheeting or curing compound ready to protect your work after pouring. Confirm you have enough coverage for the entire area.
- Kneeling pad available: Use a kneeling pad to reduce knee strain during long periods of finishing work. Check that it’s clean and in good condition without tears.
- Level present: A level is essential for ensuring your concrete surface is perfectly flat. Confirm it’s accurate and easy to read.
- Measuring tools handy: Have a tape measure, ruler, or yardstick on hand for precise measurements. Ensure they’re calibrated correctly.
Quick rule: Always have your essential tools ready before starting any concrete work to ensure efficiency and quality of the finished product.
Cost comparison and budgeting for different concrete options
This section lays out a practical budgeting framework that separates upfront material costs (bagged mixes, ready-mix, specialty blends) from labor, equipment, and site expenses, with guidance on yields and typical quantities. It highlights the main cost drivers for each option so you can spot the most cost-efficient path. You’ll see how to think through waste, deliveries, and minimum orders without guessing.
For a DIY project, understanding these details helps you avoid surprise charges and stretch your budget without sacrificing quality. It explains where hidden costs hide, like overage buffers, curing needs, and transport, and it offers practical waste-reduction tips and timing strategies to keep rates reasonable. Use this as a framework to plan, compare options, and keep your project on track from start to finish.
Cost drivers and typical price trade-offs
The biggest cost factors in concrete projects are volume, delivery fees, admixtures, reinforcement needs, and site preparation. For bagged mixes, the price per cubic yard or foot is lower compared to ready-mixed concrete but comes with higher labor costs due to mixing and placement by hand.
Ready-mix offers a better cost-to-labor ratio for larger projects because it arrives pre-blended in trucks. However, you’ll face minimum order requirements that can add up if your project isn’t big enough to use the full load efficiently. Specialty mixes might seem expensive upfront but could save money long-term by reducing maintenance and repair costs.
Site prep is another major cost driver. Proper formwork and rebar placement are crucial for structural integrity, so cutting corners here can lead to costly mistakes down the road. Always factor in these elements when budgeting your project.
How to calculate material needs and avoid overbuying
The right amount of concrete is key to staying within budget. Overbuying leads to waste, while underestimating can cause delays.
- Measure accurately: Use volume formulas for your project’s dimensions; round up slightly to account for irregularities and waste.
- Check slump requirements: Ensure the concrete has the right consistency for pouring and placement without adding too much water, which weakens it.
- Consider delivery logistics: For ready-mix, order just enough to finish before the next load arrives; bagged mixes require more precise planning due to manual mixing.
- Add waste allowances: Plan for 5-10% extra material to cover spills and uneven pours. This buffer prevents costly delays from running out mid-project.
- Optimize formwork: Use sturdy, well-fitted forms that prevent leaks; poorly made forms can lead to cracking or weak spots in the concrete.
Common mistakes and how to avoid them
Common mistakes sneak in when we rush an important job: using the wrong concrete mix, misjudging water, skipping aggregate sizing, neglecting reinforcement, or poor site preparation. You’ll also see broken curing habits and weak edge treatment that wreck finish and strength. The fix is simple but firm: check the mix design, follow bag instructions, pre-check the site, set formwork right, and plan proper curing and protection.
This matters because tiny errors here compound into cracks, surface defects, or a bond that fails over time. Knowing the culprit and applying a sane corrective routine—select the right mix, test fresh concrete in basic ways, and follow a solid pour and cure plan—keeps strength and durability up. If you’re not sure about a product label or a manufacturer’s instruction, verify it before pouring or sealing anything.
Troubleshooting common problems (cracking, scaling, spalling)
Cracks in concrete can be a sign of improper curing or inadequate reinforcement. Scaling, which is the loss of surface material, often results from poor finishing techniques or exposure to harsh weather conditions before proper curing.
To prevent cracking, ensure that your forms are properly aligned and that you’re using the right amount of water in your mix. For scaling, avoid exposing freshly poured concrete to freezing temperatures until it has cured sufficiently. Spalling, which is the chipping away of the surface layer, can be caused by corrosion of reinforcing steel or improper curing.
Fixing these issues often requires a combination of patching and reapplying sealants or protective coatings. For cracks, use an epoxy-based filler to seal them before they worsen. Scaling may require grinding down rough patches and applying a new layer of concrete or a specialized coating. Spalling might need the removal of damaged concrete and replacement with fresh material.
Permit, code, and inspection pitfalls
Before starting any project involving concrete, it’s crucial to check local building codes and obtain necessary permits. This section outlines key steps to avoid common regulatory mistakes.
- Check zoning: Verify that your project complies with local zoning laws before proceeding.
- Review concrete specs: Ensure you’re using the correct type of concrete for your application as specified by local codes.
- Contact inspector: Schedule an inspection to confirm compliance and avoid delays or fines.
- Obtain permits: Secure all necessary permits before pouring any concrete, including structural permits if required.
- Follow curing times: Adhere to the minimum curing periods mandated by local regulations.
- Use certified materials: Ensure that your concrete and reinforcing steel meet industry standards.
- Document compliance: Keep records of all inspections, permits, and certifications on hand.
Quick rule: Always consult local building codes and obtain necessary permits to avoid costly delays or legal issues.
Conclusion
Choosing the right concrete keeps your project safe, durable, and looking right for years to come. Get the mix, additives, and curing plan lined up now so you don’t pay later for cracking, setting too fast, or a weak edge.
First, plan in plain terms: confirm the load and exposure, pick the correct mix type, check any additives you actually need, size the pour, prep forms and PPE, mix and place in stages if needed, monitor slump or flow, and cure properly with protection from drying too fast or too hot. Keep notes on the exact product, water-to-mix ratio, and timing; test a small area first to verify finish and strength before committing to the full job.
Two major mistakes to avoid are using the wrong concrete for the job and skipping the curing step. Don’t rush a pour or guess at water content. Don’t ignore safety: wear eye protection and gloves, keep the work area clean and well ventilated, and lift heavy bags with proper technique. Keep edges and joints protected during curing and stay within the recommended cure time to prevent cracks and pop-outs.
If the project is large, structurally critical, or hard to access, it makes sense to bring in a pro. For typical DIY slabs, walks, or patches, follow the check in a steady, staged approach and stop if anything looks off. Stay deliberate, stay safe, and you’ll finish with a solid, lasting result.
FAQ
What concrete types should I consider for DIY projects?
For most home jobs, use general purpose concrete or a standard pre-mixed bag. Don’t chase fancy blends unless a project calls for it. Check the bag or manufacturer guidance for cure times and strength expectations.
Should I mix my own concrete or buy pre-mixed?
Pre-mixed bags save time and reduce mistakes on the job. If you mix from scratch, follow the instructions exactly and measure water carefully. Don’t guess on ratios or add extra lime or cement to speed things up.
How much water and aggregate should I use?
Always follow the bag instructions for water and aggregate. Add water gradually until the mix has a workable consistency without excess slipping or dripping. If the mix is too dry or too sloppy, adjust slowly and test again.
What are red flags to avoid?
Avoid cheap fast-setting products for critical joints or long pours. Don’t skip curing, formwork, or proper compaction. Don’t add random admixtures or too much water hoping for easier work.