

Introduction
You can tell whether bagged concrete contains air-entrainment additives and what that implies for strength and workability. The article walks through simple cues on packaging, common indicators of air-entrained mixes, and practical steps to compare products you see on shelves. You’ll learn how to evaluate a purchase in real world terms and what to do if the product doesn’t meet your project needs.
Key takeaways
- Look for bag labels indicating air-entrained or air entraining agent in cement.
- Check bags for air content specifications, typically 4-8 percent air voids.
- Visual: lighter weight, creamy texture, and visible micro air voids when cut.
- Store in cool dry place, rotate stock and avoid moisture exposure.
- Follow mixing instructions precisely; over- or under-agitation reduces air content.
- Compare brands by price per cubic yard and documented air-entraining performance.
Table of Contents
- Introduction
- Key takeaways
- What is air-entrained concrete and why it matters
- How manufacturers label air-entrained mixes on bags
- Visual checkpoints and simple tests to verify a bagged mix
- Packaging types and storage best practices
- Mixing instructions, ratios, and tips for preserving air entrainment
- Comparing brands, product types, and cost considerations
- Safety, handling, and environmental considerations
- Planning your project: selecting the right bagged air-entrained mix
- Conclusion
- FAQ
What is air-entrained concrete and why it matters
Air-entrained concrete is designed to contain tiny air bubbles distributed evenly throughout the mix. These micro air voids help the paste withstand freeze-thaw cycles and improve durability. They also influence workability and pumpability without sacrificing strength, especially in outdoor or exposed applications.
On bag labels and product specs you’ll usually see terms like air-entrained or AEA, and indications of targeted air-void content. Check supplier data sheets, batch numbers, and compatibility with other admixtures to confirm you’re getting an AE mix. Use AE when the project faces freeze-thaw exposure, de-icers, or long-term outdoor wear, and be mindful of potential pitfalls such as over-entrainment or under-mixing.
How air entrainment changes concrete properties
Air entrainment alters some key properties of concrete. Don’t worry, it doesn’t weaken your mix.
Strength-wise, you might see a slight reduction – around 5-10%. But that’s okay, because those tiny bubbles make up for it in other ways.
Permeability drops too, thanks to the air bubbles blocking water from passing through. This means better durability and less chance of frost damage.
Finishability might be a tad more challenging due to the increased surface friction caused by those microscopic bubbles. But with proper mixing and placement techniques, you’ll be fine.
When to choose air-entrained versus non-air-entrained mixes
Air entrainment is a game-changer in cold climates. If you’re in a freeze-thaw zone, always go for AE.
For exterior or exposed projects, AE is your friend. It helps protect against de-icers and weathering.
But for interior slabs or non-critical structures in mild climates, you might get away with non-AE mixes. Just remember, no air entrainment means less protection against freeze-thaw damage.
Your designer will help you decide based on your project’s needs and local conditions. Trust their expertise.
How manufacturers label air-entrained mixes on bags
Label terminology typically includes air-entrained concrete, AEA, and sometimes frost or freeze-thaw resistant language. These terms signal the mix’s capability to resist damage from repeated freezing and thawing. Look for clear references on the label that indicate the presence of an air-entraining agent.
Key phrases and symbols often appear on the front or back panel, including percentages, dosage hints, or terms like ‘air-entrained’ and ‘freeze-thaw durable.’ Brand naming and local line variations can change how labels are worded. Always cross-check claims against the manufacturer’s data sheet and compare with your climate needs before deciding.
Standard phrases and claim examples to watch for
When checking bags, look out for these standard phrases that indicate air-entrained concrete:
Air-entrained, AEA, Frost resistant, or Freeze-thaw durable. These terms tell you the mix has been designed to resist cracking from freeze-thaw cycles.
Be cautious of vague claims like ‘weather-resistant’ or ‘cold-weather mix’. They might not provide the same level of protection against freeze-thaw damage.
Regulatory and spec markings (ASTM, CSA, PSI)
Manufacturers often include regulatory or standard marks on their bags to assure you of the mix’s quality:
ASTM C494: This mark indicates the concrete meets ASTM International standards for air-entraining admixtures. It’s a good sign the mix will perform well in freeze-thaw conditions.
CSA A3000: If you’re in Canada, look for this Canadian Standards Association mark. It ensures the concrete meets their requirements for air content and durability.
You might also see PSI (pounds per square inch) values on the bag. These indicate the mix’s compressive strength – a higher PSI means stronger concrete, which can better resist freeze-thaw damage.
Visual checkpoints and simple tests to verify a bagged mix
Inspect the bag label for brand, product name, mix type, cement content guidance, and any required admixtures. Note expiration dates and storage conditions listed on the bag. This quick check helps confirm you’re not buying the wrong product by mistake.
Examine the dry mix appearance for uniform color, no oil or moisture staining, and no clumps. Look for any packets of chemical admixtures and check that the bag integrity is intact. If packets are opened or compromised, set the bag aside.
Quick mixing spot-check for bubble formation
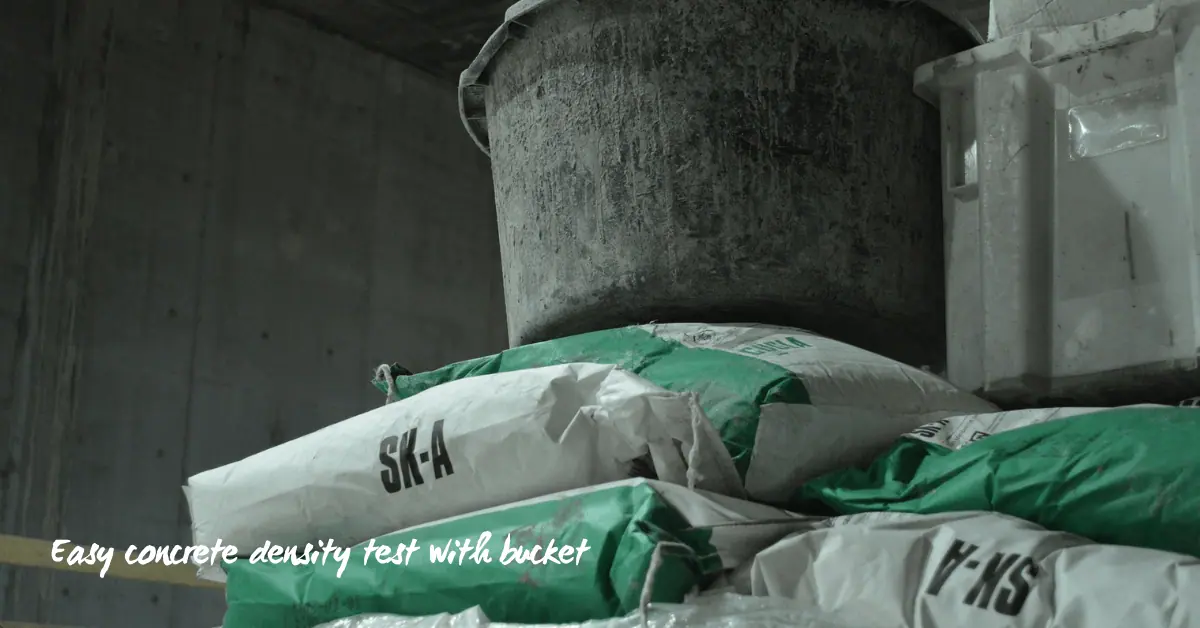
Before you start mixing, do this quick test to ensure your bag contains air-entrained concrete.
- Gather materials: You’ll need a small bucket, water, and a trowel or stick.
- Take a sample: Scoop out about 1 cup of dry mix from the bag.
- Add water: Slowly add just enough water to make a stiff, crumbly mixture. Don’t over-wet it.
- Mix gently: Use your trowel or stick to combine the water and dry mix without compacting it too much.
- Look for bubbles: Air-entrained concrete should form tiny, stable bubbles as you mix. These are signs of entrained air.
- Check workability: The mix should be easy to handle and spread without being overly wet or dry. This indicates proper water-to-cement ratio and air content.
- Avoid over-mixing: Too much mixing can cause the bubbles to disappear, giving you a false result.
- Observe setting time: Air-entrained concrete should start to set within the timeframe claimed on the bag. If it’s too fast or slow, something might be wrong with the mix.
Quick rule: If you don’t see bubbles forming and the mix is hard to work with, consider switching bags or checking your mixing technique.
What to avoid: misleading additives and fillers
Before you start using the bagged mix, check for signs of poor quality or non-standard additives.
- Check color: Concrete should be a uniform gray. Any other colors could indicate added pigments or fillers.
- Avoid oil stains: Oil spots on the bag or mix can indicate contamination, which will affect the concrete’s strength and appearance.
- No moisture: Wet mixes are no good – they’ll have absorbed too much water from the environment, affecting the cement-to-water ratio.
- Avoid clumps: Large clumps can indicate improper storage or handling, which could lead to inconsistent mix quality.
- Chalky texture: A chalky feel could mean there’s too much cement or other fine particles in the mix. This can lead to a weak, dusty finish.
- Dusty mixes: Excessively dusty mixes might have too much sand or other fillers, which can weaken the concrete.
- Glossy appearance: A glossy mix could indicate added oils or wetting agents, which aren’t standard in air-entrained concrete.
- Check for packets: If chemical admixture packets are present and opened, use the mix immediately. Otherwise, discard it to avoid contamination.
Quick rule: If you notice any of these signs, consider switching bags or contacting the manufacturer for advice.
Packaging types and storage best practices
Bagged concrete comes in paper bags, plastic/poly bags, or bulk sacks. Each type affects moisture exposure and shelf life differently. Understanding the packaging helps you plan for storage and use without premature hardening or spoilage.
Store in a stable, low-humidity environment, off the concrete floor, and away from direct rain. Follow stacking limits and protect from temperature swings. Use desiccants or moisture barriers as needed and rotate stock to use oldest bags first.
How packaging affects product integrity
The packaging of your bagged concrete plays a big role in maintaining the quality and performance of the air-entrained mix. Here’s what to look out for:
Paper Bags: While they allow moisture to escape, they also let it in. Check for tears or dampness before purchasing.
Plastic/Poly Bags: These keep moisture out but can trap heat, affecting the concrete’s properties. Inspect for punctures and ensure they’re properly sealed.
Bulk Sacks: These are durable but can still be punctured or exposed to moisture. Check for any damage before using.
Storage recommendations for contractors and DIYers
Proper storage is crucial to maintain the performance of your air-entrained concrete. Here are some guidelines:
Temperature: Store in a stable temperature environment, ideally between 50°F – 80°F (10°C – 27°C).
Dryness and Humidity: Keep the storage area dry. Low humidity is best to prevent moisture absorption.
Stacking and Time: Stack bags carefully, following manufacturer guidelines. Use pallets if available. Air-entrained concrete can typically be stored for 30-90 days, depending on conditions. Always use the oldest stock first.

Mixing instructions, ratios, and tips for preserving air entrainment
Aim for practical water-cement targets that support air entrainment, and adjust for temperature and workability without over-watering. Keep in mind that AE mixes respond differently than non-AE mixes as conditions change. Verify any climate adjustments with the product data sheet or label.
Follow a careful mixing sequence: dry mix first, then add water gradually, and limit overall mixing time. Introduce air-entraining agents only as directed, and avoid retempering or excessive moisture that can destroy the porosity. Check for consistent slump and uniform texture during placement.
Tools and materials checklist for bagged air-entrained concrete
Before you start mixing, make sure you have all the necessary tools and materials to ensure consistent results.
- Electric Concrete Mixer: Essential for thorough mixing. Check it’s in good working condition.
- Measuring Tools (Buckets, Shovel): Accurate measuring ensures the right water-cement ratio.
- Slump Cone (Optional): Helps check workability and consistency of your mix.
- Clean Water: Essential for proper hydration. Avoid using salty or contaminated water.
- Air-Entraining Admixture: Pre-measured packets are convenient. Check they’re compatible with your cement type.
- Gloves and Safety Glasses: Protect yourself from concrete splatter and debris.
- Wheelbarrow or Mixing Tub: For easy transportation of mixed concrete to the placement area.
- Tape Measure: To ensure you’re adding the right amount of water based on cement bag size.
Quick rule: Always double-check your tools and materials before mixing. Missing something can lead to inconsistent mixes or even ruined concrete.
Common mixing mistakes that destroy entrainment
Here are some common mistakes to avoid when mixing air-entrained concrete to preserve the entrained air.
- Overwatering: Too much water reduces workability, weakens concrete, and can destroy air voids. Stick to recommended water-cement ratios.
- Excessive Re-mixing: Over-mixing can break down the air bubbles, reducing their beneficial effects. Mix only until a uniform consistency is achieved.
- Incompatible Admixtures: Some admixtures can react with air-entraining agents, reducing or eliminating their effectiveness. Always check compatibility before adding.
- Improper Dispersion of Air-Entraining Agent: If not properly dispersed, the agent may clump and not entrain air effectively. Follow manufacturer’s instructions for proper dispersion.
These mistakes can lead to reduced durability, decreased freeze-thaw resistance, and overall poor performance of your concrete. Always follow mixing guidelines and avoid these common pitfalls.
Comparing brands, product types, and cost considerations
When comparing, read labels and data sheets to confirm air-entrained content and the specific air-entraining agent used. Note any referenced standards or tests the supplier claims to meet. This helps you gauge reliability and performance expectations.
Evaluate core specs such as cement content, aggregate guidance, max water content, and recommended slump. These factors influence finish, strength, and freeze-thaw performance. Consider price differences in light of yield, waste, and how air entrainment impacts overall project results.
What to compare on the product label
The bag label and tech data sheet are your best friends when comparing air-entrained mixes. Here’s what to look for:
Compressive Strength: This tells you how strong the concrete will be once set. Higher numbers mean stronger concrete.
Recommended Uses: Check if it’s suitable for your project – slabs, sidewalks, or foundations. Some mixes are better suited than others.
Air Content Claim: This should tell you the typical air-void percentage. Look for 5-8% for good freeze-thaw resistance.
Budgeting: cost vs performance trade-offs
Air-entrained concrete costs more than regular mixes. Here’s why:
Premium Materials: Air-entraining agents and higher-quality aggregates drive up the price.
Expect to pay 10-25% more for air-entrained mixes. But remember, you’re paying for durability – less cracking, better freeze-thaw resistance.
Don’t skimp on quality if your climate needs it. But for mild climates, a cheaper mix might do the trick.
Safety, handling, and environmental considerations
Wear appropriate PPE: eye protection, moisture-resistant gloves, long sleeves, and a suitable respirator or dust mask when handling dry mixes. Manage dust control and silica exposure during bag opening and mixing. These steps protect you and others on site.
Follow safe lifting practices and use carts or dollies for heavy bags. Store bags properly to prevent damage and organize waste responsibly, including washout containment and recycling where available. Observe local disposal rules for leftover material and packaging.
Health and Safety Precautions When Mixing and Placing
When working with bagged concrete, your safety is paramount. Here’s what you need to know:
Personal Protective Equipment (PPE): Wear eye/face protection, moisture-resistant gloves, long sleeves, and an appropriate respirator or dust mask. This will protect you from cement contact and silica dust inhalation.
If concrete gets on your skin, wash it off immediately. For eyes, use plenty of water and seek medical attention if irritation persists. In case of inhalation, move to fresh air, rest, and seek medical advice if symptoms worsen.
Minimizing Environmental Impact and Waste
Bagged concrete can be a great product, but it’s important to use it responsibly. Here are some strategies to minimize waste:
First, measure carefully. Overestimating can lead to excess mix that hardens before you can use it. Underestimating means you’ll have to start over, wasting time and materials.
If you do have leftover mix, try to reuse small quantities in other projects around your home. For larger amounts, follow local disposal regulations. Some areas allow concrete waste in landfills, while others require recycling or specific disposal methods.
Always contain concrete washout. This prevents wastewater from polluting waterways and helps maintain a clean work area. Use containment systems designed for the job, and dispose of contents responsibly.
Planning your project: selecting the right bagged air-entrained mix
Start with the project scope: slab thickness, dimensions, load expectations, and exposure conditions. This helps determine if a standard air-entrained mix suffices or if a specialty option is needed. Consider your finish requirements as well.
Estimate quantity and yield, including waste factors and bag coverage at typical slump. Decide between bagged premix and on-site admixtures by weighing convenience, consistency, and cost. Review bag options and read labels for air entrainment targets, slump, and curing guidance to plan accordingly.
Calculating quantities and yield from bags
First, find the bag’s cubic feet per bag (CFB) rating. This tells you how much concrete one bag makes.
For example, a 60 lb bag with a CFB of 0.5 means it yields 0.5 cubic feet of concrete.
To calculate total bags needed, divide your project’s volume by the bag’s yield: Total Volume / Bag Yield = Bags Needed. Add 10-15% extra for waste and spillage.
When to consult a supplier or concrete professional
For structural work, like footings or slabs, consult an engineer. They’ll ensure your mix is strong enough.
In unusual climates, like extreme heat or cold, ask suppliers about mixes designed for those conditions.
For large pours (over 10 cubic yards), consider site-batched concrete. Suppliers can deliver the right mix for your project’s needs.
Conclusion
You need to confirm you bought the right air-entrained concrete and protect the project from cracking, scaling, and durability problems. Do it right, and you’ll get a smoother finish, better workability, and a structure that stands up to weather and load.
In practice, confirm the bag label shows air-entrained concrete, verify the brand and type matches your plan, test a small batch following the mixing instructions, check the bag for freshness and storage notes, store bags off the ground and out of moisture, mix with the recommended water amount and timing, and inspect the final mix for consistency before applying it to the whole job.
Avoid muddy too-wet mixes, using a non–air-entrained product by mistake, and skipping the verification tests. Never mix without following the exact ratios and timing, and always wear proper gloves and eye protection, keep equipment clean, and work in a well-ventilated area to handle dust and fumes safely. If you’re unsure about the label, the storage history, or the scale of the project, pause and reassess before proceeding.
For larger structural work, high-traffic concrete, or when labels are unclear, call a professional instead of pushing ahead. Stay deliberate, test small first, and you’ll finish with a solid, lasting result you can trust.
FAQ
1. How can I tell if the bag is air-entrained concrete or plain mix?
Look at the bag label. Air-entrained mixes list air-entraining agent on the front or spec sheet. If it’s not clear, ask the dealer or check the product data online before you buy.
2. Why do I need air-entrained concrete in bags?
Air-entrained mix makes small air voids. That helps the concrete resist freeze-thaw damage and reduces cracking from freezing. It can be more forgiving in damp or cold jobs.
3. What should I watch for on the bag or box?
Check for the air-entraining agent mention, the intended use, and the compressive strength rating. Make sure the bag size matches your project and that the mix is compatible with your climate.
4. If I’m unsure, what’s the safe move?
Ask the supplier for the spec sheet and a sample bag. If it doesn’t clearly show air-entraining features, pick a product that does or buy from a different brand you trust.