
Table of Contents
- What “Rapid-Set” Means — Chemistry, Set vs. Cure Times
- Types of Rapid-Set Products and Typical Uses
- Use-Cases Where Rapid-Set Products Shine
- Preparation and Best-Practice Application Steps
- Tools, Mixing Tips, and Managing Pot Life
- Environmental Constraints — Temperature, Humidity, and Weather
- Strength, Durability, Compatibility, and Long-Term Performance
- Common Mistakes, Troubleshooting, and Repair Options
- Safety, Cleanup, Disposal, and Regulatory Considerations
- Planning, Cost-Benefit, and Scheduling Checklist
- Case Studies and Quick Reference Tables
Introduction
Rapid-set products deliver fast curing and early strength for time-sensitive construction tasks.
You’ll learn how to choose the right fast-setting option, know when to use it, and avoid common missteps through practical tips and everyday scenarios.
The guide walks through decision criteria, real-world examples, and simple rules of thumb to help plan mixes, application timing, and curing expectations.
What “Rapid-Set” Means — Chemistry, Set vs. Cure Times
“Rapid-set” in DIY and construction refers to products engineered to reach usable stiffness quickly, typically by accelerating hydration or crystallization chemistry and by incorporating accelerants or polymer-modified systems. Common types include rapid-hardening cement mixes, gypsum-based quick-setting blends, epoxy or polyurethane accelerants, and fast-setting concrete additives, each with distinct timelines: initial set often occurs in minutes to hours, final set within hours to a day or so, and full cure stretching into days or weeks for standard materials, while specialized epoxies or fast-curing polymers may cure in at most a few hours when temperatures and humidity cooperate.
Understanding these timelines helps you plan handling, finishing, and load-bearing expectations, and it clarifies why some products tolerate light foot traffic soon after placement but require longer curing before painting or heavy use. This matters on the jobsite because improper water content, suboptimal temperatures, premature finishing, or choosing the wrong product for substrate or load can derail performance; use this as a quick guide to matching project type, environment, handling time, and required finishing steps to the right rapid-set option, avoiding common missteps and optimizing results.
Chemical mechanisms and additives
Rapid-set products get their speed from three basic tricks: they either push the cement reaction faster, make a resin cure quicker, or use polymers that let things set hard sooner. Cementitious accelerators (things like calcium-based accelerants or special fast-cement blends) speed hydration and generate more heat so strength shows up fast. Fast-react epoxy chemistries use low‑molecular-weight hardeners or specialty catalysts to cut pot life and crosslink quickly. Polymer modifiers (latexes, acrylics) don’t speed chemistry as much as they improve early strength and bond so a surface feels serviceable sooner.
What you actually need to do on the job: refer to the Substrate assessment and prep checklist (see that section). Read the product data sheet and match the additive to the job conditions. If a mix uses a cement accelerator it will get hot and hard fast — don’t add extra water to “slow it down.” For epoxies, mix thoroughly and follow pot life; once mixed you have a short working window. Polymers help adhesion and freeze‑thaw resistance, but they won’t extend working time.
Watch for tradeoffs. Accelerators cut working time and can raise exotherm or change long‑term durability. Some cement accelerators contain chlorides — bad around rebar. Fast epoxies can be brittle or sensitive to cold. So pick products for your temperature, cure needs (you know the difference between set and cure from earlier), and follow manufacturer instructions rather than improvising on site.
Set time vs cure time vs pot life
Set time is when the material hardens enough to stop moving. For you that means you can walk on it or remove forms without wrecking the job. Don’t assume set time equals full strength—refer to the product label for the specific minutes or hours based on the rapid-set chemistry already discussed.
Cure time is when the material reaches its designed strength. That can be hours to days depending on temperature and humidity. Treat cure time like a real work window: avoid heavy loads, traffic, or cutting into the material until the stated cure period is met. If you rush it, you’ll get cracks or a weak bond.
Pot life is the workable time after mixing. If you mix too much and exceed pot life, the stuff thickens and is unusable. My advice: measure batches to match pot life and check manufacturer times before you start. Also plan around weather—cold or wet can stretch set times and ruin schedules.
Types of Rapid-Set Products and Typical Uses
The rapid-set category falls into clear product groups. Below is a concise, corrected list with typical uses and quick notes to help you pick the right type at the counter.
- Cementitious rapid-set repair mortars and hydraulic cements — For slabs, sidewalks, vertical/overhead patches, anchor setting (non-structural). Typical set: 10–60 minutes; walkable: 1–4 hours; light traffic: 24–48 hours depending on temperature. Avoid overwatering; follow measured water ratios (see cheat sheet below).
- Rapid-setting epoxies and structural adhesives — For setting anchors, bonding metal to concrete, high-strength repairs. Typical pot life: 5–30 minutes; handling strength: 1–6 hours; full cure: 24–72 hours. Require excellent surface prep, exact mixing ratios, and epoxy-specific PPE.
- Polymer-modified fast-setting mortars and overlays — For thin overlays, tile backer repairs, and areas needing improved bond or flexibility. Open time shorter than standard mortars; use for small to medium areas where cracking resistance matters.
- Rapid tile adhesives and grouts (cementitious and epoxy) — For same-day tile installs and grout. Use rapid adhesives for small areas and tight schedules; choose epoxy grout for wet rooms and chemical exposure.
- Fast-curing polymer sealants and polyurethane compounds — For sealing joints quickly or re-establishing movement joints where short downtime is required.
- Additives and accelerators (liquid or powder) — Often used to speed standard mixes; must be used only per manufacturer instructions and not combined indiscriminately.
One‑page cheat sheet — typical values and decision cues
| Product Type | Typical initial set (at 65°F/18°C) | Walkable / Light load | Recommended thickness | Common failure modes |
|---|---|---|---|---|
| Rapid cementitious repair | 10–60 min | 1–4 hrs | up to 2 in (single lift), multiple lifts for >2 in | Overwatering, poor compaction, frozen substrate |
| Rapid epoxy (structural) | 5–30 min pot life (mixed) | 1–6 hrs (handling) | Depends on manufacturer; anchors: depth per anchor spec | Incorrect mix ratio, contamination, cold cure |
| Polymer-modified overlay | 20–90 min | 2–24 hrs | 1/8″–1/2″ (typical thin overlay) | Adhesion failure, incompatible sealer |
| Rapid tile adhesive | 10–30 min open time | grout same day | tile dependent; check manufacturer | Insufficient trowel coverage, premature drying |
Decision cues: use epoxies for load-bearing anchors; cementitious rapid-set for shallow patches and sidewalks; polymer overlays for thin resurfacing. When in doubt, prefer a structural epoxy for anchors and a slower-setting cementitious product for large pours.
Rapid-set cement, mortar, and patching compounds
These mixes are what you grab when a slab, stair, or anchor needs fixing fast. Use them for shallow floor repairs, setting bolts and anchors, and vertical or overhead patches where slower products sag or take days to load. Expect them to develop useful strength in hours, not days—so plan your traffic and loads accordingly.
Before you mix, consult the Substrate assessment and prep checklist (see that section). Mix times are short and water changes strength, so measure carefully. If you’re doing a vertical patch, use a product rated for overhead work or add the manufacturer‑approved admixture. For anchors, pick a high early‑strength formula and torque only after the specified cure time.
Practical mixing for a 20 kg bag (example cementitious rapid repair): measure 4.0–5.5 L of clean water per 20 kg bag (follow bag for exact target). Add water to the mixer first, then slowly add powder while mixing. Mix 2–3 minutes, let slake 2 minutes, remix 30–45 seconds. Aim for a damp-putty consistency for vertical work (holds a 8–12 mm bead on the trowel); for horizontal patches use a creamier consistency that spreads without running. Discard batches that have been thinned with extra water.
Rapid-setting epoxies and adhesives
These products are for when you need strength fast — bonding metal, setting anchor bolts, or quick emergency fixes on concrete and masonry. They grab hard in minutes and reach working strength in hours. Before you buy, decide if you need a structural epoxy for load-bearing anchors or a fast adhesive for quick repairs. If you’ve already used rapid-set cement or patching compounds, think of epoxies as the fast glue for attachments and embedded hardware.
Surface prep is where most jobs fail. Clean to bare concrete or steel, remove loose material, oil, and water, and consult the Substrate assessment and prep checklist for compaction and dryness checks. Follow the manufacturer’s temperature range and pot life exactly. Mix fully and use the supplied tools — under-mixing or wrong ratio kills strength. For anchoring, set parts while the epoxy is still fluid so you don’t trap air pockets.
Watch cure time and load limits — just because it’s hard in an hour doesn’t mean it can take full load. Use epoxies for permanent fixes or temporary emergency repairs if you’ll follow up correctly. Don’t use them where continuous movement, high heat, or wet immersion will occur unless the product is rated for that. When in doubt, pick a slightly slower-setting structural epoxy over something you’ll regret pulling out later.
Rapid tile adhesives and grouts
Rapid-setting tile adhesives and grouts let you get tiles in and grouted the same day. Use them when you need quick return to service — overnight hotels, a bathroom before guests arrive, or a small backsplash repair. They save time, but don’t skip the basics: consult the Substrate assessment and prep checklist, check flatness, and dryness before you mix anything. Rapid products have shorter open time and less forgiveness for sloppy troweling.
Choose fast adhesives for small areas, non‑porous or thin tiles, and jobs with tight schedules. Pick standard-setting adhesive for large-format tiles, heated floors, or when you need longer working time to adjust patterns. For wet rooms or chemical exposure, use a rapid-setting epoxy adhesive or grout approved for those conditions rather than a standard cement grout.
Follow the product directions exactly: mix ratios, pot life, and cure time matter. Don’t thin with water or add extra retarders to stretch it — you’ll lose strength. If you aren’t certain about movement joints, substrate moisture, or tile type, call the manufacturer or take the slower adhesive. Fast cures are great — until you lock in a mistake overnight.

Use-Cases Where Rapid-Set Products Shine
Rapid-set products shine in scenarios where timing is critical: weather-sensitive outdoor work, emergency repairs, fast-track construction, trafficable surfaces, and projects needing short cure windows. Speed is the main benefit, translating to less downtime and lower project risk.
For DIY and jobsite teams, weigh upfront cost against required strength, finish, and the project schedule. Plan setup carefully: substrate cleaning, moisture control, priming, formwork handling, and joint detailing to protect fast-setting blends. Consider scenario-based steps and curing methods to stay on track without compromising durability.
Emergency and patch repairs (sidewalks, anchors, potholes)
If a sidewalk trip hazard, anchor bolt hole, or a pothole shows up, act fast but don’t rush the prep. Knock out all loose material, consult the Substrate assessment and prep checklist, and remove standing water or oil. For potholes, compact a granular subbase before you place the rapid-set product so the repair doesn’t settle the first winter.
Mixing and placement matter more than heroic finishing. Use the manufacturer’s water ratio, place the mix, tamp or screed to fit, and don’t overwork the surface. For anchors, get the hole depth and embedment right and follow the early-torque window — too soon and the metal spins out, too late and you wasted downtime.
Plan for cure times and reopening. Rapid-set products gain strength fast, but temperature and mix control change the timeline. In warm weather you can often open to foot traffic in an hour and vehicles in a few hours. In cold weather, expect longer cures or use an accelerator rated for cold application. If you need the spot back in service, prioritize proper prep and correct mixes over cosmetic perfection. Quick fixes that skip prep always come back worse.
Fast-turnaround commercial projects and staged construction
When you’re staging a commercial job and every day costs money, rapid-set mixes let you turn a slab or anchor point over fast so the next crew can move in. Before you pour, consult the Substrate assessment and prep checklist and verify drainage — if the base fails, the fast cure won’t save you. Decide the exact cure window with the product tech sheet and schedule trades around that window, not your optimistic guess.
Communicate sequencing clearly: mark which areas get rapid-set and which get normal concrete, then tell framing, MEP, or tile crews the earliest safe start times. If a follow-on trade shows up early, don’t bluff—you’ll end up redoing work. Also confirm temperature limits and mixing water on site; colder or wetter conditions force longer cure times.
Use rapid-set to prevent costly delays when inspections, anchor-setting, or equipment pads are on the critical path. For quick emergency ties or temporary openings you’ve handled before, think of rapid-set as a scheduling tool, not a shortcut on prep: solid prep plus the right product beats a rushed patch any day.
Preparation and Best-Practice Application Steps
This section outlines a practical, step-by-step approach to rapid-set installations, from substrate prep and joint/backer preparation through mixing protocols and the correct application sequence. Focus areas include thorough cleaning to remove dust, oils, and laitance, surface profiling for bonding, crack and joint preparation, and moisture testing to stabilize the substrate before coating. By detailing priming decisions, consistent water-to-powder ratios, appropriate mixing durations, controlled air incorporation, and disciplined placement methods, you can maximize bond strength and early strength while controlling cure time and long-term performance.
Planning defines which rapid-set products and substrates you’re working with and sets acceptable moisture levels and performance goals. A thorough prep checklist prevents failures by removing dust, oil, laitance, and cracks, while priming and bonding decisions ensure compatible product pairs and proper surface conditioning. Understanding mixing, batching, and handling—water-to-powder ratios, temperature control, pot-life, and equipment hygiene—reduces waste and yields a consistent finish, proper edge treatment, and reliable curing under moisture and temperature limits.
Substrate assessment and prep checklist
Use this single, authoritative checklist and refer to it for all work. Doing these checks every time avoids the repeated “check base compaction” notes scattered through other sections.
- Soundness: tap surfaces to find hollow spots; probe suspect areas and remove unsound material to solid substrate.
- Compaction (granular bases): verify with a hand tamper or plate compactor for small repairs; for vehicle loads aim for well-compacted base with no visible settlement under tamping.
- Cleanliness: remove dust, dirt, oils, paint, and efflorescence. For light contamination pressure-wash and allow to dry; for oil/tar use mechanical scrubbing and an industrial degreaser.
- Moisture check: perform a plastic-sheet test or use a moisture meter. For cementitious overlays wait until the substrate meets the product’s % moisture limit (see product tech sheet).
- Profile: roughen smooth surfaces with a grinder or shotblast to the profile recommended by the overlay or adhesive maker. For epoxy anchors, blast-clean steel to near-white.
- Edge preparation: square cut feathered edges back to a clean shoulder at least 1/2″ deep for small patches; on large repairs follow manufacturer guidance.
- Temperature: confirm substrate and ambient temperatures are within the product’s rated range; warm or cold-adjust mixes as described in the Environmental section.
- Documentation: record batch numbers, water used, ambient temp, substrate temp, and moisture readings in the job log (see QA template below).
Mixing, consistency, and application technique
Start by following the product bag for water/part ratios, but expect roughly 4–6 litres of water per 20 kg bag for most cement-based mixes (use the bag’s number first). Measure water by the bucket every batch. Mix 2–4 minutes with a paddle drill, let sit 2–3 minutes, then remix for 30–60 seconds. If you add more water to “loosen” a batch, throw it away — it will be weak and slow to cure.
For consistency targets: vertical work needs a stiff, tacky mix that won’t sag — aim for a paste that holds an 8–12 mm bead on the trowel. Horizontal work can be creamier and spreadable — a mix that will spread smoothly but not run off the trowel. If you want numbers, aim for a spread where a 50 mm (2″) tamp leaves a controlled impression without the mix slumping beyond 5–10 mm.
Application technique differs by orientation. On vertical surfaces key the first coat firmly into the prepared substrate and dress edges with a straight edge; use short, firm strokes and don’t overwork the surface. For horizontal surfaces spread and compact, then strike off to the required level while the mix is still plastic. Always follow the Substrate assessment and prep checklist before placing material, and keep successive coats within the manufacturer’s recoat window — tacky is okay, set is not. Don’t rush curing with extra heat or drying; slow, even cure gives strength.
Tools, Mixing Tips, and Managing Pot Life
Build a practical toolset for concrete mixes: drills with paddle mixers or a dedicated mortar mixer, trowel-ready buckets, rubber transfer hoses, calibrated scoops or scales, and fast-dispense dispensers. Use the right mixer type and RPM to minimize air entrainment, and choose whether to mix in one batch or in stages to extend pot life. Understand pot life limits and plan partial mixes and timed pours to keep work progressing.
This approach matters on DIY sites by reducing waste, saving time, and improving consistency. Arrange your workspace for quick transfers, pre-measured additives and water, and a clear cleanup routine to prevent early stiffening and segregation.
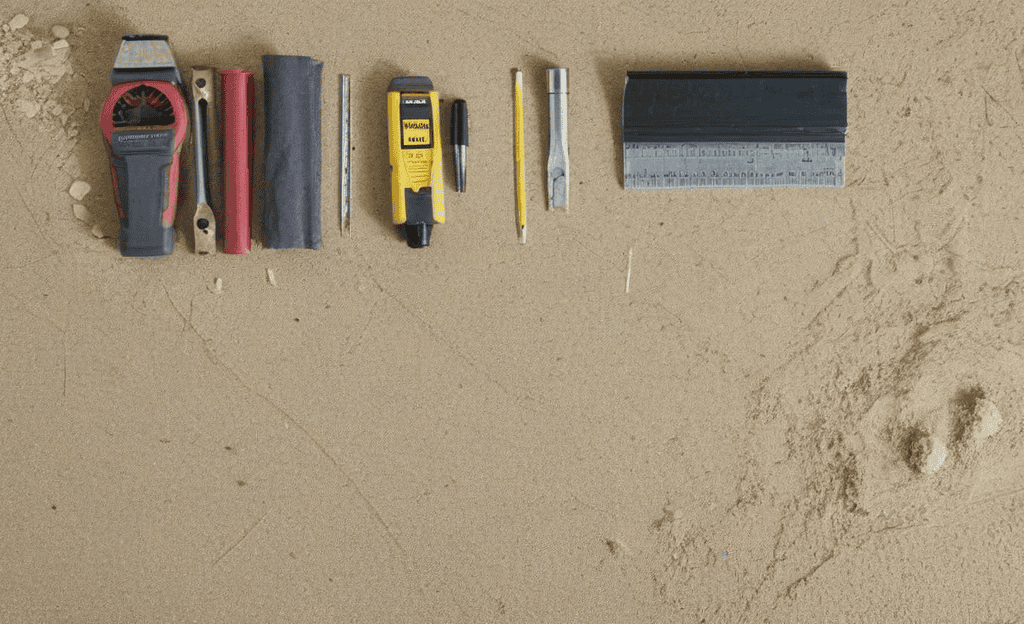
Recommended tools and their uses
Here’s a straight list of the tools you’ll actually need for rapid-set products. I’ll tell you what each does, the specs to watch, whether you should buy or rent, and one real jobsite tip or warning.
- Paddle mixer — Power mixes bags fast and consistently; use a 1/2″ hex shaft or M14 paddle at 600–900 rpm. Buy a mid-range unit ($60–$150) if you do more than one job a year; rent for one-off projects. Wrong speed or a worn paddle traps air and ruins strength.
- Mixing drill — Attaches to the paddle for mixing; choose a 10–18 mm chuck drill with at least 500–700 in-lbs torque and variable speed. A cheap homeowner drill works for small batches; rent a corded pro drill for continuous mixing. Using low-torque drills stalls and overheats the motor, leaving lumps in the mix.
- Square trowel — For spreading and floating rapid-set mixes; 12″–16″ stainless or carbon steel blades are common. Essential for clean screeds and finishing; buy one ($15–$40). Using a warped or soft blade causes uneven surfaces and more rework.
- Margin trowel — Small 4″–6″ blade for tight spots and edges; stainless is best for washability. Optional but handy for corners and patch cleanup; inexpensive ($5–$15). Using a large trowel in tight areas tears edges and wastes material.
- Mortar pump — Pushes material into forms or up scaffolds; look for 2–4 gal/min output and 3–8 bar (45–120 psi) range. Rent this for large pours — pumps cost thousands to buy. Underpowered pumps clog; over-pressuring hoses bursts them and sprays mix everywhere. Rent threshold: if you have more than 5–10 bags to place in a single day, rent; otherwise hand mix.
- Temperature controls — Heaters or coolers to keep material in recommended temperature window (often 50–80°F / 10–27°C). Essential for winter/summer work; portable electric heaters ($50–$200) or chillers (rent) work. Ignoring temperature speeds or stalls cure, causing poor strength or premature set.
- Cleanup gear — Stiff brushes, plastic scrapers, hoses, and five-gallon buckets for washout. Always have them on hand and expect to clean within the pot life. Cheap brushes are fine; hose with a shutoff nozzle is must-have. Letting material harden on tools ruins them and adds costs — scrapers beat soaked metal any day.
Pro tip: Combine a 1/2″ paddle mixer with a variable-speed drill and a square trowel as your core kit. Rent high-cost items like pumps and chillers when needed. Keep cleanup tools handy — they save time and money when the mix sets fast.
Water ratios, mixing sequence, and small-batch strategies
Measure by weight whenever you can. Scales beat scoops for consistency. If your material gives a water ratio, follow it by weight and then confirm by feel — aim for the slump or viscosity your project needs, not for a random look. If you don’t have a scale, mark a fixed cup and keep the same one for every batch. Check batch weight before you pour.
Mix in the right order. Add liquids first for cement mixes and resin parts A and B together for epoxies, then slowly add powders or fillers. Start the mixer on low speed and increase only if the material actually needs it. High speed folds in air and heats the mix fast. Gentle, steady mixing saves you from premature setting and weak mixes. Use the recommended tools mentioned earlier; you don’t need a fancy paddle to ruin a batch.
Work in small, planned runs. Know your pot life and break the job into timed batches that you can place before the mix tightens. For long pours or repairs, mix only what you can place in 5–15 minutes depending on temperature. Keep extra water, cool water or ice (for cement) and shaded space to slow things down when it’s hot. Clean tools between batches so you don’t contaminate the next mix.
Environmental Constraints — Temperature, Humidity, and Weather
Temperature and humidity directly influence concrete hydration, set time, and strength gain, with rapid-set mixes requiring careful control to avoid premature drying or excessive evaporation. Safe ranges for workability and curing are typically kept between cool room temperatures and moderate warmth, with humidity management needed to reduce surface bleed and achieve a reliable finish. On site, monitor ambient conditions, adjust mix temperatures, and apply appropriate mitigations for cold, heat, or rain to keep curing on track.
This matters for DIY projects because it helps you predict when to place, shield, or cover work, and when to switch strategies to avoid weak or cracked finishes. Understanding how to pre-warm or cool materials, employ shading or windbreaks, and use enclosures or protective blankets can save time and money while reducing mistakes. Quick checks and practical decision points—such as postponing, adjusting mix design, or changing curing methods—support safer, more predictable results under varying weather and help you achieve a durable, smooth surface.
Cold-weather and hot-weather adjustments
Cold jobs: keep materials and mix water warm. Store bags off the ground in a heated trailer or wrap pallets with warm blankets. Heat mixing water to about 70–90°F (21–32°C) if you can, but don’t use boiling water. Work in smaller batches, cover placed concrete, and use insulation or heated forms to hold temperature. Expect slower set times and plan for longer protection against freeze for at least 48–72 hours.
Hot jobs: shade stockpile and use cool water for mixing. Add water in stages and don’t overdilute just to cool the batch — that weakens the mix. Use chilled water, ice, or cooled sand to keep concrete temperature down. Wind and sun speed evaporation; mist surfaces and use evaporation-retarding curing compounds or moist coverings right away.
Admixtures and cure time: use accelerators in cold weather and retarders in hot weather, but follow manufacturer dosing exactly. If you extend cure times (blankets, insulated forms, or extended wet curing), watch for delayed strength gain and avoid early loads. And whatever you do, use the Substrate assessment and prep checklist and schedule protection — skipping either is the fastest way to waste material and time.
Humidity, wind, and evaporation control
Wind and low humidity will dry concrete fast. When the surface loses water too quickly you get rapid evaporation causes skinning — a weak, cracked top that looks fine but never cures properly underneath. Watch the breeze. If you can feel wind on your face, you need protection on the slab.
Use fogging or fine misting during the first hours to slow surface loss, but don’t blast the concrete with a hose. Gentle, continuous misting keeps the top from drying while the mass below hydrates. On larger pours or very windy sites use fogging plus temporary windbreaks or burlap to keep conditions even across the slab.
Covering is often the simplest fix. Lay down curing blankets, damp burlap, or approved liquid membrane-forming curing compounds as soon as the surface can be walked on without damage. For hot, dry, or windy days leave covers in place for several days (or as advised in the temperature/humidity adjustments already covered). Avoid premature finishing or heavy traffic until the cure is stable; a skimmed, crusted surface can ruin strength for the life of the slab.
Strength, Durability, Compatibility, and Long-Term Performance
Rapid-set products blaze past early strength in roughly 24–72 hours, while standard mixes mature more slowly and reach meaningful 7–28 day gains. That early strength accelerates form removal, sequencing, and early load exposure, but does not negate the need for continued curing to achieve the ultimate performance. In practical terms, long-term strength at 28 or 56 days defines how the material holds up under sustained use, even as rapid-set trades some early stiffness for faster completion.
Durability and performance under use encompass abrasion resistance, hardness, freeze–thaw durability, shrinkage potential, and resistance to cracking or curling from thermal cycling and load fluctuations. Substrate and curing considerations are critical, including proper moisture and porosity management, residue-free surfaces, ambient temperature control, and curing conditions that prevent premature drying or micro-cracking in rapid-set products. Compatibility with coatings, tile, rebar, and sealers also matters, with attention to adhesion risks, bonding behavior with epoxy or polyurethane coatings, tile installation timing, rebar corrosion risk, and sealer compatibility with rapid-set surfaces. Routine inspection and testing methods—rebound hammer, pull-out tests, simple moisture checks—and planned core testing guide openings, coatings, or subsequent pours while helping avoid common mistakes and mis-timed implementations.
Expected strength curves and testing
Most cementitious repairs and concrete mixes show a fast start, then slow growth. Expect something like 20–40% of design strength at 1 day, roughly 60–70% at 7 days, and near full gain by 28 days. Epoxy or polymer mortars can gain strength faster or slower depending on temperature. Don’t guess — let the material and conditions set the curve for your job.
Plan simple, timed checks: 1-, 7-, and 28-day checks as a baseline. Make small sample cubes or cylinders when you can. For in-place work, use a Schmidt hammer for quick compressive checks and a core sample for verification if the structure is critical. Record temperature and moisture during curing — those two change the curve more than anything else.
For bond, do a small sacrificial pull or scrape on a hidden spot before committing to large areas. A proper pull-off bond test is best where failure would be costly. If you can’t run formal tests, at least test a mock patch and try a shear/pull by hand or with a small jack before loading. If bond or early strength looks weak, stop, inspect substrate prep, and don’t cover or load the repair until tests show you’re safe.
Compatibility with finish systems and reinforcement
Match the timing and surface prep to the product. Many rapid‑set mixes can be covered for light foot traffic within 24 hours, but coatings and paints usually need longer. Follow the manufacturer’s cure time for final coatings — don’t guess. If a label says “moist cure” or gives a moisture limit, measure it before you paint or seal.
Test adhesion before you commit. Some sealers and epoxies won’t stick to very alkaline, still‑curing concrete or a dusty surface. Do a small test patch, clean the surface, and profile as the coating maker recommends. Solvent‑based primers often need a drier substrate than water‑based ones. If you plan a thin overlay, confirm compatibility of the chemistry and the required mechanical bond.
Watch reinforcement and movement. Keep the specified cover over rebar and use corrosion inhibitors or coated rebar if the job is exposed to salt or water. Don’t rigidly bond overlays that will be subject to different thermal movement than the base — allow for movement with joints or flexible sealants. Use the expected strength and bond test results to decide when it’s safe to attach finishes or load the structure.
Common Mistakes, Troubleshooting, and Repair Options
This section covers the common mistakes in rapid-set concrete patching and repair, explains how each misstep affects strength, set, and finish, and maps practical paths from fix to failure risk in residential and professional patching projects. Expect to see overwatering or under-watering, pot-life mismanagement, inadequate surface prep, unusual curing temperatures, and improper formwork or vibration; these errors lead to cracking, delamination, excess shrinkage, and mismatched color or texture. It also outlines diagnostic cues for homeowners vs pros, then guides troubleshooting by symptom, starting with surface prep and mixing discipline, moving to curing and temperature control, and finishing with application technique adjustments and remediation options for safe, consistent results on real job sites and field verification checks include slump testing, moisture contamination screening, and documenting cure cycles.
When remediation is chosen, the guide helps you decide between patches, overlays, epoxy or polymer mortars, and under-slab work, with clear criteria for repair vs replacement based on load-bearing failure, large structural cracks, or extensive bond failure, across different substrates. Quick field checks—slump consistency, pot-life timing, moisture screening, and cure/temperature logs—provide repeatable metrics to prevent recurrence and justify next steps, whether testing, warranty considerations, or safety/quality checks. Keep a simple notebook for the field and you can trace performance over time carefully.
Mistake: overwatering or wrong ratios
Getting the mix wrong is one of the fastest ways to ruin a job. Too much water or incorrect powder-to-water ratios weakens the set, causes gaps and movement, and shortens the life of the installation.
- Soupy mix — A mix that’s too wet looks easier to work with but dries weak and crumbly. Measure by weight when possible and mix to the manufacturer’s consistency instead of eyeballing it.
- Powder shortage — Adding water to cover a short batch reduces strength. Always batch by volume or weight and mix multiple small batches rather than trying to stretch one thin batch across the whole job.
- Soft or hollow sound — Tap tiles or the surface; a dull or hollow ring and easy edge lift mean a poor bond from overwatering or wrong ratios. Check a few spots early so you can fix before grout is applied.
- Crumbly joints — If grout or mortar crumbles under a probe, the mix was too weak. Remove the loose material and assess whether the bedding needs full removal or a targeted repair.
- Repair options — Small voids: grout injection or epoxy injection to fill voids and re-bond. Larger failures: remove and reset the affected area. For widespread thin or contaminated beds, consider a proper overlay system instead of repeated spot fixes.
Double-check your mix ratios and test a few tiles before you finish the whole area — fixing a bad set takes more time than getting the mix right the first time.
Mistake: applying in cold or wet conditions
Cold or damp conditions wreck cures and strength. These are the common things I see that turn a decent job into a repair call—know the failure modes, quick fixes, and how to plan ahead.
- Delayed set — Cold slows chemical reactions so the mix keeps tacky for hours or days. Short-term fix: move materials to a warmer spot before mixing or use a fast-setting formula rated for low temps. Plan: schedule work for warmer hours or warmer days. Temperature cutoff example: many rapid-set cement products recommend a minimum substrate temperature of 40–45°F (4–7°C); below that use a cold-weather product or delay.
- Reduced final strength — Moisture in the substrate or frozen ground prevents proper bonding and lowers long-term strength. Short-term fix: scrape and dry the surface as much as possible, or remove and replace with dry material. Plan: store materials dry and avoid applying over visibly wet surfaces. Moisture thresholds: follow product SDS — typical limits are <4% surface moisture for cementitious overlays unless the product explicitly allows more.
- Frozen substrate — Applying onto frost or ice looks okay at first but the bond fails later. Short-term fix: thaw the area with direct heat or wait until it’s thawed; don’t try to chase a cure with more product. Plan: postpone work until the substrate is above the minimum temperature recommended by the manufacturer.
- Using cold materials — Cold water or cold bags lower reaction speed and strength. Short-term fix: warm water and keep bags in a heated truck or shed before use. Plan: store products at a proper temperature overnight and rotate stock so cold bags aren’t used first thing.
- Rushing cure time — Traffic or load before full cure leads to premature failure. Short-term fix: use barriers and locals’ notice to keep loads off, or switch to a rapid cure option if available. Plan: build in extra cure time on the schedule when temperatures are low and avoid overlapping tasks that put load on the work too soon.
Double-check temperature, surface dryness, and material storage before you start. If anything’s marginal, don’t force it—either delay or switch to a product rated for the conditions to avoid a costly redo.
Post-failure inspection and remediation workflow
Start with a quick, focused inspection. Walk the area, tap suspect spots, and use a moisture meter or a small core where you can. Look for delamination, soft spots, and substrate movement. If the problem follows earlier mistakes like overwatering or work in wet/cold conditions, note that and move faster to testing.
Decide by severity. If damage is local and superficial, patch with a bonded repair mortar or epoxy slurry after cleaning and roughening the surface. If the layer is broader but the substrate is intact, rework using shotblast or grinder, re-prime, and install a new overlay or screed. If cores show loss of bond, contaminated substrate, voids, or structural compromise, you must replace full sections down to sound substrate and correct the cause (compaction, drainage, or primer failure) before reinstalling.
Before closing the job, test your repair. Do a simple pull-off test or strike-off check, confirm drying and cure times, and document results. If a repair fails the test, don’t keep layering—move one step up the tree (patch → rework → replace). Keep records so you don’t repeat the original error, and always refer to the Substrate assessment and prep checklist and bonding tests before you call the job finished.
Safety, Cleanup, Disposal, and Regulatory Considerations
This section summarizes essential safety practices for handling materials, from PPE and exposure controls to cleanup and disposal. It covers eye/face protection, chemical-resistant gloves, long sleeves, dust masks or respirators, ventilation, first-aid for skin and eye exposure, safe tool cleaning, and compliant disposal of leftovers and wash water.
Following these steps helps prevent irritation, chemical burns, and accidents on the jobsite, and keeps work areas organized and safe. Adhering to local regulations also protects you from fines and ensures environmental responsibility, especially with wash water and waste containers.
PPE and on-site safety practices
Wear the right gear and don’t improvise. For dust use a NIOSH-rated N95 at minimum for short jobs, and a P100 or a powered air-purifying respirator (PAPR) for prolonged cutting or demolition of masonry. For paint strippers, solvents, or fumes use a half-mask or full-face respirator with the correct organic vapor cartridges. Wear a proper respirator—fit-test it, seal-check it, and replace filters on schedule.
Hands and eyes matter. Use nitrile or chemical-resistant gloves for solvents and sticky epoxy resins (nitrile thickness 0.4 mm or greater recommended for prolonged exposure). For handling epoxy resins be aware of sensitization risk — avoid skin contact, wash immediately if contact occurs, and follow SDS first-aid instructions. Always wear ANSI Z87.1 safety glasses and add a face shield for grinding or chipping. Replace any torn gloves and scratched goggles; damaged PPE doesn’t protect.
Ventilation beats complacency. Open windows and run box or axial fans to create cross-ventilation. For heavy dust or vapors use local exhaust or an inline fan ducted outside. For epoxies consider a minimum airflow that keeps solvent vapor concentrations below recommended exposure limits — consult the product SDS for specific ventilation rates. Keep people away from the work zone, post a warning, and seal off adjacent rooms if dust or fumes can travel. Maintain a glove-changing and hand-washing station to reduce skin exposure.
Cleanup and disposal of leftover product and effluent
Right after the job, clean tools where you’re working — not at a storm drain or in the yard. Scrape off excess product back into the original container if it’s still liquid and usable. For brushes and small tools, wipe them with rags first, then rinse into a small, sealable bucket so you don’t spread contaminated water around.
Empty containers: follow the label. If the label allows, triple-rinse, punch a hole in the bottom and recycle or discard per local rules. If the product is hazardous or the container still has residue, don’t toss it in the curb trash — put it in a sealed, labeled container and take it to a household hazardous waste or commercial disposal facility. When in doubt, the local waste authority is your friend.
Epoxy/resin-specific disposal: never pour liquid resin or solvent-laden rinse water down drains. Allow uncured resin to polymerize in a sealed container (following manufacturer guidance) or use a licensed hazardous waste handler. Cured resin can usually be disposed of as construction debris, but confirm with local rules.
Wash water and unused product that’s begun to set need to be contained. Let suspended solids settle in a bucket or tank, decant clearer water only if the label/regulations allow. For leftover, cured material, ship it as solid waste or let it fully cure and dispose of it with construction debris if local rules permit. Always check the product label and local regulations before pouring or discarding anything — dumping this stuff can cost you way more than the headache of proper disposal.
Planning, Cost-Benefit, and Scheduling Checklist
This checklist clarifies project scope and timeline for rapid-set pours, maps exact pour windows, defines curing expectations, sequences finishes to minimize delays and rework, and establishes measurable criteria for strength gain and formwork removal that you can verify on site. It builds a practical lead-time framework for materials, tools, and site access, detailing supplier lead times, on-site storage needs, delivery windows, and contingency buffers designed to absorb order delays without cascading impacts to the schedule. With weather contingency planning, predefined soak days, alternate pours, protective coverings, and a clear impact assessment on strength, along with coordinated trades sequencing and a straightforward labor-cost model that estimates crew size, overtime potential, productivity gains from faster-setting products, and lifecycle cost considerations versus standard products.
For a DIYer or small crew, following this approach translates into fewer surprises, more predictable progress, and better control over costs and quality when using rapid-set materials on real job sites. By detailing weather allowances, lead-time buffers, form-sharing across trades, and practical sequencing workflows, you can protect critical tasks, reduce downtime, and minimize rework that erodes savings when material availability shifts or weather disrupts plans. Ultimately the checklist provides a grounded rationale for budgeting, scheduling, and stakeholder sign-off, helping you communicate requirements, justify decisions, and keep everyone aligned toward timely, durable outcomes without guesswork or last-minute scrambling.
Quick cost comparison and labor savings calculation
Think of this like a job-day trade. Estimate the material vs labor numbers first: list material cost, add tool rental and disposal, then estimate hours saved by buying the product or using a faster method. Multiply hours saved by your going labor rate (or what you’d pay a pro). That gives you the direct dollars saved by time.
Ballpark numbers (DIY US example): a 20 kg rapid repair bag $12–$25; paddle mixer purchase $80–$150 (rent $20/day); mortar pump rental $150–$400/day; small crew labor $35–$60/hr per person. Break-even rule of thumb: if rental cost < saved labor hours × labor rate, rent; otherwise buy for repeated use. Use the simple formula: Net benefit = (hours saved × labor rate) − (material cost + rental/purchase amortized + expected rework cost).
Now factor in mistakes. Multiply the probability of a slip-up by the likely rework cost to get an expected rework expense. Example: material $500, labor saved 20 hrs × $40 = $800 saved; expected rework = 10% × $300 = $30. Net benefit = $800 − $500 − $30 = $270. If the net is positive and the rework number is small, go for it.
Make the call simple: if net benefit minus a safety buffer still stays positive, buy or do the faster route. If not, stick to cheaper materials or more conservative methods. And one blunt rule — don’t skimp on anything that raises your rework risk above about 15%; rework kills schedules and margins fast. Rework risk drives more cost than most people expect.
Pre-job scheduling and coordination checklist
Start by locking in deliveries: confirm delivery windows, quantities, and lead times with suppliers, then order with enough buffer for one delay. Schedule materials to arrive before the crews need them but not so early they clutter the site. If a special part or long-lead item is missing, drop everything and sort it—don’t hope it shows up.
Set a clear staging plan: pick a dry, level spot for pallets, label piles, and keep a small working bin of daily materials near the work area. Put protective cover over moisture-sensitive items and make sure equipment access is unobstructed. Tell the crew where the staging area is and enforce it—random piles cost hours every day.
Coordinate trades and tests: confirm each trade’s start/stop times, who blocks access, and when inspections or concrete/cabinet/etc. testing happens. Plan a simple fallback: a short list of tasks that can move forward if a trade is late (cleanup, prep, small installs). Communicate the fallback to everyone so delay time isn’t wasted.
QA log sample (use for warranties and claims)
Keep simple, repeatable records. Sample entry format:
- Date/time: 2025-12-01 09:00
- Product: RapidRepair 20 (batch #12345)
- Mix: 20 kg bag, water 4.5 L measured, paddle mixer 700 rpm, mix 2 min + 30s
- Ambient temp/substrate temp: 12°C / 14°C
- Substrate moisture: plastic-sheet test pass (no condensation after 16 hrs)
- Placement start/end: 09:15–09:25
- Initial set observed: 35 min; walkable 2 hrs
- Inspector: J. Smith
Store logs with photos and pull-off or Schmidt hammer readings if taken. This lightweight record reduces disputes and helps you learn from outcomes.
Case Studies and Quick Reference Tables
Case Studies and Quick Reference Tables compile concise success and failure examples with exact mixes, ambient temps, cure times, and measured outcomes, using a consistent framework that records product name, substrate, mixing protocol, delivery method, placement technique, and both initial and final set times. Each entry includes a brief lesson learned to guide readers’ decisions, and the section pairs every case with a corresponding quick-reference table row that highlights recommended mixes, working times, cure guidance, and safety notes, all color-coded for scanability. Visuals and minimal charts illustrate setting time and strength progress, while callouts flag deviations from standard procedures and opportunities to rerun a mix or adjust products as needed.
This approach matters on a DIY jobsite because it translates technical data into actionable guidance you can compare at a glance, helping you choose the right product for the application and environment while avoiding common pitfalls. By cross-referencing manufacturer data sheets and test results, the tables and case notes support safer, more predictable results, with clear notes on when professional oversight or testing is warranted and where quick fixes or substitutions may be appropriate.
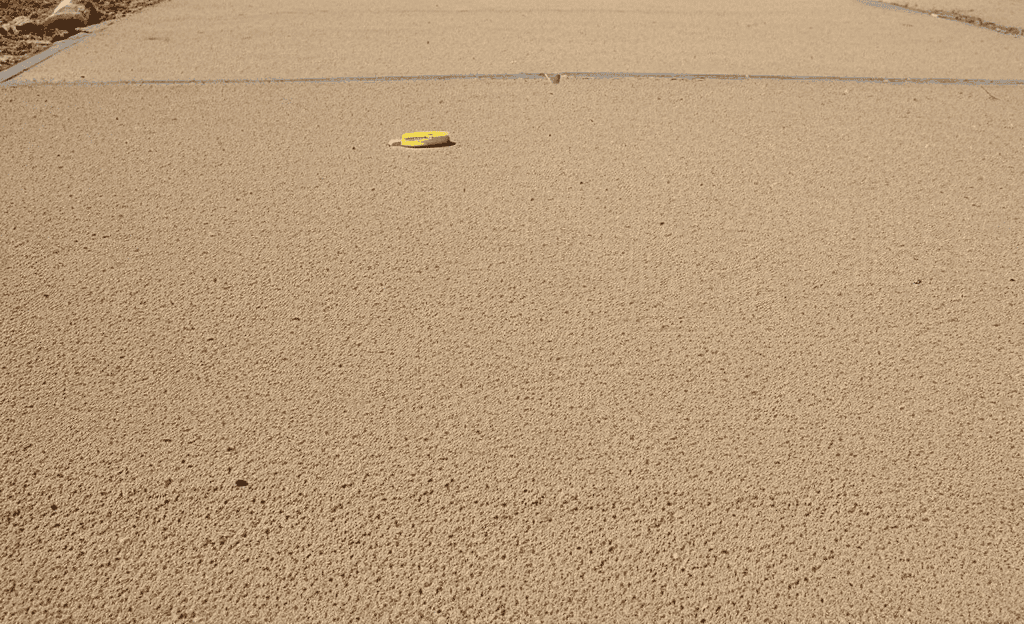
Success case: fast-turnaround sidewalk patch (with mix, temp, time)
Small trip-hazard patch on a 4 ft section. I used a rapid-setting cement mix: roughly 1 part rapid hydraulic cement to 2.5 parts clean sand by volume, mixed to a stiff, damp-putty consistency. Keep the edges sawcut or square and consult the Substrate assessment and prep checklist so the patch sits on solid material, not loose fill.
Ambient temp around 65–75°F. At that temperature expect initial set in 20–40 minutes, walkable in 1–2 hours, and light vehicle load avoided for 24–48 hours. Colder than 50°F slows everything; over 85°F speeds it up and needs cooler water and shade. Mix only what you can place in 10–15 minutes.
Curing: mist the patch and cover with plastic or a damp burlap for at least 24 hours—keep damp. Remove forms or tape at 24 hours and avoid heavy loads for a week. Observed performance: the patch remained true through freeze–thaw cycles and normal foot traffic all season when these steps were followed; shortcuts like thin placement or poor compaction caused cracking fast.
Failure case: common novice error and recovery
These are the mistakes I see on every small job. Short, practical fixes so you don’t waste material or redo the patch later.
- Overwatered patch — Too much water in the mix in cold weather kills strength and causes surface dusting. Diagnosis: patch crumbles or sands off after a few freezes. Recovery: chip out weak concrete back to sound material, let the base dry, use a stiffer mix (less water), and add a small warm-water batch or accelerant rated for the product if temps are low. Keep new patches covered but ventilated to prevent rewetting from rain.
- Mix too sloppy — Runs or sags, then shrinks and cracks. Diagnosis: visible slump, vertical faces slump, big shrink cracks after curing. Recovery: remove loose paste until you reach firm material, rebuild with the manufacturer’s recommended consistency or use a drier trowelable patch, compact in thin layers, and cure with a damp burlap or curing compound per product guidance.
- Poor edge prep — Feathered or crumbly edges that break off within weeks. Diagnosis: edges break under fingertip; patch lifts from the surround. Recovery: cut a clean square or chamfer edge back to sound concrete, roughen the substrate with a chisel or grinder, apply a bonding slurry or primer the product specifies, then pack the patch tightly and tool the edges so they tie into the existing surface.
- Insufficient compaction — Voids under the patch lead to potholes returning. Diagnosis: hollow sound when tapped, or tiny sinkage under load. Recovery: remove the top loose layer, fill in thin lifts (maximum 1–2 in depending on product), tamp or vibrate each lift so there are no air pockets, and finish when the material holds an imprint without slumping.
- Opened to traffic too soon — Walks or cars cause premature failure despite a decent-looking cure. Diagnosis: pushed edges, fingerprints, or ruts after first use. Recovery: chip out the damaged portion back to firm concrete, use a faster-setting or higher-strength repair mix next time, and enforce a dry/cold-weather extended cure window — block traffic with cones and a firm timeline.
Double-check these points before you mix. Fix the root cause first — then the repair will stick.
Conclusion
Rapid-set products finish fast, but they won’t save you if you skip prep or ignore the conditions—quality work shows up as durability, safe handling, and a clean, professional look. Your job starts with surface readiness, proper mixing within pot life, and keeping the work area and tools ready so you don’t rush or mess up the cure.
First, verify the ambient temperature and surface temperature, confirm humidity and weather windows, read the product’s pot life, prep the substrate, mask and protect nearby areas, set up clean mixing and application stations, mix in small batches only, apply promptly in the recommended sequence, and keep tools and spill control on hand, then allow curing with minimal disturbance and plan for clean-up and disposal per regulations. Safety first and a quick, small-area test before full use helps catch issues early, so you don’t waste material or damage the project.
Common mistakes to avoid are skipping surface preparation, pushing past pot life or cure time, and applying in temperatures outside the recommended range, which invites cracks, poor bonding, or rapid premature failure; always follow the maker’s instructions, never improvise mixes or additives, and wear proper PPE to stay safe during mixing, placement, and clean-up.
If you’re dealing with a large area, unknown substrates, or tight weather windows, or the project bears structural or functional risk, it’s wise to call in a pro rather than riding it out; otherwise, stay disciplined, work in daylight or dry hours, and finish with a clean, protected cure so you avoid costly callbacks and enjoy a solid, lasting result. You’ve got this—line it up, do it right, and you’ll see the benefits in strength, appearance, and peace of mind.
FAQ
What is rapid-set product good for?
Use it for quick repairs and small patches. It works fast and helps you get back to work soon. For structural or large-area work, follow manufacturer guidance or call a pro.
How should I prep the surface before applying?
Follow the Substrate assessment and prep checklist: remove loose material, confirm compaction, check moisture, and profile the surface as required by the product—don’t skip these tests.
What are the common mistakes to avoid?
Avoid mixing too much at once. Don’t add water to thin it out. Don’t rush the cure or skip proper prep and documentation.
How long does it take to set and cure?
Set time is usually minutes to an hour depending on the product and temperature. Full cure can take 24 hours to several days—consult the product tech sheet and follow the QA log thresholds before loading.