
Introduction
Removing paint from masonry means choosing between chemicals that soften coatings and mechanical grinding that abrades them, and the right choice depends on the paint type, the masonry surface, and how careful you need to be to avoid damage. For a DIYer that often means weighing slower, gentler chemical strippers against faster, more aggressive grinding while checking product labels and manufacturer instructions for safety and compatibility. Think about ventilation, containment of runoff, and testing a small area first.
Chemical strippers can reduce scarring if you pick one compatible with the paint and substrate and follow dwell times and rinse procedures; grinding can be quick but risks gouging or smoothing the texture unless you use the right grit and keep the tool moving. Start with a trial patch, protect surrounding materials, and if unsure, consult product directions or a local pro about the best method for your specific masonry. Take your time—mistakes are harder to hide on textured masonry than on flat surfaces.
Key takeaways
- Inspect substrate for masonry type, existing coatings, and potential moisture issues before removal.
- Perform a small test area to compare chemical stripper and grinding impacts without full failure.
- Follow label instructions and PPE when using chemical strippers; ventilate and seal area.
- Grinding risks gouging joints or creating heat-induced crazing; use low speed and guards.
- Use masonry-compatible strippers on lime-based mortars to prevent substrate damage.
- Clean residues thoroughly and test for residual coating before recoating.
Table of Contents
- Introduction
- Key takeaways
- Overview: Why Paint on Masonry Is Different
- Assessment and Testing Before Removal
- Chemical Strippers: Options, Pros, Cons
- Mechanical Removal: Grinding, Abrasive Methods and Alternatives
- How to Avoid Scarring and Surface Damage
- Tools and Materials Checklist
- Environmental, Health, and Disposal Considerations
- Post-Removal Repair, Prep, and Recoating
- Conclusion
- FAQ
Overview: Why Paint on Masonry Is Different
Masonry materials—brick, stone, concrete, stucco—absorb and hold coatings differently than wood or metal because of varying porosity and surface hardness. That means paint can penetrate, sit on, or bridge pores in ways that change how removers work.
The chosen removal method affects the final look and long-term durability by altering surface texture, removing or damaging mortar, and changing how new coatings bond. Check product data sheets and test patches to confirm compatibility with the specific masonry in your project.
Types of masonry and surface characteristics
Masonry surfaces come in various types, each with its unique characteristics. Brick, stone, concrete, and stucco all have different porosities, textures, and mortar joints that affect paint adhesion and removal.
Brick and stone are porous due to their natural composition. This means paint can sink into the surface, making it harder to remove without damaging the substrate. Concrete and stucco, on the other hand, are less porous but have textured surfaces that paint can cling to tightly.
Mortar joints in brick and stonework also pose challenges. They’re often more porous than the surrounding material, allowing paint to penetrate deeply. This can make removal difficult without causing damage or leaving residue.
How paint behaves on masonry
Paint behaves differently on masonry surfaces compared to wood or metal. Here’s what you need to know:
Delamination: Paint can peel or flake off in large sheets, especially if it wasn’t properly prepared or if moisture is present.
Sinking into pores: On porous surfaces like brick and stone, paint can penetrate deep into the substrate. This makes removal challenging as you need to get rid of both the surface paint and the underlying color that’s seeped in.
Bridging: Paint can bridge over cracks or imperfections in the masonry, giving a false sense of a smooth, even surface. When you try to remove it, these areas can crumble or flake off, leaving your surface damaged.
Assessment and Testing Before Removal
Start by inspecting the surface, identifying the paint type if possible, and evaluating substrate condition so you can choose the least-damaging approach. Look for loose mortar, previous coatings, efflorescence, and any historic material that needs protection.
Document conditions with notes and photos and set up containment to protect landscaping and neighbors before work begins. If paint composition or hazards are uncertain, arrange lab or kit testing and review the manufacturer’s instructions for products you plan to use.
Visual inspection checklist and red flags
Before you start removing paint, walk the area with a keen eye. This checklist helps spot potential issues.
- Crumbling or loose mortar: Check joints for signs of deterioration. If found, use conservative methods to avoid further damage.
- Chalky or powdery surface: These indicate a weak substrate. Be gentle; grinding could cause crumbling.
- Historic finishes or markings: Look for any unique features that might be lost with aggressive removal methods.
- Hidden damage: Check for signs of previous repairs, hidden cracks, or delamination.
- Paint type and age: Identify the paint’s type (latex, oil-based) and approximate age. Older paints may require specialist removal.
- Moisture stains or efflorescence: These indicate potential moisture issues that could worsen with improper paint removal.
- Paint layers: Count the number of paint layers. Multiple layers might need more time and care to remove.
- Frost damage: Look for signs of freeze-thaw cycles, which can weaken masonry.
Quick rule: If you’re unsure about any findings, consult a specialist before proceeding.
Small test patch protocol
Before diving in, do some test patches. This helps compare methods and assess their impact on your surface.
Choose a hidden or inconspicuous area for your tests. Make sure it’s representative of the rest of the masonry.
Record results with photos and notes. This will help you make informed decisions before full-scale work.
Test different methods (chemical strippers, grinding) and observe their effects. This helps you choose the least damaging approach for your specific situation.
Chemical Strippers: Options, Pros, Cons
Chemical strippers fall into categories like solvent-based, caustic, bio/soy-based, and gelled formulas; each behaves differently on porous masonry and in how deeply they penetrate. Some remove multiple layers easily but can require thorough rinsing or neutralizing on masonry surfaces.
Consider ease of application, dwell time, required rinsing, and potential staining or alteration of the substrate when selecting a product. Always read the product label and test on an inconspicuous patch to verify compatibility and cleanup requirements for your masonry type.
When chemical stripping is the right choice
Chemical strippers are your best bet when you’re dealing with delicate masonry textures. They won’t damage those fine details like mechanical methods might.
They also come in handy when access is limited. Can’t get a grinder or scraper into that tight spot? A chemical stripper can reach it.
But, if your masonry is highly porous, you might want to reconsider. Strippers can get trapped inside those pores and cause more harm than good.
Application technique and neutralization essentials
First things first, always follow the manufacturer’s instructions. They know their product best.
Apply the stripper evenly, making sure to cover all areas you want to treat. Let it dwell for the time specified – don’t rush this step.
Once the paint is softened, scrape it off gently. Then, neutralize the stripper using a suitable solution or rinse thoroughly with water, as instructed.
Pros and cons summary vs. other methods
Chemical strippers have their upsides and downsides compared to mechanical methods like grinding.
Pros
- Less abrasive, preserving masonry’s surface.
- Can reach tight spots where grinders can’t.
- Generally safer, with no dust or flying debris.
- Easier on your back and arms compared to grinding.
Cons
- Longer process due to dwell time and neutralization.
- Potential residue if not rinsed properly.
- Runoff can be an environmental hazard.
- Health hazards from fumes and contact with skin or eyes.
Chemical strippers make sense when you need a less invasive method, but they require patience and careful handling.
Mechanical Removal: Grinding, Abrasive Methods and Alternatives
Mechanical methods range from hand scraping and wire brushing to angle grinders, cup brushes, and blasting techniques; aggressiveness rises with power and grit. More aggressive methods remove paint quickly but increase the risk of scarring, rounding edges, or loosening mortar on masonry.
Use mechanical removal where paint is tenacious and substrate is hard, but avoid heavy abrasion on soft or historic materials. Before using powered tools, try less-aggressive methods and perform test sections to check for surface damage and tool suitability.
Grinding and power tools: best practices
The right tools and techniques can make grinding paint off masonry efficient and safe. Here’s what you need to know.
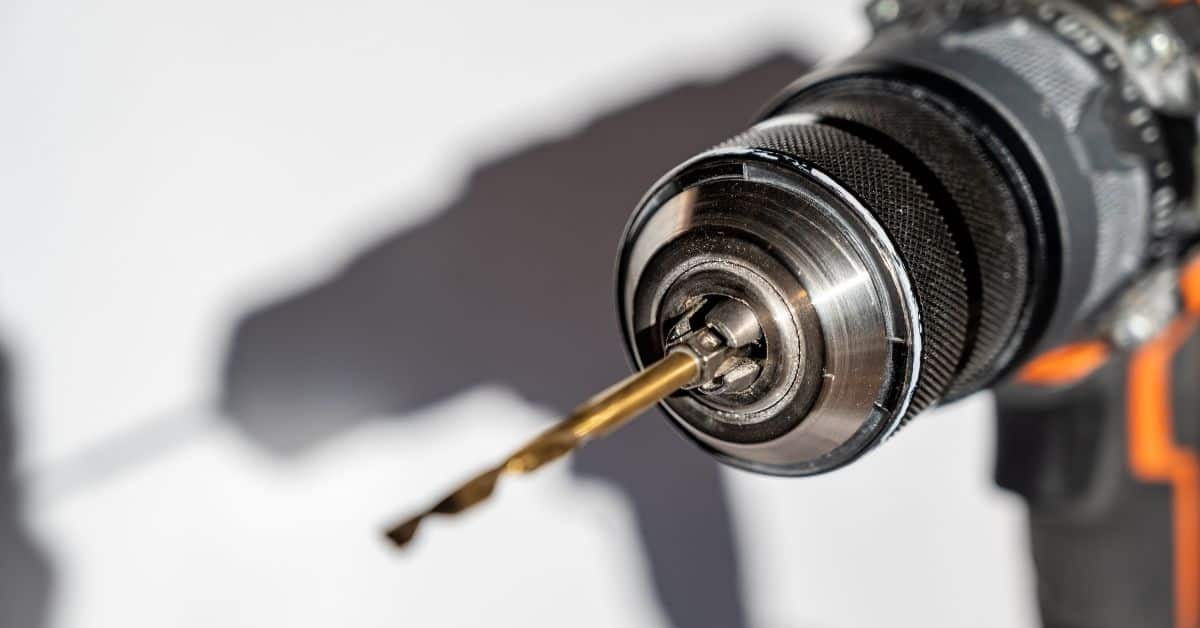
- Angle Grinders: Versatile, affordable. Use 40-80 grit discs for paint removal.
- Speed: Start slow (5000 RPM) to avoid gouging. Increase as needed.
- Pressure: Apply even pressure. Too much can damage the surface.
- Wet/Dry Vacuum: Rent one for dust control. Around $50/day.
- Safety: Wear protective gear – goggles, gloves, ear protection, and a respirator.
Blasting and non-impact abrasives (soda, micro-abrasives)
For gentler paint removal, consider these low-pressure alternatives. They’re less aggressive but require skill and containment.
Soda Blasting: Uses sodium bicarbonate. It’s soft on surfaces but can clog equipment if not done right.
Micro-Abrasives: Like glass or plastic beads. They’re gentle, recyclable, but more expensive than soda.
Both methods need proper containment to prevent media scatter and damage. Hire a pro for the first time.
When to call a professional for mechanical work
Mechanical removal can be risky. Here are signs it’s best to hire an experienced contractor:
Historic Masonry: Preservation is key. Pros know how to handle old masonry without causing damage.
Complex Detailing: Intricate carvings or patterns need careful handling. A pro can navigate these details better.
Risk of Structural Harm: If you’re unsure about the structure’s integrity, call a professional. They have the knowledge and tools to assess and work safely.
How to Avoid Scarring and Surface Damage
Minimize scarring by selecting the right tool and abrasive, working progressively from gentler to stronger methods, and keeping tools flat and moving to avoid gouging. Maintain control of pressure and speed and replace worn abrasives that produce heat or tear the surface.
Stop frequently to inspect test patches and finished areas so you can adjust technique early rather than repairing damage later. If unsure about limits for a specific masonry, consult manufacture guidance or a preservation specialist before scaling up.
Step-by-Step Process
Follow these practical steps to avoid scarring and surface damage while removing paint from masonry.
- Preparation: Inspect the area, gather tools (scrapers, brushes, safety gear), and test a small patch with your chosen method. Why: To ensure you’re using the right approach and to avoid damaging the surface.
- Start gently: Begin with light scraping or chemical stripping. Why: This minimizes initial damage and allows you to assess the paint’s removal ease.
- Inspect progress: Regularly check your work, looking for any signs of damage or difficult-to-remove areas. Why: Early detection helps prevent further damage.
- Increase intensity carefully: If needed, use more aggressive tools (stiffer scrapers, power tools) or chemicals, but only in small sections at a time. Why: This prevents over-removal and potential damage.
- Cleanup and final checks: Remove all paint residue, clean the area, and perform a final inspection. Why: To ensure no remaining paint causes further damage or discoloration.
Progressive-removal strategy
Using a stepwise approach helps avoid unnecessary material loss and surface damage when removing paint from masonry.
Start: Always begin with the least aggressive method – usually chemical stripping or light abrasion. This softens the paint and makes removal easier.
Inspect: After applying your initial method, inspect the area for any signs of damage or difficult-to-remove paint. If the paint is coming off easily, proceed with caution; if not, consider a more aggressive approach.
Increase aggressiveness gradually: Only if necessary, move on to more aggressive methods like power tools or harsher chemicals. Always test in small areas first and monitor closely for any signs of damage.
Surface support and stabilization techniques
Before removing paint, stabilize soft mortar or friable stone to prevent damage. This can be done using consolidants (like lime-based products) or temporary supports.
Consolidants: Apply these to strengthen the surface before removal. They help bind loose particles and make the surface more resistant to damage. Always follow the manufacturer’s instructions.
Temporary supports: For large areas with soft mortar, consider using temporary supports (like wooden braces) to prevent collapse during removal. Be careful not to apply too much pressure, as this can cause further damage.
When to seek professionals: If the surface is extremely friable or has significant damage, consult a conservation specialist before proceeding. They can provide expert advice and specialized treatments tailored to your specific situation.
Tools and Materials Checklist
Prepare a checklist that separates hand tools, power tools, abrasives, chemical products, PPE, and testing supplies so you can stage the job efficiently. Include items like scrapers, stiff brushes, grinders with compatible discs, containment materials, neutralizers, and lead-test kits as applicable.
Note compatibility for each item with your masonry type and confirm specifics on product datasheets or labels before purchase or use. Having spare consumables and a clear plan for sequence of use reduces downtime and the chance of using an inappropriate tool mid-job.
Personal protective equipment and safety gear
Before you start any removal process, ensure you’re well-protected.
- Respirator: Choose one with a filter suitable for the chemicals or dust involved. Read manufacturer guidelines to confirm.
- Eye Protection: Use safety glasses or goggles that seal at the base to protect from splashes and dust.
- Skin Protection: Wear long sleeves, gloves, and coveralls to prevent direct contact with chemicals or abrasives.
- Hearing Protection: Use earplugs or earmuffs when using power tools for grinding or blasting.
- Head Protection: Wear a hard hat in case of falling debris during mechanical removal.
- Foot Protection: Wear sturdy, non-slip boots with steel toes if working around heavy equipment.
Quick rule: Always prioritize safety gear over speed. Skipping protection can lead to serious injuries or health issues.
Consumables, containment, and cleanup supplies
Gather these essentials before you begin to ensure a smooth process and minimize environmental impact.
- Drop Cloths: Use canvas or plastic drop cloths to protect floors and surrounding areas from paint chips and chemicals.
- Plastic Sheeting: Cover windows, vents, and other openings to contain dust and fumes.
- Neutralizers: Have the correct neutralizer for your chosen chemical stripper on hand to stop the stripping process when needed.
- HEPA Vacuum: Use a high-efficiency particulate air vacuum to collect fine dust and debris, protecting both you and the environment.
- Collection/Containment System: Set up a system to collect paint chips, chemicals, and dust, preventing them from entering soil or drains.
Quick rule: Proper containment and cleanup prevent environmental damage and make your job easier in the long run.
Environmental, Health, and Disposal Considerations
Account for lead paint possibilities, VOCs, and hazardous residues by testing for lead and checking local disposal rules before work begins. Prevent runoff to soil and storm drains with containment and collect spent materials for proper disposal.
Protect yourself and others with appropriate respirators, gloves, and barrier clothing, and follow manufacturer safety data sheets for any chemical used. If you encounter suspected hazardous waste or aren’t sure about local requirements, contact your local environmental or public-health authority for guidance.
Lead and hazardous material testing
The choice of testing materials is crucial as it affects the accuracy of results, which in turn impacts your legal obligations and safety measures.
- Lead Test Kits: Use for quick, on-site screening. Look for kits with color-coded results and a rating of 0.5% or less sensitivity to lead. Tip: Always follow up positive results with a professional lab test.
- Professional Lab Testing: Use for definitive results. Specify XRF (X-ray fluorescence) analysis, which is the most accurate method. Avoid kits that use swabs as they can give false negatives.
- Hazardous Material Test Kits: Use to check for other harmful substances like asbestos or mercury. Look for multi-purpose kits that test for a range of hazards. Tip: Always follow up positive results with professional abatement.
Containment, runoff control, and waste disposal
Containing liquids and abrasive fallout is crucial to prevent environmental damage and ensure safe disposal.
Liquid Containment: Use drop cloths, plastic sheets, or containment booms to catch paint stripper runoff. Regularly replace or clean them to maintain effectiveness.
Abrasive Fallout Control: Use HEPA vacuums or wet-dry vacuums to collect abrasive fallout. Never sweep or blow dust as it can cause inhalation hazards and spread contamination.
Always follow local hazardous-waste rules for disposal of removed paint and contaminated media. Contact your local waste management department or a licensed hazardous-waste disposal company for guidance.
Post-Removal Repair, Prep, and Recoating
After paint removal, assess the surface for residual stains, mortar damage, or loose units and make necessary repairs such as repointing or patching before finishing. Clean and dry the substrate fully and remove any chemical residues according to product instructions.
Choose primers and coatings formulated for masonry breathability and verify compatibility with the substrate and previous treatments before applying. Conduct a small test area to confirm adhesion and appearance, and follow product datasheets for cure times and application conditions.
Repairing scuffs, mortar, and surface profile
After removing paint from masonry, you’ll need to repair any damaged areas. Start by inspecting the surface for:
- Scuffs or gouges
- Missing or crumbling mortar (repointing)
- Irregularities that need light grinding to feather edges
Rebuilding vs. Skim-coating: For minor damage, skim-coat with a thin layer of fresh mortar. For major damage, rebuild the affected area.
If structural repairs are needed, consult a professional. They can assess and fix any underlying issues before you proceed.
Preparing for repaint or breathable sealing
Before applying primer or paint, ensure your masonry surface is clean and dry. Here’s how:
- Remove any loose material with a stiff brush.
- Clean the surface using a suitable cleaner (follow manufacturer’s instructions).
- Rinse thoroughly with clean water and let it dry completely.
Profiling: Lightly grind or sand any high spots to ensure an even finish. Be careful not to damage the surface.
When selecting primers and sealants, choose breathable masonry coatings. These allow moisture to escape while protecting against water ingress. Always follow manufacturer’s surface-prep instructions for best results.
Conclusion
Protecting people, the brick, and the appearance matters most. With careful testing, selecting the right approach, and clean, deliberate steps, you can remove paint without creating new problems or costly repairs.
Begin with a simple, practical check: test a small patch, read and follow the stripper directions, wear proper PPE, mask off nearby surfaces, and lay down protective tarps. Decide on a method that fits the test patch, work in progress, keep the area ventilated, manage dust and residue, and then inspect the surface for any signs of damage before you move on to the next patch. If you proceed, finish with thorough cleaning, a basic repair plan, and a solid recoating setup.
Common mistakes to avoid are skipping the initial test, picking a method that is too aggressive for the brick, and rushing through grinding or stripping without containment. Always keep ventilation and dust control in mind, never overheat masonry or gouge the surface, and never mix chemicals or apply them to unseen areas. A simple safety rule is to work small, test often, and stop when something doesn’t look right.
If the project is large, or you’re unsure about the brick, flagstones, or delicate edges, or if multiple tests keep failing to produce a clean, non-scarred surface, call a professional. When in doubt, prioritize safety and long-term appearance over a quick fix. With the right approach, you’ll finish with a durable, even finish you can trust. You’ve got this.
FAQ
How do I decide between chemical strippers and grinding for a masonry surface?
Consider the mortar joint condition, texture, and what you plan to expose. If the paint is thick or deeply embedded, grinding may be faster but risks scarring. For delicate surfaces or old brick patterns, chemical strippers are gentler when used correctly.
What signs indicate grinding could scar the masonry, and what should I do instead?
Visible grooves, rounded edge damage, or uneven texture are red flags. If you see layer differences or soft areas, pause grinding and reassess. Switch to controlled chemical stripping or test a small area first.
What steps help minimize surface scoring when using chemical strippers?
Follow the manufacturer’s instructions and wear proper PPE. Work in small, controlled areas and use a plastic scraper to lift softened paint. Rinse or neutralize as directed and avoid forcing paint off with metal tools.
How should I test a small area before proceeding with full removal?
Choose a representative spot away from corners and edges. Apply the product and observe how the masonry responds, including color change and paint looseness. If there’s no adverse reaction, you can proceed cautiously with the larger area.