

Table of Contents
- Table of Contents
- Introduction
- Understanding Rust Stains on Concrete
- Essential Equipment and Supplies for Cleaning Concrete
- Step-by-Step Guide to Removing Rust Stains
- The Importance of Sealing Concrete After Cleaning
- Safety Precautions When Using Cleaning Agents
- Maintenance Tips for Concrete Surfaces
- Comparing Cleaning Methods: Pressure Washing vs. Power Washing
- Cost Analysis: DIY vs. Professional Cleaning and Sealing
- Common Mistakes to Avoid During Cleaning and Sealing
- Eco-Friendly Alternatives for Cleaning and Sealing
- How to use enzymatic cleaners on concrete
- The do’s and don’ts of cleaning concrete with vinegar
- How to clean concrete with muriatic acid
- Final Thoughts on Protecting Concrete from Rust Stains
- FAQ
Introduction
To protect concrete surfaces from rust stains, regularly apply a high-quality sealant and promptly clean any rust-prone items. In this DIY guide, you’ll learn effective methods to prevent rust stains, the best products to use, and step-by-step instructions for maintaining your concrete surfaces.
Understanding Rust Stains on Concrete
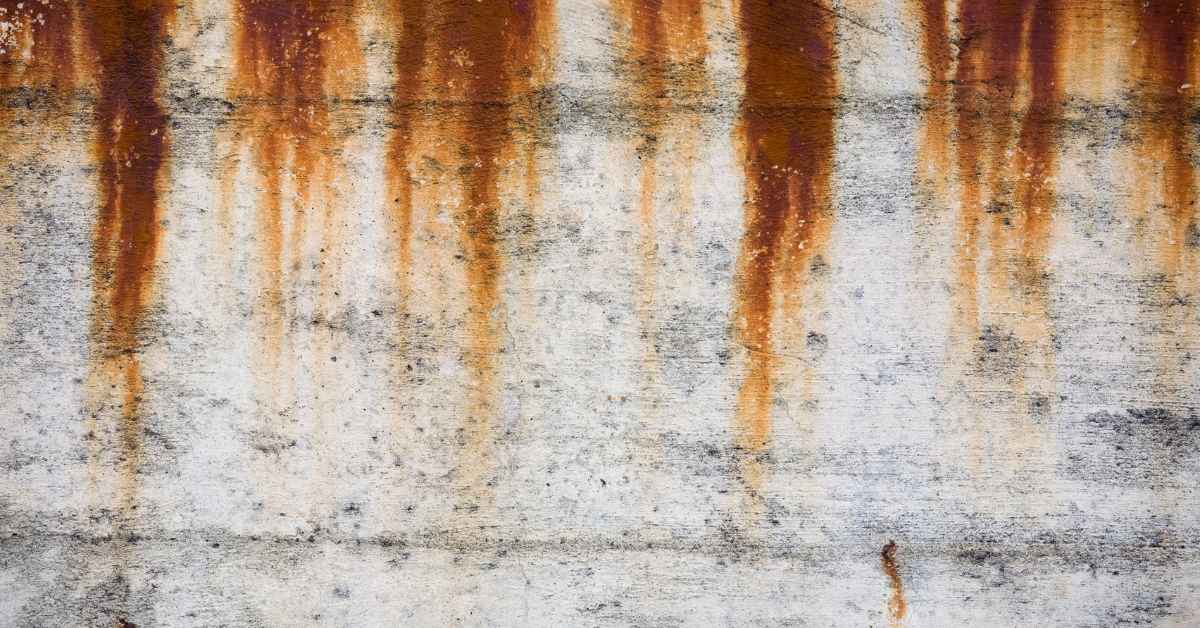
Rust stains on concrete are unsightly marks that occur when iron or metal elements corrode and leach into the surface. These stains can appear as reddish-brown patches, often resulting from sources like metal furniture, rebar, or landscaping features.
Understanding how rust forms is crucial for maintaining concrete surfaces. Factors such as moisture levels and the porosity of the concrete can exacerbate these stains, making prompt treatment essential to prevent further damage and preserve the integrity of your concrete.
Causes of Rust Stains
Rust stains on concrete often come from everyday items left outside. One common culprit is metal furniture. If metal chairs or tables sit on your concrete patio or driveway, they can leave rust marks over time. Moisture from rain or humidity accelerates this process, so keep an eye on the weather and move furniture indoors or onto a mat when possible.
Another source of rust stains is tools. Leaving tools like hammers or wrenches on concrete surfaces is a recipe for rust. These items can quickly develop rust spots, which then transfer to the concrete. Always store tools properly after use to avoid this issue.
Even small items like nails or screws can cause problems. If you’re working on a project, be mindful of where you place these items. A single nail left on the ground can create a rust stain that’s tough to remove. Check your work area before calling it a day to ensure nothing is left behind.
Impact of Rust on Concrete
Rust stains on concrete aren’t just an eyesore; they can signal deeper issues. When rust forms, it can weaken the concrete’s surface, leading to potential cracks and structural problems. If you notice rust, it’s crucial to address it promptly to prevent further damage. Ignoring these stains can compromise the integrity of your concrete surfaces over time.
Concrete is porous, which means rust can penetrate below the surface. This can lead to internal corrosion of any embedded metal, like rebar, which is essential for structural support. If rebar starts to rust, it expands and puts pressure on the surrounding concrete, causing it to crack or even spall. This isn’t just a cosmetic issue; it’s a structural one.
To maintain the longevity of your concrete, regularly inspect for rust stains and address any you find quickly. Cleaning the stains might be enough if caught early, but if the rust has penetrated deeper, you may need to consult a professional. Don’t skimp on this—proper maintenance can save you from expensive repairs down the line.

Essential Equipment and Supplies for Cleaning Concrete
Cleaning concrete surfaces effectively requires the right tools and supplies. Essential equipment includes brooms, pressure washers, and scrub brushes, while recommended cleaning agents feature detergents, rust removers, and enzymatic cleaners. Safety equipment such as gloves, goggles, and masks is also critical for handling these cleaning agents safely.
Using the appropriate products for specific stains—like oil or rust—ensures better results and prolongs the life of your concrete. Proper maintenance of your cleaning equipment not only enhances its performance but also makes your cleaning tasks more efficient. Investing in the right tools and supplies ultimately saves time and effort, leading to a cleaner and more appealing concrete surface.
Cleaning Tools
To clean concrete effectively, you’ll need a few specific tools. These tools help tackle dirt, stains, and grime efficiently. Some are essential, while others are optional based on your specific needs.
- Pressure Washer Essential for removing tough stains and dirt. Look for at least 3000 psi for concrete. Renting is a good option if you don’t own one. Using too low psi will waste time and water.
- Stiff Bristle Brush Used for scrubbing stubborn spots. A long handle saves your back. Avoid metal bristles; they can scratch the concrete surface.
- Garden Sprayer Useful for applying cleaning solutions evenly. A 1-gallon sprayer is usually sufficient. Clean it thoroughly after use to avoid clogs.
- Wet/Dry Vacuum Optional but great for sucking up dirty water and debris. A 5-gallon model works well. Don’t use a regular vacuum; it can get damaged by water.
- Concrete Cleaner Essential for breaking down stains and grime. Choose a product specifically for concrete. Test on a small area first to avoid discoloration.
- Safety Gear Includes gloves, goggles, and non-slip shoes. Essential for protecting yourself from chemicals and slips. Never skip this; accidents happen fast.
- Extension Cord Optional but handy for reaching distant areas. Use a heavy-duty cord rated for outdoor use. A regular indoor cord can overheat and cause a fire.
Pro tip: Combine the pressure washer with a concrete cleaner for the best results. This duo tackles tough stains efficiently and saves time.
Cleaning Agents
When tackling rust and other stubborn stains on concrete, choosing the right cleaning agent is crucial. For rust stains, a commercial rust remover is often the most effective choice. These products are specifically designed to break down rust particles without damaging the concrete surface. Always follow the manufacturer’s instructions and test a small area first to ensure compatibility.
If you’re dealing with oil or grease stains, a degreaser is your best bet. These are powerful solutions that can penetrate and lift oily residues from the concrete. Apply the degreaser, scrub with a stiff brush, and rinse thoroughly. Remember, using too much water can spread the stain, so keep it controlled.
For organic stains like mold or mildew, a simple bleach solution can be effective. Mix bleach with water, apply it to the affected area, and scrub gently. Be cautious with bleach, as it can discolor concrete if left on too long. Always wear protective gear when handling harsh chemicals to avoid skin irritation.
Step-by-Step Guide to Removing Rust Stains
Removing rust stains from concrete surfaces can be a straightforward process if you follow the right steps. This guide will help you identify the source of the stains, gather the necessary materials, and apply effective techniques for removal.
Understanding how to effectively tackle rust stains is essential for maintaining the appearance and longevity of your concrete. By using the right methods and precautions, you can restore your surfaces and prevent future staining, ensuring a clean and safe environment for your home or workspace.
Step-by-Step Cleaning Process
This sequence will guide you through effectively removing rust stains, ensuring your surfaces are clean and restored without causing further damage.
- Gather your cleaning materials and protective gear. You need gloves, goggles, a scrub brush, and a rust remover. This ensures you’re ready and safe. Check that you have everything before starting.
- Test the rust remover on a small, hidden area. This confirms it won’t damage the surface. If discoloration occurs, stop and consider a different product.
- Apply the rust remover to the stained area. Use just enough to cover the rust, as over-application can damage the surface. Wait for the recommended time on the product label.
- Scrub the area gently with a brush. This helps lift the rust without scratching. The surface should start looking cleaner. If not, reapply the remover and try again.
- Rinse the area thoroughly with water. This removes any remaining rust remover, preventing future damage. The surface should feel smooth and residue-free.
- Dry the area completely with a clean cloth. This prevents new rust from forming. Ensure no moisture is left behind.
- If rust persists, repeat the process or consult a professional. Stubborn stains might need expert attention to avoid damaging the surface further.
Pro tip: Always work in a well-ventilated area when using chemical rust removers to avoid inhaling fumes.
Preparing the Surface
Before you dive into cleaning, make sure the concrete surface is ready. Start by giving the area a good sweep. Remove all dirt, debris, and loose particles. This will ensure that nothing interferes with the cleaning process. A clean surface helps the rust remover work more effectively.
Next, take a moment to protect nearby areas. Cover plants, grass, or any surfaces that might be damaged by cleaning agents. Use plastic sheeting or old towels to shield these areas. This step prevents accidental damage and keeps your focus on the task at hand.
Finally, inspect the concrete for any existing damage. Cracks or chips can worsen if not addressed. If you find any, consider patching them up before you proceed. A well-prepared surface not only makes cleaning easier but also ensures better results.
Applying Rust Remover
Start by choosing a high-quality rust remover that suits your needs. Read the label carefully to ensure it’s safe for the surface you’re treating. Before you apply it, put on gloves and goggles. You don’t want this stuff on your skin or in your eyes. If you’re working indoors, crack a window or two for ventilation.
Apply the rust remover directly to the stain. Use a brush or cloth to spread it evenly. Let it sit for the recommended time—usually just a few minutes. Don’t rush it, but don’t leave it on too long either, or you might damage the surface. While you wait, keep an eye on it. If you see any adverse reactions, rinse it off immediately.
Once the time is up, rinse the area thoroughly with water. Make sure all the rust remover is gone. If the stain persists, you might need a second application. But don’t overdo it. If two rounds don’t work, it’s time to consider other options. Always follow up with a clean rinse and dry the area completely to prevent future rust.
Rinsing and Drying
After applying the rust remover, it’s time to rinse the concrete. Use a garden hose with a spray nozzle to thoroughly wash away the residue. Make sure to cover the entire area that was treated. This helps prevent any leftover chemicals from soaking into the concrete and causing further issues. Don’t skimp on the water; a good rinse is crucial.
Once rinsed, allow the concrete to dry completely. If you’re working outdoors, choose a sunny day to speed up the drying process. Indoors, use fans or open windows to promote air circulation. Check for any remaining moisture before moving on. A dry surface ensures that no new stains will form and that your hard work pays off.
Remember, patience is key. Rushing this step can lead to uneven drying and potential damage. Take your time and ensure the surface is fully dry before considering any sealing or further treatment.
The Importance of Sealing Concrete After Cleaning
Sealing concrete after cleaning is essential for maintaining its appearance and longevity. This process involves applying a protective layer that prevents moisture penetration and future stains, ensuring your concrete surfaces remain pristine.
Choosing the right sealer—whether penetrating or topical—depends on the type of concrete and its exposure to elements. Proper sealing not only enhances durability but also reduces the likelihood of rust stains and other damage, making it a vital step for any DIY enthusiast or professional on the job site.
Types of Concrete Sealers
When it comes to sealing concrete, you have a few options. The most common types are penetrating sealers, acrylic sealers, and epoxy sealers. Each type serves a different purpose, so choosing the right one depends on what you need. Penetrating sealers are great for protecting against moisture and stains. They soak into the concrete, providing a long-lasting shield without changing the surface appearance.
Acrylic sealers are a solid choice if you’re looking to enhance the color and add a bit of shine. They form a thin layer on the surface, which can make cleaning easier. However, they might need more frequent reapplication, especially in high-traffic areas. Epoxy sealers offer a durable and glossy finish, making them ideal for garage floors or industrial spaces. But be cautious—they can be slippery when wet and might yellow over time in direct sunlight.
Before you pick a sealer, think about where your concrete is located and what kind of wear and tear it will face. If you’re dealing with a driveway or patio, a penetrating sealer might be your best bet. For indoor spaces, an acrylic or epoxy sealer could work well. Remember, the right sealer can make all the difference in maintaining your concrete’s appearance and longevity.
How to Apply a Concrete Sealer
Before you start, make sure the concrete surface is completely clean and dry. Any dirt or moisture can prevent the sealer from adhering properly. Choose a day when the weather is dry and the temperature is moderate. Extreme temperatures can affect how the sealer sets.
Begin by applying the sealer to the edges of the concrete using a brush. This ensures you cover all the nooks and crannies. For the larger areas, use a roller or a sprayer for even coverage. Don’t skimp on the sealer; a thin coat won’t provide adequate protection. Work in small sections to ensure the sealer doesn’t dry before you spread it evenly.
Once applied, allow the sealer to dry completely before walking or driving on the surface. This usually takes 24 to 48 hours, but check the manufacturer’s instructions for specific drying times. Resist the urge to rush; a properly cured sealer will offer the best protection for your concrete.
Safety Precautions When Using Cleaning Agents
When using cleaning agents, safety should always be a top priority. Understanding the labels and safety data sheets (SDS) is crucial, as they provide essential information about the chemicals you are handling.
Implementing proper safety measures, such as wearing personal protective equipment (PPE) and ensuring adequate ventilation, can prevent accidents and health issues. By following safe storage and disposal methods, you not only protect yourself but also contribute to a safer environment for everyone around you.
Personal Protective Equipment
When handling cleaning agents, the right protective gear is crucial to keep you safe from harmful chemicals. Here’s what you need to wear to protect yourself effectively.
- Rubber Gloves Essential for protecting your hands from harsh chemicals. Look for gloves that are chemical-resistant. If you skip them, expect dry, irritated skin.
- Safety Goggles Shields your eyes from splashes and fumes. Always wear them when mixing or pouring chemicals. Without them, you risk serious eye injury.
- Face Mask Use a mask to avoid inhaling toxic fumes, especially in poorly ventilated areas. A basic dust mask won’t cut it; go for one rated for chemical use.
- Apron or Coveralls Protects your clothes and skin from spills. Optional for smaller jobs, but a must for large-scale cleaning. A ruined shirt is the least of your worries if you skip this.
- Ventilation Fan Not worn, but crucial for safety. Use it to disperse fumes in enclosed spaces. Rent one if needed to avoid breathing in harmful vapors.
- Boot Covers Keep your footwear clean and chemical-free. They’re optional but handy for messy jobs. Without them, you’ll track chemicals all over your home.
Pro tip: Combine goggles and a face mask when working with strong fumes. This combo offers better protection than either alone.
Safe Handling and Disposal
When dealing with cleaning agents, always handle them with care. Make sure to read the labels and follow the instructions. Use the recommended amount—more isn’t better and can be dangerous. Keep these products away from children and pets. If you’re using them in a confined space, ensure there’s adequate ventilation to avoid inhaling harmful fumes.
For disposal, never pour cleaning agents down the drain unless the label specifically says it’s safe. Many of these chemicals can harm the environment. Instead, check with your local waste management facility for proper disposal methods. They often have guidelines for disposing of hazardous materials. Don’t mix different cleaning agents when disposing of them, as this can cause dangerous reactions.
Always store cleaning agents in their original containers. This prevents confusion and keeps the safety instructions handy. If a container is damaged, transfer the contents to a similar container and label it clearly. Never re-use containers for other purposes. This can lead to accidental poisoning or chemical burns.
Maintenance Tips for Concrete Surfaces
Maintaining concrete surfaces is essential for keeping them clean and free from rust and stains. Regular cleaning, the right products, and protective measures can significantly extend the life of your concrete and enhance its appearance.
By implementing routine maintenance checks and using effective cleaning agents, you can prevent costly repairs down the line. Understanding the do’s and don’ts of concrete care ensures that your surfaces remain in top condition, providing a safe and attractive environment for years to come.
Regular Cleaning Schedule
Keeping your concrete surfaces clean is straightforward if you stick to a regular schedule. Aim to sweep or blow away debris like leaves and dirt at least once a week. This prevents stains and buildup that can be a real pain to remove later. If you notice any spills, especially oil or grease, clean them up immediately. These substances can seep into the concrete and cause permanent discoloration.
Every month, give your concrete a more thorough cleaning. Use a mild detergent mixed with water and scrub with a stiff brush. Focus on areas that see more traffic or exposure to the elements. Rinse thoroughly with a hose to remove any soap residue. If you have sealed concrete, this routine will help maintain the sealant’s effectiveness.
Don’t wait until your concrete looks dirty. By then, you’re already dealing with buildup. Stick to this routine, and you’ll keep your concrete looking fresh and new. Remember, consistency is key to preventing long-term damage and keeping maintenance costs down.
Protective Measures
Concrete surfaces can last a long time if you take the right steps to protect them. Start by using mats or rugs at entry points. These catch dirt and debris, reducing wear and tear on the concrete. Make sure the mats are made from non-slip materials to prevent accidents.
Covers are another smart move, especially for outdoor concrete. Use them to shield surfaces from harsh weather. Rain, snow, and even too much sun can damage concrete over time. A simple tarp can do wonders, but make sure it’s secured properly to avoid wind damage.
Pay attention to what’s under your concrete too. If you’re laying new surfaces, check base compaction. A poorly compacted base can lead to cracks and uneven settling. If you’re not sure, consult a pro. It’s easier to prevent a problem than to fix one later.
Comparing Cleaning Methods: Pressure Washing vs. Power Washing
Pressure washing and power washing are two popular methods for cleaning concrete surfaces, but they differ significantly in their approach. Pressure washing uses high-pressure water to remove dirt and stains, while power washing combines high pressure with heated water, making it more effective for tougher stains like rust.
Understanding these differences is crucial for selecting the right method for your cleaning project. Choosing the appropriate technique can enhance the longevity of your concrete surfaces and ensure effective stain removal while considering factors like surface material and environmental impact.
Advantages and Disadvantages
Let’s break down the pros and cons of pressure washing and power washing for different stains and surfaces. This will help you decide which method suits your needs best.
Pros
- Pressure washing is great for delicate surfaces like wood decks and patios.
- Power washing is more effective on tough stains like oil and grease due to its heat.
- Pressure washing is generally more affordable and accessible for DIY projects.
- Power washing can sanitize surfaces, making it ideal for areas prone to mold and mildew.
- Both methods can save time compared to manual scrubbing.
Cons
- Pressure washing may not remove stubborn stains as effectively as power washing.
- Power washing can damage softer surfaces if not used carefully.
- Both methods require some skill to avoid causing surface damage.
- Power washing equipment can be more expensive to rent or buy.
- Pressure washing might not kill bacteria or mold without additional chemicals.
Choose pressure washing for lighter jobs on delicate surfaces. Opt for power washing when dealing with tough stains on hard surfaces. Always consider the surface and stain type before deciding.
Choosing the Right Method
When deciding between pressure washing and power washing, consider the surface you’re cleaning. For delicate surfaces like wood or painted areas, pressure washing is the safer choice. It uses less force and avoids potential damage. Power washing, on the other hand, is ideal for tough surfaces like concrete or brick, where the added heat can help remove stubborn grime.
Think about the type of dirt or stain you’re dealing with. If you’re facing oil stains or heavy mildew, power washing might be your best bet thanks to its heated water. For lighter cleaning tasks, pressure washing should suffice and is less likely to cause harm to your surfaces.
Don’t forget to assess the condition of your surfaces. Older or cracked materials might not withstand the intensity of power washing. Always test a small area first to avoid costly mistakes. Remember, the goal is to clean, not to create more work for yourself by causing damage.
Cost Analysis: DIY vs. Professional Cleaning and Sealing
When deciding between DIY cleaning and sealing versus hiring professionals, understanding the costs involved is crucial. DIY projects may seem budget-friendly at first, but the expenses for materials and tools can add up, while professional services offer a clear pricing structure based on the job’s complexity.
Evaluating these costs helps homeowners make informed decisions about their cleaning needs. By considering factors like time investment and the potential for long-term savings, individuals can better assess whether a one-time DIY effort or ongoing professional services align with their goals and budgets.
DIY Costs
Tackling a cleaning and sealing project yourself can be cost-effective, but you need to plan for all the expenses. First, consider the tools you’ll need. Basic equipment includes a pressure washer, scrub brushes, and a sealant applicator. If you don’t already own these, renting or purchasing can add up quickly.
Next, think about materials. You’ll need cleaning solutions and sealants specific to your surface type. Prices vary, so check local stores for the best deals. Remember to buy a little extra to account for mistakes or reapplications.
Finally, factor in your time. DIY projects often take longer than expected, especially if you’re new to this kind of work. Consider the value of your time and whether you have the patience and skill to do the job right. Skimping on time can lead to poor results and higher costs down the line.
Professional Service Costs
Hiring professionals for concrete cleaning and sealing can save you time and effort, but it comes at a price. On average, you might spend anywhere from $1 to $3 per square foot for cleaning and sealing services. This cost can vary based on the size of the area, the condition of the concrete, and your location.
Some companies might charge a flat rate, while others bill by the hour. It’s wise to get multiple quotes and ask for a detailed breakdown of what’s included. Always ensure that the quote covers both cleaning and sealing, as some might try to upsell sealing as an extra service.
Remember, not all services are equal. Check reviews and ask for references to ensure you’re hiring a reputable contractor. A low price might be tempting, but it could mean cutting corners, which can lead to costly repairs down the line. Paying a bit more for a quality job can save you money in the long run.
Common Mistakes to Avoid During Cleaning and Sealing
Cleaning and sealing surfaces may seem straightforward, but several common mistakes can lead to unsatisfactory results. From using harsh chemicals that damage concrete to neglecting proper surface preparation, these errors can compromise the effectiveness of your efforts.
Understanding these pitfalls is crucial for achieving a durable and aesthetically pleasing finish. By avoiding these mistakes, you can ensure your cleaning and sealing projects last longer and maintain their appearance, ultimately saving you time and money on repairs and reapplications.
Overuse of Cleaning Agents
Using too much cleaning product can do more harm than good. Excessive cleaning agents can seep into the concrete and cause damage over time. This not only weakens the surface but also makes it more susceptible to future stains and erosion. Stick to the recommended amounts on the product label and resist the urge to add extra for “good measure.”
Always test a small area before applying any cleaning solution to the entire surface. This helps you gauge the reaction of the concrete to the chemicals. If you notice any discoloration or weakening, stop immediately and consider a gentler alternative. Remember, less is often more when it comes to cleaning agents.
After cleaning, ensure you rinse the surface thoroughly with water. Leaving residue can lead to a buildup that not only looks unsightly but can also compromise the integrity of your concrete. A clean, well-rinsed surface is essential before moving on to the sealing process.
Inadequate Surface Preparation
Before you even think about cleaning and sealing, you’ve got to make sure the surface is ready. This isn’t just about sweeping up dirt. You need to check base compaction and ensure the area is level. Any uneven spots or loose materials can cause big headaches later. If the base isn’t solid, your sealant won’t last, and you’ll be back to square one.
Another thing to watch out for is moisture. If the surface is damp, the sealant won’t stick properly. Make sure everything is bone dry before you start. This might mean waiting a day or two after cleaning. It’s worth it to get it right the first time.
Finally, inspect for any stains or residues left from previous cleaning. These can interfere with the new sealant. A quick check now saves you from peeling or discoloration later. Remember, a little extra effort in preparation saves a lot of trouble down the line.
Eco-Friendly Alternatives for Cleaning and Sealing
Eco-friendly alternatives for cleaning and sealing concrete surfaces provide effective solutions that are safe for both the environment and your health. Options like baking soda, vinegar, and citric acid serve as natural cleaning agents, while enzymatic cleaners break down tough stains without harsh chemicals.
Choosing sustainable cleaning and sealing products not only reduces your carbon footprint but also enhances the longevity of your concrete surfaces. By adopting these eco-friendly practices, you can maintain your surfaces effectively while minimizing the impact on the environment and ensuring a safer workspace.
Green Cleaning Products
When tackling stains, reach for vinegar and baking soda. These two are a powerhouse duo for lifting grime without harsh chemicals. Mix them into a paste and apply directly to the stain. Let it sit for a few minutes before scrubbing gently. This method is effective for most surfaces and won’t damage your pavers.
For tougher stains, consider using hydrogen peroxide. It’s a natural bleaching agent that works well on organic stains like wine or coffee. Apply it directly to the stain and allow it to bubble for a few minutes. Rinse thoroughly with water afterward to prevent any residue.
Don’t overlook lemon juice. Its natural acidity is great for breaking down grease and grime. Squeeze some juice onto the stain, let it sit, and then scrub with a brush. It’s a simple solution that leaves a fresh scent behind.
Sustainable Sealing Options
Choosing the right sealer is crucial for maintaining your surfaces while being kind to the environment. Look for sealers made from sustainable materials like natural oils or water-based formulas. These options not only reduce harmful emissions but also provide a durable finish that protects surfaces effectively.
When selecting a sustainable sealer, consider its VOC content. Low or zero VOC sealers are better for indoor air quality and safer for your family. They dry quickly and are less toxic, making them a smart choice for eco-conscious homeowners.
Always check the label for certifications that guarantee the product’s environmental friendliness. Certifications like Green Seal or EcoLogo ensure the sealer meets strict sustainability standards. Don’t just trust the marketing—verify the claims.
How to use enzymatic cleaners on concrete
Enzymatic cleaners are specialized solutions that utilize natural enzymes to break down stains and organic matter on concrete surfaces. These cleaners are particularly effective for tackling stubborn rust stains, offering a safer and more environmentally friendly alternative to traditional chemical methods.
Using enzymatic cleaners not only helps restore the appearance of your concrete but also minimizes the risk of damaging the surface or surrounding areas. By understanding how to apply these cleaners properly, you can achieve professional results while ensuring a safer work environment for yourself and others.
Step-by-Step Cleaning Process
Follow these steps to effectively clean concrete surfaces using enzymatic cleaners. This process will help you achieve a spotless and odor-free result.
- Ensure the area is well-ventilated. Good airflow is crucial for safety and helps the cleaner work effectively. If the air feels stale, open windows or use fans.
- Apply the enzymatic cleaner evenly over the affected area. This ensures the entire surface is treated. The surface should look uniformly damp but not soaked.
- Let the cleaner sit for the recommended time. This allows the enzymes to break down stains and odors. Check the product label for exact timing; typically, it’s around 15–30 minutes.
- Gently scrub the surface with a brush. This helps the cleaner penetrate and lift stubborn stains. You should see dirt and grime loosening as you scrub.
- Rinse the area thoroughly with clean water. This removes any remaining cleaner and residue. The surface should feel smooth and free of any slippery residue.
- Allow the concrete to dry completely. This prevents mold growth and ensures a clean finish. It should look dry and feel cool to the touch.
- Inspect the area for remaining stains or odors. If issues persist, consider repeating the process or consulting a professional. Lingering problems might indicate a deeper issue.
Common mistake: Skipping the drying step can lead to mold and mildew. Always ensure the concrete is completely dry before using the area again.
The do’s and don’ts of cleaning concrete with vinegar
Cleaning concrete with vinegar can be an effective and eco-friendly solution, but it’s essential to understand the proper techniques to avoid damage. This guide will cover the do’s and don’ts of using vinegar, including how to dilute it, the best application methods, and common mistakes to avoid.
Using vinegar correctly not only helps maintain the appearance of your concrete surfaces but also prolongs their lifespan. By following these practical tips, you can tackle tough stains, such as rust, while exploring alternative cleaning options if vinegar isn’t your preferred choice.
Essential Tools and Materials for Cleaning Concrete with Vinegar
To clean concrete effectively with vinegar, you’ll need a few key tools and materials. These items will help you get the job done efficiently and safely.
- Vinegar – The main cleaning agent. Use white vinegar for the best results. Avoid using flavored or colored vinegars as they can stain.
- Stiff-bristled brush – Essential for scrubbing the concrete surface. Choose one with synthetic bristles to avoid damage. A wire brush can scratch, so stick with synthetic.
- Protective gloves – Keeps your hands safe from irritation. Opt for rubber or latex gloves. Don’t skip these; vinegar can dry out your skin.
- Safety goggles – Protects your eyes from splashes. Essential when working with any liquid cleaner. Vinegar in the eyes stings, so don’t risk it.
- Bucket – For mixing and applying vinegar. A standard 5-gallon bucket works well. Make sure it’s clean to avoid contamination.
- Garden hose – Rinses the concrete after scrubbing. A standard hose with a spray nozzle is ideal. If you don’t have one, borrow or rent.
- Tarp or plastic sheeting – Optional, but useful for protecting surrounding areas. Lay it down to catch any runoff. Don’t let vinegar damage nearby plants or surfaces.
- Old towels or rags – For drying the area after rinsing. Use absorbent materials. Avoid using new towels as they might get stained.
Pro tip: Combine the brush and vinegar for tough stains. Let the vinegar sit for a few minutes before scrubbing for better results.
Step-by-Step Process for Cleaning Concrete Stains with Vinegar
Follow these steps to effectively clean concrete stains using vinegar, ensuring a fresh and stain-free surface.
- Test a small area first. This checks if vinegar is safe for your concrete. If the spot doesn’t change color or texture, you’re good to go.
- Mix equal parts of vinegar and water in a spray bottle. This dilution prevents the vinegar from being too harsh. The solution should look clear with no sediment.
- Spray the solution generously on the stained area. The goal is to soak the stain for better penetration. The surface should be visibly wet without puddles.
- Let it sit for 15 minutes. This allows the vinegar to break down the stain. If the stain lightens, it’s working.
- Scrub the area with a stiff-bristled brush. This helps lift the stain from the concrete. The surface should feel rougher as you scrub.
- Rinse thoroughly with water. This removes vinegar residue and any loosened dirt. The area should look clean and feel residue-free.
- Repeat if necessary. Some stains need a second treatment. If the stain persists after two tries, consider professional help.
- Allow the area to dry completely. This ensures no moisture is trapped in the concrete. The surface should feel dry to the touch.
Common mistake: Don’t use vinegar on colored or sealed concrete; it can cause damage. Always test a small area first to avoid unwanted surprises.
Common Mistakes to Avoid When Using Vinegar on Concrete
When cleaning concrete with vinegar, it’s easy to make a few common mistakes that can lead to less than stellar results. Here’s what to watch out for.
- Improper Dilution Using vinegar at full strength can damage the concrete surface. Always dilute it with water to prevent etching or discoloration.
- Neglecting Surface Testing Skipping a small test patch can result in unexpected damage. Always test a small, hidden area first to see how the concrete reacts.
- Overlooking Safety Precautions While vinegar is natural, it can still be harmful. Ensure good ventilation and wear gloves to protect your skin.
- Ignoring Stain Types Not all stains are the same. Some might require additional treatments or different cleaning agents. Identify the stain type before starting.
- Rushing the Process Allow the vinegar solution time to work. Rushing can lead to incomplete cleaning and wasted effort.
Double-check these points to ensure a smooth and effective cleaning process. Avoiding these mistakes will save you time and preserve your concrete surfaces.
How to clean concrete with muriatic acid
Muriatic acid is a powerful cleaning agent that effectively removes tough stains, grime, and discoloration from concrete surfaces. Its strong acidic properties make it a go-to solution for homeowners and professionals looking to restore the appearance of driveways, patios, and floors.
Using muriatic acid requires careful handling and safety precautions, as it can be hazardous if not used properly. Understanding how to dilute, apply, and neutralize the acid is crucial for achieving optimal results while protecting yourself and your surroundings, ensuring that your concrete surfaces look their best without damage.
Step-by-Step Cleaning Process
Follow these steps to effectively clean your concrete surface with muriatic acid, ensuring a thorough job while maintaining safety.
- Ensure all safety gear is on, including goggles and gloves. This protects you from harmful splashes. Double-check your gear before proceeding.
- Mix the acid solution in a plastic container, following the dilution ratio discussed earlier. Proper dilution prevents damage to the concrete. The solution should appear slightly cloudy.
- Wet the concrete surface with water before applying the acid. This helps the acid spread evenly. The surface should be damp, not puddled.
- Apply the acid solution using a plastic watering can. This allows for even distribution. Watch for a light fizzing reaction, which means it’s working.
- Scrub the surface gently with a stiff-bristled brush. This helps lift stains and grime. The concrete should start to look cleaner as you scrub.
- Rinse the area thoroughly with water to neutralize the acid. This prevents residue from damaging the concrete. Ensure no foaming remains on the surface.
- Inspect the concrete for any missed spots. Reapply and scrub if necessary. If stubborn stains persist, it might be time to call a professional.
- Allow the concrete to dry completely before using the area again. This ensures the surface is safe and ready for use. Drying can take a few hours, depending on weather conditions.
Common mistake: Never leave the acid on the concrete for too long, as it can cause irreversible damage. Always keep track of time and rinse promptly.

Final Thoughts on Protecting Concrete from Rust Stains
Protecting your concrete surfaces from rust stains is not just about aesthetics; it’s about preserving the integrity and longevity of your structures. A proactive approach to maintenance can save you time and money in the long run. Here are some key takeaways to ensure your concrete remains in top condition:
- Regularly inspect your concrete surfaces for early signs of rust or damage. Catching issues early can prevent more significant problems down the line.
- Apply a high-quality concrete sealer to create a protective barrier against moisture and rust. Choose the right type of sealer for your specific surface and environment.
- Keep metal objects, like furniture and tools, off concrete surfaces or use protective mats to prevent direct contact and potential staining.
- Address rust stains promptly using the appropriate cleaning methods to prevent them from becoming permanent or causing further damage.
- Ensure proper drainage around your concrete areas to minimize moisture exposure, which can accelerate rust formation.
- Consider eco-friendly cleaning options to maintain your surfaces without harming the environment or your health.
- When in doubt, consult a professional for persistent stains or structural concerns to avoid costly repairs in the future.
FAQ
- What causes rust stains on concrete? Rust stains typically occur when metal objects like furniture or tools are left on concrete surfaces and exposed to moisture. This leads to oxidation, which can seep into the concrete and leave unsightly stains.
- How can I prevent rust stains from forming? Regularly applying a high-quality concrete sealer can create a protective barrier against moisture and rust. Additionally, using mats under metal objects and ensuring proper drainage around your concrete surfaces can help minimize exposure to moisture.
- Are there eco-friendly options for removing rust stains? Yes, eco-friendly options such as using a mixture of baking soda and vinegar can be effective in removing rust stains. These natural cleaners are less harsh on the environment and your concrete surfaces.
- When should I consider hiring a professional? If rust stains persist despite multiple cleaning attempts, or if you notice structural damage, it’s wise to consult a professional. They can offer specialized treatments and repairs that might be beyond DIY capabilities.