
Table of Contents
- What is Rebar Shadowing (Ghosting) and How It Appears
- Physical and Mechanistic Causes of Rebar Shadows
- Diagnosing Risk Before You Overlay
- Surface Preparation Best Practices to Minimize Ghosting
- Material Selection and Mix Design to Reduce Telegraphed Reinforcement
- Reinforcement Alternatives and Correct Placement
- Application and Installation Best Practices
- Inspection, Testing, and Verification After Placement
- Cost, ROI, and Choosing the Right Prevention Strategy
- Safety, Planning, and Jobsite Coordination
- Long-term Performance, Maintenance, and Case Studies
Introduction
Use an opaque, properly pigmented concrete overlay that is thick enough and finished with full surface cover to fully conceal rebar shadows.
This article explains surface prep, recommended overlay thickness, pigment choices, and finishing techniques to minimize or eliminate visible rebar shadows in thin overlays.
Critical pre-work checks (one-page checklist)
-
- Map reinforcement: cover-meter or GPR grid, mark locations and measured cover depth.
- Minimum acceptable immediate cover thresholds (DIY trigger values): if measured cover < 12 mm (½”) — stop and raise bars or change strategy; if < 6 mm (¼”) — professional intervention required.
- Moisture: perform RH (ASTM F2170) and MVER (ASTM F1869) tests. Target limits before overlay: RH ≤ 75% (typical), MVER ≤ 3 lb/1000 ft²/24 hr; if RH > 85% or MVER > 5 — do not proceed; consult pro.
- Pull-off baseline: perform at least one pull-off per 50 m² (≈540 ft²) and one per long run/joint (see testing section). Acceptance guideline: ≥0.7 MPa (100 psi); <0.5 MPa (75 psi) requires remediation.
- Rust assessment: if section loss > 20% or heavy pitting — replace steel or call engineer.
- Base compaction: verify compaction and edge restraint at mock-up and spot-check elevations (simple plate-check or probe). If the subbase is loose or unstable, fix before overlay.
- Recordkeeping: photograph, note temps, RH, substrate temp, and all test data; archive for warranty and QA.
Downloadable quick tools: annotated cross-section diagram, single-page pre-pour checklist, and mock-up protocol (PDF)—placeholders for contractor downloads and on-site use.
What is Rebar Shadowing (Ghosting) and How It Appears
Rebar shadowing, or ghosting, is when thin overlays reveal faint, dark lines or halo-like edges that align with rebar spacing, rather than the clean appearance of unobstructed concrete or cement. It shows up as subtle, irregular shadow patterns that are distinct from surface flaws or curing marks, and it becomes noticeable mainly when the overlay is very thin. In practice, you’ll see these ghost lines imprinting across edges and near joints, signaling the proximity and orientation of the embedded bars rather than a uniform substrate.
For a DIY or jobsite reader, recognizing the signs from varied lighting, macro shots of edges, and cross-sections helps confirm that the shadow is tied to rebar rather than surface defects. Understanding the root causes—rebar proximity and orientation, surface profile and porosity, moisture content, overlay thickness limits, curing conditions, and any movement during setting—lets you plan the right mitigation. The issue matters beyond aesthetics because ghosting can indicate potential bond weaknesses, differential flexing under load, moisture ingress pathways, corrosion risk under thin coverings, and concealed voids that threaten long-term performance.
Visual characteristics and timing
Rebar shadowing usually shows up as faint to dark lines or bands on the slab surface. The patterns follow the rebar layout and look like telegraphed lines, spots of discoloration, or thin streaks where the finish sheen changes. They’re often easiest to spot on smooth, broomed, or polished finishes and under low-angle light.
Timing varies. You can sometimes see shadows within hours of finishing as bleed water and settlement reveal differences. Most become obvious during the first few days to a week as the concrete cures and moisture evens out. Others don’t show until later—after curing, light traffic, or when the slab dries and a sealer is applied.
What to do: inspect the slab early and during the first week. If you spot lines while the slab is still workable, fix them now—adjust finishing or correct drainage under the slab. If they appear later, plan your repair or cosmetic fix before major schedules like painting or sealing. And always address before sealing, because sealers lock the shadow in place.
Differences between shadows, cracking, and efflorescence
Rebar shadowing usually looks like a faint, repeatable outline that follows where the steel sits beneath the surface. It doesn’t open up or have a gap you can stick a nail into. Cracks are actual breaks in the concrete — they have width, edges that can move, and you can often feel a split with a fingernail. If you already read the earlier section on appearance, use that as your baseline and focus on whether the mark is surface-only or an actual break.
Efflorescence is a white, powdery deposit from salts, and it will rub off or dissolve with water. Moisture marks are darker when wet and often change or disappear as the concrete dries. Rebar shadowing won’t powder off and won’t change much with drying. Do a quick rub test and a tap test: a dusty white rub suggests salts; a hollow or ringing sound when you tap can mean delamination around the rebar.
Other quick checks: look for rust staining near the outline (that’s suspect), use a small moisture meter or tape a plastic sheet down for 24 hours to spot trapped moisture, and don’t just slap on a patch or paint if you’re unsure. If you see actual gaps, rust bleed, or active wet spots, get a pro to inspect—covering up a structural issue is a false economy. Remember: tap test and a rub check for rust staining will tell you more than guessing from appearance alone.
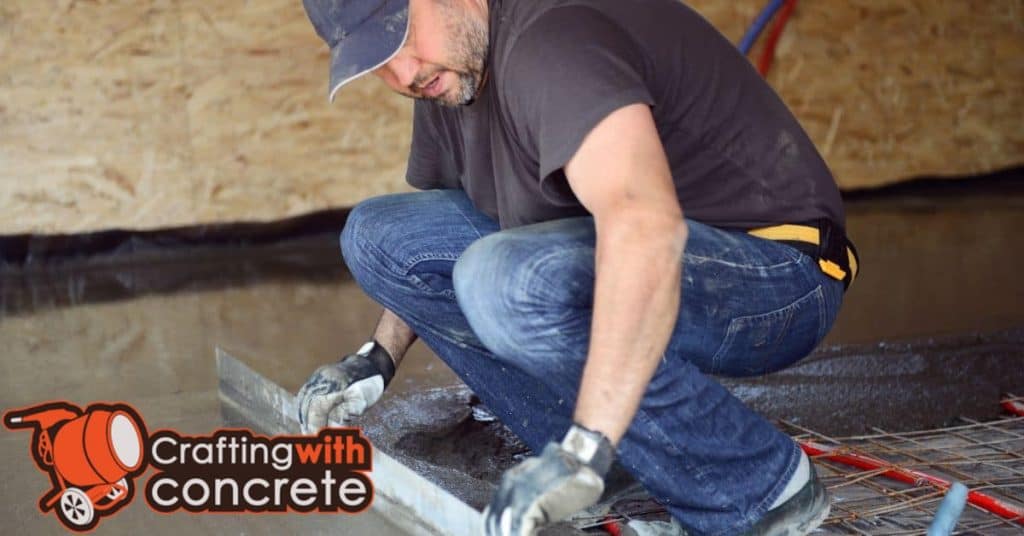
pours concrete over steel rebar on construction site” decoding=”async” src=”https://craftingwithconcrete.com/wp-content/uploads/2024/07/What-Time-Can-Construction-Work-Start-3.jpg”/>Construction worker in boots pours concrete over exposed steel rebar on site, demonstrating overlay placement over reinforcement.
Physical and Mechanistic Causes of Rebar Shadows
Rebar shadows in thin overlays arise from five physical mechanisms that interrupt heat and moisture balance: thermal gradients that block heat flow, moisture vapor drive from the cooler substrate, substrate profile and roughness, differential drying between substrate and overlay, and the metal heat-sink effect of steel. Together they create ghosted edges and varying shade intensities, with shadows most pronounced at shallow overlays—roughly 1/4 to 1/2 inch—and where curing windows are limited or temperature differentials are sustained. Each mechanism manifests differently: thermal gradients show up as cool stripes or blocked heat paths, moisture drive as damp spots near the substrate, and surface roughness as irregular haloing; they can act cumulatively or dominate in specific conditions.
On the job, understanding which mechanism dominates guides practical fixes—substrate conditioning, ambient controls, mix design tweaks, and targeted curing strategies—while diagnostic checks like thermal imaging, moisture testing, surface flatness checks, and simple field tests help you prioritize actions. Documenting with photos at scale, noting temperatures, curing times, substrate moisture levels, and overlay thickness ranges lets you tailor fixes and track improvements on future projects. This practical framework keeps repairs efficient, reduces callbacks, and translates theory into concrete steps you can implement without heavy equipment by focusing on measurable cues and repeatable QA.
Thermal and heat-sink effects of metal reinforcement
Steel pulls heat out of fresh concrete and can act like a mini heat sink under the slab. That changes local curing speed: concrete over the rebar often dries and gains strength slower, or the surface skin sets differently than the surrounding mix. You’ll see this as slightly darker, dustier, or less dense patches where the bars run close to the surface.
What to do on the job: check cover depth and location of bars before finishing—if the steel is too close, plan for extra curing and gentler finishing. Avoid aggressive power troweling right over suspected rebar lines, and don’t let the surface dry fast with wind or sun; that makes the differences worse. If it’s cold, insulate or heat — target substrate and ambient temperatures between 10–32°C (50–90°F) for most cementitious overlays and avoid >10°C (18°F) differential between substrate and air; maintain this for the first 48–72 hours. If it’s hot or windy, keep the surface moist longer or use a curing compound as directed by the product data sheet (common moist cure: 3–7 days, many microtoppings benefit from 7 days wet cure). If using heating, do so gently and avoid direct high-temperature heat that can accelerate surface drying and increase telegraphing risk.
When you’re inspecting later, look for hairline texture changes and run a hammer or probe test if you suspect weak spots. If shadows are present, you’ll usually need to accept localized repair or longer-term surface treatments instead of trying to force uniform finish at placement time. Shortcuts here mean a patch job later—so plan the cure, not just the pour.
Moisture vapor movement and differential drying
Moisture trapped in the slab or blockwork will try to escape upward. Where there’s rebar it can change the drying pattern so the concrete above the steel dries slower or differently. That makes small, darker or rougher bands right over the reinforcement. It’s not magic — it’s just vapor following the path of least resistance and being interrupted by the bar.
What to check on a job: probe for trapped moisture with a moisture meter or plastic-sheet test before you finish, inspect for poor base compaction or ponding, and confirm you had a proper vapor barrier under the slab. If the substrate is damp or you see efflorescence, fix the source of water first. Don’t cover concrete too soon with paint or membrane if it still holds moisture.
If you already have a shadow, decide whether it’s cosmetic or structural. For cosmetic cases, allow full drying (often up to 28 days depending on thickness and RH), then grind or feather and use a breathable repair mortar and matching finish. For ongoing wetting or recurring shadows, remove the cause — improve drainage, replace failed vapor barrier, or correct formwork — otherwise any patch is a short-term fix.
Substrate geometry and profile factors
Concrete over rebar only works if the slab profile gives the steel room to behave. Where you have shallow cover or a very thin overlay, the rebar sits close to the surface and creates high-risk spots for shadowing. If you’re trimming the slab depth or using a thin topping, expect localized discoloration and weak finish unless you change the reinforcement layout or increase cover.
Uneven substrate profiles make things worse. Low spots and hollows let the steel come even closer to the surface, and high spots can pull screed and finish away from the bar. Before you pour or overlay, walk the slab and check base compaction, screed lines, and any depressions. Patch or level those areas; don’t rely on feathering thin mixes over dips.
Plan fixes that actually change geometry: raise the floor thickness where required, add a thin non-metallic separation layer, or reposition the steel if possible. If you can’t move the bar, increase the overlay thickness or use mesh/ferrocrete alternatives designed for thin sections. Remember the other causes like heat-sink and moisture movement can amplify shadowing—so combine geometry fixes with good curing and moisture control for best results.
Diagnosing Risk Before You Overlay
Before you install, pin down the overlay context—substrate type, overlay thickness, and the planned finish—to flag where ghosting is most likely, including edge conditions and high-traffic areas. Measure moisture and vapor drivers, including moisture content, relative humidity, potential vapor drive, and surface temperature gradients, so you can decide if a barrier or cure protocol is needed for long-term durability. Review rebar layout, spacing, and hidden shadow routes under the slab to predict ghosting hotspots, and outline a simple plan for pre-install tests and mitigation, with roles and deadlines and safety considerations for installers.
Testing at small patches now, with shadow simulations and visual mapping, helps you choose effective methods like sealers, cocoons, mesh, or alternative overlays before committing to full coverage, and it sets clear pass/fail criteria for remediation. By identifying dust, laitance, oil, and porosity issues early, you improve bond and reduce future ghosting, saving time and materials that would otherwise be wasted on failed placements and call-backs. This proactive approach translates to fewer callbacks, smoother finishes, more predictable results on a DIY jobsite, and better budgeting and scheduling for the project.
Mapping reinforcement and measuring cover depth
Before you touch the slab, find every bar and mesh run with a cover meter or ground-penetrating radar. If you’ve read the earlier diagnostics, you know why — don’t guess. Rent or hire the kit, scan in a grid pattern, and take overlapping passes so you don’t miss staggered bars.
Mark the findings on the slab with paint or tape and transfer them to a simple plan. Mark clearly where bars, splices, and any anomalies sit. Note the depth readings beside each mark so a crew walking the job knows where it’s safe to cut, drill, or chase without hitting reinforcement.
Physically verify key spots by test coring or small probes to confirm the meter/GPR numbers. Measure cover depth at several locations, check overlap and mesh laps, and decide whether your overlay thickness needs to change to maintain cover. If reinforcement sits too shallow, don’t just hope — either increase overlay depth, add a non-destructive protective layer, or consult an engineer before proceeding.
Moisture testing and documentation
Don’t guess—measure. Use in-situ RH probes (ASTM F2170) for slab interior, a calcium‑chloride MVER test (ASTM F1869) for surface vapor, and a surface moisture meter or carbide (CM) sample for quick checks. Typical cutoffs to remember: RH readings are usually expected to be at or below 75% RH, MVER at or below about 3 lbs/1000 ft²/24 hrs, and CM moisture numbers commonly need to be in the low single digits (check the product you plan to use). These aren’t law, they’re practical thresholds used on most overlay jobs.
How the numbers change the plan: high RH or MVER means you either delay work, install a vapor mitigation system, or pick a moisture‑tolerant primer or membrane. High surface or CM readings force extra drying time, scarifying, or a different adhesive/finish. Low, consistent readings let you move forward with standard primers and coatings. Don’t force a product into conditions it wasn’t made for—that’s where failures start.
Document everything. Mark probe locations, record time, ambient temp, and multiple readings. Photograph test setups and keep the manufacturer’s acceptable limits with the readings. If you ever have to argue with an installer or supplier, a clear record of RH, MVER and CM tests will save you time and money.
Visual inspection and rust assessment
Walk the slab with a keen eye. Look for rust stains running from joints, rebar ends or cracks. If you see bubbling, flaking or orange staining near the surface, that often means the steel is corroding and the topping over it is compromised.
Tap and probe suspicious areas with a hammer or screwdriver. Tap and probe for delamination—a hollow sound or loose powder under the surface means the topping will not bond well and will ghost through any new overlay. Don’t assume hairline cracks are harmless; pry at edges and between layers where possible.
Check for scale build-up on exposed reinforcement and for lifting or buckling in thin toppings. If you find active corrosion or extensive delamination, either remove back to sound concrete or plan for full repair. You’ve already mapped reinforcement and checked moisture; use those results plus what you see here to decide if an overlay is safe or just cosmetic band-aiding.
Surface Preparation Best Practices to Minimize Ghosting
Effective surface preparation for thin overlays over rebar-embedded substrates hinges on achieving the right roughness, orientation, and an even anchor pattern to minimize ghosting. Start with the target profile that supports a strong bond without magnifying shadows, then thoroughly clean to remove form oils, curing compounds, dust, and other contaminants. Carefully address rust by removing loose or penetrating rust and choosing a strategy that avoids weak zones or color changes after the overlay cures, followed by controlled mechanical treatment such as light grinding or scarification that prepares the substrate without over-roughening.
This sequence matters on the jobsite because it directly influences adhesion, cure consistency, and the final appearance of the surface. By documenting surface energy or tack tests and verifying moisture and temperature conditions, you reduce surprises during overlay placement and cure, and you ensure primer or bonding agents are compatible with the prepared substrate. When done right, the preparation saves time, improves long-term durability, and minimizes ghosting by producing a uniform, ready-to-bond surface.
Profile and cleanliness targets (shotblast/diamond grind)
Aim for an ICRI CSP of about CSP 2–4 for most floor coatings and thin overlays — that gives a clean, consistent bite without over-roughening the slab. If you’re doing a heavy industrial topping you can push toward CSP 4; for thin epoxy sealer work closer to CSP 2–3. Don’t guess the profile: use replica tape or a simple visual check and write the result on your job sheet.
Choose shotblast when you need a uniform, open profile and you’re dealing with laitance or weak concrete; it’s fast and leaves a textured surface that coatings love. Choose diamond grind when the slab is smooth, has high spots to remove, or when you need precise flatness. If the slab has both problems, grind first to level, then shotblast to open the surface — don’t skip one because of time pressure.
Make sure you remove all laitance, grease, curing compounds and dust. Vacuum and wipe, then test adhesion before proceeding. If you see powdering or contaminants after blasting/grinding, go again — sloppy prep is the quickest way to get ghosting and failures. Clean, dry, and properly profiled beats fancy primers every time.
Rust and corrosion treatment for exposed reinforcement
First, inspect the bars. Look for heavy pitting, flaking, bent or broken bars, and signs of concrete delamination. If you see rust stains but the bar is mostly intact, you can usually treat it on-site. If bars are badly corroded or show large loss of area, replace the steel and call an engineer — patching over bad rebar is a false economy.
Do the cleaning mechanically. Hand wire brushes, needle scalers, or small abrasive blasting will get you to bright steel faster than chemicals. Use a passivator or corrosion inhibitor after cleaning if the surface can’t be fully encapsulated right away. Once clean and dry, coat with a zinc-rich or epoxy primer made for rebar before you patch the concrete.
Check for concrete surface profile and cleanliness targets already discussed — the patch wants good bond. If corrosion is local and cover is sound, a primer plus proper patching mortar will do. If corrosion is widespread, bars are sectioned, or the structure shows movement, stop and get structural advice. Do not just paint over active rust and hope it goes away.
Repairing delaminations and weak areas
Tap the slab with a hammer or use a chain-drag to find hollow spots. Mark and remove any area that moves, cracks off, or flakes—don’t try to feather thin it back. Remove unsound concrete down to a solid edge and a stable substrate. Leaving loose pockets or thin feathered edges is the fastest way to get future delaminations and trapped vapor.
Pick a repair mortar made for structural patching and compatible with your topping system. Mix and place full-depth patches so you don’t create isolated voids that hold moisture. For very thin repairs use a bonding agent or cementitious microtopping specified by the manufacturer; for deeper holes use a high-strength repair mortar. Use proper repair mortars and follow pot life and cure directions—rushed repairs fail.
After patching, check that repaired areas meet your profile and cleanliness targets and that any exposed rebar was treated per the earlier rust guidance. Verify patches are compacted, level with surrounding slab, and cured long enough before grinding or coating. If in doubt, cut out and do the repair again—temporary fixes only make more work later.
Material Selection and Mix Design to Reduce Telegraphed Reinforcement
Goal: prevent telegraphed rebar shadows by selecting overlays that are chemically and physically compatible with existing concrete and by optimizing the mix design for smooth, uniform coverage over reinforcement. Compare polymer-modified mortars, self-leveling overlays, and shrinkage-control mixes, noting substrate prep needs, bond strength, and long-term performance under temperature cycling and moisture exposure. Plan mix design parameters—binder dosage, aggregate size, water-to-binder ratio, flow and viscosity targets, and thixotropy—to achieve easy placement and strong encapsulation properly.
Why it matters on the jobsite: a thoughtful material strategy reduces ghosting, improves surface flatness, and minimizes the likelihood of post-application repairs caused by telegraphed shadows after cure. The approach also supports DIY success by balancing workability and final appearance, accommodating thickness limits, primer requirements, and surface prep while maintaining bond to existing substrate. Invest in additives such as shrinkage-reducing agents, superplasticizers, air-entraining agents, and slump retention to control differential movement and crack risk, and couple that with disciplined curing and QC checks to catch issues like bleed, flatness deviations, or rebar visibility early and guide practical fixes and delays, avoiding entirely costly rework.
Polymer modifiers, shrinkage reducers, and additives
Polymer modifiers and shrinkage reducers are your go-to when you want a finish that hides reinforcement instead of telegraphing it. They make the mortar or thin-coat more flexible and improve bond to the substrate, which cuts down on cracking and the edge-on “ghost” lines you see when the base dries differently than the overlay. If you already followed the basic mix and substrate prep earlier, these additives are the final tweak that makes those steps work together.
For a DIY job, pick a polymer-modified product from a reputable brand and follow the mix ratio on the bag. Too little polymer and you get no benefit; too much and you lose workability. Also use a shrinkage reducer when you’re working in hot, dry conditions or over large panels — it slows internal drying so the overlay and base dry more evenly. Choose the right dosage and measure carefully.
Quick checks on the job: check base compaction before you add anything, confirm compatibility between the additive and your cement or acrylic base, and do a small mock-up patch if the surface or reinforcement is unusual. Don’t skip manufacturer directions or substitute random liquids — cheap shortcuts often mean ghosting comes back later. If you follow these rules, the finish will be tougher, less crack-prone, and much less likely to show the reinforcement underneath.
Selecting primers and bond coats (epoxy vs cementitious)
Think practical: if you need a primer that stops moisture and gives a rock-solid bond to steel or sound concrete, epoxy is the usual choice. Epoxy primers have low permeability, high bond strength, and are great under thin polymer-modified toppings or when you’re trying to mask rusted rebar. The trade-offs are obvious: they can trap vapor, have limited pot life and cold-weather limits, and need a clean, dry, profiled surface — check base compaction and surface prep before you pour them on.
Cementitious bonding slurries are more forgiving on damp or rough substrates. They’re breathable, carry vapor through instead of blocking it, and act as a mechanical key for new cementitious overlays. That makes them a safer pick where substrate moisture or vapor drive is a problem. Don’t expect epoxy-level bond to steel or dramatic tensile strength; use them when you want compatibility with cement-based mixes and to avoid creating a vapor trap.
Acrylic primers sit between the two: easier to apply, more vapor-permeable than epoxy, but weaker overall. They’re fine for light-duty overlays and where quick recoat and low odor matter, but they’ll let shrinkage and movement telegraph more easily under heavy loads. Whatever you pick, read the product data sheet for vapor transmission rates, cure and recoat windows, and compatibility with the polymer modifiers or shrinkage reducers you’re already using, and always perform a small adhesion test before committing to a full pour — wrong primer choice is the fastest route to delamination and telegraphed reinforcement. Vapor transmission and adhesion are the two checks to get right.
Thinner overlays vs full-depth repairs: material tradeoffs
Thin overlays can hide minor ghosting and look great fast, but they have strict limits. Pick materials rated for thin application and for bond strength, or go thicker and do a full-depth repair. The wrong bag or shortcut today means cracking, delamination, or the ghosting comes back in months.
- Cementitious resurfacer — Used for skim coats on sound concrete up to about 3/8″ (10 mm). Look for products listing “featheredge” or “0–3/8 in” and a bond strength ≥150 psi (1 MPa+). Cheap generic bag can blister or delaminate; expect $20–$50 per 50 lb bag and a paddle mixer or drill with a mixing bit is fine.
- Polymer-modified overlay — Best for thin, durable toppings where some movement occurs. Check for “polymer-modified”, flexural strength, and manufacturer max thickness per lift (often 1/8″–1/4″). Skip if you need deep patching; wrong use causes corner uplift and visible reinforcement shadows despite good surface prep.
- Epoxy/cement bond coat — Use a primer when specified to lock thin overlays to the slab. Look for bond strength numbers and whether it’s solvent or water-based; epoxies usually give the highest bond for thin systems. Epoxy fumes and skin contact are hazards; wear gloves and respirator; expect $30–$120 per gallon depending on type.
- Full-depth repair mortar — For delaminated concrete or when reinforcement is near the surface you must remove and rebuild. Look for 5,000–8,000 psi compressive strength and fast-set options if you need traffic return. Trying to cover deep defects with a thin overlay invites cracking and corrosion re-exposure; bags run $15–$40 for 50 lb depending on specialty additives.
- Shrinkage-compensating mix — Use when you’re placing thicker patches or overlays over a few inches to avoid crack shrinkage. Check the label for “shrinkage compensated” or low drying shrinkage % and recommended cure times. Not needed for hairline skim coats; if skipped in thicker work you’ll get map-cracking later.
- Corrosion-inhibiting rebar primer — If rust or close rebar is the cause of ghosting, treat before patching. Specs to look for: chloride-free, compatible with cementitious overlays, and a demonstrated corrosion inhibition claim. Skipping it risks continued steel corrosion, staining, and spalling; expect $20–$60 per liter for common primers.
- Flexible polymer topping (urethane/urethane-modified) — For areas expecting movement or thermal cycling where thin cement overlays will crack. Look for elongation %, tensile strength, and approved thickness range; these are pricier but hide reinforcement shadows better. Not for heavy abrasion zones unless rated; wrong choice leads to surface wear and sticky finishes. Materials cost $2–$8/ft² installed DIY depending on product.
Pro tip: Buy products that list maximum thin-layer thickness and bond numbers on the label, keep bags dry, and mix only what you can place in the pot life. If you don’t own a mortar mixer, a heavy-duty drill with a paddle will do for small jobs; rent larger mixers for big pours. Always follow PPE guidance—some primers and polymers need gloves and a respirator or you’ll regret it.
Reinforcement Alternatives and Correct Placement
Reinforcement alternatives and correct placement focus on minimizing visible shadows in thin overlays by choosing raised or embedded reinforcement, non-metallic mesh such as glass/ceramic fiber or polypropylene, and smarter layouts like closer spacing or staggered grids, plus precise minimum overlay cover and placement details to control edge ghosting. It emphasizes specifying minimum clear cover from forming surfaces, establishing tolerance bands for all sides, and ensuring consistent cover when integrating pavers, joints, or irregular substrates. These options work together with practical installation steps to position reinforcement before pours, anchor it to prevent displacement, and keep meshes at the appropriate depth while using temporary supports and careful vibration to avoid shadow lines.
For a DIY or jobsite reader, this matters because correct choices and placement reduce costly call-backs from visible shadows and deteriorating overlays, especially in coastal, chemically aggressive, or reactive environments. The guidance aligns with code and durability considerations (ACI/CSA and related 318 equivalents) and offers practical decisions: when to raise reinforcement versus switch to non-metallic mesh, how to verify proper placement during formwork removal, and where common pitfalls occur with overlays thinner than a typical slab. A quick reference checklist and optional visuals help visualize cross-sections and cover requirements, supporting faster, more reliable installations without sacrificing strength or longevity.
Minimum cover and thickness tables (quick reference)
Don’t overthink it—use these rule-of-thumb numbers on site and then confirm with your specs. These are quick checks after you read the Reinforcement Alternatives and Correct Placement notes earlier. Before you pour, check base compaction and make sure chairs or spacers hold the steel at the intended height.
Minimum concrete cover to steel (typical): low-risk indoor work 25 mm (1″); normal exterior or damp ground 40 mm (1½”); high-exposure, coastal or heavy chemical/abrasion 50–75 mm (2–3″). Mesh/Welded Wire Fabric (WWF): place so top of mesh is 25 mm (1″) below finished surface for light loads, 40 mm (1½”) for regular slabs, 50 mm (2″) for heavy loads. Fiber-reinforced concrete is not a substitute for proper cover—use fiber plus steel only when specs allow. Bonded overlays need at least 25 mm (1″) thickness over a prepared substrate; unbonded or level-up toppings need 50 mm (2″) or more.
Slab thickness quick rules with reinforcement: pedestrian/light patio 75–100 mm (3–4″); residential garage or drive with rebar/mesh 100–150 mm (4–6″); heavy vehicle or commercial 150 mm (6″) and up. If you find bars or mesh nearer the surface than these covers, fix it—lift chairs, add spacers, or pour a thin lean mix first. Skimping on cover is the fastest way to corrosion and premature failure—don’t be cheap here.
Raising or re-locating rebar and using non-metallic mesh
If you need more cover, lift the bars onto proper chairs or precast spacers and then check base compaction and level before placing concrete. Don’t stack loose materials — use purpose-made chairs, plastic spacers, or folded wire chairs so the bars won’t sink when you pour. If rebar must be moved laterally to avoid a thin cover, tie new runs securely and keep overlaps to the minimum lap length shown in your project tables.
Consider a thin cement topping (or haunch) to gain a few millimetres of cover where moving bars isn’t practical. Make sure the topping is bonded and cured well; a poor bond just shifts the problem. Never accept reduced cover just to hide rusty or undersized bars — clean or replace them, or consult the cover tables referenced earlier.
Fiberglass (alkali-resistant) and carbon meshes are great where corrosion is a worry: they don’t rust and can let you get away with thinner sections in some repairs. Fiberglass is cheaper but weaker and can creep under load; carbon is very stiff and strong but costly and brittle — cut carefully and fix with recommended anchors or concrete admixtures. Whichever mesh you use, install it at the correct depth (not sitting on the formwork bottom), overlap per manufacturer instructions, and avoid using it as a shortcut to ignore required cover — it’s a tool, not a code replacement.
Design coordination with structural trades
Talk to the structural engineer, concrete crew and the finish trades before the first pour. Agree on the exact rebar layout, slab thickness and where blockouts or sleeves must go. If anyone shows up with different plans, stop work and resolve it — last-minute changes cost time and make ugly fixes.
Walk the slab area together and mark high-importance items: penetrations, embedded plates, and finished floor levels. Make sure the finish trades have their required cover documented and signed off so you don’t have to chase them later. If the finish crew needs extra cover for tile or overlays, note it on the shop drawings.
Confirm who will verify placement on-site and when. Have someone check base compaction, rebar spacers and elevations at the mock-up or first pour. If you must use alternatives like raised rebar or non-metallic mesh, reference the earlier tables and drawings so nobody guesses on-site.
Application and Installation Best Practices
Apply the overlay in careful, multi-pass layers that fully cover and slightly overlap the rebar, with consistent spacing to avoid gaps that create shadows, and coordinate pass sequencing so each increment bonds to the previous one. Control final thickness per pass using gauges or templates, maintain uniform slump, measure surface flatness with a straightedge, and check for edge runs that could reveal the rebar after cure. Manage ambient temperature and substrate moisture within specified limits, monitor dew point, and follow a deliberate curing regime to minimize differential shrinkage that highlights rebar, including timely form removal, misting or curing blankets, and protection from rapid evaporation.
Understanding these steps helps DIYers predict outcomes, schedule pours, and coordinate crew roles, safety practices, and cleanup so operations stay efficient. The guidance reduces rework, speeds completion, and delivers a flatter, shadow-free surface that meets inspection criteria and supports long-term durability, especially when rebar is close to the surface. By planning the pour plan, tools, texture options, and a post-installation inspection checklist, you gain confidence to troubleshoot issues on site and maintain consistent results from edge to edge while protecting embedded steel during the cure.
Layering, feathering, and maintaining consistent thickness
Work in thin, controlled layers rather than trying to build thickness all at once. Lay each layer to a consistent depth that your material and weather allow. Stop, look, and strike off to keep the surface even. If you rush, you’ll get low spots over reinforcement and messy repairs later.
Feather edges carefully so you don’t create thin spots where reinforcement sits. Keep a small bevel and feather into the edge with steady strokes instead of scraping it thin. Where mesh or rebar crosses, add a bit of extra material around the intersection and smooth it out to maintain cover.
Before you start, check base compaction and set simple gauges or screed blocks to verify thickness as you go. Run a straight-edge across finished areas every few passes. If a spot looks light, don’t sand it down—add material and blend it in. Consistent pace and constant checks beat guessing every time.
Temperature, humidity, and curing controls
Work when the ambient temperature is steady — ideally between about 50–90°F (10–32°C). For cement-based products you want a minimum of roughly 40–45°F (4–7°C) and avoid installing when temperatures will dip below freezing within 24 hours. Keep the substrate temperature close to the air temperature; a difference bigger than 10°F (5–6°C) invites uneven drying and bonding problems.
Keep relative humidity higher rather than lower during the first 24–72 hours. If conditions are dry, use plastic sheeting, damp burlap, or a fine mist to slow evaporation. For hot, windy, or sun-exposed jobs, provide shade and wind breaks or use curing compounds recommended by the product manufacturer. If it’s cold, use a heated enclosure or warm the substrate gently — but don’t blast direct heat that dries the surface too fast.
Protect the work for at least the critical first 24–72 hours; many cementitious toppings benefit from moist curing for 7 days and reach practical strength around 28 days. For adhesives and primers follow the product cure times, but as a rule allow longer in cool or humid conditions. The simple rule on site: keep conditions stable, and avoid rapid drying — that’s what prevents shrink cracks and differential drying between layers mentioned earlier.
Tooling, finishing, and timing to limit telegraphing
These are the actual tools you’ll use to keep patches and overlays from showing the steel beneath. Use the right tool at the right time, and don’t try to beat metal into submission with the wrong gear.
- Mixing drill & paddle — Mixes compound uniformly so you don’t get weak spots that telegraph. Use a low-speed (300–600 rpm) paddle and mix to manufacturer viscosity. Cheap homeowner drill is fine; rent a pro mixer for large jobs to avoid under-mixing and weak patches that crack over steel.
- Finishing trowel — Smooths and firms the final face of the material to hide small irregularities. Use a 12–16″ stainless or carbon blade and keep a light, consistent pressure. Essential tool; a bent or dirty trowel will create ridges and drag marks that telegraph over steel.
- Magnesium float — Compacts and opens the surface for the final float without creating excessive shear. Use a medium-pressure hand technique right after set-start; don’t overwork. Optional if you’re doing tiny spot repairs, but skipping it on larger areas often leaves texture differences over steel.
- Notched squeegee / gauge rake — Applies thin, even beds when using feathering mixes or self-levelers. Choose notch size per product (usually 1/8″–1/4″) and pull at steady speed. Rent if needed; wrong notch or jagged teeth causes inconsistent thickness that telegraphs the metal pattern.
- Hand sanding block — Controls final high spots and blends edges without removing too much. Use firm foam block with 80–120 grit for patch feathering. Always sand by hand near steel; aggressive power sanding will heat and gouge the metal or remove too much compound and expose the flange.
- Random-orbit sander with dust port — Speeds up leveling on large areas but is brutal if misused. Use 80–120 grit discs and keep dust extraction on. Optional—hire or rent for big jobs; using it too early or at high speed sands thin and shows steel through the finish.
- Respirator & PPE — Protects lungs and skin from silica and dust when sanding or mixing. Use an N95 or P100 for sanding and goggles for splash protection. Essential—skimping here risks health problems and forces rushed clean-ups that can damage the final surface.
Pro tip: Combine hand tools and a rented power sander—start with hand finishing around steel and switch to the sander only when the patch is uniformly cured. That way you keep delicate edges intact and still finish the field fast.
Inspection, Testing, and Verification After Placement
Establish clear success criteria for preventing rebar shadows and ghosting, including no visible ghosting, adequate bond, and an even finish, then apply a post-placement inspection protocol using standardized lighting and backlighting to reveal subtle shadows. Combine these visuals with non-destructive checks for thin overlays and bond integrity to confirm the overlay is properly adhered to the substrate. Define when remediation is warranted with concrete thresholds and document results, photos, measurements, and proposed actions in a standard field report, including cure milestones for short-term follow-up.
For a DIY or jobsite reader, this approach translates into practical steps that catch problems early and avoid costly rework, while providing a consistent framework you can repeat on every project. The emphasis on lighting, shadows, and surface finish helps you spot issues before they advance, and the structured record-keeping gives you a defensible trail for quality and accountability. Following a scheduled inspection cadence and using simple tests near critical areas keeps your repairs targeted, minimizes downtime, and improves overall reliability of the overlay and its bond to the substrate.
Pull-off testing and bond verification
Do a few pull-off tests over the reinforcement areas to prove the overlay is actually stuck to the substrate. A practical rule: perform at least one test per 50 m² (≈540 ft²) of reinforced area and at least one test every 30 m (100 ft) along long runs or at every joint/termination. Always test at the start of a pour, at mid-point, and at the end of the day if the job is large.
Use the project specification for the acceptance value. If you don’t have one, aim for a minimum of about 0.7 MPa (100 psi) as a working threshold and treat anything below 0.5 MPa (75 psi) as a failure requiring immediate investigation. If one test fails, stop work and take three additional tests within a 1–2 m² area to characterize the problem.
If tests show marginal strength but not outright failure, dig one cut-down to expose the reinforcement and check for contaminants, poor compaction, or missed primer. If tests fail, remove and repair the affected area, correct the surface prep or bond coat, and re-test. Don’t just keep pouring—failed pull tests mean you could be chasing delamination down the road.
Visual follow-up schedule and moisture monitoring
Walk the job every day for the first 48 hours. Then check again at 1 week, 2 weeks, and weekly through the first month. After that, inspect monthly for up to six months or until the moisture readings stabilize. Also do a quick check after any heavy rain, big HVAC changes, or if you see staining or efflorescence.
Put moisture sensors or RH probes in the areas that matter: high-traffic runs, corners, and any places that looked wetter during placement. Install probes at a representative depth and keep them in the same spots for repeated readings. Log values each visit and watch trends — a steady rise is more telling than a single high number. If readings go above the product’s stated limit (commonly around 75% RH for many floor systems), stop work and sort it out before proceeding.
Don’t skip photos and a short note with every check so you can prove what happened and when. If bond is in question later, you’ll still need the pull-off testing covered earlier — but your inspection logs and sensor data will tell you whether poor adhesion was likely caused by moisture or something else. If readings stay high, improve drying, reduce sources of moisture, and only continue when tests and records show it’s safe.
Remediation options if ghosting appears
If you see ghosting, decide fast whether it’s cosmetic or structural. For light surface marks try cleaning, sealing, or staining first. These are cheap fixes and often enough when the slab is sound.
For deeper, uneven ghosting consider grinding and a thin reoverlay. That evens the look without tearing out the slab. Make sure you check base compaction and bond before you overlay, and confirm moisture and bond per your earlier tests.
If the slab is delaminating or bond tests fail, plan on removal and replacement. Don’t waste money patching a bad slab. Cut it out, fix the base, then pour new concrete to get a durable result.
Sampling grid and escalation protocol (quick method)
- Divide the work area into zones ≤50 m². In each zone perform: 1 RH probe (ASTM F2170), 1 MVER (ASTM F1869), and 1 pull-off test near reinforcement.
- For long runs >30 m or at every termination do an additional pull-off at the joint.
- Acceptance: RH ≤ 75% and pull-off ≥ 0.7 MPa. If one parameter fails, stop and perform 3 more tests within the immediate area (1–2 m²) to localize the issue.
- Escalation triggers to call a professional: repeated pull-offs <0.5 MPa, RH >85% after mitigation, cover <12 mm, corrosion loss >20% of bar section, or visible structural cracking.
Cost, ROI, and Choosing the Right Prevention Strategy
This section compares the full cost of common prevention options—epoxy primer, vapor barrier, thicker overlay, and non-metallic mesh—against their long-term value, using upfront cost per ft², project size scaling, and expected lifespan to estimate ROI. It also outlines the key cost drivers (materials, labor, downtime, and maintenance) and a simple decision framework to match prevention strategy to moisture risk, substrate condition, and overlay thickness.
A DIY or jobsite reader benefits from a practical quick calculator or cost-per-square-foot table, plus guidance on installation sequencing, warranty implications, and when a barrier is necessary versus a non-metallic mesh. Understanding these factors helps minimize ghosting risk, avoid rework, and choose the most durable, compatible option within budget.
Budget comparison: typical costs and lifespan
Crack sealing runs about $0.50–$2.00 per linear foot and buys you roughly 3–5 years if you do it while cracks are small. Sealcoating costs about $0.10–$0.25 per square foot and extends life by 2–4 years when applied every 2–4 years. Both are cheap stopgaps. They fail fast if you ignore subbase problems, so check base compaction before you spend.
Thin overlays and resurfacing cost roughly $1.50–$4.00 per square foot and can add 7–12 years if the base is sound and drainage is fixed. Full-depth replacement is $6–$15+ per square foot but gives 20–30 years of life. If you’re seeing wide base failures or constant puddling, skip cheap fixes and budget for the heavier work.
Minor drainage fixes, edge repairs, or adding a geotextile run $200–$1,200 depending on scale and typically extend life by 3–10 years when paired with other work. For decision-making: if the surface is mostly intact, choose crack sealing or sealcoat. If patches are frequent or the base moves, plan for overlay or replacement. Don’t waste money repeating surface fixes when the problem is below grade.
Example ROI scenarios (illustrative)
- Small patio (100 ft²): Epoxy primer + thin overlay ≈ $250–$400 material & DIY labor. Life extension ≈ 7–10 years. If you skip primer and rework once in 3 years, total cost > preventative approach.
- Driveway patch (500 ft²): Thicker bonded overlay (¼”–½”) with polymer modifier ≈ $1,000–$2,000 installed DIY+rentals. Avoids full replacement ($3,000–$8,000). If moisture issues absent, investment pays off in 5–8 years.
- Commercial bay (2,000 ft²): Vapor mitigation + non-metallic mesh + ½” overlay ≈ $6,000–$12,000. Prevents repeated repairs; break-even against repeated 2–3 year patch cycles in roughly 3–5 years depending on traffic and downtime costs.
Decision rule: when expected rework frequency > once every 3–5 years, invest in the higher-proof solution (thicker overlay, vapor mitigation, or non-metallic mesh) — the higher upfront cost typically pays off through reduced callbacks, less downtime, and longer warranty support.
Risk-based decision matrix
Start by walking the site and answering three questions: how much water hits the area, how often will people or vehicles use it, and what happens if it fails (trip hazard, water in the basement, erosion). If water pools, slope is toward a foundation, or traffic is heavy, treat the site as higher risk. If the soil is loose or there’s a history of repairs, that’s another strike against a cheap patch.
For each answer give a score: low, medium, or high. Low-risk sites get simple fixes—spot repairs, surface sealers, basic grading. Medium-risk sites need better base work, drainage fittings, and stronger materials. High-risk means you need a full rebuild: proper subgrade, compaction testing, and engineered drainage. If you’re unsure how to measure compaction or drainage, check base compaction and measure fall over at least 10 feet before you commit.
Use cost and lifespan from the earlier budget comparison as a tie-breaker: cheaper options can be tempting, but if failure risks structural damage or repeated repairs, go with the high-investment route. Don’t save a few bucks now and double-cost later. Make decisions by risk first, budget second.
Safety, Planning, and Jobsite Coordination
Safety controls for thin overlays focus on limiting silica dust from grinding or shot blasting, with clear respirator requirements including fit testing and appropriate cartridge types, plus eye/face protection and skin protection aligned to primer and additive handling. The plan emphasizes dust control and containment through local exhaust ventilation, wet-cutting or pre-cutting where feasible, vacuum systems with HEPA filtration, spill/erosion barriers, and workflow zoning to prevent cross-contamination, along with sequencing that avoids rebar obstruction and realistic daily targets. Pre-task hazard assessments and defined handoff points ensure materials, tools, and waste are managed efficiently, backed by accessible MSDS/SDS, training records, and incident reporting in a concise pre-job safety plan tailored to rebar-shadow prevention.
This approach matters for DIY and jobsite readers because it translates into actionable steps that reduce exposure, protect workers, and keep projects on track through clear coordination and documentation. By instituting gate controls, toolbox talks, visible restricted-zone signage, and digital checklists for PPE compliance, crews stay prepared and accountable while maintaining orderly waste disposal plans and material labeling. The emphasis on risk management and emergency readiness—eyewash stations, first-aid readiness, and defined escalation protocols for structural trades or supervisors—helps you respond quickly to flare-ups and disruptions, safeguarding everyone and the work itself.
PPE and silica/dust control during prep
Silica dust is not negotiable. Wear a NIOSH-approved respirator with P100 or HEPA-rated cartridges when you’ll be grinding, shotblasting, or doing heavy dry sanding. If you can, use a full-face respirator or goggles instead of cheap safety glasses. Disposable coveralls and nitrile gloves keep dust off skin and make cleanup easier.
Use a HEPA vacuum on every cleanup and hook one to grinders or sanders when possible. Recommended vacuum class: true HEPA filter meeting H13/H14 efficiency (99.95%+ at most penetrating particle sizes) and a dedicated dust collection unit designed for concrete dust. Don’t rely on a broom or shop vac without HEPA — they spread dust around and make the problem worse. Vacuum debris frequently during the day, not just at the end.
For shotblasting or grinding, add water suppression or wet methods whenever practical. Wet down the work area or use water-fed attachments to keep dust from becoming airborne. Seal off the work area with plastic and run a portable air cleaner if you’re inside. If you skip these steps, you’re choosing more work, more risk, and possible fines — plain and simple.
Engineering controls and exposure limits
- Use local exhaust ventilation (LEV) at grinders with a capture hood and HEPA filtration. Maintain airflow per tool manufacturer guidance; check suction daily.
- Respiratory fit testing: annually for tight-fitting respirators; do a user seal check each use. Replace cartridges per manufacturer or when breathing becomes harder.
- Silica exposure reference (regulatory): OSHA respirable crystalline silica PEL = 50 µg/m³ (8‑hr TWA); action level = 25 µg/m³. Where possible, use controls that keep exposures well below the action level.
- Waste disposal: collect and contain grinding dust in sealed bags; dispose per local regulations (non-hazardous in most jurisdictions but avoid release to storm drains). Clean up with HEPA vacuuming — don’t dry-sweep.
Coordinating schedules and documentation for warranties
Plan the sequence first: structural repairs and any substrate fixes go in before surface work or finishes. Don’t let trades overlap where one can undo another’s work. Book the structural engineer or repair crew, then the moisture tester, then the installer. If a manufacturer requires a rep on site for acceptance, schedule them as a hard stop — no shortcuts.
Who signs what: moisture tests should be signed by a qualified third party or an approved manufacturer’s representative — not just the installer. Get a written report with timestamps, readings, the test method used, and a clear signature or stamp. If a structural engineer made repairs or approved load-bearing fixes, get their written clearance too. Those names and signatures are what warranty claims will hinge on.
Preserve warranties by keeping everything together and easy to find. Take photos at key stages, save test reports, invoices, emails, daily logs and any pre-installation acceptance forms. Make the owner or GC get a copy of the signed pre-installation acceptance — get pre-installation sign-off — and retain clear documentation so you can prove you followed the requirements if a claim comes up. Don’t trust verbal promises; written proof wins.
Long-term Performance, Maintenance, and Case Studies
Long-term performance for preventive rebar-shadow mitigation in thin overlays hinges on durable coatings, properly chosen sealants, and maintaining overlay thickness within practical limits under varying loads and environments. Expect crack control and reduced delamination risk to persist with regular surface prep before re-coats, timely resealing, and moisture management, supported by simple at-a-glance checks. In brief, one project with a successful silicone-sealant restoration reduced ghosting by over 60 percent for five years, while a nearby failed epoxy overlay highlighted the consequences of inadequate moisture control and insufficient cure, underscoring the need for proper sequencing and follow-up.
This matters on the jobsite because it translates into clear maintenance routines, measurable indicators, and actionable logs that non-specialists can follow. Track inspection frequency, cleaning methods that won’t damage coatings, resealing intervals, and weather-Ready documentation such as batch numbers, installation conditions, and moisture levels to guide timely interventions. If you see color/ghosting changes, increased delamination risk, or corrosion indicators, use the built-in checklists and consult a professional before major rehabilitation, ensuring longevity and documented accountability for future maintenance planning.
Maintenance checklist to prevent late-onset ghosting
Keep the surface clean. Sweep or blow off dirt and grit weekly. Wash high-traffic or oily areas with a mild detergent and a soft-bristled brush monthly. Do not use acid etchers or harsh solvents that can weaken the overlay and invite staining.
Inspect the overlay visually every three months. Look for early discoloration, delamination edges, or hairline cracks and mark them. If you see ghosting starting, stop heavy cleaning and isolate the area for concentrated cleaning and possible spot grinding. Also check base compaction if discoloration appears along seams — poor support is a common culprit.
Keep sealers current. Apply a breathable topical sealer after proper cleaning and cure, typically every 2–4 years depending on exposure and traffic. For high-use or exterior projects, err on the side of more frequent reseal (closer to 2 years). Track actions with dates and photos so you know what worked when — repair decisions get easier with a record.
Short case studies and lessons learned
I’ve seen jobs where a simple habit change made all the difference. On one porch we check base compaction and correct drainage before laying pavers. The crew sealed the edges, kept a tight joint sand profile, and the surface stayed clean for years with only annual touch-ups from the maintenance checklist.
Another success was a homeowner who invested time up front to slope the patio away from the house and install a small channel drain. A few hours of proper grading and sealing prevented water siting and the ghosting that comes from soluble salts moving to the surface. It cost more at installation, but cut down on cleaning and repairs later.
Common failure: crews skip proper base prep or use cheap, nonwashed sand. That saves time now and guarantees ghosting within a season. I’ve pulled up sections where poor compaction and no edge restraint let the joints migrate and white residue appear. Lesson: fix the foundation and edge restraint first, then follow the maintenance checklist—trying to correct ghosting after the fact is slower and more expensive than doing it right once.

Conclusion
Preventing rebar shadows isn’t cosmetic a tough call—it’s about safety, durability, and a clean look that lasts. When you control placement, preparation, and testing, you reduce the risk of hidden flaws that can show up as cracks or delamination later.
Proceed with a clear, simple checklist: assess risk before overlay by reviewing the existing reinforcement layout, confirm the selected mix and bleed/flow characteristics work with the overlay thickness, verify spacer and binding practices to keep rebar and embeds properly positioned, ensure surface prep is thorough, perform a quick pre-pour inspection, and then verify placement again after the overlay is set and cured. After placement, run basic tests and visual checks to confirm there’s no ghosting and that the finish remains true and even.
Common mistakes to avoid include skipping proper surface preparation, ignoring bond and spacing requirements, and rushing installation or skipping inspections. Always wear proper PPE, lock out equipment, keep forms and spacers in place during pour, and don’t compromise the rebar or its position to save time. Treat the first test patch or small area as your reality check; if it shows any ghosting signs, pause, reassess, and adjust before moving to the full job.
If the project is large, or if you’re unsure about the reinforcement layout, code requirements, or long-term performance, call in a pro. A qualified concrete contractor or structural specialist can confirm the plan, supervise placement, and prevent costly mistakes. With careful planning, you’ll finish strong, safe, and with a durable overlay that ages well. You’ve got this.
FAQ
What causes rebar shadows in thin overlays?
Rebar sticks up into the overlay and blocks the concrete from drying evenly. That creates dark lines or shadows on the surface. Thin overlays show this more because there isn’t much material to hide the bars.
How can you prevent shadows when pouring thin overlays?
Keep rebar off the form by using spacers or chairs so the bars sit in the middle of the overlay. Use a proper thickness for the overlay and smooth the surface quickly to avoid gaps around the bars. Don’t skimp on practice—overlays need solid footing to stay uniform.
Where should rebar be placed to avoid shadows in thin overlays?
Position rebar in the middle of the intended thickness, not at the top. Space bars or welded mesh so there’s coverage on both sides. If you’re unsure, ask a pro or follow the project specs—don’t guess.
What are common mistakes that cause rebar shadows?
Letting rebar sit on the form or touching the surface creates direct shadows. Skipping spacers or using the wrong overlay thickness also causes uneven drying and dark lines. If you see gaps around the bars, fix it before finishing.