

Table of Contents
- Why Rebar Caps Matter — Safety and Injury Prevention
- Types of Rebar Caps and How Expansion Caps Fit In
- Standards, Regulations, and Liability
- Step-by-Step Installation Procedure for Expansion Caps
- Inspection, Maintenance, and Replacement Schedules
- Common Installation Mistakes and Failure Modes
- Procurement, Cost Breakdown, and ROI Analysis
- Training, Toolbox Talk Templates, and Onsite Implementation
- Compatibility Matrix and Quick Troubleshooting Guide
- Appendices — Templates, Quick Reference, and Further Reading
Introduction
Install expansion-style rebar caps on exposed rebar to prevent jobsite injuries. This article focuses on end‑protection products for rebar (push‑on, mushroom, and expansion-style safety caps) used to blunt and mark protruding steel. It does not cover structural anchors, drop-in anchors, or other expansion anchors designed to fasten fixtures to concrete — those are a separate product family with very different installation, testing, and acceptance criteria.
In this article, you’ll learn why caps are necessary, how to choose the right size, and the proper installation steps to keep workers safe. Where manufacturer specs or engineer involvement are required, the text calls those items out and explains when to stop work and escalate to a licensed contractor or design professional.
Why Rebar Caps Matter — Safety and Injury Prevention
Exposed rebar poses immediate impalement and puncture hazards in typical construction workflows, from handling and tying to crane placement, and OSHA and industry data show that these injuries occur annually with the potential for severe trauma, long-term disability, and even fatalities. When ends are unprotected, workers face risks from tripping, dropped materials, and accidental contact with sharp edges, which can escalate into costly medical treatments and extended project delays. Compliance professionals emphasize that mandatory cap coverage, effective edge protection, and proper retention reduce these incidents far more reliably than improvised covers.
This section explains why caps matter, how they work to cover ends, and why they’re preferred over makeshift solutions, with practical, jobsite-ready actions for supervisors and crews. By aligning with OSHA/ANSI/CSA guidance and conducting routine installation, fit checks, and maintenance, teams can prevent injuries, avoid regulatory fines, and stabilize schedules and insurance costs, while keeping work moving. The right caps fit common diameters, stay in place during handling and bending, and support quick inspections, training, and signage that reinforce a culture of ongoing protection on every shift.
Injury Risks and Real-World Incidents
Exposed rebar is not just ugly—it’s dangerous. I’ve seen a backyard project where a homeowner stepped back into a protruding rod and suffered a deep laceration that needed stitches. On a jobsite, a laborer fell against an uncapped vertical bar and suffered a puncture wound through the thigh. Those are the kinds of incidents that happen fast and change plans for months.
Common injury mechanisms are simple: impalement from vertical bars, sharp-edge laceration when someone brushes or falls across a cut rebar end, and trip/fall incidents around cluttered rebar layouts. Do not assume temporary covers like cardboard or loose scrap will hold up—cheap fixes fail when you need them to hold.
What to do: walk the site daily and inspect caps, replace any split or missing ones, and mark or barricade areas with exposed rebar until you can properly cover them. If kids, pets, or neighbors are nearby, secure the area overnight. If a rebar is sticking out where people will move, cut it back or bend it down to eliminate the hazard. No excuses—fix it before someone gets hurt.
Cost of Ignoring Protection (Medical, Legal, Delays)
Skimping on rebar caps isn’t just risky—it’s expensive. A single puncture or trip can mean hospital bills, long recovery, and a workers’ comp claim that raises your premiums. Beyond that, OSHA fines or local citations can hit hard if an inspector finds exposed bars. The safer, cheaper move is to install and inspect protection from day one.
There are indirect costs people forget about. Work stops while someone gets treatment or while you fix safety failings. That downtime delays schedules and forces overtime. If a subcontractor or neighbor gets hurt, you’ll spend time on reports and maybe legal fees. Those lost days and paperwork add up faster than replacing a few caps.
Think like a foreman: decide now to buy decent caps, train crews to use them, and keep spares on site. Walk the job each shift, document any missing protection, and don’t sign off on pours until exposed rebar is covered. It costs less to prevent an incident than to deal with the fallout.

Types of Rebar Caps and How Expansion Caps Fit In
This section compares the main cap types—plastic push-on, mushroom/pour caps, metal caps, and expansion‑style safety caps—using clear descriptions to help you quickly identify each option on the job site. Note: when the text refers to “expansion caps” here it means expansion-style rebar safety caps (mechanical collars/wedges that clamp to the bar) — not concrete anchors or drop-in anchors used to secure fixtures. Treat those anchor products separately; anchors carry structural design and testing requirements that do not apply to passive end‑protection caps.
Expansion-style rebar caps are favored where a more positive mechanical grip is required, such as high-traffic areas, sites with vibration, or when bars are irregular or deformed and a simple push-on cap might fall off. This section outlines sizing, fit, and compatibility for rebar end protection, and explains how to verify cap diameter, rebar size, and correct installation method to ensure a secure, code‑compliant fit that stands up to field conditions.
Plastic vs Metal vs Expansion (Pros & Cons)
Quick rundown from the jobsite: plastic caps, metal caps, and expansion-style rebar caps each have clear trade-offs. Below are the hard facts on durability, install speed, reusability, and how they hold up to impact.
Pros
- Plastic push‑on caps — cheapest per unit, fast to install, and lightweight for covering many protruding bars quickly.
- Metal caps — very durable under repeated jobsite abuse and resist crushing better than plastic.
- Expansion-style safety caps — clamp tight to rebar, excellent retention under vibration and impact, and reduce the chance of snagging or accidental removal.
- Plastic caps — quick install saves labor time when covering lots of protruding bars for short durations.
- Metal caps — reusable many times, so cost-effective over multiple projects.
Cons
- Plastic push‑on caps — poor impact resistance; they crack or pop off under heavy blows.
- Plastic caps — limited reusability; often get deformed after one use.
- Metal caps — heavier and sometimes slower to fit, increasing installation time on large pours.
- Expansion-style safety caps — costlier per piece and can require specific installation steps to achieve rated retention.
- Expansion-style caps — may need correct bar size or light tooling (e.g., hand driver); wrong fit reduces effectiveness.
If you need speed and low cost for a one‑off job, go with push‑on plastic caps. If you want long-term toughness and reuse, metal is better. If safety and retention are the priority and budget allows, use expansion‑style safety caps—especially on high‑traffic or high‑risk sites.
Expansion/Impact Cap Designs and Variations
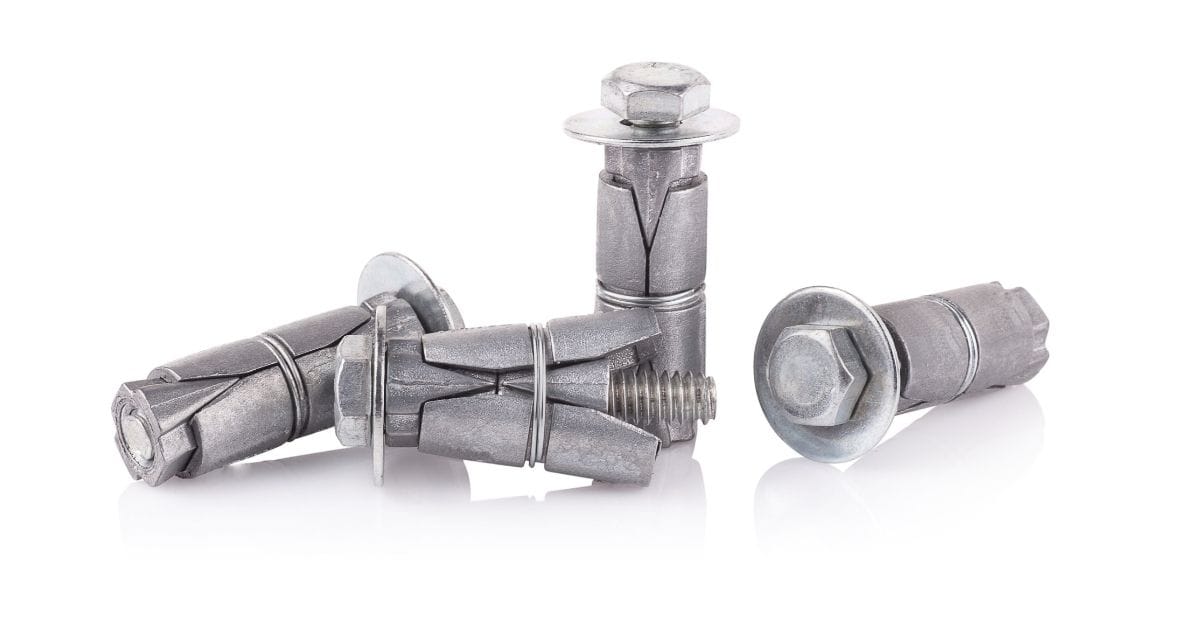
Expansion-style safety caps for rebar typically clamp around the bar either by an expanding internal collar, a wedge or split-sleeve, or by a mechanical clamp. Choose the design based on how secure the cap must be and how the bar will be handled. Expansion-style rebar caps tolerate slightly irregular bar ends and vibration better than simple push‑on caps but always follow manufacturer installation steps and torque/setting guidance when provided.
Material matters: UV-stabilized nylon or heavy-duty polymer works for temporary protection, steel or plated components resist crushing and corrosion for repeated reuse, and stainless is best for coastal or very wet sites. Use corrosion‑resistant materials when you expect moisture. For any cap intended to provide retained protection under handling, require manufacturer data showing retention performance under specified loads or impacts.
Note for spec teams and buyers: include a compatibility matrix (bar sizes No.3–No.11, cap model, cap ID/OD, required seating depth, and retention rating) in your procurement package. If you don’t have an illustrated matrix, require suppliers to supply one and tag each box by size and lot number on delivery.
Standards, Regulations, and Liability
Exposed rebar on construction sites is governed by OSHA standards, Subpart M fall‑protection requirements, and specific rules on rebar caps, end protection, and field safety practices. A core takeaway is the duty to identify and apply core references, integrate cap requirements into site routines, and document compliance through inventories, inspections, and training records.
Understanding these codes helps prevent impalement hazards, clarifies when caps are required, and explains acceptable cap designs, fit, and color‑coding for permanent versus temporary worksites. It also highlights contractor liability—duty of care, duty to warn, supervision responsibilities, and how noncompliance can affect bids, change orders, and daily routines. Clear documentation expectations, from site safety plan updates to pre‑task risk assessments, cap inventory logs, inspection photos, and crew competency proof, support accountability and facilitate audits. A practical checklist for audits and handoffs—on arrival, during a concrete pour, after form removal, and at shift changes—provides quick pass/fail criteria and helps manage corrective actions, rework, and communications with owners, clients, and subcontractors.
Relevant OSHA and ANSI References
Don’t overthink the law — check the OSHA rules that actually affect rebar on site: 29 CFR 1926.100 (head protection), 29 CFR 1926.501 (fall protection where protruding rebar creates fall hazards), and the general construction rules in 29 CFR 1926 that cover guarding, housekeeping, and barriers. Read those sections and then act: hard hats, barricades, and caps where people walk are non‑negotiable.
For product and material guidance, look to ANSI/ISEA Z89.1 for hard hat performance and ASTM A615 for rebar material specs. If you buy rebar caps or covers, make sure the caps are designed for construction use and match the bar size — cheap one‑size‑fits‑all caps often fail. Buy rated caps and require supplier datasheets showing retention test results. Always follow manufacturer torque or setting specifications when provided; generic torque rules are only placeholders until you have the product data.
Recordkeeping, Inspection Logs, and Compliance Evidence
Keep a simple, consistent inspection log that you actually use. Each entry should show date, time, location, who inspected, what was checked (caps, exposed bars, barricades), findings, corrective actions, and signer. Templates that work: a one‑line‑per‑item form for daily checks, a short checklist for weekly system inspections, and a detailed form for post‑incident or commissioning records. Don’t overcomplicate it — if the crew won’t fill it out, it’s useless.
Set clear frequencies and stick to them. Do a pre‑shift quick check every day, a more thorough site/system inspection weekly, and a formal documented inspection monthly or after any change to the setup. Inspect immediately after any incident, severe weather, or work above where loads or anchors might have shifted. Date and sign each entry; unsigned or backdated records won’t help you during an audit or claim.
When auditors or insurers ask, present records clearly and fast. Keep a physical binder on site and a mirrored digital folder (PDFs named by date and job). Include supporting items like photos with timestamps, product datasheets, batch/lot numbers, and repair receipts. Cross‑reference entries to the relevant OSHA/ANSI note if needed, but don’t rewrite standards — show your checks, fixes, and who did them.
Step-by-Step Installation Procedure for Expansion Caps
Begin with a thorough pre‑installation check of rebar size, bend angles, corrosion, and any damage, and verify that the cap type matches the rebar diameter and intended use (temporary protection vs repeated handling). Confirm material and tool readiness, including the cap model, seating depth, and any small hand tools recommended by the manufacturer. Select caps that meet the intended service environment (UV, chemical exposure) and perform cleaning of rebar ends before engagement.
Proceed through a seating procedure by aligning the cap with the rebar axis, inserting to the specified depth, verifying seating, and securing with the recommended method without over‑torquing. Follow quality checks and documentation by confirming full seating, no gaps or misalignment, performing a gentle pull check, and recording lot or batch information for jobsite records.
Step-by-Step Installation Process
This sequence takes you from final prep to finished, checked expansion-style safety caps on site. Follow each step in order, do the checks, and stop for a pro if something looks off.
- Lay out and mark positions for each cap using the plan and a tape measure. Measure twice; if locations don’t match drawings or you hit a hidden pipe/wire, stop and call a pro or locate utilities before continuing.
- Select the correct cap model for the bar size. Verify cap ID/OD on the packaging and check the manufacturer compatibility table. Do not assume caps are interchangeable between manufacturers.
- Clean the bar end of heavy rust, burrs, or debris so the cap seats fully—use a wire brush and rag. For heavily corroded or damaged ends, replace or dress the end before capping.
- Install the cap per manufacturer instructions: push‑on, snap, or set the expansion mechanism. For expansion-style caps, set until you feel positive engagement or until a depth/torque stop engages as specified. If a torque spec is published for the product, use a torque wrench to that value.
- Perform a seating verification: visual check for flush seating, a firm hand‑pull (see acceptance/testing criteria below), and document the lot number and installer initials.
- If the cap is not fully seated or wobbles, remove and re‑inspect the bar end and cap. Don’t force a cap onto a damaged bar—repair or replace the bar end or use a purpose-built adapter.
- Record installed quantities, cap model/lot, and any defects in the inspection log. Tag and quarantine damaged or suspect caps and remove them from stock.
Pro tip: Keep a small log with cap type, lot number, installer, and installation notes for each shift—saves headaches during audits and when batches show defects.
Tools, PPE, and Pre-Installation Checks
These are the actual tools and checks you need before you start the installation steps covered earlier. Get the right gear, confirm caps match bar size, and clean the end—skip any of those and you’ll be back fixing safety gaps.
- Hand tools — small punch, pliers, and a rubber mallet for seating push‑on caps where appropriate. Avoid heavy impact that could fracture plastic caps.
- Torque wrench — only when manufacturer instructions specify a torque value for an expansion-style cap. If a product provides a torque spec, follow it exactly; otherwise do not invent torque values for caps.
- Wire brush & rag — cleans the rebar end so the cap seats and seals correctly.
- PPE — safety glasses, gloves, hard hat, and hearing protection where drilling or cutting occurs.
- Tape measure & calipers — verify bar diameter and cap fit before installing.
Pro tip: If a cap’s installation instructions call for tools you don’t have (torque wrench, pull‑tester), do not improvise—either obtain the tools or escalate to a crew with the right equipment.
Acceptance and Testing Criteria (measurable)
Inspection and acceptance must be measurable. Require manufacturer retention data when procuring caps. In the field, apply these minimum QA steps unless the manufacturer specifies otherwise:
- Sampling rate: test at least 1% of installed caps per shift with a minimum of five units per lot/batch (whichever is greater). Increase sampling for high‑risk areas.
- Pull test: perform a calibrated hand‑pull or mechanical pull test to a specified load per manufacturer. If the manufacturer provides no numeric load, use a conservative field check of approximately 100–150 lbf (450–667 N) in pull force as a functional check and treat any movement as a failure requiring corrective action and escalation. Always record measured values when using a calibrated pull gauge.
- Torque verification: where a torque spec is published for the product, use a calibrated torque wrench and record values. Reject any installation where the recorded torque deviates from spec by more than ±10%.
- Batch sampling: if any sampled cap fails, quarantine the entire lot and increase testing to 10% or stop installation pending supplier investigation.
- Acceptance thresholds: no visible gap, no rocking movement under the specified pull load, and recorded torque within spec (if provided). Any caps that fail must be removed and replaced immediately and the failure documented.
If you cannot meet these testing steps because you lack tools or manufacturer data, stop and escalate (see escalation guidance below).
Special Cases: Threaded Bars, Bundles, and Irregular Ends
If you encounter threaded bars, bundles, or bent/corroded ends, don’t force a standard cap. Use a purpose‑made adapter, multi‑bar cap, or a clamping retrofit designed for that condition. For any nonstandard retrofit, document the modification, perform a fit and pull test, and note the deviation in the inspection log. If the cap is expected to perform under handling loads (not just passive protection), require engineer approval.
Inspection, Maintenance, and Replacement Schedules
Establish clear inspection intervals—daily pre‑shift checks for immediate hazards, weekly documented checks, and a quarterly or annual review depending on exposure and project duration. During each check, look for UV and chemical degradation of plastic caps, cracked or deformed metal parts, missing or loose caps, rust at attachment points, and misalignment of caps relative to rebar ends. Apply predefined criteria to decide whether replacement is required.
Define replacement triggers: visible cracking or loss of material, caps that fail the pull/torque check, caps with chemical damage, or any deformation that compromises coverage. When replacing, record the lot, replacement date, and reason in the log. Mark installed caps with batch/lot numbers on delivery and keep those records tied to installation locations for traceability.
Daily/Weekly Toolbox Checks vs. Formal Inspections
Keep a small set of go‑to tools in the truck for quick checks and fixes, and separate what you use for a fast toolbox look‑over from the gear you bring for formal, documented inspections. The daily kit should allow you to do the required sampling and basic seating checks; the formal inspection kit should include a calibrated pull gauge and torque wrench when the product or installation requires numeric verification.
- Daily kit — tape, hammer, wire brush, spare caps, marker for tagging defects, and camera or phone for timestamps.
- Formal inspection kit — calibrated pull gauge, calibrated torque wrench (if applicable), measuring calipers, and inspection forms with lot/serial tracking.
Pro tip: Store caps in shaded or enclosed areas, rotate stock using first‑in/first‑out, and reject boxes where the lot number is missing.
Life Expectancy, Storage, and End‑of‑Life
Plastic caps in mild, sheltered conditions often last 5–10 years; in direct sun their life can drop to 2–4 years. Store caps flat, out of direct sunlight, and away from solvents or fuels. Label boxes with arrival date and lot number and rotate stock (FIFO). Record installed cap lot numbers against locations so you can trace any future defects back to the supplier.
End‑of‑life: dispose of degraded polymer caps per local regulations; recycle metal caps when possible. Maintain a replacement schedule tied to the observed environment: aggressive environments (salt, chemicals, heavy traffic) require more frequent replacement—documented in the inspection log as a lifecycle action item.
Common Installation Mistakes and Failure Modes
Common installation mistakes include using the wrong cap size, under‑torquing (when torque is required), reusing damaged caps, and failing to remove loose or damaged stock from circulation. These map to failure modes such as cap detachment under load, exposure of rebar, or slippage during handling. Use a pre‑installation checklist that includes cap model, lot number, and a spot sample test to prevent these failures. If failures recur, escalate to procurement and the supplier for a Root Cause Investigation.
Prevention Tips and Quality Control Measures
Do quick checks as you go: random spot torque or pull tests with calibrated tools, tag damaged caps so they aren’t reused, and have crew members sign off on their inspected area each shift. If a cap looks battered, remove it from service immediately and record the reason.
Field Retrofits When Caps Are Missing or Damaged
If you find a missing or cracked cap on the job, stop and protect the area before anyone walks past it. Use physical barriers and bright warning signage as temporary protection only, and replace the cap with a correct, rated unit as soon as possible. Do not use mismatched or improvised covers as a long‑term solution.
Procurement, Cost Breakdown, and ROI Analysis
Unit costs for common rebar cap types vary by material and size. To help justify purchases, here is a simple worked example you can adapt for local rates:
- Assume plastic push‑on cap unit price = $0.30, expansion‑style safety cap unit price = $1.20.
- Labor: two‑person crew installing 60 caps per hour = labor cost $40/hour per person → $80/hr total → labor per cap ≈ $80 / 60 = $1.33 per cap.
- Total installed cost per cap (plastic) ≈ $0.30 + $1.33 = $1.63. For expansion‑style ≈ $1.20 + $1.33 = $2.53.
Compare that to a conservative estimated incident cost: a single lost‑time injury plus medical and indirect costs can easily exceed $50,000. If you prevent one such event by spending an extra $0.90 per cap across a project with 1,000 protrusions, the incremental spend is $900 — trivial compared to one serious injury. Use local labor rates and supplier quotes to refine the example for procurement approval.
Where to Buy and Supplier Options
Buy from manufacturers, regional distributors, big‑box chains, or local jobsite suppliers. Require supplier datasheets with retention test results and lot numbers. For bulk buys, demand batching and lot tracking so you can trace installed components back to the shipment.
Quantity Estimating and Staging for Project Phases
Start with simple counts and include a waste factor. Example: Caps_needed = total_exposed_bars × 1.10 (10% waste). Stage boxes by phase and label each box with cap size and lot number. Schedule JIT deliveries near the pour or work phase to avoid long exposure on site.
Training, Toolbox Talk Templates, and Onsite Implementation
This section provides a concise outline for a 5–10 minute toolbox talk that aligns training objectives with OSHA and industry best practices for rebar handling and cap usage, plus a clear plan for onsite implementation that can be adapted to different sites, crews, and language needs. It covers who delivers the talk, what crews should know, how to demonstrate proper cap placement with visual demonstrations, and how to manage inventory, pre‑task planning, and immediate corrective actions to address non‑compliance in real time.
Sample Toolbox Talk Script and Visual Aids
Use photos showing correct vs incorrect installations to demonstrate acceptable seating, coverage, and what a failed cap looks like. Include a short hands‑on demo of a pull check and a walk‑through of the inspection log fields.
- Key messages — Always cover exposed ends before leaving the area, use the right cap for the bar size, and tag and replace damaged caps immediately.
- Who signs — the crew lead signs the daily inspection log and notes corrective actions taken that shift.
- Demo — show how to seat a cap and carry out one sample pull/torque test and record it in the log.
Pro tip: Photos of correct vs incorrect installations make the point faster than a long speech.
Implementation Checklist and Communication Plan
Rollout checklist: procure the specified caps and PPE, run the toolbox talk, inspect each install point daily, and document every pass with photos and initials. Give subs a one‑page spec and checklist and require signoff. Communicate with a short morning walk‑through and an end‑of‑shift wrap up with photos attached to the log entry.
Compatibility Matrix and Quick Troubleshooting Guide
Provide or require from suppliers a compatibility matrix mapping common rebar sizes (No.3–No.11) to cap model numbers, cap ID/OD, and minimum seating depth. If a matrix is not available in this article, require it as part of procurement. As a quick jobsite reference, confirm cap internal diameter matches the nominal rebar diameter (No.3 = 3/8″ actual, No.4 = 1/2″, etc.) and always dry‑fit one sample before bulk install.
Common Problems and Immediate Fixes
Stripped threads, oversized bars, or stuck caps require the correct repair path. For caps that wobble, remove and use the correct size or a clamping adapter; do not rely on shims unless the supplier endorses that fix. For stuck caps, use penetrating oil or a proper cap puller. Always record temporary fixes and schedule permanent repairs.
When to Escalate to Design or Safety Team
Escalate immediately in these conditions (do not continue work in the affected area):
- Clustered or congested rebar that prevents safe capping without changing structural ties or layout.
- Any use of threaded bars or anchors where the cap or adapter would be relied on for structural load transfer.
- Work at height where fall‑protection anchors or engineered solutions are involved.
- Repeated or systemic cap failures in a lot/batch that indicate product defects.
- Lack of required tools or manufacturer specs to perform acceptance tests (torque or pull tests).
When escalating, photograph the area, note exact dimensions, and provide the product lot numbers and inspection data. For structural questions, obtain written direction from a licensed engineer before making changes that affect a load path.
Emergency & Post‑Incident Steps: if an injury occurs due to exposed rebar, preserve the scene, provide first aid and call emergency services immediately, notify the site safety officer, and secure the area. Document: names of injured, time/date, witness statements, photos of the scene before any change, and equipment/material lot numbers. Report per OSHA requirements and your company incident procedure. Keep all evidence and logs for investigators and insurers.
Appendices — Templates, Quick Reference, and Further Reading
This appendix provides ready‑to‑use templates—an inspection log, a procurement checklist, and a toolbox talk script—along with a quick reference sizing chart and a concise list of authoritative sources to deepen safety knowledge for safe rebar cap installation. Each template includes the key fields to complete and guidance on version control so documents stay current on site.
Sample Inspection Log and Procurement Checklist
The inspection log fields: date, location/area, inspector name, weather, items inspected, cap model/lot, pass/fail, notes, photo references, and signature. The procurement checklist: item description, SKU/spec, ordered quantity, supplier, delivery date, received quantity, condition, and lot number. Keep PDFs of datasheets and photos with each log entry.
Cited Regulations and Manufacturer Datasheets
Pull the relevant building code, OSHA construction standards, and ASTM/ISO test standards for materials. Require manufacturer technical datasheets and installation guides for each product and refuse any product without current datasheets on site.

Conclusion
The core idea is clear: using expansion-style safety caps on rebar isn’t optional—it’s frontline protection for workers, the job site, and the finished structure. Do it right, and you reduce injuries, avoid costly repairs, and keep the project moving.
Start by choosing the right cap for your rebar size and environment, verify standards compliance and manufacturer instructions, inspect rebar ends, dry‑fit, perform the step‑by‑step installation, and finish with a thorough inspection and documented maintenance plan. Use the sampling and acceptance criteria in this article; if you lack the tools or data to meet those checks, stop and escalate to procurement or a qualified contractor.
Two common mistakes to avoid are using caps that don’t fit or aren’t rated for the intended service and skipping the inspection and replacement schedule. Always match caps to rebar size, verify product ratings and acceptance criteria, and follow the standard installation sequence. If in doubt on fit, standards, or site conditions — or when a cap might be used as a structural connector — call a licensed professional.
FAQ
What are expansion caps and why do we use them on rebar?
Expansion-style rebar safety caps are mechanical or clamping caps that attach securely to the bar to protect workers from impalement and to make the end visible. We use them where a more secure attachment is needed than a simple push‑on cap can provide.
Where should I place expansion caps on rebar?
Place caps on all exposed rebar ends that present a hazard to people moving around the site. Install them as soon as bars are in place and before workers access the area. For bars that will be handled, use caps rated for handling; otherwise use appropriate temporary protection.
How do I install expansion caps properly?
Follow the manufacturer’s installation instructions: verify cap and rebar size, clean the bar end, seat the cap per instructions, and perform the specified verification check (visual, hand‑pull, or torque). Record lot numbers and any test results in the inspection log.
What happens if I skip them or do a poor job?
You risk serious injuries from sharp ends, regulatory citations, and project delays. Missing or loose caps can cut skin or snag tools, and poor QA increases liability. Don’t skip this step.