

Introduction
Spalling is when the surface concrete flakes, chips, or peels away at the garage door edge. The damage comes from moisture intrusion, freeze-thaw cycles, or heavy traffic over time. You’ll notice rough edges where the edge of the slab meets the door opening.
To rebuild the edge, remove loose material and clean the area well. Repair with a compatible patch or concrete mix, following the product instructions and local rules for curing. Seal and protect the edge to reduce moisture intrusion, and consider improving drainage or joint details.
Key takeaways
- Identify spalling signs and damage patterns at garage thresholds before repair.
- Inspect drainage, moisture, and door operation to diagnose root causes.
- Gather durable repair materials and weatherproof sealants for edge rebuild.
- Prepare the edge by removing debris, loose concrete, and creating clean joints.
- Follow step-by-step rebuild methods with proper curing and protection time.
- Wear eye protection and gloves; keep others away during grinding and demolition.
Table of Contents
- Introduction
- Key takeaways
- What Is Spalling and Why Garage Thresholds Are Vulnerable
- Inspecting and Diagnosing Threshold Damage
- Tools and Materials Checklist
- Preparing the Threshold for Repair
- Step-by-Step Methods for Rebuilding the Threshold Edge
- Reinforcement, Geometry, and Durability Upgrades
- Maintenance Plan and Prevention Best Practices
- Cost Considerations, DIY Vs Professional, and Troubleshooting
- Conclusion
- FAQ
What Is Spalling and Why Garage Thresholds Are Vulnerable
Spalling is when concrete flakes, chips, or peels away from the surface. Think of it as tiny chunks breaking loose rather than a uniform crack. At a garage threshold, this shows up where traffic, moisture, and temperature shifts meet the edge of the slab.
The threshold endures pounding from foot and vehicle traffic, and it sits where water tends to collect or seep in. Chemical reactions, freeze-thaw cycles, and poor finishing can cause layers to separate and delaminate. Use plain terms when you describe the failure to others on site to avoid confusion later.
Definition and failure mechanics
Spalling is when concrete flakes off, exposing the aggregate underneath. It’s a progressive degradation that starts with microcracking at the surface.
The process goes like this: tiny cracks form due to stress or impact. Water seeps in, freezes, and expands, further widening these cracks. Over time, pieces of concrete start to pop off, leaving you with an ugly, damaged threshold.
Think of it like a tree trunk with a hidden rot. You can’t see the damage until a chunk falls off.
Common contributing factors
Spalling happens due to a mix of factors. Here are the usual suspects:
Freeze-thaw cycles: Water expands when it freezes, pushing against concrete and causing microcracks.
Deicing chemicals: These can break down the cement paste that holds concrete together over time.
Abrasion: Constant traffic wears away at the surface. Even small pebbles in tire treads can cause tiny scratches that grow into cracks.
Poor mix or finishing: If concrete was mixed or poured improperly, it’s more likely to spall.
Water intrusion: When water gets into concrete and has nowhere to go, it causes pressure from within, leading to delamination.
How threshold design and use accelerate spalling
Garage door thresholds are particularly vulnerable due to their design and constant use:
Edge geometry: Thresholds have sharp edges that concentrate stress, making them more prone to cracking.
Door sill impact: Every time the garage door opens or closes, it hits the threshold. This repeated impact can cause tiny cracks over time.
Drainage issues: If water doesn’t drain properly from the threshold, it can sit there and cause damage through freeze-thaw cycles.
Constant traffic: Vehicles driving over the threshold day after day wear away at the surface. Even people walking on it contribute to this abrasion.
Inspecting and Diagnosing Threshold Damage
Start with a visual survey for cracking, hollow sounds, and loose material. Tap corners and edges to gauge soundness without removing material. Look for pooled water or uneven drainage that could worsen damage.
Perform simple tests to separate surface issues from deeper problems. Probe with a screwdriver or awl at the edge to see how deep the loose material runs. If the base feels soft or you can see exposed aggregate, plan for a more thorough evaluation or a pro consult.
Visual checkpoints and what to photograph
Before you start any repair, document the damage. This helps plan work and get quotes.
- Cracks: Check length, width, and direction. Hairline cracks are minor, but wider ones need attention.
- Delamination: Look for flaking or peeling concrete. It’s a sign of deeper damage.
- Exposed aggregate: If you see gravel or sand, it means the surface is wearing away.
- Rust stains: These indicate reinforcement corrosion, which can cause structural issues.
- Concrete color variation: Uneven coloring could signal moisture problems or inconsistent mix.
- Spalling size and location: Measure and note where spalling occurs. It helps target repairs.
- Garage door operation: Check if the door binds, sticks, or operates poorly. This can indicate threshold damage.
- Adjacent areas: Inspect nearby concrete for signs of spreading damage.
Quick rule: Take photos from different angles and distances to capture all details.
Assessing severity: surface vs structural
To decide if you need a simple patch or major repair, follow these steps:
First, tap the concrete. A dull sound indicates deeper damage. A hollow sound means it’s worse.
Next, check for movement. Gently push and pull on the damaged area. If it moves, you’ve got a structural issue.
Finally, look for cracks at corners or edges. These can signal structural problems needing professional attention.
When to call a professional
Some damage is beyond DIY repair. Here are red flags:
Evidence of movement: If the concrete shifts or wobbles, it’s time to call in help.
Large voids: Holes bigger than a quarter indicate serious damage that needs professional assessment.
Undermined reinforcement: Rust stains and crumbling concrete around rebar mean you need expert eyes.
Drainage-related undermining: Water pooling or eroding soil around the threshold could signal major structural issues.
Tools and Materials Checklist
Prepare a practical set of hand tools, a grinder or chisel, and basic PPE like eye protection, gloves, and a respirator if dust is present. Have a trowel, margin trowel, and a level for shaping the edge. Include a bucket, mixing paddle, and a suitable bonding agent as needed.
List the repair materials and reinforcements you might use, such as patch mortars, bonding primers, polymer additives, and rebar or mesh if required. Always check product datasheets and local code or permit requirements before selecting components.
Essential tools and PPE
Before you start, make sure you have all the necessary tools and personal protective equipment (PPE) to ensure a safe and efficient job.
- Safety glasses: Protect your eyes from debris. Don’t skip – risk eye injury.
- Work gloves: Prevent hand cuts and abrasions. Check for grip and dexterity.
- Ear protection: Reduce noise exposure from power tools. Use when using grinder or other loud tools.
- Dust mask: Protect your lungs from concrete dust. Essential when chipping or grinding.
- Hard hat: Protect against falling debris. Wear when working under garage door.
- Chisel and hammer: For removing damaged concrete. Check for sharp edges, proper size.
- Grinder with diamond blade: For cutting and smoothing concrete. Ensure it’s in good condition, has the right blade.
- Trowels (hand and square): For applying and finishing new concrete. Check for straight edges, no bends.
- Measuring tape: To ensure accurate cuts and measurements. Check for flexibility, easy reading.
- Level: To ensure repairs are even and smooth. Use a 2′ or 4′ level for best results.
Quick rule: Always wear PPE when using power tools or handling concrete to prevent injuries.
Repair materials and bonding agents
Choose the right repair materials and bonding agents for a strong, lasting fix.
- Patching mortar: For filling gaps and holes. Check compatibility with existing concrete, follow manufacturer’s instructions.
- Polymer-modified mixes: For increased strength and flexibility. Ensure it matches your climate’s freeze-thaw needs.
- Bonding primer: To improve adhesion of new materials. Check for proper surface preparation, application method.
- Epoxy injections: For structural repairs. Verify they’re suitable for your repair size and type.
- Concrete sealer: To protect repaired area from water and de-icing salts. Choose one with good penetration and durability.
- Fiber reinforcement: To add strength and reduce cracking. Check for proper mix ratio, installation method.
- Expansion joints: To control cracking in new concrete. Ensure they’re compatible with your repair material.
Quick rule: Always follow manufacturer’s instructions to ensure materials work as expected.
Material specs and standards explained
Understand the key material properties and check local codes for acceptable values.
- Bond strength: Ensures new concrete adheres to old. Check datasheets, ASTM C882 standard.
- Freeze-thaw resistance: Crucial in cold climates. Check ASTM C666 for relevant values.
- Recommended application thickness: Affects strength and durability. Follow manufacturer’s guidelines, local codes (e.g., IBC, UBC).
- Curing time: Allows concrete to gain full strength. Check datasheets, follow recommended procedures.
- Compressive strength: Measures concrete’s resistance to compression. Check ASTM C39 for testing methods.
- Flexural strength: Measures concrete’s resistance to bending. Check ASTM C78 for testing methods.
- Shrinkage: Affects cracking potential. Check ASTM C157 for relevant values.
Quick rule: Always consult local codes and manufacturer datasheets to ensure materials meet required standards.
Preparing the Threshold for Repair
Remove loose and flaky material with careful chiseling or grinding. Clean the surface thoroughly to expose sound concrete and remove dust. Address drainage and subgrade issues before applying new material.
Control dust by misting lightly and using containment if indoors. Protect surrounding surfaces and keep a clear work zone. Validate that the base is dry and stable before proceeding with bonding and patching.
Removing loose concrete and cleaning the area
Start by removing any loose chunks of concrete from the threshold. Use a chipping hammer or a grinder with a diamond blade to carefully chip away at the spalled areas.
Be cautious not to damage the reinforcement bars while doing this. If you hit one, back off and use a smaller tool like an angle grinder with a wire brush attachment to clean it up.
Once all loose material is removed, use a wire brush or a pressure washer to clean the profile. This will ensure that the new repair material has a sound substrate to bond with.
Surface profiling and priming for bond
After cleaning, create a mechanical profile on the surface. This can be done using a diamond blade or a surface grinder to roughen up the concrete. This will increase the surface area and provide better adhesion for the repair mortar.
Next, apply a bonding agent or primer to the prepared surface. These products help to create a strong chemical bond between the old and new concrete. Follow the manufacturer’s instructions for application and drying times.
Remember, proper profiling and priming is crucial for a successful repair. Don’t skip these steps thinking you’ll save time or money – it will only lead to future failures.
Handling corroded embedded metal or undermined substrate
If you find that the reinforcement bars are corroded, they’ll need to be treated or replaced. For small areas of corrosion, use a wire brush to clean the bar and apply a rust inhibitor. For larger areas, the bar may need to be cut out and replaced with new rebar.
If the soil beneath the threshold is undermined or there are voids, these must be addressed before proceeding with the repair. Compact the soil if necessary, and fill any voids with a suitable material like flowable fill or foam grout.
Remember, addressing these issues is vital for the longevity of your repair. Ignoring them will only lead to further damage and costly repairs down the line.
Step-by-Step Methods for Rebuilding the Threshold Edge
Choose a method based on damage: quick patches for minor spalling, edge rebuild with formwork for larger damage, or overlays for durability. Plan sequencing from edge repair to finish coating. Maintain clean edges to ensure a good bond.
Follow cure and protection guidelines from the material you select. If you use formwork, ensure the frame is square and secure before pouring. Allow the repair to set per the manufacturer’s instructions and keep traffic away during cure.
Step-by-Step Process
This section guides you through rebuilding your garage door threshold edge, from prep to finish.
- Inspect and prepare the area: Remove loose concrete, clean the surface, and prime for bonding. Safety first: Wear gloves, goggles, and a dust mask.
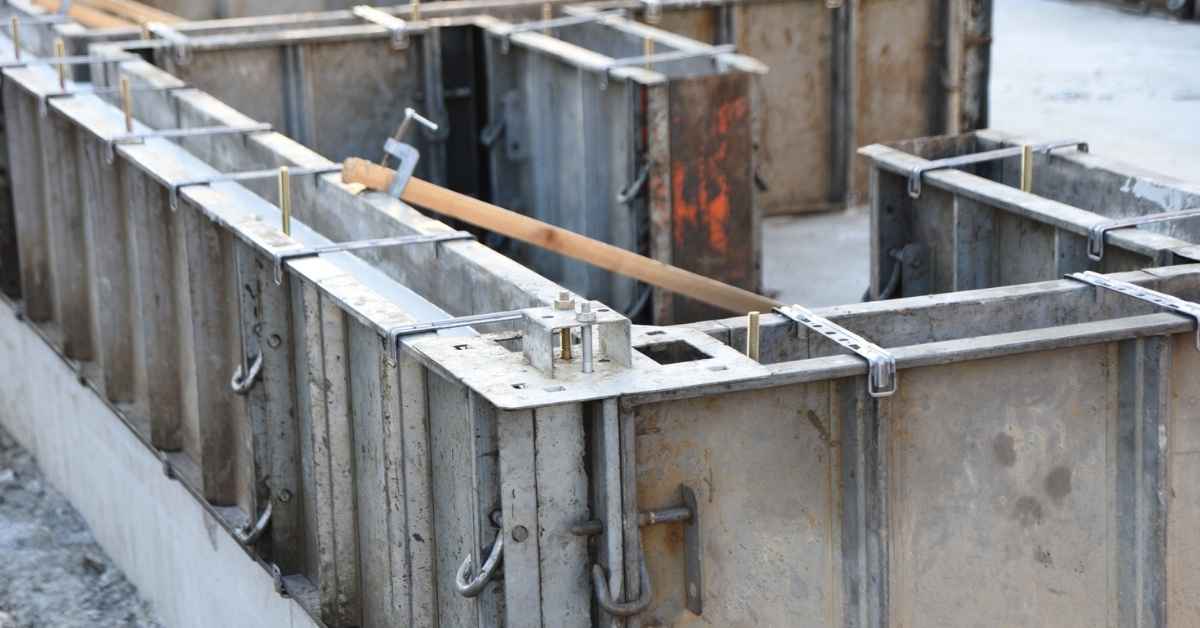
- Measure and cut formwork: Create forms that match your desired edge profile. Use 2x4s or plywood, securing them with screws or nails.
- Reinforce if needed: For larger repairs, add fiber reinforcement to strengthen the new concrete.
- Mix and place concrete: Follow manufacturer’s instructions for mixing. Pour into forms, tamping down to remove air bubbles. Level off with a straight edge.
- Cure properly: Cover the repair with plastic sheeting, keeping it moist for at least 7 days. Check daily for signs of curing progress.
Patch and resurfacing for shallow spalls
For minor damage, patching or resurfacing can restore your threshold’s edge. Use a trowel-applied repair material.
First, clean and prime the area. Then, apply the repair material with a trowel, shaping it to match the existing edge profile. Smooth out any air bubbles or voids.
Let it cure according to the manufacturer’s instructions. Once cured, use a concrete sealer to protect your patch.
Rebuilding the edge with forms and cast repairs
For larger chips or deeper spalls, a cast repair using forms is necessary. Here’s how:
First, prepare the area: Remove loose concrete, clean, and prime. Then, create formwork that matches your desired edge profile.
If needed, add fiber reinforcement to strengthen the new concrete. Mix and place concrete into forms, tamping down to remove air bubbles. Level off with a straight edge. Allow it to cure properly, keeping it moist for at least 7 days.
Overlays and bonded toppings
For extensive damage or when you want a new look, consider an overlay or bonded topping. This involves applying a thin layer of new concrete over the existing edge.
First, prepare the surface: Remove loose material, clean, prime, and profile for better bonding. Then, mix your overlay or topping material according to instructions.
Apply the material with a trowel, smoothing it out to match the existing edge profile. Let it cure properly, following manufacturer’s guidelines. Seal once cured.
Reinforcement, Geometry, and Durability Upgrades
Consider reinforcement options that resist cracking and moisture intrusion, such as corrosion-resistant mesh or bars if appropriate for the project. Review geometry changes that help shed water away from the threshold. Small design tweaks can extend service life and reduce future maintenance.
Consult local codes or a professional for reinforcement requirements and allowable materials. Ensure any added reinforcement is compatible with the repair system you plan to use. Prioritize durable finishes that resist wear and freezing cycles.
Edge Reinforcement Options
When it comes to reinforcing your concrete threshold, you’ve got a few options. Each has its own strengths and best use cases.
Fiber-modified mortars are a popular choice for DIYers. They’re easy to apply and can help prevent cracking. But they won’t give you the same strength as steel reinforcement.
For heavier duty repairs, consider discrete steel. It’s stronger but more labor-intensive to install. You’ll need to embed it in the concrete during pouring or use a special anchor system for retrofitting.
The best option for longevity is corrosion-resistant bars, like epoxy-coated rebar. They’re pricier, but they’ll last longer, especially in areas with deicing salts. Always check local codes before choosing your reinforcement.
Slope, Drainage, and Threshold Geometry Fixes
The way your threshold is shaped can make a big difference in how long it lasts. Here are some simple changes you can make.
First, slope the threshold. A slight slope away from the garage door will help water drain off instead of pooling at the edge. Aim for about a 1/4 inch drop over every foot.
Next, add proper drainage. This could be as simple as a small channel or as complex as an integrated drainage system. The key is to move water away from the threshold quickly.
Lastly, consider threshold geometry. Rounded edges and corners can help reduce impact damage and make it harder for water to collect. Sharp angles and flat surfaces are more prone to spalling over time.
Sealers, Coatings, and Protective Finishes
After reinforcing and adjusting your threshold’s geometry, it’s time to protect it. Sealers and coatings can help keep water and salts out.
For sealers, look for ones that are specifically designed for concrete and can resist deicing salts. Apply them according to the manufacturer’s instructions, usually once a year or every other year depending on exposure.
For coatings, consider epoxy or polyurethane-based options. They provide more protection but can be harder to apply. Reapplication intervals vary, so follow the manufacturer’s guidelines.
Remember, no sealer or coating will last forever. Inspect your threshold regularly and reapply as needed to keep it protected.
Maintenance Plan and Prevention Best Practices
Set a simple, repeatable maintenance routine that fits your climate and use. Check the threshold seasonally for cracking, spalling, and drainage issues. Address issues early to avoid bigger repairs later.
Use low-cost habits to reduce damage, such as keeping water away from the edge and clearing debris regularly. Document observations so you can track changes over time and plan timely interventions.
Routine inspections and visual checkpoints
Inspect your garage door threshold regularly to catch issues early. Here’s a simple checklist:
- Cracks: Look for hairline cracks, which can grow quickly if ignored.
- Spalling: Check for flaking or chipping concrete, especially around the edges.
- Water pooling: Ensure water isn’t sitting on the threshold as it can cause damage over time.
- Metal reinforcement: Inspect any visible metal for signs of corrosion.
- Slope: Verify the threshold is still sloped away from the door to facilitate drainage.
- Sealer: Check if the sealer is intact and hasn’t worn off in places.
- Door alignment: Ensure the door sits properly on the threshold, not rubbing or misaligned.
- Document findings: Keep a record of your inspections and any repairs made.
Quick rule: Inspect your threshold at least twice a year – once before winter sets in and again after spring thaw.
Winter care and deicing guidance
Protect your concrete from harsh winter conditions:
Use pet-friendly deicers like calcium chloride or potassium chloride instead of rock salt, which can damage concrete.
Minimize freeze-thaw cycles by keeping the threshold clear of snow and ice. Use a shovel with a plastic edge to avoid chipping the concrete.
Apply sand for traction if necessary, but avoid using it as a primary deicer as it can hold moisture against the concrete, leading to damage.
When and how to refresh repairs
Regularly check your repaired threshold for signs that touch-ups or resealing are needed:
Look for small cracks around the repair area, which may indicate movement or further damage.
Check if the sealer has worn off. If so, apply a new coat to protect the concrete from moisture and deicing chemicals.
If you notice any signs of deterioration or your threshold starts to look worn, it’s time for refresher repairs. Follow the same steps as before, but on a smaller scale.
Cost Considerations, DIY Vs Professional, and Troubleshooting
Outline factors that influence cost, like damage extent, materials, and whether formwork is needed. Weigh the time and skill required against hiring a pro for larger repairs. Consider getting multiple quotes for bigger edge rebuilds.
Identify common repair failures to watch for, such as poor bonding, improper curing, or inadequate preparation. Verify quotes against your project scope and check references or past work. Use manufacturer instructions as a baseline for acceptable results.
Factors affecting cost and quotes
The price of your concrete repair depends on several factors. First, the extent of damage plays a big role – minor spalls will be cheaper to fix than large ones.
Formwork or reinforcement might be needed if you’re rebuilding the edge. This adds to the cost, as does any access issues that make the job harder to reach.
Local labor rates also impact the quote. Ask contractors about these factors upfront to understand their pricing better.
DIY readiness and time expectations
Not all repairs are created equal when it comes to DIY. Simple patch jobs can be done in a weekend, but rebuilding edges with forms might take longer.
You’ll need basic concrete skills for most DIY repairs. For complex rebuilds, expect a learning curve and more time commitment. Be honest about your skill level and the time you can dedicate.
Remember, rushing through a repair can lead to mistakes. Plan your time accordingly.
Common mistakes and how to troubleshoot failures
Avoiding common pitfalls is key to successful repairs. Here are some frequent causes of failed repairs and how to troubleshoot them:
- Poor preparation: Inadequate cleaning or priming leads to weak bond. Solution: Thoroughly clean and prime the surface before applying new concrete.
- Wrong material: Using the wrong mix design can cause early failure. Solution: Consult with a pro or use pre-bagged mixes designed for repairs.
- Insufficient cure: Concrete needs time to gain strength. Rushing it can lead to weak spots. Solution: Keep the repaired area moist and protected from traffic until fully cured (usually 7 days).
- Improper finishing: Rough or improperly finished surfaces can trap water, leading to future spalling. Solution: Ensure a smooth, properly sloped finish.
If you notice signs of failure – like cracking or crumbling – inspect the repair site for any of these issues. Address them promptly to prevent further damage.
Conclusion
Rebuilding the edge of a spalled garage threshold is a practical fix you can do with care, and doing it right protects people, pets, and the looks of your space. A solid rebuild stops water intrusion, reduces future damage, and keeps the door working smoothly.
First, assess and plan: inspect the extent of damage, gather the approved tools and materials, clean and roughen the surface, apply repair materials in the correct order, cure and seal correctly, and recheck the edge geometry after it sets. Work in small, deliberate steps and test fit and movement before finishing. Always prioritize a safe, properly cured repair and avoid rushing the sequence.
Common mistakes to avoid include skipping surface preparation, using the wrong mix or wrong water-to-mix ratio, and ignoring curing time or temperature. Keep a clear work zone, wear eye protection and gloves, shut power to nearby outlets if you’re near the door electrics, and work with the door supported and stable. If you see large cracks, shifting slabs, or the door frame pulling out of plumb, pause and get a pro involved—quickly addressing those signs saves money and avoids costly damage. With a deliberate plan and steady steps, you can restore a solid, durable threshold edge and get back to normal use with confidence.
FAQ
What should I look for to tell if spalling is widening at the threshold after I start repairs?
Watch for fresh cracks opening across the edge and new chunks flaking off. If you see the edge changing shape or moisture coming through, pause and reassess. Take photos and compare week to week to confirm progress.
Can I reuse the old threshold material after I clean it up?
Usually not. Spalled concrete often has unseen cracks and poor bonding. Follow the manufacturer’s guidance on removing and replacing material to restore a solid edge.
What fasteners or reinforcement should I use to protect the rebuilt edge?
Use whatever the repair kit or concrete mix guide recommends, and anchor into solid surface where possible. If you’re unsure, ask the product label or manufacturer for acceptable anchors and spacing. Don’t improvise with random screws or weak fasteners.
How can I tell if the repair is strong enough to withstand door activity and weather?
Check that the new edge is fully cured and bonded, with no hollow spots when you tap it gently. If the edge still sounds hollow or shows movement, delay full use and re-check the prep and mix. For safety, follow the curing and backfill guidance on the product instructions.