
Introduction
Shot blasting alternatives for DIY garage prep are practical mechanical or chemical methods you can do without industrial equipment; think grinders, diamond pads, acid etch, or degreasing depending on what the slab needs. In plain terms: grinding or diamond-sanding removes coatings and profile, chemicals etch and clean, and heavy degreasers strip oil—check product labels and local rules before use.
This guide speaks like a hands-on foreman: straightforward steps, real tools, and what to expect on the floor instead of technical theory. If you’re unsure about a product, surface condition, or disposal rules, read the manufacturer’s instructions and local regulations or consult a pro.
Key takeaways
- Evaluate surface type, corrosion stage, and target finish before choosing methods.
- Mechanical abrasion like hand tools and orbitals can prep small areas safely.
- Abrasive blasting substitutes include dry brushing, sanding pads, and rust converters.
- Chemical heat and solvent methods require ventilation, PPE, and manufacturer guidelines.
- Match tool choice to garage space constraints to minimize dust and noise.
- Create a step-by-step workflow plan for each scenario to reduce rework.
Table of Contents
- Introduction
- Key takeaways
- Why Consider Alternatives to Shot Blasting
- Surface Types, Corrosion Stages, and Prep Goals
- Mechanical Abrasion Methods That Work in a Garage
- Abrasive Blasting Substitutes Suitable for Garage Use
- Chemical and Thermal Removal Techniques
- Tools and Materials Checklist for a Garage-Ready Setup
- Step-by-Step Garage Workflows for Common Scenarios
- Comparing Outcomes: Cost, Time, Finish Quality, and Pitfalls
- Conclusion
- FAQ
Why Consider Alternatives to Shot Blasting
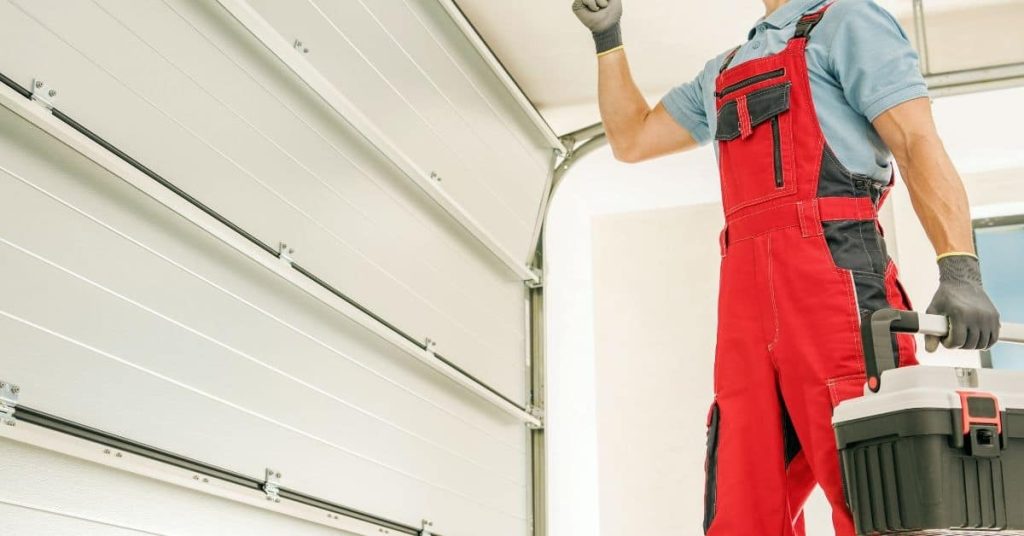
Shot blasting equipment is sized and specified for industrial work; that often makes it bulky, expensive to rent, and awkward to use in a home garage. Noise, dust containment, and the need for blast booths or large extraction systems can turn a small project into a major setup.
This article’s goal is to present practical, garage-friendly methods that produce acceptable surfaces for common finishes like paint and powder coat. I’ll focus on approaches you can safely and effectively use in a typical driveway or attached garage while noting where to check product labels and manufacturer instructions.
When shot blasting is not feasible for DIY
Shot blasting might seem like the best way to prep your garage floor, but it’s not always practical. Here are some scenarios where you should consider alternatives:
Space constraints: Shot blasting equipment needs room to maneuver. If your garage is small or cluttered, it might be tough to use.
Budget concerns: Renting shot blasting equipment can be expensive. Plus, you’ll need to factor in the cost of media and disposal.
Access issues: If your garage floor has obstacles like pipes or wires running through it, shot blasting could damage them. Alternatives are safer in these cases.
Regulatory limits: Some areas have noise restrictions or rules about dust control. Shot blasting might violate these, so check local regulations first.
Realistic expectations vs. professional blasting
Before you start, understand that DIY alternatives won’t match the results of commercial shot blasting. Here’s what to expect:
Surface profile: Shot blasting creates a uniform, aggressive profile that promotes excellent adhesion. DIY methods might leave some areas smoother or rougher than others.
Cleanliness: Professionals use high-pressure air and vacuum systems to remove dust and contaminants. DIY methods may not get your surface as clean, leading to potential issues with your final finish.
Prep time: Shot blasting is fast. DIY alternatives can take longer, especially if you’re covering a large area or dealing with tough stains.
Surface Types, Corrosion Stages, and Prep Goals
Different metals and corrosion conditions demand different prep: mild steel, stainless, and aluminum don’t respond the same to abrasion or chemicals. Likewise, light surface rust, loose scaling, and deep pitting all require different removal intensity and may need different final profiles for adhesion.
Match your method to the coating you plan to apply and the metal’s condition—some coatings tolerate a light feathered surface, others need bare metal with a defined anchor profile. When in doubt, check the coating manufacturer’s surface prep recommendations or a product data sheet before proceeding.
Identifying metal and assessing rust/damage
Before you start prepping your surface, you need to know what you’re dealing with. Here’s how:
Metal Type: A simple magnet test will help. If it sticks, it’s steel. If not, it’s likely aluminum or stainless.
Rust/Damage Assessment: Inspect visually for rust, pits, or other damage. Light surface rust can be cleaned and primed over. Heavy pitting may need repair or full strip.
Paint and coating removal vs. profile creation
Removing old coatings and creating a surface profile are two different goals, requiring different methods:
Coating Removal: Your aim is to get rid of old paint or rust. Methods like chemical stripping or heat guns can do this.
Profile Creation: You want to roughen the surface for better adhesion. Abrasive blasting, grinding, or even wire brushing can create a profile.
Material specs and standards explained
Choosing the right prep materials matters. Here are some basics:
- Blasting Abrasives: Silica sand is cheap but messy. Aluminum oxide or steel shot/girt are better, lasting longer and causing less dust.
- Primers: Zinc-rich primers protect steel from rust. Epoxy primers work well on all metals.
- Blasting Equipment: Look for a rating of at least 10-15 psi. Lower pressure may not remove rust effectively.
- Safety Gear: Always use approved safety glasses, gloves, and respiratory protection.
- Avoid: Using the wrong abrasive can cause damage. Steel shot on aluminum can leave pits. Sandblasting with dry ice can stain.
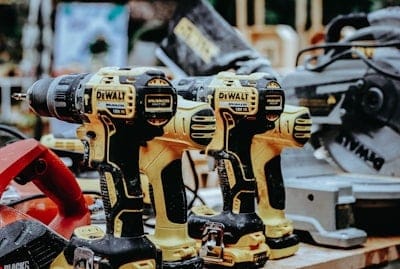
Mechanical Abrasion Methods That Work in a Garage
Hand and powered abrasion—flap discs on angle grinders, random-orbit sanders, and wire brush wheels—are controllable and adaptable to tight spaces and edges. These tools let you scale aggression by grit/disc type and speed, but they can gouge thin metal or work-harden stainless if used incorrectly.
Choose tools and abrasives to suit the task: softer pads and lower grit for light cleaning, coarser discs for heavy rust, and stainless-specific brushes for stainless steel to avoid contamination. Check manufacturer instructions for tool RPM limits and recommended abrasive sizes to avoid damage and injury.
Angle grinder with flap discs and wire wheels
The angle grinder is a versatile tool for garage prep work. It’s great for removing rust, paint, and mill scale.
Use flap discs for aggressive material removal. Start with coarse grits (e.g., 24 or 36) to tackle heavy rust and corrosion. Then finish with finer grits (e.g., 60 or 80) for a smoother surface.
Wire wheels are ideal for light touch-up and deburring. Be cautious not to gouge the metal. Keep the RPM around 10,000 – 12,000 to avoid overheating. Always wear safety gear, including gloves, goggles, and ear protection.
Random orbital sanders and detail sanders
For lighter prep work or finishing touches, random orbital sanders are your friend. They’re perfect for progressive sanding, starting with coarse grits (e.g., 60) to remove light rust and paint, then moving up to finer grits (e.g., 120 or 220) for a smooth finish.
Detail sanders are great for tight spaces and intricate areas. They’re less aggressive than angle grinders but more maneuverable. Use them with the same grit progression as orbital sanders.
Both tools work best on light to moderate rust. For heavier corrosion, consider starting with an angle grinder or wire brushes first.
Hand tools and manual abrasion (scrapers, sanding blocks)
Manual prep methods are best for small areas, intricate details, or when you need precise control. They’re also great for combining with power tools to ensure a thorough job.
- Scrapers: Ideal for removing loose paint and rust. Use a sharp edge to scrape off material, then follow up with sanding or wire brushing.
- Sanding blocks: Great for even pressure when sanding by hand. They help prevent gouging and ensure consistent results. Use with grits ranging from 60 to 120, depending on the prep goal.
- Wire brushes: Handheld wire brushes are useful for light touch-up or when you need to reach tight spaces. They’re less aggressive than power tools but still effective at removing rust and debris.
- Needle scalers: These tools have sharp points designed to remove heavy corrosion. They’re useful for tackling tough spots before sanding or painting.
- Wire cup brushes (rentable): A bit more aggressive than handheld wire brushes, these are great for removing rust and paint from large areas. Rent them if you don’t have one; they’re around $20-$30 per day.
Abrasive Blasting Substitutes Suitable for Garage Use
Lower-dust or lower-pressure media like baking soda, crushed walnut shells, and glass bead alternatives can be used in small blasting cabinets or siphon-style guns to reduce cleanup and airborne fines. These media have different cutting actions and leave different surface profiles, so pick one that matches your finish needs.
Containment, ventilation, and wet methods help control dust; always confirm local rules on media disposal and whether certain media are restricted in your area. Follow product labels and safety data sheets for respiratory protection, containment, and cleanup requirements.
Low-impact media options and pros/cons
When shot blasting isn’t feasible, consider these lower-impact alternatives for your garage projects.
Soda Blasting: Uses sodium bicarbonate. It’s soft, leaves no metal embedment, and cleans well but can be messy and may not profile as deeply as other media.
Crushed Walnut Shells: A natural, biodegradable option. They’re gentle on surfaces, create a fine dust, and are good for removing paint and light rust. But they can be expensive and don’t last as long as other media.
Glass Beads: Small, hard beads that create a smooth profile. They’re reusable but can embed in soft metals like aluminum. Not suitable for lead-based paints due to potential lead exposure.
Wet abrasive or pressure-assisted methods
Wet blasting and pressure washer attachments can help reduce dust in your garage. Here’s how:
Wet Blasting: Uses water to suppress dust. It’s great for cleaning and reduces the risk of fire when working with combustible materials. But it increases runoff, so containment is crucial.
Pressure washers can also be used with abrasive attachments. These spin a brush or use water pressure to propel an abrasive material. They’re easy to set up but may not provide as aggressive a clean as dedicated blasting equipment.
Remember, while these methods reduce dust, they increase water usage and runoff management needs.
Containment, filtration, and neighbor considerations
Keeping your blasting contained and minimizing disruption to neighbors is crucial. Here’s how:
Temporary Enclosures: Build a simple tent or enclosure using plastic sheeting to contain dust. This helps keep your workspace clean and reduces dust migration.
Filtration Systems: Consider using a dust collector or filtration system to capture spent media and reduce airborne particles. Some DIY options use shop vacuums with HEPA filters.
Neighbor Considerations: Be mindful of your neighbors. Blast during reasonable hours, keep noise levels down, and consider informing them beforehand about any potential disruption. Always follow local regulations regarding blasting operations.
Chemical and Thermal Removal Techniques
Paint strippers (caustic, solvent, or gel), rust converters, and heat guns offer non-abrasive ways to remove coatings or stabilize rust when mechanical methods aren’t suitable. Each method leaves residues or altered surfaces that affect adhesion, so thorough rinsing, neutralizing, or light sanding may be needed afterward.
Ventilation and PPE are critical with chemicals and heat; check label directions for dwell times, safe use, and disposal instructions. When disposal or fume control is unclear, consult the product’s safety data sheet or local hazardous-waste guidance.
Choosing and using paint strippers safely
Paint strippers come in three main types: caustic, solvent, and gel. Each has its own dwell time – caustic (15-30 min), solvent (30-60 min), and gel (up to 24 hrs). Neutralize with a suitable agent, then clean thoroughly.
Safety first: Wear gloves, goggles, and a respirator. Ventilate the area. Dispose of residues responsibly.
Heat guns and careful thermal stripping
Heat guns soften paint for easy scraping. They’re great for thin coats but risky on thin metal. Keep the gun moving, maintain a safe distance (1-2 inches), and use low settings.
Beware: Warping or burning can occur if not used carefully. Never leave the heat gun in one spot too long.
Rust converters and primers for marginal surfaces
Rust converters are a quick fix, turning rust into a stable compound. They’re best used on light rust or as a primer before painting. Prep involves removing loose rust and cleaning the surface.
Compatibility: Rust converters can affect adhesion of some coatings. Always test first. They’re not a substitute for proper surface prep but can extend its life.
Tools and Materials Checklist for a Garage-Ready Setup
Prepare a compact kit that covers the methods you’ll use: grinders and sanders with appropriate discs, wire brushes and flap wheels, small blasting cabinet or siphon gun and chosen media, chemical strippers or rust converters, and a heat gun if needed. Include containment items like drop cloths, tarps, a shop vacuum with HEPA-rated filter, and basic hand tools for disassembly.
Don’t forget PPE—respirator cartridges rated for the hazards, eye and face protection, gloves resistant to solvents, and hearing protection—and consumables such as masking tape, solvent rags, and waste containers. For tool and accessory selection, check the tool’s rated RPM, abrasive compatibility, and the media manufacturer’s guidance for equipment compatibility.
Essential power tools and attachments
Before you start, ensure you have the right tools for the job. This checklist helps you prepare.
- Angle grinder: For heavy-duty work like removing old paint or rust. Look for one with a variable speed trigger to control disc rotation.
- Flap discs: Ideal for aggressive material removal. Choose ones designed for your angle grinder’s size and rated power.
- Wire wheels: Great for light deburring and cleaning. Ensure they fit your angle grinder and have the right wire gauge for your needs.
- Random orbital sander: For smoothing surfaces and fine sanding. Opt for one with a dust collection bag or port to keep your workspace clean.
- Detail sander: Perfect for tight spaces and intricate areas. A smaller, lighter model is easier to control.
- Sanding blocks: For even pressure when using hand sanding. Choose ones that fit your sandpaper size.
- Scrapers: Useful for removing loose paint or rust before power tools. Get a set with various blade sizes and shapes.
- Extension cords: Ensure you have long enough cords to reach all areas safely, without tripping hazards.
Quick rule: Always check your tools’ condition and compatibility before starting any job.
PPE, ventilation, and waste handling
Safety first! Here’s what you need to protect yourself and your workspace.
- Respirator: A half-face or full-face respirator with P100 filters protects against dust and fumes. Ensure it fits properly.
- Eye protection: Safety glasses or goggles shield your eyes from debris and sparks.
- Ear protection: Earplugs or earmuffs protect your hearing from power tool noise.
- Gloves: Work gloves protect your hands from cuts, scrapes, and chemicals. Choose ones that fit well but don’t restrict movement.
- Ventilation: Open garage doors or use a fan to ventilate the area, keeping dust levels down. For chemical stripping, consider using a fume hood if available.
- Waste segregation: Separate used media (like sanding discs) and chemical residues for proper disposal. Never mix them together.
- Trash bags: Have trash bags ready to collect waste as you go, keeping your workspace clean.
- Dust collection or vacuum: Use a shop vacuum or dust collector to keep your workspace and lungs clear of dust.
Quick rule: Always prioritize safety. If you’re unsure about any aspect, consult a professional or the product’s instructions.
Step-by-Step Garage Workflows for Common Scenarios
Light prep for repainting: clean with degreaser, remove loose paint and rust with hand tools or a random-orbit sander, feather edges, apply rust inhibitor or etching primer, then final wipe and paint. Include checkpoints for surface cleanliness and adhesion, and allow recommended flash times—consult product instructions for exact intervals.
Heavy prep for powder coat or bare-metal finishes: disassemble parts as needed, use aggressive mechanical abrasion or appropriate blasting substitute to remove coatings and profile the metal, then follow with solvent wipe and immediate transfer to coating to avoid flash rust. Emphasize ventilation, PPE checks, and inspecting the surface for pitting or cracks before finishing.
Step-by-Step Process
This section outlines a clear, numbered sequence of practical steps for common garage workflows. It starts with preparation and safety checks, moves on to the main work, and finishes with cleanup or final checks.
- Preparation: Gather tools, materials, and PPE. Check your workspace is well-ventilated.
- Safety Checks: Inspect surfaces for sharp edges or hazards. Ensure all power tools are in good working order.
- Main Work: Follow the specific workflow for your project (light prep for repainting or heavy prep for powder coat/bare-metal finishes).
- Cleanup: Dispose of waste responsibly. Clean and store tools properly.
- Final Checks: Inspect your work. Make sure it meets your standards before moving on to the next stage.
Light surface rust and repaint workflow
For light rust and repainting, follow this sequence: clean, degrease, abrasive scuff, feather edges, check primer/paint compatibility, and ensure visual acceptance.
Start by removing any loose rust with a wire brush or scraper. Then, use a degreaser to clean the surface. Lightly abrade the surface using sandpaper or a sanding block to create a ‘scuff’ for better paint adhesion. Feather out any sharp edges to prevent visible lines in your final coat.
Before painting, ensure your primer and paint are compatible. Finally, visually inspect the surface to confirm it’s ready for painting.
Heavy rust or full-strip workflow
For heavy rust or full-strip projects, follow this sequence: mechanical/chemical removal, neutralize/flush, fill/repair pits, final profile creation, and apply recommended primers for corrosion protection.
Use mechanical methods like wire brushing or chemical strippers to remove heavy rust. Neutralize any remaining chemicals with water and flush the surface clean. Fill and repair any deep pits using a suitable filler. Create a final surface profile using sandpaper or a sanding block, then apply a recommended primer for corrosion protection.
Note: If you’re unsure about any step, consult a professional to avoid damaging the surface.
Comparing Outcomes: Cost, Time, Finish Quality, and Pitfalls
Each alternative trades off cost, time, and achievable profile: manual abrasion is low-cost but labor-intensive; small blasting setups increase speed and consistency but add setup effort; chemicals reduce dust but introduce disposal and residue concerns. Consider common failure modes like insufficient profile, contamination, or overheating that affect adhesion and finish longevity.
Weigh the methods against your project priorities—time, finish level, and acceptable mess—and document your process with photos and notes for future reference or warranty claims. If uncertain about a product’s suitability, consult the manufacturer’s data sheet or technical support for guidance before committing.
Matching methods to final coatings (paint, powder, plating)
When choosing a surface prep method, consider your final coating. Here’s what works best:
Paint: Most paints require a minimum of 2-3 mils profile for good adhesion. Chemical stripping and light sanding are usually sufficient. Avoid heavy blasting as it may leave too deep a profile.
Powder coating: Powder coats need a clean, bare metal surface with a 1-2 mils profile. Heavy blasting or chemical stripping can provide this. Be sure to remove all residue and contaminants.
Plating: Plating processes require a clean, bare metal surface with no contaminants. Heavy blasting or chemical stripping are common methods. Ensure you remove all residue and follow proper cleaning procedures.
Common mistakes and troubleshooting guide
To avoid pitfalls, learn from these common errors:
- Insufficient profile: Inadequate surface prep can lead to poor adhesion. Always aim for the recommended profile for your final coating.
- Contamination: Dirt, grease, or other contaminants can ruin a good prep job. Ensure surfaces are clean before starting.
- Overheating: Using heat guns without proper ventilation can cause overheating and warping. Keep the area well-ventilated.
- Improper waste handling: Incorrect disposal of chemicals or blast media can harm the environment. Always follow local regulations for waste handling.
Document your project to learn from any mistakes made, and adjust future prep methods accordingly.
Conclusion
Keep the work safe and done right by choosing a method that suits your surface, the corrosion state, and the finish you want. The goal is a durable, clean base that won’t crack or peel once you seal or paint.
First, assess the surface type and corrosion stage, then pick a method that fits a garage workflow, verify your tools and consumables, run a small test on a hidden area, protect nearby parts, and follow a simple, repeatable sequence from prep to final check. If the test area looks good, scale up in clear, measured steps and recheck after each stage to avoid surprises.
Avoid common mistakes: skip proper PPE and ventilation, overdo abrasion or heat, or misuse chemicals not suited for the surface. Never rush a workflow—seal edges, protect surrounding metal or concrete, and always inspect the finish before moving to primers or coatings. If you’re unsure about the metal’s integrity, or you’re dealing with structural members, call a professional instead of pushing on alone; otherwise, stay disciplined, follow the steps, and you’ll finish with a safe, solid prep that pays off in durability and appearance.
FAQ
What garage-friendly method reliably removes rust and scale without a full blast setup?
Mechanical abrasion like a good wire wheel, flap disc, or abrasive pad on an angle grinder can remove surface rust and roughen the metal for coating. Work in short sessions and keep the tool moving to avoid gouging. Check the material’s reaction with your chosen method on a small area first.
How should I stage the prep to avoid creating a dusty mess or thin coatings?
Work in a well-ventilated area and use a mask or respirator for dust. Clean between steps with a stiff brush or vacuum and wipe with a compatible cleaner before priming. Follow the coating manufacturer’s prep instructions for cleanliness and dryness.
What should I expect in finish quality when skipping traditional shot blasting?
You’ll usually get a rougher surface than blasting, which helps coatings bite in. You may need an extra coat or a tougher primer to seal pitted areas. Always test a small spot and follow product guidance for recoat windows.
What are common mistakes that sabotage garage prep, and how can I avoid them?
Don’t rush the rust removal or skip cleaning between steps. Don’t use the wrong disc on soft metals or overheat parts. Always verify label instructions and local rules for the coatings you plan to apply.