

Introduction
Tackling paint removal from masonry can seem daunting, but with a clear timeline and understanding of the process, you’ll be well on your way to restoring your surfaces. This step-by-step guide focuses on the duration and sequence of using chemical strippers versus grinding methods, ensuring you stay organized and efficient throughout the project.
Before diving in, remember that every masonry surface is unique, so always test a small area first to avoid costly mistakes. Now, let’s break down your paint removal journey into manageable stages.
For the full guide, see Removing Paint From Masonry: Chemical Strippers vs Grinding and How to Avoid Scarring.
Understanding the Timeline: Chemical Strippers vs Grinding
The timeline for removing paint from masonry varies depending on whether you choose chemical strippers or mechanical grinding. Both methods require careful planning and preparation, but they differ in application time, waiting periods, and cleanup.
- Chemical Stripper Timeline:
- Preparation: 30-60 minutes
- Application: 15-30 minutes per section
- Dwell Time: 20-45 minutes to several hours, depending on the stripper and paint type
- Scraping: 15-30 minutes per section
- Cleanup: 30-60 minutes
- Grinding Timeline:
- Preparation: 30-60 minutes
- Masking and Protection: 15-30 minutes
- Grinding: 15-45 minutes per section, depending on the abrasive and paint type
- Cleanup: 30-60 minutes
As you can see, both methods require a significant time investment. However, chemical strippers often involve longer waiting periods, while grinding may take less time but generates more dust.
Key takeaways
The preparation stage for both methods is crucial and affects the overall timeline. Ensure you have all necessary tools, materials, and safety gear ready before starting to minimize delays.
- Inspect substrate for loose paint and structural cracks before choosing removal method.
- Test patch on hidden area to verify no excessive substrate damage occurs.
- Chemical strippers require ventilation and PPE; follow label directions precisely.
- Grinding risks gouging or scorching masonry; use low pressure and watch heat.
- Test patches demonstrate compatibility and reveal scarring potential before full work.
- Document surface conditions and touched-up areas to guide repairs and repainting.
Table of Contents
- Introduction
- Key takeaways
- Overview: Why Remove Paint from Masonry?
- Chemical Strippers: Types, Pros and Cons
- Mechanical Methods: Grinding, Blasting, and Abrasive Techniques
- Test Patch Protocol: Plan, Perform, and Evaluate
- Preventing and Repairing Scarring and Substrate Damage
- Preparation, Tools, and Materials Checklist
- Finishing, Surface Prep, and Repainting Considerations
- Conclusion
- FAQ
Overview: Why Remove Paint from Masonry?
Paint is often stripped from masonry for appearance, to address paint failure or substrate deterioration, or to prepare the surface for a new coating system. Removing paint for these reasons affects long-term performance, so plan with the end use in mind.
Choosing chemical versus mechanical removal is a tradeoff between surface preservation and speed or completeness; the wrong choice can etch, scar, or weaken the masonry. Check product labels, manufacturer instructions, and local rules to confirm any method’s suitability for your specific masonry type before proceeding.
When to Strip Versus Repaint Over
Before you grab your paint scraper or chemical stripper, consider these factors:
Adhesion: If the existing paint is peeling or flaking, it’s best to remove it entirely. Repainting over loose paint will only lead to more problems down the line.
Paint Condition: If the paint is in good condition but you want a fresh look, you might be able to get away with painting over it. But remember, every new coat of paint reduces the surface’s ability to breathe, which can cause issues later on.
Historical Value: If your home has historic value, removing the old paint could uncover original features that you’d want to preserve. In this case, full removal might be worth it.
Moisture Issues: If there are signs of moisture problems, like efflorescence or mold, the paint needs to go. Moisture can cause serious damage to masonry and should be addressed immediately.
Common Masonry Substrates and Finish Types
The material of your masonry and the type of paint or finish it has can greatly affect how you remove the paint.
Brick: Brick is porous, which means it absorbs water. This can make chemical strippers less effective as they can soak in too deeply. A mechanical method might be better for brick.
Natural Stone: Natural stone varies greatly in porosity and hardness. Some stones may require a gentler touch to avoid damaging the surface. Always test a small area first with any removal method.
Concrete: Concrete is dense and smooth, making it easier to work with than porous surfaces. Both chemical strippers and mechanical methods can be effective on concrete.
Stucco: Stucco is similar to concrete in that it’s dense but can also have a textured surface. The texture can make mechanical removal more difficult, so a chemical stripper might be a better choice.
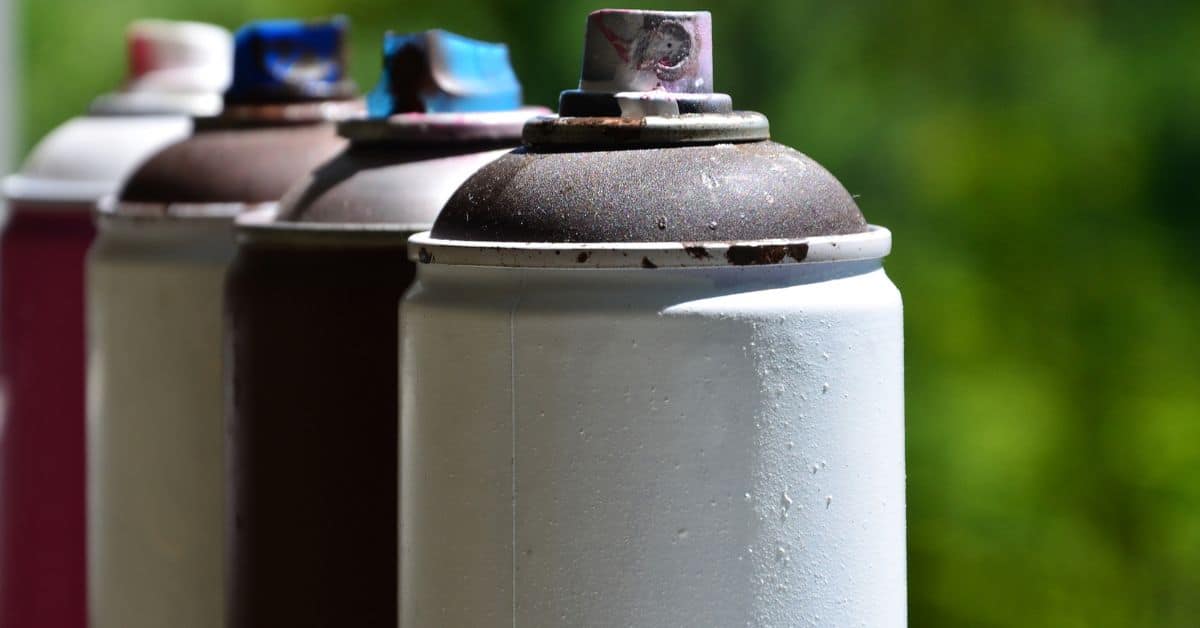
Chemical Strippers: Types, Pros and Cons
Chemical strippers fall into categories such as solvent-based, caustic, gel/paste, and biodegradable or pH-neutral formulations, each behaving differently against varied paint systems. Their effectiveness and required dwell times vary with paint chemistry and film thickness, so match the stripper chemistry to the paint and substrate.
Chemical options can reduce mechanical scarring but introduce concerns about runoff, neutralization, and cleanup; disposal and environmental controls matter. Read the product data sheet and label for application details, dwell times, and required PPE, and follow local disposal rules for spent material and wash water.
How chemical strippers work
Chemical strippers work by attacking the paint’s binder, breaking its molecular bonds. This softens and loosens the paint for easy removal.
The process involves three main mechanisms:
- Softening: The stripper penetrates the paint film, making it flexible and easier to remove.
- Saponification: In case of caustic strippers, they react with the paint’s oils, turning them into a soap-like substance that can be washed off.
- Dissolution: Some strippers dissolve the paint’s binder, breaking it down completely.
Penetration depth and multiple applications matter. A test patch helps gauge performance and ensures you’re using the stripper correctly.
Safety, PPE, and environmental regulations
Safety first: Always wear appropriate Personal Protective Equipment (PPE) when handling chemical strippers. This includes gloves, goggles, and protective clothing.
Contain runoff to prevent damage to the environment and your property. Use drop cloths or plastic sheets to catch drips and spills.
Be aware of fumes. Some strippers can emit harmful vapors, so ensure proper ventilation. Never use strippers in enclosed spaces without adequate airflow.
Check product labels for specific safety instructions and disposal requirements. Always follow local regulations regarding chemical waste disposal.
Mechanical Methods: Grinding, Blasting, and Abrasive Techniques
Mechanical methods include angle grinders with cup wheels, diamond or carbide tools, various abrasive blasting medias, and high-pressure washing or needle scalers for thick coatings. These methods tend to remove paint quickly and completely but concentrate energy on the surface.
Mechanical removal poses primary risks like surface scarring, loss of mortar, or profile changes that compromise future coatings or structural integrity. Verify tool and abrasive selection against the masonry type and use test patches to gauge damage potential before full-scale work.
Choosing the right abrasive and tool
The grit size of your abrasive media and the aggressiveness of your tool will dictate how fast you cut and how much damage you do to your surface.
Finer grits (like 20-40) remove material slower but leave a smoother finish. Coarser grits (60-100) are faster but can cause more damage. Always start with a test patch to see what works best for your surface and desired finish.
As for tools, aggressive ones like heavy-duty grinders or high-pressure blasters will cut fast but may also cause more damage. Softer tools like orbital sanders or low-pressure blasters are slower but gentler on the surface. Again, test first to see what works best.
Always follow manufacturer guidance for your specific tool and abrasive. They know their products best and can help you avoid mistakes. And remember, it’s better to go slow and get a good finish than to rush and damage your surface.
Techniques to minimize scarring when grinding
When grinding concrete, your goal is a smooth surface with minimal damage. Here’s how:
Light multiple passes. Don’t bear down too hard or make deep cuts. Light pressure, multiple passes is the way to go. Think of it like shaving – don’t press too hard or you’ll end up with nicks.
Consistent angle and motion. Keep your grinder at a consistent angle (around 15-30 degrees) and move it in steady, overlapping strokes. This helps prevent gouges and uneven profiles. Check your tool’s instructions for the ideal angle.
Avoid dwell time. Don’t let the disc spin in one spot too long. This can overheat the concrete and cause damage. Keep moving!
Consider using guides or depth control to maintain a consistent grind depth and prevent gouging. You can make your own guide using a straight edge and some clamps.
Test Patch Protocol: Plan, Perform, and Evaluate
Run controlled test patches that include at least one chemical and one mechanical method on a discreet area to compare effectiveness and substrate impact. Set up containment, PPE, and fall protection as needed, and document the exact steps, products, and settings used for each patch.
Allow adequate time to assess dwell times, mechanical settings, and any delayed effects such as efflorescence or mortar looseness. Use the test results to select the full-method approach and to develop cleanup, neutralization, and waste-handling plans.
How to Document and Score Results
Documenting your test patches is crucial for making an informed decision. Here’s what you should record:
Before and After Photos: Take photos of the test areas before and after each method. This helps visualize the results.
Removal Completeness: Note how much paint was removed. Was it 100%? Or are there stubborn spots?
Substrate Change, Texture, Time, and Cleanup Effort: Observe if the masonry surface has changed (e.g., softened, discolored). Measure the time taken for each method and note the cleanup effort required.
Decision Matrix: Choosing Chemical vs Mechanical
After testing, use this decision matrix to choose the best method for your project:
Substrate Sensitivity: If your masonry is delicate or has a sensitive finish, mechanical methods might cause damage. Choose chemical stripping.
Paint System and Environmental Constraints: For tough paints or environmental concerns (e.g., lead paint), chemical strippers might be better. But for quick results with no environmental worries, consider grinding.
Schedule, Cost, and Aesthetic Goals: If time is of the essence, mechanical methods are faster but more expensive. Chemical stripping takes longer but costs less. Consider your budget and desired finish.
Preventing and Repairing Scarring and Substrate Damage
Preventive measures include selecting lower-impact methods first, using the correct abrasive grade or stripper formulation, controlling tool speed and pressure, and keeping a consistent technique across the surface. Protect nearby features and stop as soon as the masonry shows signs of distress.
If scarring or mortar loss occurs, common repairs range from local repointing and grinding to re-profiling small areas; some cosmetic and structural repairs are DIY while others need a mason. When in doubt, consult product data sheets and consider a professional evaluation for structural or widespread damage.
Minor scarring repair techniques
After paint removal, minor scarring can happen. Here’s how to tackle it:
Filling and Color-Matching: Use a masonry filler that matches your substrate’s color. Apply with a putty knife, let dry, then sand smooth.
Mortar Patching/Tuckpointing: For deeper scratches, mix fresh mortar to match the existing joints. Apply with a pointing trowel, tooling it to mimic surrounding joints’ profile.
Surface Texturing: To blend repaired areas, use a stiff-bristle brush or wire brush to texture the surface, mimicking the surrounding masonry’s finish.
When to call a mason or restoration specialist
Know when you’re in over your head. Here are signs it’s time to call a pro:
Structural Mortar Loss: If paint removal reveals extensive mortar loss, exposing bricks or stones, stop and call a mason.
Significant Stone/Brick Loss: Large areas of missing material require specialized repair techniques. Don’t risk further damage; call a pro.
Work on Historic Fabric: If your masonry is historic, consult with a restoration specialist before proceeding. They can preserve original materials and maintain historical integrity.
Preparation, Tools, and Materials Checklist
Prepare a checklist covering PPE (respiratory protection, gloves, eye and hearing protection), containment and drop cloths, neutralizers and rinsing equipment, and appropriate tools and abrasives for the chosen method. Also include waste containers, absorbents, and materials for temporary protection of adjacent surfaces.
Verify PPE and product instructions on labels and data sheets, and check local regulations for waste disposal and runoff control before starting. Having the right spare parts, backup abrasives, and cleanup supplies on hand prevents rushed decisions that can damage the masonry.
Recommended protective and cleanup materials
Before you start, set up these essentials to protect your workspace and ensure a clean job.
- Tarps: Cover the ground to catch drips and debris. Protect landscaping too.
- Masking tape: Seal edges of tarps and protect adjacent surfaces from paint splatter.
- Neutralizing agents: Have specific neutralizers for your chosen stripper or abrasive to stop the process if needed.
- Spill kits: Be ready to contain any spills with absorbent materials and proper disposal bags.
- Proper waste containers: Use approved, labeled bins for paint chips, dust, and liquid waste. Check local regulations.
- Storm drain protection: Prevent paint or debris from entering storm drains to avoid environmental damage.
- Gloves and eye protection: Protect your hands and eyes during setup, removal, and cleanup.
- Respirator: Use a proper respirator for dust control when grinding or blasting.
Quick rule: Always follow manufacturer’s guidelines on product labels. Check local disposal rules before starting.
Visual checkpoints during removal
Keep an eye on these signs to monitor progress and prevent damage while removing paint.
- Mortar erosion: Watch for exposed aggregate or crumbling mortar. Stop if you see it; grinding may be causing damage.
- Surface color change: Monitor the surface for a consistent, even tone. Uneven color could indicate incomplete paint removal or damage to the masonry.
- Dust levels: Keep dust to a minimum when grinding. Excessive dust may indicate aggressive grinding or a wrong abrasive choice.
- Edge definition: Check edges for clean lines. Ragged edges might suggest incomplete paint removal or damage to the masonry.
Quick rule: If you notice any of these signs, stop and reassess your technique or switch methods if necessary.
Finishing, Surface Prep, and Repainting Considerations
After paint removal, thoroughly clean the surface of residue, neutralize any chemical stripper, and inspect the masonry for profile and soundness required by the new coating. Achieving the correct surface texture and removing salts, dust, and loose particles is critical for adhesion.
Select primers and paints that are compatible with masonry and allow for vapor permeability where required, consulting product data sheets for compatibility and cure times. Test adhesion in a small area if you are uncertain, and follow the coating manufacturer’s surface-prep recommendations.
Choosing Primers and Breathable Coatings
After removing paint, it’s crucial to choose the right primer and topcoat for your masonry surface. Masonry is porous, so it needs a breathable, or vapor-permeable, system to prevent moisture buildup.
Breathable primers allow moisture to escape while sealing the surface against dirt and minor damage. They’re ideal for masonry as they help maintain the substrate’s durability over time.
When selecting a primer, consider your masonry type – brick, concrete, or stone – and its condition. Some primers are better suited for specific substrates or levels of deterioration. Always check product data sheets for compatibility.
For topcoats, opt for breathable paints that allow moisture to pass through. These are typically labeled as ‘vapor-permeable’ or ‘breathable’. They help prevent peeling and flaking by allowing the masonry to ‘breathe’.
Long-Term Maintenance and Monitoring
Maintaining your painted masonry involves regular inspections and timely touch-ups. This helps extend coating life and prevents premature failure.
Inspect your surfaces at least once a year, ideally during spring or fall when temperatures are mild. Look for signs of peeling, cracking, or efflorescence (white salt deposits).
To control moisture buildup, ensure gutters and downspouts are functioning properly to direct water away from walls. Address any leaks promptly.
For touch-ups, use the same paint as originally applied. If you can’t match it exactly, apply a spot of primer first to seal the area before painting. This helps maintain a consistent appearance and prevents further damage.
Conclusion
Removing paint from masonry is about protecting safety, preserving durability, and keeping the look clean and even. Do the work with a plan, test first, and proceed section by section so you don’t guess your way into costly repairs.
Starting now, think: plan the area, run a test patch, choose the method that fits your wall, seal and protect nearby surfaces, work in small sections, watch for signs of damage or grain rise, neutralize or rinse as needed, and let the surface dry before repainting. Move in logical steps, document what works, and keep the surface clean as you go.
Common mistakes to avoid are choosing a method that risks deep gouges or chemical damage, skipping the test patch or a small-area trial, and rushing through prep or finishing without thorough drying. Always wear the right PPE, ventilate well, keep chemicals away from plants and kids, and don’t pressure-wash or grind aggressively near delicate edges. If you’re unsure about substrate depth, or the project covers a large area, err on the side of caution and call a professional rather than forcing a fix.
When it makes sense to bring in help, consider the scope, substrate condition, and potential for unseen damage. If the task exceeds your experience or the area is compromised, don’t push on alone. Stay methodical, stay safe, and you’ll get a durable, good-looking result that lasts.
FAQ
When should I use chemical strippers vs. grinding on masonry paint?
Use chemical strippers when you want to remove paint from detailed or textured masonry without heavy abrasion. Use grinding or abrasive methods if the paint is thick or well-bonded and you need faster, more aggressive material removal. Always test a small area first to see how the surface responds.
How do I protect the masonry substrate to avoid scarring during stripping?
Follow the product label exactly and use the gentlest method that works. Stop if you see gouges, network cracking, or delamination of the substrate, then reassess your approach. When in doubt, switch to a less aggressive option and test a patch.
What safety steps should I take before starting stripping or grinding?
Wear eye protection, gloves, and a respirator suitable for dust or chemical fumes. Work in good ventilation and cover nearby surfaces to catch drips or dust. Read the product instructions for any ventilation or exposure limits.
How do I verify I’ve removed the paint enough and haven’t damaged the substrate?
Do a test patch by lightly abrading a small area and inspect for uniformity and any gouges. Wipe and clean the surface to reveal true condition, then plan the next steps based on what you see. If you see any color bleed or substrate darkening, proceed slowly and re-evaluate.