

Introduction
Painting over old limewash can be a challenge due to its unique composition and properties. This guide will help you identify, neutralize, and prime your limewashed surfaces for successful painting.

Key takeaways
- Identify limewash by chalky finish, mineral content, and matte, breathable film.
- Test adhesion with scrape and moisture penetration before priming.
- Contain dust, use plastic sheeting, and seal off area to protect occupants.
- Remove loose limewash safely, then rinse and air-dry surface thoroughly.
- Stabilize flaking substrate using manufacturer-approved methods and compatible fillers.
- Choose primers labeled for limewash, breathable films, and compatible finishes.
- Follow gentle application workflow, avoid overthinning, and monitor for peeling or efflorescence.
Table of Contents
- Introduction
- Key takeaways
- Identifying Limewash Versus Paint and Other Finishes
- Assessing Condition and Substrate Readiness
- Safety, Containment, and Tools Checklist
- Neutralizing, Removing, and Cleaning Old Limewash
- Repairing, Stabilizing, and Prep Before Priming
- Choosing the Right Primer for Former Limewash Surfaces
- Application Techniques and Painting Workflow
- Troubleshooting and Long-Term Maintenance
- Conclusion
- FAQ
Identifying Limewash Versus Paint and Other Finishes
Distinguishing limewash from modern paints and other finishes is crucial before painting over it. Limewash, a thin, matte mineral finish, behaves differently due to its porous nature. Use visual cues, touch, and simple field tests for identification.
Visual clues and tactile signs
- Appearance: Limewash has a distinctive matte, chalky appearance unlike glossy emulsion paint.
- Touch: Feel the surface. Limewash is soft with slight texture; paint is smoother.
- Burnishing: Polishing with a cloth, limewash becomes shiny briefly but quickly dulls. Paint stays shiny.
Simple on-site tests (scrape, water, pH strip)
- Scrape test: Gently scrape a small area. Limewash leaves a white, powdery residue.
- Water test: Drip water onto the surface. Limewash darkens and may bubble slightly due to its alkalinity.
- pH strip test: Use pH strips for accurate testing. Limewash is alkaline (pH 10-12), turning the strip blue or purple.
When to consider professional analysis or lab testing
- Historic fabric: Unique limewash compositions may require professional analysis.
- Legal constraints: Conclusive proof of finish composition might be needed, which a lab test provides.
Assessing Condition and Substrate Readiness
Begin by thoroughly inspecting the wall to evaluate its readiness for priming. Assess adhesion, flaking, salt blooms, and the nature of the substrate beneath the limewash.
Record areas where coatings are powdering or sound material remains. Also, note any structural or moisture issues that could compromise a new finish. Test adhesion using a small scrape or tape pull. Check for moisture, efflorescence, and movement in joints. Consult product data sheets to verify any substrate moisture or alkalinity limits.
Adhesion, Flaking, and Cohesion Tests
Before painting, check your limewash surface for loose material such as flaking or peeling paint, or crumbling plaster.
Gently pull at suspect areas using a piece of tape. If the old finish lifts off easily, remove and repair it before proceeding.
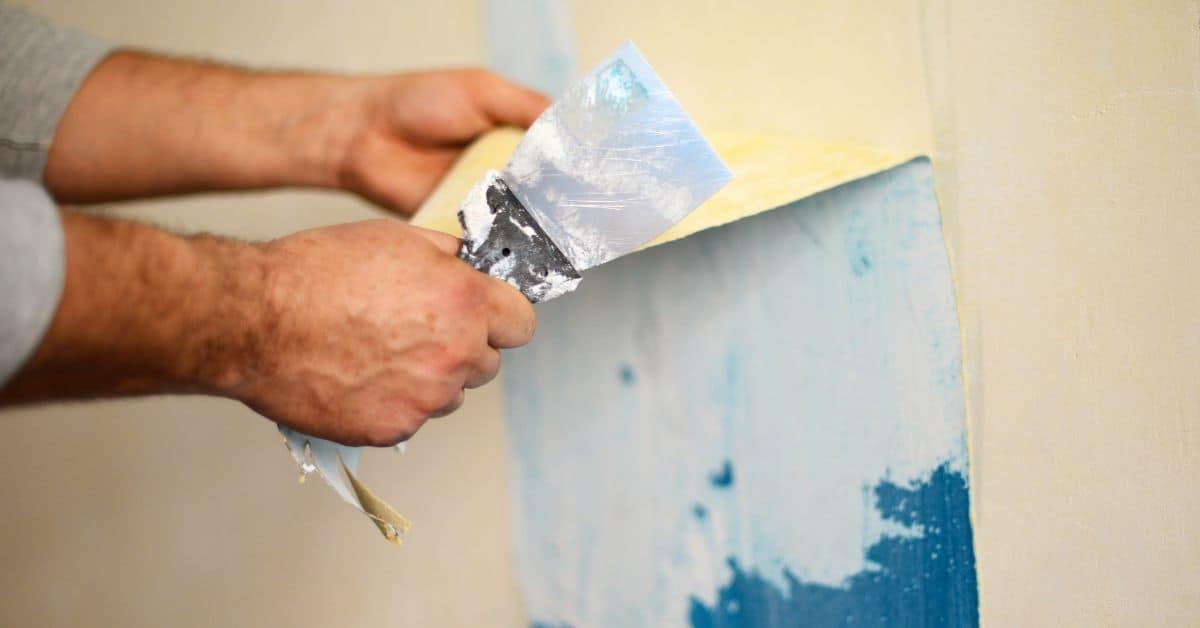
Scrape away any loose material with a putty knife, taking care not to damage the underlying substrate. Mark these areas clearly for focused repairs.
Moisture, Salts, and Efflorescence Checks
Inspect walls for signs of moisture like tide marks or watermarks. Feel the wall; if it’s cold and damp to touch, there might be a moisture problem.
Look out for visible salt deposits (efflorescence). If found, address these issues before priming. You may need to install a damp-proof course or improve ventilation.
Identifying Substrate Types
The substrate type affects repair methods and compatible primers. Use a small chisel to gently tap the surface in an inconspicuous area. The sound will help identify the substrate – hollow for gypsum, solid for brick or stone, soft for lime plaster.
Knowing your substrate aids in choosing the right primer and repair methods.
Safety, Containment, and Tools Checklist
Before commencing work, plan safety measures and containment strategies to protect yourself and the surrounding area. Choose appropriate respiratory protection, eye and hand protection, and implement dust and runoff control methods on site.
Gather essential tools for testing, removal, and priming such as scrapers, brushes, low-pressure rinsers, neutralizers, sponges, and recommended primers. Always check product labels or technical sheets for any required proprietary tools. If dealing with unknown materials or potential hazardous coatings, confirm PPE and disposal rules with local regulations or a testing lab.
Personal Protective Equipment (PPE) and Ventilation
- Respirator: Use a P100 or N95 rated filter for concrete dust. Ensure it fits properly by performing a user seal check.
- Safety Glasses: Inspect them for any cracks or scratches. Wear with side shields to protect from debris.
- Gloves: Choose chemical-resistant gloves, not just work gloves. Check they’re in good condition before use.
- Coveralls: Ensure they’re long-sleeved and cover your ankles to prevent skin contact with concrete.
- Hard Hat: Inspect it for cracks or damage. Secure it properly to protect from falling objects.
- Ear Protection: If using power tools, check your earplugs are in good condition and fit correctly.
- Ventilation: For large mixing areas, ensure you have a dust extractor or fan to keep the area well-ventilated. Check it’s working properly before starting.
Dust Control, Containment and Waste Handling
- Wet down area: Lightly mist the working area with water using a sprayer or hose to control dust.
- Protect adjacent surfaces: Cover nearby walls, floors, and plants with plastic sheets or drop cloths. Secure them in place with tape.
- Use dust collection equipment: If available, connect a dust collector to your concrete tools to suck up dust at the source. Check that the filter is clean and functioning properly.
- Wear respiratory protection: Wear a NIOSH-certified respirator or a P100 particulate filter mask to protect against lime dust.
- Contain waste concrete: Place a tarp or containment barrier around the work area to catch any overspray or debris. This makes cleanup easier and prevents waste from spreading.
- Collect and dispose of waste properly: After finishing, sweep up all concrete dust and debris. Check local regulations for disposing of concrete waste.
- Clean tools promptly: Clean your tools after each use to prevent concrete buildup and make future cleaning easier. Use a wire brush, scraper, or compressed air to remove excess material.
Tools and Materials Checklist
- Scrapers: Inspect them for good condition with sharp edges for efficient paint removal.
- Stiff brushes (for prep): Ensure bristles are firm yet flexible, not too soft or hard. Soft bristles won’t clean well; hard ones can damage surfaces.
- pH strips: Test a small, hidden area to ensure the surface is neutral (pH 7). Extreme pH levels require neutralization before painting.
- Neutralizers (if needed): Choose one suitable for your surface type and pH level. Follow manufacturer’s instructions for safe use.
- Compatible primers: Select a primer that matches the paint type (oil-based, latex, etc.) and surface material (wood, metal, etc.).
- Breathable paints: Ensure your chosen paint allows moisture to escape. Non-breathable paints trap moisture, leading to bubbling, blistering, and peeling.
Neutralizing, Removing, and Cleaning Old Limewash
Begin with the gentlest cleaning methods—dry brushing and careful rinsing—to preserve the substrate’s integrity. Progress to stronger techniques only as needed, documenting your process and results.
Always rinse thoroughly after chemical treatments and allow the surface to dry to the level specified by the primer’s datasheet before priming. If unsure about a neutralizer’s suitability for your wall material, consult product labels or seek specialist advice to prevent damage.
Dry Methods: Brushing and Mechanical Removal
Start by gently removing any loose limewash using a soft-bristled brush, such as a wire or horsehair brush. Be cautious not to damage the substrate.
Never use steel wool or harsh abrasives, which can scratch and harm the surface.
For stubborn areas, carefully scrape off limewash using a scraper at a 45-degree angle to minimize damage.
Lightly sand any remaining limewash with fine-grit sandpaper. Always wear a dust mask and safety glasses during sanding.
Wet Cleaning and Rinsing Techniques
For light to moderate limewash, use low-pressure water rinse. A garden hose with a nozzle works well. Maintain low pressure to avoid damaging the surface.
Add mild detergent to your water for tougher areas. Apply it with a soft-bristled brush, let it sit for 10-15 minutes, then rinse thoroughly.
Be cautious not to over-wet the substrate, as this can lead to moisture ingress and further issues.
Monitor the surface post-washing. If efflorescence appears, address underlying moisture or salt issues before proceeding.
Chemical Neutralization and Safety Cautions
The goal of neutralization is to reduce limewash alkalinity, aiming for a neutral pH. Use mild acids like white vinegar or commercial limewash removers.
Dilute your chosen neutralizer according to the manufacturer’s instructions. Apply it with a soft-bristled brush, let it sit for 10-15 minutes, then rinse thoroughly.
Never mix different chemicals without proper knowledge of their compatibility, as this can create harmful gases or reactions.
Always wear gloves and eye protection when handling chemicals. Ensure the area is well-ventilated during application and rinsing.
Repairing, Stabilizing, and Prep Before Priming
Before applying a primer, address any loose material, open joints, or crusted salts. Reattach flakes, repoint missing mortar, and replace failed plaster as necessary. Use compatible repair materials—lime-based mortars for masonry—and follow manufacturer instructions.
Clean, level, and feather repairs to ensure continuous primer bonding. Allow adequate drying or curing per product guidelines. If unsure about compatibility between repairs and primer, consult technical data sheets or the manufacturer.
Filling cracks, consolidating flaking areas, and repointing
Before priming, fix any cracks or loose bits using a matched mortar or filler to maintain historic appearance.
Key in repairs with a stiff brush for better adhesion. Let them cure before priming, following the maker’s guide. For repointing, use a lime-based mix matching existing mortar color and texture.
Replastering or applying lime render over problematic areas
If the substrate is too damaged, patchy, or incompatible with your primer, consider a fresh lime-based render or skim. This creates a compatible surface for mineral primers and paints but requires extra work.
Use high-quality NHL (Natural Hydraulic Lime) render, applying it like any lime plaster per the maker’s guide.
Use of consolidants and compatibility checks
Consolidants strengthen crumbly surfaces. Apply with a brush where flaking is light but widespread, following the maker’s guide.
Before priming, test for compatibility by mixing a small amount of consolidant with your primer, letting it cure, and checking for adverse reactions. If unsure, consult a conservator for specific substrate advice.
Choosing the Right Primer for Former Limewash Surfaces
When painting over old limewash, select a primer that can handle high pH levels, allows moisture vapor to pass through (vapor permeability), and is designed for mineral substrates. Evaluate breathable mason