
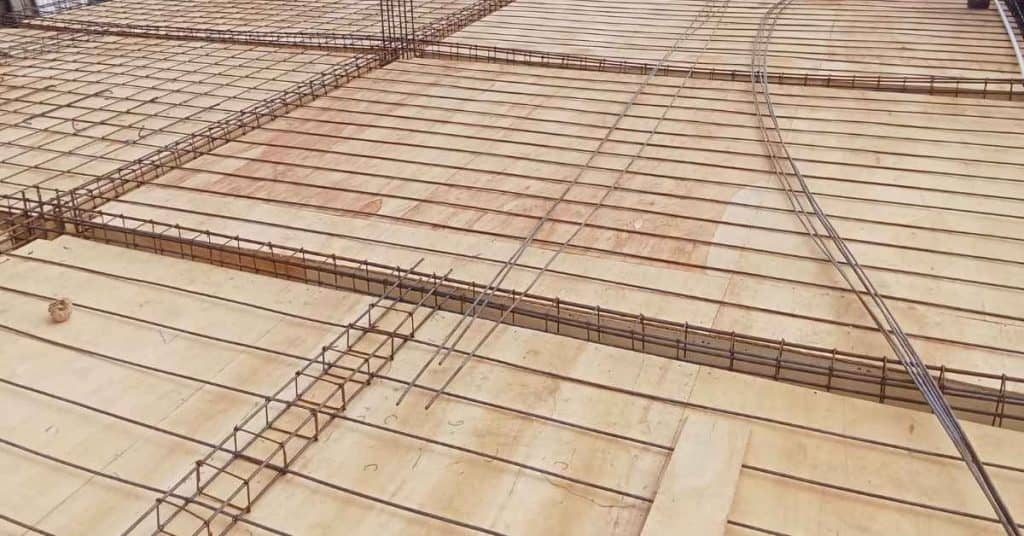
Introduction
Dusting in basements is when the top layer of concrete powder flakes away, leaving a dusty, chalky surface. It’s usually caused by weak laitance, moisture, improper finishing, or wear from foot traffic. Choosing a floor hardener and a solid prep plan helps harden the surface and reduce future dust.
Prep work is critical: clean the area, remove loose material, and give the floor a profile so coatings can grab. When you choose a hardening option, read the label for surface prep, application method, and cure times, and follow local rules. In practice, test a small area first and pick an approach that fits your basement use and foot traffic.
Key takeaways
- Assess dusting causes: moisture, alkali, wear, efflorescence, improper finishing, sealing gaps.
- Choose hardener type based on concrete porosity, moisture, and usage before sealing.
- Clean thoroughly and fix cracks before applying any hardener or sealer.
- Test moisture and perform surface prep to reduce dusting recurrence long-term.
- Acrylic sealers and epoxy have different prep and durability; choose suited to use.
- Ventilate workspace, wear respirator, and follow disposal rules for residue.
Table of Contents
- Introduction
- Key takeaways
- What Is Concrete Dusting? Definition and Root Causes
- Diagnosing Severity and Testing Before Treatment
- Common Hardener Types and How They Work
- Preparation Steps That Actually Work (Cleaning, Repairs, and Moisture Control)
- Application Processes and Best Practices for Each Hardener
- Pros, Cons, and Long-Term Durability Comparison
- Safety, Ventilation, and Disposal for Diyers
- Costs, Common Mistakes to Avoid, and a DIY Planning Checklist
- Conclusion
- FAQ
What Is Concrete Dusting? Definition and Root Causes
Dusting is a fine, powdery residue that rubs off easily from the surface. It looks chalky and can feel soft to the touch, unlike solid dirt or embedded grime. Quick visual cues and a light dry rub test help determine if you’re dealing with dusting rather than surface dirt.
Root causes split into mechanics and moisture. Mechanics include a weak surface paste, incomplete curing, and improper finishing, which show up as powder on the wall or floor. Moisture-driven issues come from high humidity, water intrusion, or rising damp, and they manifest as damp patches or a chalky film with potential mineral deposits behind the dust. For basements, use moisture meters, surface abrasion tests, and check cure history and finishing methods to diagnose accurately. Distinguish dusting from efflorescence—white crystalline salt that vanishes with cleaning—and from dirt, which is embedded grime. Remediation choices hinge on the diagnosis, so plan to keep surfaces clean, dry, and sound, and document moisture sources before moving to the next step with a suitable hardener.
Visual and Tactile Symptoms to Identify Dusting
Concrete dusting isn’t always obvious. Here’s what to look for:
Powdery residue: Gently rub the surface with a damp cloth. If it leaves a white, chalk-like mark, that’s dusting.
Reduced hardness: Tap the concrete lightly with a coin or key. Dusting concrete feels softer and sounds hollow compared to sound concrete.
If you’re unsure, try these quick checks:
- Moisten a cloth and rub the surface. If it turns white, that’s dusting.
- Use a coin or key to tap the surface. Listen for a dull, hollow sound.
Underlying Causes: Curing, Mix Issues, and Moisture
Dusting is often due to poor concrete practices:
Incomplete curing: Concrete needs time to gain strength. Inadequate curing can leave a weak surface paste that powders over time.
High water/cement ratio: Too much water in the mix can lead to a weak, dusty surface. Improper finishing can exacerbate this issue.
Moisture also plays a significant role:
- High humidity can prevent concrete from drying properly, leading to dusting.
- Water intrusion or rising damp can weaken the surface and cause dusting.
How Dusting Differs from Efflorescence and Staining
Efflorescence and staining can look similar to dusting but require different treatments:
Efflorescence: This is a white, crystalline salt deposit that appears on the surface. Unlike dusting, efflorescence disappears when cleaned with water. To confirm, try cleaning a small area with a damp cloth.
Staining: Stains are usually embedded or adhered grime that doesn’t rub off easily like dusting. They may appear as dark spots or patches and require different cleaning methods.
To differentiate:
- Efflorescence: Wipes away with water, reappears over time.
- Staining: Doesn’t wipe away easily, requires specific stain removal techniques.
Diagnosing Severity and Testing Before Treatment
Start with a baseline: observe how deep the dusting goes, whether sheen is lost, and if there are any cracks or efflorescence. Note texture and any visible damage patterns to guide your approach. A quick entry-level assessment helps choose the right hardener later.
Moisture checks are essential. Use a simple tape test or plastic sheeting to gauge dampness and, if available, capture RH or MVER readings. Pore and alkali checks can be done with basic absorption tests and pH indicators to decide if a penetrating silicate or a film-forming option is appropriate. Do a small patch test in a hidden area and monitor for a day or two to confirm adhesion and stability. If moisture remains persistent or the substrate shows high alkalinity or repeated failures, plan for professional input or lab testing before proceeding.
Quick field tests (rub, tape, water bead)
The first step is to perform some quick at-home tests. These will give you an idea of the surface condition and how well a hardener might stick.
Rub test: Run your hand over the concrete. If it feels gritty or powders off, that’s dusting. A hardener can help lock in this powder.
Tape test: Stick some duct tape on the surface, press firmly, then pull it off. If there’s a lot of dust or powder on the tape, you’ve got dusting. This also gives you an idea of how well the hardener might adhere.
Water bead test: Drip some water onto the concrete. If it beads up and rolls around, that means the surface is relatively non-porous and a hardener should work well. If it soaks in quickly, the surface is too porous for a hardener to be effective.
Moisture, RH and pH testing to inform selection
Before you apply any hardener, you need to check for moisture and measure the pH. These tests will help you choose the right product.
Moisture: Use a moisture meter or simply place a piece of plastic sheeting on the floor overnight. If it’s damp in the morning, there’s too much moisture for a hardener. Wait until the area is dry before treating.
Relative Humidity (RH) and pH: These tests are best done with professional meters. High RH or high pH can affect how well a hardener works. For example, if the pH is too high, you might need an epoxy-based hardener instead of a silicate one.
If your tests show high moisture, high RH, or high pH, it’s best to delay treatment until these issues are resolved. Otherwise, the hardener won’t work properly and could even cause more damage.
When to call a professional structural or slab expert
While some dusting can be fixed with a hardener, there are times when you need a professional. Here are some red flags:
Active leaks: If you’ve got water coming through the floor, that’s not just dusting – it’s a leak. You’ll need a pro to find and fix the source.
Sinking slab: If your concrete is sinking or settling, that’s a structural issue. A hardener won’t fix this – you need a professional to assess and repair the problem.
Large cracks: Cracks wider than 1/8 inch are too big for a hardener to fix. They indicate a structural issue that needs professional attention.
Common Hardener Types and How They Work
Three main categories drive most basements work: sodium/potassium silicates, silanes/siloxanes, and acrylic/polymer sealers. Silicates rely on a chemical reaction that penetrates and hardens the surface; silanes and siloxanes mainly provide water repellence with penetrating chemistry; acrylics act as film-forming coatings that sit on top of the concrete.
Mechanism translates to use: penetrating options suit high porosity and moisture situations, while film-formers are easier to apply where a uniform surface is desired. Consider durability, vapor permeability, and whether the goal includes stopping efflorescence or improving cleanliness. Selection criteria should factor porosity, humidity, and whether a penetrating or film-forming solution best fits the basement conditions. Prepare for the usual prep steps, required surface cleanliness, and appropriate curing considerations, as well as common pitfalls like saturation risk or compatibility with existing coatings.
Silicates and organo-silicates (penetrating densifiers)
These hardeners work by reacting with the concrete’s free lime to form a silica gel. This gel fills in micro-cracks and pores, making your slab stronger.
They strengthen: Tensile strength, abrasion resistance, and freeze-thaw durability. Your floor will be tougher and more resistant to wear.
The surface appearance is natural-looking, with a slight sheen. No film or coating is left behind, just a denser concrete. To check if it’s working, try the water bead test: Water should form beads on the surface instead of soaking in.
Silanes and siloxanes (water repellents / penetrating)
Silanes and siloxanes are your water-repellent buddies. They don’t densify like silicates, but they sure keep the moisture out.
Penetration depth is where these guys shine. They soak in deep, forming a barrier against water from both top and sides. Unlike silicates, they won’t seal off breathability completely, which is good for your concrete’s health.
Use them after densifiers or on their own for new, well-cured (check cure time on product label) concrete. Apply evenly, let it soak in, then wipe off excess. No need to rinse. It’s that simple.
Acrylics and Topical Polymer Sealers
These sealers work by forming a thin film on the concrete surface. They’re easy to apply but need proper prep.
Check base compaction. If it’s not right, no sealer will help. Then, clean and let it dry. Apply in thin coats, following manufacturer’s instructions.
Acrylics give you gloss control – from matte to high-gloss. But they’re not as durable as other options. They can peel or flake if not applied right. So, be patient, let each coat dry before applying the next.
Topical polymers like epoxies and urethanes are tougher but harder to apply. They need a clean, dry surface too. Always check local rules for these chemicals.
Preparation Steps That Actually Work (Cleaning, Repairs, and Moisture Control)
Focus on high-impact steps first: clean thoroughly and degrease to remove hydrocarbons, then tackle repairs like spalls and loose patches, followed by moisture control measures. This sequencing reduces rework and improves long-term performance. Confirm the surface will hold the chosen hardener without pulling dust back to the surface.
Cleaning specifics matter: use safe degreasers or mild detergents, scrub, rinse, and dry completely. For repairs, specify polymer-modified mortars or epoxy injections where needed and allow proper curing. Moisture testing should include simple humidity checks or calcium chloride tests, plus identifying moisture sources such as vapors or intrusion and installing barriers or drainage adjustments before any coating. Document the readiness with a clear go/no-go note before applying the hardener.
Tools and materials checklist for prep
Before you start, make sure you have the right tools and materials to ensure a thorough and effective preparation of your basement concrete surface.
- Degreaser: A heavy-duty degreaser to remove oils and grease. Skip this and you might not get a proper bond with the hardener.
- Mild detergent: For general cleaning, like removing dust or dirt.
- Scrub brush: Stiff-bristled for mechanical scrubbing to ensure a clean surface.
- Pressure washer (optional): To help rinse the surface thoroughly. Not having one might leave residue and affect hardener adhesion.
- Patching mortar: Polymer-modified for repairing spalls and loose patches.
- Epoxy injection kit: For filling hairline cracks and small voids.
- Moisture meter (pin-type): To test moisture levels before and after repairs. Skipping this can lead to recurring dusting issues.
- Calcium chloride test kit: For accurate moisture readings, especially in high humidity areas.
- Safety gear: Gloves, goggles, and a respirator for protection during cleaning and repairs.
Quick rule: Always check your tools and materials before starting to avoid mid-job trips to the store.
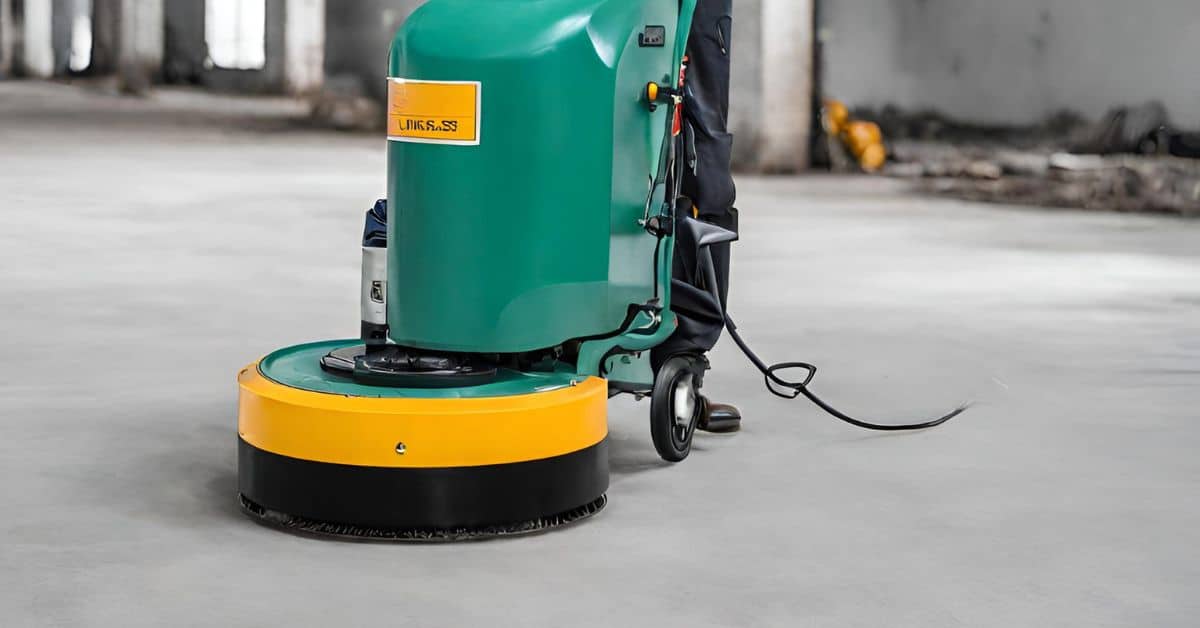
Cleaning, etching, and degreasing methods
Start by cleaning your concrete surface using a degreaser to remove any oils or grease. This is crucial as these substances can prevent the hardener from bonding properly.
Use a stiff-bristled scrub brush to mechanically clean the surface. A pressure washer can help rinse it thoroughly, but be careful not to damage the surface.
After degreasing and scrubbing, rinse the surface with clean water and let it dry completely before proceeding. This step is often overlooked, but moisture can interfere with hardener adhesion.
Acid etching is typically not necessary for dusting issues unless your concrete has a very smooth or glossy surface. It’s best to avoid acid etching in basements due to the risk of fumes and potential damage to nearby materials. Always test a small, hidden area first if you decide to etch.
Repairing cracks, spalls, and addressing moisture
Before applying any hardener, it’s crucial to repair any visible cracks or spalls. Use a polymer-modified mortar for larger repairs and epoxy injections for hairline cracks.
Allow the repairs to cure according to the manufacturer’s instructions before proceeding. Rushing this step can lead to weak repairs that won’t last.
Moisture is a common cause of dusting in basements. Use a moisture meter to test your concrete and identify any high-moisture areas. If you find any, address the source of the moisture – it could be vapor drive from the soil, leaks, or poor drainage. Installing a moisture barrier or adjusting drainage may be necessary.
If your basement has high humidity, consider using a dehumidifier to lower the relative humidity before and after hardener application. This can help prevent recurring dusting issues.
Application Processes and Best Practices for Each Hardener
Define precise prep steps for each category: remove dust, perform moisture checks, and confirm substrate porosity before starting. Verify readiness in inconspicuous areas, and adjust for porous versus non-porous surfaces. This helps ensure uniform adhesion and finish without surprises.
Outline practical dilution, coverage, and thickness expectations for silicates, silanes, and acrylics. Specify application tools—brush, roller, sprayer, or sponge—and establish a consistent workflow to prevent streaks or lap marks. Include open time, recoat intervals, cure expectations, and how temperature and humidity influence performance. Safety and environmental notes should cover PPE, ventilation, and disposal, plus compatibility with primers or sealers. Use test patches to guide decisions and troubleshoot common issues like pinholes or uneven sheen.
Applying silicate densifiers: step-by-step
Silicate densifiers penetrate and react with concrete to form a stronger, more durable surface. Here’s how to apply them in 8 simple steps.
- Remove all dust, dirt, and debris using a broom, vacuum, or leaf blower.
Reason: Densifiers need clean surfaces to penetrate effectively. - Check for moisture. Concrete should be dry before application.
Quick check: Use a moisture meter; readings below 4% are ideal. - Wet the surface lightly with water using a sprayer or mop.
Reason: This helps in even distribution and penetration of the densifier. - Mix the silicate according to manufacturer’s instructions. Typically, it’s 1 part silicate to 5 parts water.
Coverage: Expect around 200-300 sq ft per gallon. - Apply the mixture using a low-nap roller or sprayer, working in small sections (around 4×4 feet).
Reason: This helps avoid over-saturation and ensures even coverage. - Let the densifier dwell on the surface for about 10-15 minutes.
Quick check: Observe the surface; it should look wet but not puddled. - Remove excess material using a damp mop or cloth. Be sure to remove any white residue that forms.
Reason: Excess densifier can cause a white haze if not removed properly. - Allow the treated area to cure for at least 24 hours before walking on it or applying sealers.
Quick check: The surface should feel dry and slightly tacky when ready for the next step.
Applying silanes/siloxanes and penetrating repellents
Silane and siloxane penetrants create a water-repellent barrier in concrete. Here’s how to apply them effectively.
Application: Use a sprayer for large areas or a roller for smaller sections. Apply the product evenly, ensuring full coverage.
Recoat timing: Allow 24-48 hours of cure time between coats for optimal performance.
Reason: This allows the penetrant to fully react with the concrete before applying additional coats.
Topical seal interference: Avoid applying topical sealers over silane/siloxane treatments unless recommended by the manufacturer.
Reason: Topical sealers can trap moisture and prevent the penetrant from working properly.
Applying acrylics and topical coatings properly
Acrylic coatings provide a protective layer on concrete surfaces. Here’s how to apply them correctly.
Surface profiling: Ensure the surface is clean, dry, and free of any contaminants before application.
Reason: This promotes better adhesion of the acrylic coating.
Film thickness control: Apply acrylics in thin, even coats. Aim for a film thickness of 2-3 mils per coat.
Reason: Thicker coats can lead to delamination and increased risk of failure.
Adhesion promotion: Lightly abrade the surface with sandpaper or an etching solution before applying acrylics.
Reason: This increases surface area, promoting better adhesion. Always test for compatibility with underlying densifiers.
Pros, Cons, and Long-Term Durability Comparison
Identify key performance metrics for each option: surface hardness or abrasion resistance, how long the dust control lasts, breathability, and any visible finish changes. Consider how each choice interacts with typical basement floor coverings. Use practical, observable criteria rather than brand claims to guide decisions.
Evaluate durability and maintenance: resistance to cracking, spalling, chemical exposure, and wear from foot traffic and equipment. Weigh installation requirements like prep intensity, cure times, any odors, and the potential for moisture movement during or after treatment. Basements pose humidity and temp swings, so note how each option performs under those conditions. A simple decision framework can help readers score options by their priorities, and cross-reference with prep and floor-covering plans for consistency.
Durability and performance in basement conditions
Basements present unique challenges due to humidity, temperature swings, and heavy traffic. Here’s how different hardeners hold up:
Silicates and organo-silicates, being penetrating densifiers, strengthen the concrete from within. They’re great for resisting cracking under heavy loads and foot traffic. However, they might not be the best choice in high-humidity areas as they can draw moisture into the slab.
Silanes and siloxanes, water repellents, excel in damp conditions. They keep moisture out, reducing the risk of spalling and delamination. But they may not provide the same level of strength enhancement as densifiers.
Acrylics and topical polymer sealers offer good resistance to chemicals and wear but can be more susceptible to cracking under heavy loads or extreme temperature changes. They also might not perform well in high-humidity conditions without proper preparation.
Visual, maintenance and coating-compatibility trade-offs
Each hardener option has its own visual impact and maintenance requirements:
Silicates and organo-silicates usually darken the concrete slightly, enhancing its natural look. They require minimal maintenance but may not be compatible with all floor coverings due to their increased surface tension.
Silanes and siloxanes typically leave a matte finish and don’t change the color much. They’re easy to maintain but might affect future coating adhesion if not properly prepared.
Acrylics and topical polymer sealers can provide a glossy or semi-gloss sheen, depending on the product. They require periodic reapplication (every 3-5 years) and may need specific primers for optimal floor covering compatibility.
When to use combined approaches (densifier + sealer)
A two-step approach using a penetrating densifier followed by a topical sealer or waterproofer can be beneficial in certain basement scenarios:
First, apply a penetrating densifier to strengthen the concrete and improve its resistance to cracking and wear. This is especially useful in basements with heavy traffic or structural loads.
Next, apply a topical sealer or waterproofer. This creates a barrier against moisture, reducing the risk of spalling, delamination, and mold growth. It’s particularly important in high-humidity basements or those prone to flooding.
Combining these approaches provides both strength enhancement and moisture protection. However, it also means two applications, increased cost, and potentially longer cure times.
Safety, Ventilation, and Disposal for Diyers
Maintain a PPE checklist tailored to concrete work: gloves, goggles, respirators or appropriate filters, coveralls, and boots. Include safe donning and doffing practices and keep a clean work area to minimize exposure. This foundation reduces risk during mixing, applying, and curing.
Be mindful of chemical hazards specific to hardeners, sealers, and additives. Check MSDS, compatibility notes, and signs of irritation, then implement practical mitigation steps. Plan ventilation for tight basements with exhaust/evacuation fans and carbon monoxide monitoring, and ensure continuous airflow during mixing and curing. Store and handle materials properly, label containers, and follow a clean mixing sequence to prevent splashes or dust inhalation. For disposal and spill response, follow local regulations, segregate waste, and use containment to minimize contamination and dust spread.
Personal protective equipment and exposure limits
Safety first, buddy. Here’s what you need to protect yourself during basement concrete work.
- Gloves: Protect your hands from chemicals and rough surfaces. Choose nitrile or neoprene for better grip and durability. Around $10-$20 a pair.
- Eye protection: Safety glasses with side shields are essential. For spraying, use goggles with an adjustable band. About $5-$15.
- Respirator/Filter: A P100 filter or half-face respirator is crucial for dust and chemical exposure. Around $20-$40 plus filters at $5-$10 each.
- Coveralls: Protect your clothes and skin from chemicals. Disposable Tyvek suits are around $5-$10 each.
- Boots: Steel-toe boots with good grip protect your feet and provide traction on wet surfaces. Around $40-$80.
Ventilation, confined-space considerations, and odor control
Basements are tight spaces. You need good airflow to keep yourself safe.
Fans: Place exhaust fans near the work area to remove fumes and dust. Rent a 20-inch fan for around $50-$70 per day.
Use CO monitors to detect carbon monoxide buildup. Around $30-$50 each.
Keep the door open or use portable fans to maintain continuous airflow. Work in short durations, then take breaks outside to avoid latency effects.
Waste handling and cleanup
Proper disposal keeps your basement safe and clean for years to come.
Rags: Dispose of rags used with chemicals according to the product’s SDS. Some can be washed, others must be thrown away in sealed bags. Check local regulations.
Rinsate: Collect and dispose of rinse water per local wastewater guidelines. It might need to go to a hazardous waste facility.
Unused product: Store leftover chemicals properly, following the manufacturer’s instructions. Dispose of according to local regulations or take to a hazardous waste collection site.
Costs, Common Mistakes to Avoid, and a DIY Planning Checklist
Outline cost drivers clearly: materials like hardeners and sealers, surface prep tools, and any specialty products. Include estimated labor time ranges based on basement layout and complexity, but avoid fabricating prices. Keep the focus on what you need to verify on your own job sheet.
Identify typical DIY mistakes that cost time and money: skipping moisture testing, underestimating prep, improper mixing or coverage, and poor ventilation or curing conditions. Provide a concise pre-job planning checklist: perform moisture tests, decide on moisture barriers, set rough surface goals, inventory tools and safety gear, plan access and cleanup, and sketch a basic timeline to minimize rework. Use this as a practical reference to stay organized and avoid common pitfalls.
How to estimate materials, labor and time
Before you start, get a handle on what’s needed. Here’s how:
- Measure square footage: Length x Width = Square Footage. Add 10% for waste.
- Assess surface condition: More porous surfaces need more hardener.
- Choose application method: Spraying covers faster, rolling takes longer.
- Calculate materials: Follow product coverage notes. Get local quotes for best prices.
- Estimate labor time: Basement size and complexity affect work hours.
- Add contingencies: 10-20% for moisture mitigation, unexpected flaws, tool rentals.
- Check product compatibility: Ensure hardener suits your concrete’s porosity and moisture levels.
- Plan for safety gear: Include PPE, ventilation, disposal costs in budget.
Quick rule: Always overestimate time and materials. It’s better to have too much than not enough.
Common mistakes that cause treatments to fail
Don’t let these common errors ruin your hard work:
- Skipping cleaning: Dirt and dust prevent absorption. Clean before applying.
- Applying over moisture: Moisture weakens hardeners. Test for dampness first.
- Wrong product choice: Silane/siloxanes aren’t densifiers. Choose right product for your goal.
- Poor dwell time: Too short, no effect. Too long, over-curing causes issues. Follow product guidelines.
- Inadequate ventilation: Fumes can be harmful. Ensure good airflow during application and curing.
- Ignoring surface roughness: Smooth surfaces need less hardener than rough ones.
- Not checking moisture barrier: Leaks cause long-term damage. Inspect before applying.
Quick rule: Prevention is cheaper than cure. Always prep properly.
Step-by-step DIY planning checklist
Follow this list to ensure a successful basement concrete treatment:
- Moisture test: Use a moisture meter. Skip at your peril.
- Decide on moisture barrier: If damp, consider an epoxy or polyurethane sealer.
- Set surface roughness goal: Smooth = less hardener. Rough = more.
- Inventory tools and safety gear: Grinders, etchant, PPE, ventilation – check you’ve got it all.
- Plan access/cleanup: Clear a path for work. Plan how to clean up afterwards.
- Create Gantt-style timeline: Break down tasks (prep, application, curing) and set dates.
- Check product compatibility: Ensure hardener suits your concrete’s porosity and moisture levels.
- Plan for maintenance: Regular cleaning extends treatment lifespan.
Quick rule: Planning takes time, but it saves you from costly mistakes down the line.
Conclusion
Prioritize safety, proper prep, and choosing the right hardener so the basement finish lasts and stays looking solid. The right steps protect you from dust, moisture damage, and costly repairs down the line.
Now, move with a simple, steady checklist: test a small area first, dry and clean the surface, repair visible cracks, control moisture, pick the appropriate hardener, mix and apply per tool and product instructions, ventilate well, wear proper PPE, and dispose of waste responsibly. Do each step in the order above, and don’t rush the cure or the cleanup.
Avoid these pitfalls: skip testing or moisture checks; neglect ventilation or protective gear; over-wet or under-mix materials; apply too thick a coat or on damp surfaces; ignore edge and corner prep; and rush the project to save time. Follow basic safety rules—read product labels, wear a respirator and gloves, keep doors and windows open, and guard children and pets from work areas. Always test first, and document what you see before moving on.
If you encounter persistent moisture, wide cracks, uncertain surface conditions, or you’re unsure about the right hardener for your concrete, call a professional rather than guessing. With careful prep and conservative steps, you can push toward a durable, clean basement that stands up to time—and you’ll sleep easier knowing you avoided costly mistakes.
FAQ
What common causes lead to concrete dusting in basement floors, and how can I spot them early?
Dusting often comes from a weak or flaking surface, improper finishing, or alkalinity issues from moisture. Look for a powdery layer that wipes away easily and small surface flakes. If you notice frequent flaking, check the finished surface and any signs of moisture or poor curing.
What types of floor hardeners are available, and which might suit a basement project?
Hardeners range from penetrating densifiers to surface sealers and epoxy coatings. For dust control, you’ll often choose among surface hardeners and sealers, with options like acrylics or epoxy-based products. Always read the label to see what the product is designed to do and match it to your concrete condition.
What preparation steps are essential before applying a hardener or sealer?
Clean the floor thoroughly, remove loose material, and dry out any moisture. Do a thorough sanding or grinding if the surface is rough or dusty. Follow the product instructions for curing and airflow, and don’t skip the moisture check.
How do acrylic sealers compare to epoxy coatings for basement dust control?
Acrylic sealers are usually easier and faster to apply and fewer steps, but may wear faster in high-traffic areas. Epoxy coatings tend to be tougher and longer-lasting but require more prep and careful mixing. Choose based on traffic, moisture risk, and the manufacturer’s directions.