

Introduction
Concrete dusting is the surface powdering that happens when the upper layer of the concrete wears away, leaving a chalky film. It can occur from weak finishing, too much air in the mix, poor curing, or heavy traffic without protection. Understanding the signs helps you decide whether to protect, repair, or reseal the floor.
To prevent dusting, seal or harden the surface after curing and use proper finishing and curing practices. For repairs, you can clean the dusted layer, then follow a compatible surface hardener or sealant as directed by the product label. Always check manufacturer instructions and local rules for acceptable methods and safety, and wear a dust mask when working.
Key takeaways
- Causes include improper finishing, excessive water, and poor curing leading to chalky surface.
- Prevention: use proper finishing timing, brooming, and curing methods during placement.
- Safety: dusting can create airborne silica; wear masks and seal dust area.
- Repair by applying compatible surface hardener or topical sealer per label.
- DIY densify with appropriate hardener following manufacturer instructions and safety data.
- Regular sealing and dust control reduces future repairs and upkeep.
Table of Contents
- Introduction
- Key takeaways
- Why Concrete Floors Dust: Causes and the Chemical Process
- Risks and Consequences of Concrete Dusting
- Diagnosing a Dusty Floor: Inspection and Simple Tests
- Preventative Measures During Placement and Curing
- Options to Harden or Stop Dusting: Products and Approaches
- Step-by-Step DIY Method to Harden a Dusty Concrete Floor
- Repair Strategies for Badly Dusting or Deteriorated Floors
- Maintenance, Safety, and Cost Considerations
- Conclusion
- FAQ
Why Concrete Floors Dust: Causes and the Chemical Process
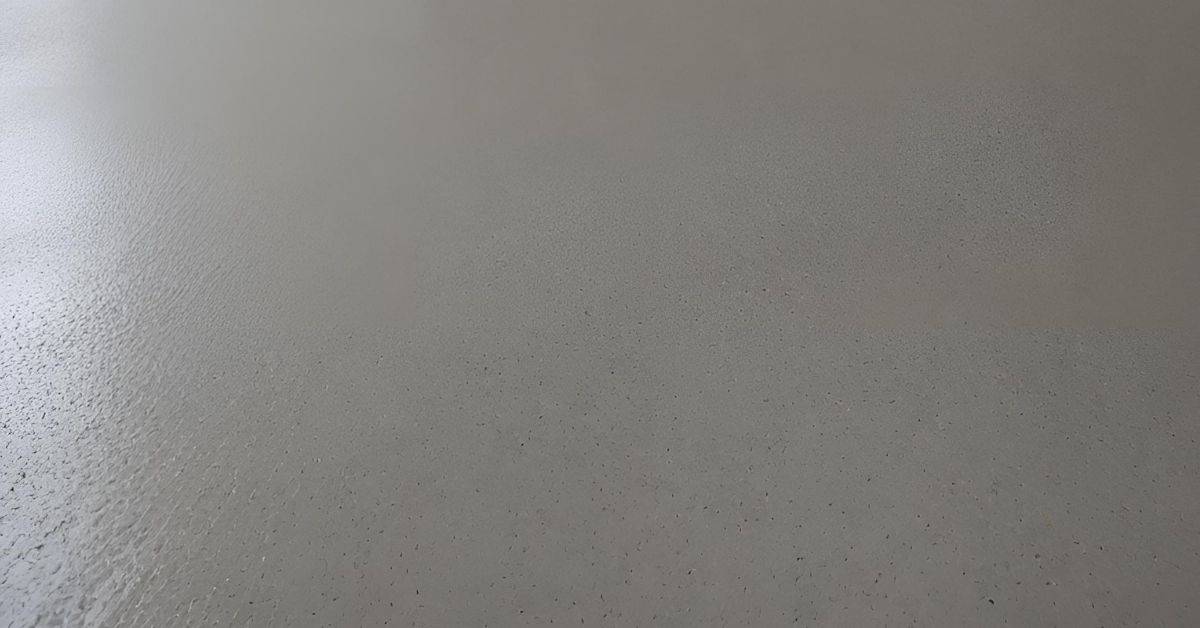
Concrete dusting starts at the surface where the paste and fines are loosely held by the top layer. The wearing of the pad or foot traffic helps pull loose material away, leaving a chalky film that feels powdery. You can see microcracks and a fine topography that indicate deeper weakness in the paste.
Laitance forms a distinct, weak layer from bleed-water carrying fines to the surface. This soft skin powders under impact, while deeper cohesive failure shows up as broader spalling or cracking. Observable symptoms often point to incomplete hydration and too much water in the mix, especially when curing is rushed or uneven.
Surface weakening mechanisms (bleed water, finishing, low cover)
Concrete dusting often starts at the surface. Here’s why:
Bleed Water: Too much water in your mix forces cement particles to rise, leaving a weak top layer. This layer, called laitance, is soft and prone to dusting.
Overworking the Surface: Improper finishing – over-troweling or over-brooming – can also weaken the surface. It breaks down the cement paste, making it friable and dusty.
Low Cover: Insufficient aggregate cover at the surface leaves a weak layer of mortar exposed. This layer wears away easily under traffic, turning into dust.
The chemistry behind dusting (hydration, laitance, silica)
Concrete dusting is a chemical process:
Incomplete Hydration: If concrete doesn’t cure properly, cement particles don’t fully hydrate. This leaves unreacted cement and weakens the surface.
Laitance Layer: As mentioned earlier, laitance is a weak layer that forms due to bleed water. It’s soft and dusty because it hasn’t hardened properly.
Silica in Dust: Concrete dust contains crystalline silica. This can be harmful if inhaled. Always wear a respirator when dealing with concrete dust.
Environmental and load factors that accelerate dusting
Concrete dusting can be sped up by external factors:
Freeze-Thaw Cycles: Water expands when it freezes, cracking the concrete surface. This makes it easier for dust to form.
Moisture Migration & Deicing Salts: Moisture moving through the slab can cause efflorescence – a white, powdery deposit on the surface that’s easy to turn into dust. Deicing salts can also accelerate this process.
Heavy or Abrasive Loads: Heavy traffic or abrasive materials can wear down the concrete surface, creating more dust.
Risks and Consequences of Concrete Dusting
Dusting shows up as a chalky surface, powdering, or efflorescence that is easy to wipe away with a touch. These signs help you identify where the surface is weakest. You also need to note the health and safety implications of fine particulates on site.
In the short term, dusty floors create more cleaning work and can be slippery. Over time, the surface wears faster, finishes lose sheen, and adhesion for coatings drops. These issues translate into more downtime and potential rework, affecting project timelines and budgets.
Health and indoor air quality concerns
Concrete dusting isn’t just a nuisance. It poses real health risks, especially when it comes to respirable dust and crystalline silica exposure.
Inhalation of these particles can cause respiratory irritation, aggravate asthma or allergies, and even lead to long-term lung damage like silicosis. So, dust control during cleanup and treatment is crucial. Use wet methods whenever possible to minimize dust.
Personal Protective Equipment (PPE) is a must. Wear a respirator or dust mask, safety glasses, and gloves when working with concrete dust. Keep your workspace well-ventilated too.
Damage to property and equipment
Concrete dust isn’t just harmful to health; it’s tough on your stuff too.
- Vehicle finishes: Dust can scratch and dull paintwork. Regular washing helps, but consider a $20-$50 car cover for extra protection.
- Filters: Dust clogs filters in HVAC systems, vacuums, and other equipment. Clean or replace them regularly to maintain efficiency.
- Stored items: Dust soils everything from furniture to tools. Keep sensitive items covered when working on concrete.
- Electronics: Dust can damage electrical components over time. Keep electronics away from dusty areas and clean them regularly.
- Clothing: Concrete dust stains and abrades clothing. Wear old clothes you don’t mind ruining, or invest in a $10-$20 disposable coverall.
Structural and durability implications
Surface dusting isn’t just cosmetic. It can be a sign of deeper durability issues, like inadequate curing or excessive water usage during mixing.
If left unaddressed, dusting can accelerate surface wear, leading to reduced lifespan and increased maintenance costs down the line. It can also affect adhesion for sealers and coatings, making future treatments less effective.
In extreme cases, dusting can indicate more serious structural problems, like excessive water usage during mixing or inadequate curing. If you notice significant dusting, inspect for deeper issues. It’s better to address problems early before they become major (and expensive) repairs.
Diagnosing a Dusty Floor: Inspection and Simple Tests
Define dusting versus chalking and establish a practical severity scale so you can judge when to act. Look for light powdering up to full surface flaking and compare with reference photos if available. This helps standardize your assessment.
Visual checks should cover finish type, any laitance, curing history, moisture, and recent grinding work. Simple tests include water beading, surface absorption, dry dust generation, and a basic wipe test to gauge cohesion. Based on findings, decide whether to clean, grind, or treat with densifiers or sealers.
Visual and Tactile Inspection Checkpoints
Before diving into tests, use this checklist to visually assess your dusty floor.
- Powder on surfaces: Light dusting indicates minor issues; heavy powder signals severe problems.
- Sweeping residue: Faint residue after sweeping shows weak surface cohesion.
- Finish type: Smooth finishes like polished or sealed concrete are less prone to dusting than exposed aggregate or broom-finished surfaces.
- Laitance presence: A thin, powdery layer on the surface may indicate laitance formation during curing.
- Curing history: Insufficient curing can lead to a weak, dust-prone surface. Check if the floor was properly cured.
- Recent grinding or edits: Freshly ground surfaces are more prone to dusting until they’ve been sealed or allowed to cure fully.
- Moisture conditions: Excessive moisture can weaken concrete and cause dusting. Check for damp spots or standing water.
- Efflorescence or staining: These may signal underlying issues like improper curing, inadequate drying, or chemical reactions within the concrete.
Quick rule: If you see heavy powdering, flaking, or signs of moisture, escalate to lab testing or an expert.
On-Site Tests for Surface Condition
These quick, non-destructive tests help gauge your floor’s surface condition and dusting severity.
- Adhesive tape test: Apply a piece of adhesive tape to the surface, press firmly, then remove it. If dust comes off with the tape, the surface is weak.
- Water beading test: Sprinkle water on the surface. If it beads up and doesn’t absorb, the surface is likely sealed or densified.
- Absorption test: Pour a small amount of water onto the floor. If it absorbs quickly, the concrete is porous and prone to dusting.
- Dry dust generation: Gently brush the surface with a broom. If it kicks up a cloud of dust, the surface is weak and friable.
- Wipe test: Wipe the surface with a damp cloth. If powder comes off easily, the surface has poor bond strength.
Quick rule: If tests show high dust transfer or quick water absorption, consider applying a hardener or densifier.
When to Use Lab Testing or a Professional Assessment
Certain conditions warrant further investigation. Here’s when to escalate:
- Persistent dusting: If DIY fixes don’t work, it’s time for lab testing.
- Coating delamination: Peeling or bubbling coatings may indicate underlying issues that need expert assessment.
- Dusting near joints or specimens: Excessive dusting in these areas could signal structural problems that require lab testing.
- Compressive strength concerns: If you suspect the concrete’s compressive strength is low, order a compression test.
- Petrographic analysis needed: If you suspect aggregate issues or laitance formation, consider petrographic analysis.
Quick rule: Don’t hesitate to contact local labs or specialists if you’re unsure about your floor’s condition. They can provide targeted testing and expert advice.
Preventative Measures During Placement and Curing
Choice of mix design matters. A proper water-cement ratio, appropriate binder, and well-graded aggregate influence dusting risk. Select components that balance durability with workability for your area and use.
During placement, control slump and consolidation to avoid laitance at the surface. Finishing practices should minimize surface braking and trap fewer fines, while curing keeps the surface moist enough to develop strength. Field checks help catch risks early and keep the surface solid.
Mix design and placement best practices
The mix design is the backbone of durable concrete. Here’s what you need to know:
Water-cement ratio: Keep it low (0.45-0.6) for strength and durability. Too much water weakens the concrete and increases dusting risk.
Cement type: Use Type I or II cement for most floors. Supplementary cementitious materials like fly ash or slag can improve durability but may slow setting time.
Aggregate grading: Well-graded aggregates reduce voids and improve concrete density, minimizing dusting. Avoid excessive fines which can lead to laitance and surface chalking.
Proper finishing and cure techniques
Correct finishing and curing are crucial for a durable floor:
Timing of troweling: Avoid overworking the surface. Trowel when bleed water has disappeared but before the concrete stiffens.
Finishing sequence: Use a combination of floats, trowels, and sometimes brooms to achieve desired texture without trapping fines at the surface.
Curing: Moist curing or using a curing compound helps retain moisture and control temperature. Follow product labels for application instructions.
Common field mistakes to avoid
Steer clear of these harmful practices:
- Sprinkling dry cement onto plastic concrete: This can’t replace lost water and may cause surface crazing or dusting.
- Overworking the surface with excessive braking: This brings fines to the surface, promoting laitance and chalking.
- Ignoring bleed water: Allow it to escape naturally. Don’t spread it around as this can lead to a weak, dusty surface.
- Finishing too early or late: Too early and you’ll trap bleed water; too late and you’ll damage the surface.
Always follow best practices for your specific project. If unsure, consult with a professional or refer to mix design specs.
Options to Harden or Stop Dusting: Products and Approaches
Understand what dusting means on your floor—chalky surface, powdering, or efflorescence—to set your expectations. Typical causes include unfinished surfaces, exposed aggregate, and sealing gaps that let dust escape.
Compare densifiers and penetrating sealers with surface coats and protectives. Densifiers harden the cement paste, sealers reduce moisture exchange, and coatings add a wear layer. Each option suits different situations and levels of traffic.
Penetrating densifiers (silicate-based)
Silicate-based penetrating densifiers are a popular choice for hardening concrete surfaces and reducing dusting. They work by reacting with the cement paste in your concrete to form a harder, more durable surface gel.
Use cases: These are ideal for new or existing concrete that’s showing signs of dusting due to a chalky surface or aggregate exposure. They’re also great for indoor and outdoor surfaces, but may not be suitable for high-traffic areas where a wear layer is needed.
Limitations: While they penetrate deep into the surface, they don’t create a barrier against moisture or chemicals. Also, they won’t work on concrete with high porosity or efflorescence issues.
Surface hardeners, epoxies, and topical coatings
Depending on your needs, you might want to consider surface hardeners, epoxy/urethane coatings, or topical sealers.
Cementitious hardeners: These are great for new pours or existing dusty floors. They’re easy to apply and can be used indoors and outdoors. However, they won’t provide a wear layer and may not be suitable for high-traffic areas.
Epoxy/urethane coatings: These add a durable wear layer, making them ideal for high-traffic areas. They’re also good for damp or actively leaking slabs. But they require more prep work and maintenance than other options.
Topical sealers: These create a moisture/air barrier, preventing dusting and protecting the surface from stains. They’re easy to apply but may not be as durable as hardeners or coatings.
Material specs and standards explained
Choosing the right material is crucial for a successful outcome. Here are some key properties to check:
- Compatibility: Ensure the product is suitable for your concrete type and age.
- Permeability: Check the permeability rating to ensure it matches your needs (e.g., low permeability for waterproofing).
- VOCs: Consider VOC levels, especially if you’re working indoors or in a poorly ventilated area.
- Recommended substrate conditions: Make sure the surface is clean, dry, and free of contaminants before application.
- Local codes: Always consult local building codes to ensure compliance with any regulations.
If you’re unsure about any aspect, always consult the product’s technical datasheet or contact a professional. Using the wrong material can lead to cracking, staining, weak bond, and other issues.
Step-by-Step DIY Method to Harden a Dusty Concrete Floor
Assess whether the dusting is light or moderate to tailor the treatment. Clearly define the severity before starting so you apply the right product. This helps avoid over- or under-treatment.
Prep with PPE, ventilation, and a thorough removal of loose dust. Test porosity and adhesion on a small patch before full application. Choose a densifier or a penetrating sealer based on the floor’s needs and performance goals.
Step-by-Step Process
The following is a clear, numbered sequence of practical steps to help you harden your dusty concrete floor safely and effectively.
- Safety first: Wear PPE (gloves, goggles), ensure proper ventilation, and contain the work area. Remove loose dust with a broom or vacuum.
- Check moisture levels: Use a concrete moisture meter to ensure your floor is dry enough for treatment (ideally below 4%).
- Assess surface condition: Verify porosity, check for existing coatings, and perform simple absorption/adhesion tests on a small patch.
- Choose the right product: Select a densifier/chemical hardener or penetrating sealer based on your floor’s severity of dusting and desired performance enhancement.
- Mix and apply: Follow manufacturer instructions for mixing, thinning if needed. Use a broom, roller, or airless sprayer to apply an even film, avoiding runs or over-application.
- Monitor dwell time: Allow the product to sit on the surface as per label instructions (usually 15-30 minutes).
- Cure and finish: Follow post-application curing or ventilation needs. If necessary, apply a second coat after the recommended re-coat time.
- Final check: Inspect for any streaks, high spots, or uneven hardness. Make adjustments as needed.
Tools and materials checklist
Before starting your project, ensure you have all the necessary tools and materials to make the job easier and safer.
- Cleaning equipment: Broom, dustpan, vacuum cleaner – To remove loose dust and debris.
- Grinder or broom (optional): For light grinding or etching to improve surface profile.
- Densifier/Sealer: Choose based on your floor’s condition and desired outcome. Read labels carefully.
- PPE (Personal Protective Equipment): Gloves, goggles, mask – To protect yourself from chemicals and dust.
- Sprayer/roller/squeegee: For application. Choose based on product type and coverage area.
- Tape measure: To ensure you have enough material for the job.
- Moisture meter: To check concrete moisture levels before treatment.
- Timer: To keep track of dwell time during application.
- Plastic sheeting or tape: For containing the work area and preventing product drift.
Quick rule: Always check your tools and materials before starting to avoid mid-project delays.
Preparation and application steps
Thorough preparation is key to a successful concrete floor hardening treatment. Follow these steps to ensure your surface is ready for the product:
1. Cleaning: Remove all dirt, grease, and contaminants using a suitable cleaner or degreaser. Rinse thoroughly and allow to dry.
2. Light grinding/etching (optional): If your floor has minor imperfections, use a grinder with a coarse grit to lightly grind the surface or apply an etcher to improve product adhesion.
3. Neutralize and dry: After cleaning or grinding, neutralize any remaining residue with water and allow the surface to dry completely (at least 24 hours).
4. Product application: Follow manufacturer instructions for mixing, thinning if needed. Apply the product evenly using a broom, roller, or airless sprayer, ensuring no runs or over-application.
5. Monitor and maintain: Keep an eye on the product’s dwell time, curing needs, and re-coat recommendations. Follow these guidelines closely to achieve optimal results.
Visual checkpoints and acceptance criteria
After completing your concrete floor hardening treatment, use the following visual checkpoints to ensure a successful job:
- Reduced dusting: Sweep the area with a broom. If there’s significantly less dust than before, the treatment was successful.
- Improved surface sheen: Check for a subtle increase in surface gloss or sheen, indicating better product absorption and adhesion.
- Adhesion tests: Perform simple adhesion tests (like applying and removing tape) to ensure the product has bonded well with the surface.
- Even coverage: Inspect for any missed spots, high points, or uneven application. Make adjustments as needed.
- No streaks or discoloration: Check for any visible streaks, lines, or color changes that could indicate improper application or product incompatibility.
Quick rule: If you’re unsure about the results, wait 72 hours and re-evaluate. If dusting persists or issues arise, consider repeating the treatment or consulting a professional for stronger options.
Repair Strategies for Badly Dusting or Deteriorated Floors
Identify the damage level by watching for powdering, chalking, or spalling and note any moisture or cracking. A quick inspection checklist helps determine the next steps. This frames the repair plan.
Match options to severity: light to moderate dusting may respond to grinding or densification, while deeper issues may require overlays or full removal. Pre-repair prep emphasizes a clean, dry substrate and a plan for dust control and cure times.
Mechanical removal and preparation (grinding, shot blasting)
When your concrete floor is dusting badly, the first step is often to remove the weak surface material. This exposes sound concrete for better bonding of densifiers or coatings.
Grinding is ideal for light to moderate dusting. It uses diamond-impregnated tools to level and clean the surface. For heavier damage, consider shot blasting, which propels steel shot at high speeds to remove weak material.
Both methods create dust, so use proper PPE and containment. After removal, ensure the surface is clean, dry, and sound for best results.
Reprofiling, overlays, and bonded toppings
For moderate damage, consider cementitious overlays or thin toppings to restore profile and strength. These can be applied over a prepared surface to create a new wear layer.
Cement-based overlays are typically used for leveling and resurfacing. They require proper surface preparation, including profiling (F-C 30-70 or CSP 2-4) and moisture barrier application if necessary.
Bonded toppings, like epoxy terrazzo or thin milled overlays, provide a durable, decorative finish. Ensure the substrate is sound and clean for proper bonding. Avoid common failure modes like inadequate surface prep or moisture intrusion.
When to call a professional
While DIY repairs are possible, there are times when hiring a professional is crucial. Extensive delamination (flaking or peeling), structural cracking, and signs of moisture intrusion are red flags.
These issues could indicate underlying problems like inadequate substrate, structural damage, or improper design. A professional can diagnose these issues accurately and plan repairs to ensure longevity and safety.
Don’t hesitate to consult a concrete contractor or engineer if you’re unsure about the extent of damage or the best repair method for your situation.
Maintenance, Safety, and Cost Considerations
Set maintenance goals to keep hardness and limit dusting. Look for signs that dusting is returning and schedule action before it worsens. This keeps future costs predictable.
Plan routine cleaning, periodic reapplication of densifiers or sealers, and targeted spot repairs. Safety includes PPE, ventilation, and proper chemical handling. Local costs depend on materials, labor, and climate, so tailor your expectations accordingly.
Long-term maintenance and cleaning tips
Maintain your concrete floor’s hardness and minimize dusting with these long-term care tips.
Regular Cleaning: Sweep or vacuum weekly to remove loose particles. Use a mild detergent and warm water monthly for deeper cleaning, avoiding harsh chemicals that strip treatments.
Avoid Abrasives: Never use steel wool or wire brushes as they can damage the surface and reintroduce dusting.
Regular upkeep prevents buildup and preserves your floor’s lifespan. Follow up with densifier/sealer reapplication every 1-2 years, depending on foot traffic and environmental exposure.
Safety, PPE, and ventilation when applying treatments
Prioritize safety during treatment application with proper personal protective equipment (PPE) and adequate ventilation.
PPE: Wear a respirator for dust and vapor protection, gloves to prevent chemical exposure, and eye protection to shield from splashes. Follow product Safety Data Sheets (SDS) for specific PPE recommendations.
Ventilation: Ensure your workspace is well-ventilated. Use fans or open windows to maintain proper airflow. If working in a confined space, use a respirator with an air-purifying filter.
Always follow local regulations and product SDS guidelines for safe handling, storage, and disposal of chemicals.
Cost-benefit: prevention versus repair
The cost of preventive measures is typically lower than major repairs over time. Here’s why:
Preventive Measures: Regular cleaning, densifier/sealer application, and minor spot repairs keep your floor in good condition, extending its lifespan and reducing the need for expensive repairs.
Major Repairs: Once concrete surfaces deteriorate (etching, spalling, heavy dusting), restoration can be costly. It may involve mechanical removal, reprofiling, overlays, or bonded toppings.
When budgeting, collect multiple quotes for both preventive measures and potential repairs. Check local labor and material price ranges to make informed decisions. Regular maintenance is the most cost-effective way to preserve your concrete floor in the long run.
Conclusion
Keep the project focused on safety and lasting performance. A dusty floor can be fixed effectively, but the right steps protect people, prevent costly mistakes, and bring back a solid, clean surface.
To finish strong, follow this practical flow: inspect the floor and confirm the dusting causes, test any repair method in a small, hidden area first, remove loose material, choose a suitable hardening or sealing approach, apply per product directions with attention to cure times and ventilation, and verify the surface remains dust-free after treatment and during maintenance.
Avoid common missteps by never mixing products in a single spot, never skip the small-area test, and never rush the cure. Always wear proper PPE, keep the work area dry and well ventilated, and respect manufacturer instructions. If the floor shows severe deterioration, if dusting returns after treatment, or if moisture or cracking is present, pause and reassess before proceeding.
If the surface is badly deteriorated, or you’re unsure about the correct product or method, call in a professional rather than pushing forward. When you can confirm solid adhesion, proper curing, and a dust-free finish, you’ll have a durable floor that stands up to daily use and time. Stay careful, stay methodical, and you’ll finish with confidence.
FAQ
What commonly causes the concrete surface to become dusty or chalky?
Dusting happens when the top few millimeters are weak or worn away, often from improper finishing, curing, or finishing too early. Overworking the surface or leaving it exposed too long before sealing can also break down the surface and make chalky dust. Check the finishing and curing practices you used and look at the surface closely for a powdery layer.
How can I prevent dusting during and after placement?
Seal or harden the surface as soon as it’s ready per the manufacturer’s instructions. Use proper curing methods and avoid heavy traffic or cleaning with harsh materials while the floor is still curing. If in doubt, verify guidance on labels or with the product data sheet before applying any sealers or hardeners.
What repair options exist for a dusty or chalky concrete floor?
Surface abrasion or light grinding can remove the chalky layer. After cleaning, reapply a compatible sealer or densifier if the concrete surface accepts it, following the product instructions. If you’re unsure about compatibility, test a small area first and consult the product manual or manufacturer guidance.
What types of sealers or hardeners should I consider, and how do I choose?
Look for sealers or hardeners that are labeled for dusty or chalky concrete and compatible with your surface type. Read the label for cure time, layering, and recoat intervals. If you’re unsure, check the instruction sheet or contact the manufacturer for local applicability and safety notes.