
- Introduction
- Key takeaways
- What is stucco spalling?
- How paint/coating compatibility affects stucco performance
- Chemical incompatibilities: common bad combinations
- How incompatibility accelerates moisture trapping and freeze-thaw damage
- Poor surface preparation and priming as compounding factors
- Substrate condition: when the stucco itself is the problem
- Application errors and unfavorable conditions that worsen incompatibility
- Signs that incompatible coatings are causing spalling
- Diagnostic workflow: how pros assess coating-stucco interaction
- Remediation options: from spot repairs to full recoat or re-stucco
- DIY testing and diagnostic steps homeowners can do
- Prevention checklist and routine maintenance to avoid accelerated spalling
- Common DIY mistakes that cause or worsen spalling
- Safety, regulations, and environmental considerations during repairs
- Cost estimates and timelines for remediation options
- When to DIY and when to hire a professional
- Case studies and before/after examples (brief)
- Appendix: tools, materials checklist, and material specs explained
- Conclusion
- FAQ
Introduction
Incompatible paint coatings can accelerate stucco spalling.
Understanding how chemical, moisture, and substrate differences cause coatings to fail helps explain why this happens and what you should avoid.
You’ll learn how to assess coating compatibility, choose safer finishes, and apply practical maintenance steps to reduce spalling risk.
Key takeaways
- Choose coating systems compatible with stucco substrates to prevent moisture traps.
- Test VOCs and latex/oil compatibility before committing to a full coating.
- Ensure proper surface prep and primer selection to avoid adhesion failure.
- Inspect substrate condition; hairline cracks or loose plaster aggravate spalling.
- Address moisture sources first; exterior leaks, gutters, and flashing impact coatings.
- Use compatible primers and sealers; mismatches accelerate moisture ingress and failure.
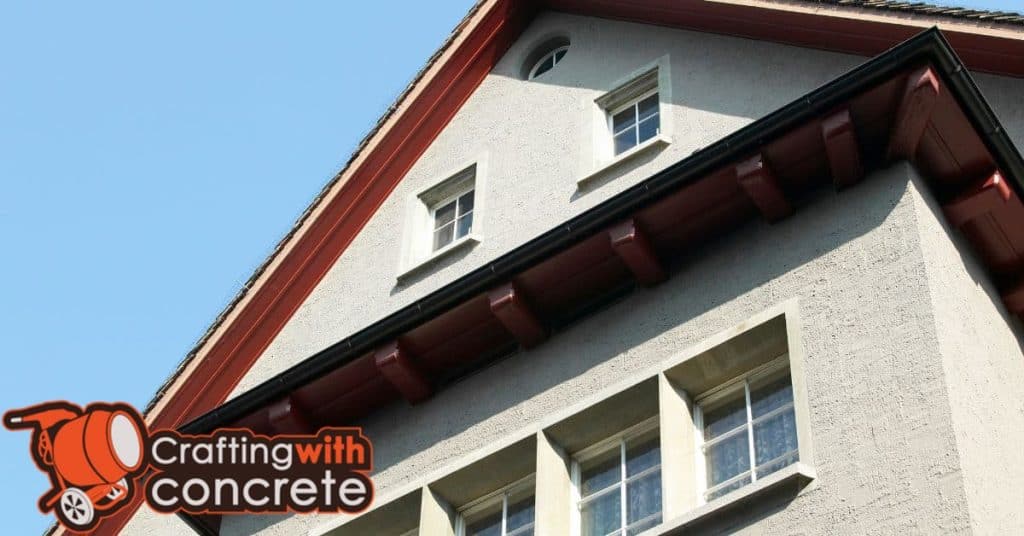
What is stucco spalling?
Stucco spalling is when the top layer of a stucco wall starts to flake, powder, or peel away, revealing a weakened substrate beneath. It’s not just cosmetic wear; it signals the underlying material has lost bond and integrity, often with bubbling, delamination, or hollow-sounding patches when you tap. The appearance can range from chalky specks to visible chips, and it tends to worsen with moisture exposure and time.
For DIY readers, recognizing spalling matters because moisture intrusion can creep behind the coating, insulation can suffer, and small issues can balloon into costly repairs. Typical culprits include freeze–thaw cycles, inadequate substrate prep, incompatible coatings, and aging. Quick checks—moisture tests, a careful screwdriver probe, and a tapping test—help separate true spalling from superficial coating problems and set the stage for timely remediation.
Visual signs vs. structural damage
Visual signs show up first: powdery dust, flaking chips, or patches where the finish has shed and you can see the aggregate. These are common homeowner cues that something warrants closer inspection.
But not every chip is fatal. If delaminated areas are large, persist after repairs, or expand despite treatment, suspect deeper issues like rusting lath or saturated backing. Depth, spread, and recurrence are the clues that distinguish cosmetic wear from structural trouble.
Common causes overview
Moisture is the main driver—water behind the stucco weakens the bond and promotes flaking. Freeze–thaw

How paint/coating compatibility affects stucco performance
Vapor permeability and breathability
Practical check: use moisture-mapping or surface-permeance tests to confirm you’re selecting a finish with appropriate vapor transmission for your climate and stucco porosity.
Elasticity and thermal movement
Stucco expands and contracts with temperature and moisture. A rigid coating cannot follow these movements, leading to
Chemical incompatibilities: common bad combinations
Choosing coatings for lime-based substrates is a balance between letting the wall breathe and providing a durable surface. Mis-matched products trap moisture, create vapor barriers, and can push the finish into blistering or spalling over time. Read the signs below and test first before committing to a system.
This section highlights practical, field-tested incompatibilities and how to verify compatibility on site, so you can sequence primers, topcoats, and elastomerics without sealing in trouble. Use simple moisture, adhesion, and breathability checks to guide safer choices for historic lime and stucco.
Oil vs. latex/ acrylic over masonry
Oil-based primers and topcoats interact with masonry differently than waterborne latex or acrylic systems. Oils tend to seal brick or older renders, blocking capillary movement and trapping interior moisture that wants to escape. If moisture accumulates, you’ll see blistering, downstream alkali effects, and edge- or spot-peeling where the coating can’t move with the wall.
If you later apply latex or acrylic over an oil layer, expect poor intercoat adhesion and potential solvent-induced lifting from the bottom layer. A practical test is a small adhesion scrape after a week of dryness: if the oil surface remains peel-prone, refrain from layering incompatible topcoats. Use a breathable latex/ acrylic system, or apply a compatible primer that is designed for oil-to-latex conversion and does not seal the substrate completely.
Thick non-breathable coatings (elastomeric) over old lime stucco
Historic lime stucco relies on porosity to vent moisture. Thick elastomeric coatings form a continuous, relatively impermeable skin that traps moisture inside, elevating pressure behind the coating. Over time this can lead to microcracking, delamination, and eventual spalling as the base struggles to shed moisture through a sealed layer.
Field cues: look for excessive sheen, shrinking around edges, or moisture staining on neighboring areas after rain. A practical approach is to first apply breathable primers or a lime-compatible surface finish, and reserve elastomeric coats for substrates that are confirmed non-porous or that have been properly prepared with compatible, breathable prep systems. If in doubt, remove the elastomeric and restore with a compatible lime- or cement-based base before re-coating with a breathable finish.
How incompatibility accelerates moisture trapping and freeze-thaw damage
When coatings seal moisture against stucco, water can’t evaporate and builds in wall cavities. In freezing temperatures the trapped moisture expands, causing microcracks and progressive spalling of the surface. Damage often shows weeks to seasons after coating, and older or poorly prepped substrates accelerate the process.
Understanding coating incompatibilities helps you choose compatible products and plan proper surface prep to prevent entrapment. Look for signs like peeling, blisters, dark staining, and use basic moisture tests to verify hidden moisture before sealing. A staged repair approach—clean, prime, seal only when surfaces are dry, and allow curing times—reduces rapid cycles of damage.
Capillary moisture and salt crystallization
Water wicks up through pores and sits under a coating that won’t breathe. When that water evaporates it leaves salts behind in the pore network.
On drying cycles those salts rehydrate and crystallize. The crystals grow and press on the pore walls. Over time that pressure creates microfractures and surface flakes.
On a job you see this as powdering or spalled edges under an otherwise intact finish. Plugging or covering the surface without addressing salts only speeds the damage. Always test for soluble salts before sealing or coating.
Condensation and inter-coat moisture
Different materials shift the dew point inside the wall assembly. Moisture moves toward the cooler or less permeable layer and condenses at the interface.
That trapped inter-coat moisture sits between layers and kills adhesion. Paints and membranes peel from the inside out, not just the surface.
Simple checks help: measure moisture at adhesion planes and consider vapor-open primers. Preventing inter-coat condensation is often the difference between a short-term patch and a lasting repair.
Poor surface preparation and priming as compounding factors
Dirt, dust, efflorescence, and loose or deteriorating stucco create a stubborn barrier that lets primer and paint fail early by preventing good adhesion to the substrate. Missing or ill-suited primers worsen this incompatibility, trapping moisture and magnifying delamination and spalling under freeze-thaw cycles. When the surface isn’t properly prepared, coatings can’t bite into sound material, so adhesion is compromised from the start and short-term performance suffers.
Clear signs of loose stucco and surface contamination are red flags that require physical repair and proper cleaning before priming. A practical approach emphasizes thorough degreasing, mechanical abrading where appropriate, and exposing sound substrate to improve primer bite and long-term durability. Using a surface-appropriate, moisture-tested primer and following a step-by-step workflow—inspection, cleaning, patching, proper primer selection, and correct timing under environmental conditions—helps DIYers avoid trapping moisture and ensures compatible coatings bond effectively, reducing the risk of future failures.
Cleaning and efflorescence removal
Start with a dry scrape and a stiff wire brush to knock off loose stucco, dirt, and powdery salts. Don’t skip this — paint won’t bond to flaky material.
For white salt deposits (efflorescence) use a water rinse and a masonry cleaner or diluted muriatic acid following label instructions. Rinse thoroughly and let the wall dry completely before any primer or patching.
After cleaning, test a small patch with water. If the surface still powders or sheds salts, repeat cleaning or consider a deeper repair. Good cleaning is half the adhesion battle.
Selecting the right primer for stucco
Pick a breathable masonry primer designed for cement and stucco. These let trapped moisture escape and prevent blistering and peeling later.
Avoid universal or heavy acrylic primers on new or damp stucco — they can trap moisture and make incompatibility issues worse. If the wall had salts or moisture problems, use a salt-resistant or specialty masonry primer.
Match the primer to your topcoat and substrate, and follow manufacturer cure times. A proper primer makes finishing paint behave like it should.
Substrate condition: when the stucco itself is the problem
Substrate problems show up as cracks, delamination, hollow or bouncing texture, and improper cure, all of which undermine coating adhesion and age the finish prematurely. Visual inspection paired with simple tests—moisture measurements, crack mapping, and delamination checks—helps pinpoint where the stucco needs repair before any coating. Root causes include poor field mixing, moisture intrusion from failed flashing, age-related deterioration, and mismatched patch materials, which together create an unstable substrate.
A practical remediation flow starts with cleaning, patching, skimming, and proper curing, followed by moisture mitigation and a re-check before selecting primers and a breathable coating. Understanding when to repair guides coating strategy, as breathable coatings suit a damp or porous substrate while non-breathing types can trap moisture and fail. Documenting findings and scheduling follow-up inspections helps ensure adhesion after substrate repair and avoids repeat coating failures.
Identifying deteriorated stucco vs. coating failure
Look for where the problem starts. If paint flakes off but the stucco underneath is hard and bonded, it’s usually a topcoat or primer issue. If the base layer crumbles, powdery dust comes off, or you can pry chunks away, that’s substrate breakdown.
Check around openings and at the base of walls. Water routes and soft spots that extend beyond the paint layer point to failing stucco, not just a bad finish. Tap the surface—hollow sounds predict delamination; solid sounds usually mean the substrate is intact.
Tip: Pull back a small patch of coating in an inconspicuous spot. If the stucco beneath is intact it’s a coating failure. If the stucco itself separates or falls apart, you’re dealing with substrate repair.
When to repair stucco before painting
Repair before painting when cracks go all the way through or are wider than about 1/8 inch, when patches of stucco are loose or missing, or when soft, crumbly areas appear. Small hairline cracks that don’t go deep can be routed and filled, but anything deeper needs proper patching.
Use area thresholds to decide on larger work: if more than 10–15% of a wall shows delamination or extensive damage, consider re-rendering that elevation rather than spot patches. For scattered small repairs under that threshold, repair and then prime before repainting.
If moisture caused the damage, fix the leak and let the wall dry fully before repair and paint. Painting over unaddressed substrate failure just delays the next failure.
Application errors and unfavorable conditions that worsen incompatibility
Proper weather windows and surface dryness
Don’t paint stucco that’s still holding moisture. For cementitious and porous stucco I look for a moisture meter reading under 12–15% before any coating. If you can’t get a meter, wait until the wall feels cool and dry and there are no damp patches.
New stucco needs time to cure — often up to 28 days before paint. After rain or pressure washing, allow at least 48–72 hours of drying in warm, breezy conditions. High humidity or low temperature stretches that out; add another day or two when it’s damp or cold.
Plan work during a true weather window: dry forecast, temps in the manufacturer’s recommended range, and several hours of uninterrupted drying time after application. If conditions aren’t right, postpone — trying to force it risks adhesion failure and trapped moisture.
Coating thickness and recoat timing
Too-thick coats look faster, but they cause problems. Thick layers can skin over while underneath stays soft, trapping solvents and moisture. That leads to bubbling, cracking, and poor adhesion to the stucco underneath.
Follow recoat windows from the manufacturer. For typical acrylics you recoat when the film is dry to the touch or after the recommended hours — often 4–8 hours in good weather, longer in cool or humid conditions. Heavy build systems may require 24 hours or more between coats.
If you’re unsure, wait longer. Better to apply a thin, even coat and let it cure than rush multiple heavy coats and create adhesion or moisture traps that force a redo.
Signs that incompatible coatings are causing spalling
Incompatibility-driven spalling shows up as visible blistering and bubbling of the topcoat, with raised edges around the blisters and abrupt flaking that begins beneath the finished surface rather than from the substrate. You may notice mapped or spiderweb crack patterns, irregular hairline cracks, and sections that lift in sheets, all indicating that the layers are not bonding as a cohesive system. Also look for clues at the coating interface, such as peeling or chalking where old coatings meet new ones, especially latex over oil-based products or non-porous finishes, or sheen mismatches on exposed substrate.
Moisture-related cues, damp-to-the-touch spots, rust-colored staining along joints, and rainfall- or humidity-triggered blistering all point to incompatibility amplifying spalling risk. Quick DIY checks—scratch or tape test for bond strength, moisture meter readings on suspect areas, and compatibility notes on product labels—help distinguish true issues from surface imperfections. If several signs align, plan careful cleaning, select appropriate stain and primer, and consult manufacturer guidelines before recoating to improve long-term adhesion and avoid repeat failures.
Adhesion and cross-cut/peel test
Make a small cross-hatch through the topcoat down to the substrate with a sharp blade. Press strong tape over the cuts, pull it off quick and see what comes away. If large squares of coating lift, you’ve got poor adhesion.
A few tiny flakes at the cut edges are normal. But full squares or long strips coming away point to chemical incompatibility or a poor bond. Complete separation down to primer or substrate means the layers aren’t compatible and will keep spalling.
Peel tests with a putty knife give the same clue: easy lifting equals bad bond. Keep tests small and note patterns across the surface — uniform failure suggests a system issue, isolated failures suggest surface contamination or prep problems.
Moisture mapping with a meter
Run a moisture meter over the coated surface in a grid. Compare readings across the area and against an unaffected control spot. Elevated pockets under the coating often show trapped moisture that’ll push coatings off.
Pin meters read through coatings better; non‑contact meters give a quick scan. If readings jump near blisters, mapped cracks or flaking, moisture is likely driving the spalling rather than just age or wear.
Note: High readings near joints, downpipes or poor flashing are common. If the whole area reads high, investigate sources (leaks, rising damp) before recoating — otherwise the incompatibility will just show up again.
Diagnostic workflow: how pros assess coating-stucco interaction
A systematic diagnostic workflow evaluates how the coating and stucco interact by progressing from noninvasive observations to targeted tests, starting with visual cues such as color and texture changes, blistering, efflorescence, and staining that hint at moisture issues or substrate weakness. Adhesion and cohesion tests, including quick pull-off and cross-cut methods, provide thresholds that guide remediation decisions and indicate whether the system is failing due to poor bonding, surface contamination, or substrate movement. Moisture profiling with surface meters and infrared cues helps determine coating compatibility and whether underlying moisture would compromise adhesion before any coating is applied or re-coated.
When noninvasive checks raise concerns, plan sample removal and targeted lab analyses for chemical compatibility, porosity, and capillary action to confirm causes and inform material choices. A stepwise triage, proper labeling, and clear documentation ensure safe, compliant work and help clients understand why remediation steps are necessary. This approach reduces guesswork on the jobsite and provides a transparent path from inspection to remediation, with safety and permit implications guiding the escalation to invasive testing if required.
When to do a probe or core sample
Pull small coating patches or drill cores when visible signs don’t tell the whole story. Examples: repeated delamination, blistering that recurs after repairs, or suspect staining that could be salt-driven.
Take samples where failure is active and at a control location nearby. A local probe shows bond quality; a core shows layer buildup, adhesion to the stucco, and trapped moisture paths.
Don’t probe blindly. If the issue looks widespread or the coating history is unclear, sample early so your repairs are directed by facts, not guesses.
Role of lab analysis (salts, binder compatibility)
Send samples for lab work when field checks and simple adhesion tests leave questions. Labs can quantify soluble salts, identify alkali reactions, and analyze binders from old coatings.
That data tells you whether salts drove the failure, or whether an incompatible binder or primer is causing poor adhesion. It also guides choice of cleaners, neutralizers, or suitable replacement coatings.
Use lab results to back your repair plan. They cost a bit up front but prevent repeated callbacks and wasted labor on the wrong fix.

Remediation options: from spot repairs to full recoat or re-stucco
Remediation options progress from minimal to comprehensive, starting with cleaning, crack patching, and spot priming to address localized damage, advancing to a controlled coatings removal with a breathable recoat when moisture risk or material degradation is confined to broader areas, and culminating in a full stucco replacement or re-stucco when the damage is wide, ongoing, or includes substrate deterioration. This section clearly defines each tier and explains, with practical criteria, when it is appropriate based on damage extent, signs of moisture intrusion, and the likelihood of recurring failure, while also outlining a quick diagnostic approach to distinguish superficial issues from systemic problems.
Surface preparation, coating and material compatibility, and safety are essential to successful remediation, with emphasis on thorough cleaning, dust removal, crack sealing, breathable primer selection, and choosing elastomeric or smooth coatings that won’t trap moisture or promote spalling. Understanding the sequencing—from containment and cleaning to patching, possible coating removal, priming, and the final coat—helps you plan weather windows, curing times, and required protective measures for workers and occupants. Costs and timelines vary by tier, but knowing when a full re-stucco makes more sense long-term helps manage expectations and budget while reducing the risk of repeat repairs.
When spot repair is appropriate
Choose spot repair when the substrate is solid and the problem is limited to a few areas — hairline cracks, chipped coating, or small stains. You can clean back to sound material, prime the area, and feather in patch material without disturbing the rest of wall.
Keep repairs local. If adhesion tests and probes show no hidden delamination, a targeted fix is faster and far cheaper than a full recoat. Use compatible primers and match finish thickness to avoid future failures.
Tip: Always document tests and take photos. If problems return, you’ll need that evidence to justify stepping up to a larger remediation.
When full coating removal is required
Strip back to substrate when failures are widespread — peeling across large areas, multiple failed layers, or clear incompatibility between systems. If probes show that the coating isn’t bonded to the base, patching over it only delays the inevitable.
Also remove coatings when you find trapped moisture, recurring blistering, or hidden salts rising through the surface. In those cases you must address the source and reapply a breathable, compatible system to prevent repeat failures.
Note: Full removal lets you inspect the substrate, repair defects, and start with a single correct system rather than layering over unknowns.
Re-stucco vs. patching decision factors
Decide based on damage extent and cause. Small cosmetic damage or isolated hairline cracks usually take a patch. Large areas of delamination, structural cracking, or recurring moisture events point toward full re-stucco.
Consider substrate condition, insulation changes, and window/flashings details. If the render is losing key adhesion or the wall assembly is wet and deteriorating, replacement is the safer long-term choice.
Practical rule: If repairs repeat in the same spots or you can’t get a uniform, compatible surface with local work, budget for re-stucco — it saves time and cost over repeated callbacks.
DIY testing and diagnostic steps homeowners can do
DIY testing helps homeowners identify moisture intrusion, coating adhesion issues, substrate health, and salt deposits that can weaken paint performance, while giving you a baseline to compare different areas and track changes over time. Safe, simple steps—adhesive tape tests, coin-tap sounding, basic moisture meter use, and visual salt checks—let you spot problems early, compare problem areas to intact sections, and plan targeted prep before repainting, priming, or sealing.
During the tape test, place a small patch along an edge, press for about 30 seconds, and compare edge lift to other areas to flag areas with poor adhesion. A weak edge lift or no lift, a hollow-sounding coin tap, and moisture meter readings outside typical ranges for the substrate all suggest different levels of prep or possible professional involvement, especially if salt efflorescence appears. Record findings in a simple field notebook with color codes—green for OK, yellow for caution, red for near-defect—and include photos or sketches to guide whether to proceed with prep and priming, full repaint, or to seek professional advice.
Step-by-step adhesion tape test
Quick, low-risk way to check if the stucco coating is bonded to the base. You get a direct read on adhesion and areas that need follow-up.
- Clean a small, flat area of the stucco with a damp cloth and let it dry. Dirt and loose dust give false weak results. The surface should look clean and not powdery.
- Press a strong adhesive tape (3M-style) firmly onto the area for 30 seconds. This pulls on the coating the same way weather does. You should feel it grab when you press down.
- Pull the tape back quickly at a low angle. Fast removal stresses the bond; a clean pull shows good adhesion. Inspect the tape—little or no coating on it is the check.
- For a cross-hatch, score a small grid through the coating to the substrate first. This isolates the coating so you test the film, not the substrate. Apply tape over the grid and remove as before; loose squares mean poor adhesion.
- Repeat tests in several suspect spots: near windows, at corners, and under eaves. Adhesion can vary across a wall. Mark failing spots for repair planning.
- If large areas lift or whole flakes come off, stop and consult a pro. Extensive delamination often needs adhesive testing and repair methods beyond DIY.
Basic moisture-meter reading protocol
Moisture readings tell you if a substrate is dry enough for coatings or if water is present behind the stucco. Use either a pin-type (probes) or a non‑invasive pinless meter depending on the surface and depth you need to check.
Take several readings: near suspect areas, at mid-wall height, and at low points where water collects. For pin meters, push probes into the stucco to reach the lath or substrate. For pinless meters, hold the pad flat and take overlapping scans to cover the area.
Watch the numbers: as a general rule, readings under 12% are typically safe for most exterior coatings. Readings between 12–18% are cautionary—investigate flashing, drainage, and recent weather. Readings above 18% indicate active moisture or drying issues that need fixing before any recoating.
Prevention checklist and routine maintenance to avoid accelerated spalling
A practical prevention plan builds a seasonal cadence for moisture control, with spring and fall inspections and post-storm checks designed to curb moisture ingress and coating failures before they start, while scheduling timely maintenance that matches local weather patterns. Prioritize caulking and sealant integrity around windows, trim, and joints, replacing cracked or aged material and ensuring compatibility with stucco and any existing coatings to maintain a continuous, breathable protective layer. Regularly address gutters and downspouts, perform gentle surface washing to remove mildew and dirt, and complete crack touch-ups to minimize water exposure and defend against premature coating failure.
This approach gives DIY and jobsite readers a clear, repeatable routine that can be tracked seasonally, helping to identify and fix small issues before they escalate into costly repairs. By documenting hairline and larger cracks and selecting breathable, compatible products for touch-ups, you improve long-term coating performance and reduce the risk of moisture-driven damage. Checking for moisture or substrate issues during each step—blistering, staining, efflorescence, or soft spots—lets you address root causes before re-coating, avoiding mismatched materials and extending the life of the finish.
Annual inspection items
Walk the job once a year with a flashlight and a notepad. Check roofline flashings, window and door perimeters, and any expansion or control joints for gaps or separation.
Look for visible coating defects like blistering, cracking, or areas where the substrate shows through. Pay special attention to areas that see water runoff from gutters and downspouts.
Fix small defects now — a quick recaulk or touch-up paint saves a lot of work later. If something looks loose or water-stained, mark it for repair before winter or the rainy season.
Cleaning and gentle mold/efflorescence removal
Use a soft-bristle brush and a mild detergent or a diluted bleach solution for mold. Rinse thoroughly with low-pressure water — high pressure can damage breathable coatings and make spalling worse.
For efflorescence, dry brushing or a vinegar-water rinse usually works. Test any cleaner on a small hidden area first to make sure it doesn’t harm the finish or sealant lines.
Wear protective gear and avoid harsh acids or abrasive pads. When in doubt, consult the coating manufacturer’s recommended cleaner to protect breathability and adhesion.
Common DIY mistakes that cause or worsen spalling
Common DIY mistakes include painting over damp or moisture-prone stucco, skipping primer, using the wrong paint type, and overcoating with too many layers, all of which raise spalling risk. These shortcuts can trap moisture inside the substrate, force thick, uneven films, and undermine adhesion long before you notice peeling or cracking that signals moisture migration. Proper moisture testing, adequate drying times, careful primer selection, and restrained coating thickness are essential to protect the stucco surface from premature failure for long-term resilience.
Without thorough surface prep—removing efflorescence, dirt, mold, and loose paint—and addressing cracks, movement, flashing, and weep holes, bonding will be compromised and failures may recur. Choosing elastomeric or compatible coatings and applying the right number of coats at the correct intervals matters for long-term performance, because improper paint type or layering can cause poor elasticity and delamination under freeze-thaw cycles, and protecting interior finishes. Understanding moisture sources and substrate issues helps you plan repairs before coatings fail, improving durability, reducing costly callbacks, and giving you a safer, more lasting finish.
Overcoating without addressing leaks
Painting over damp or leaking stucco is like putting a tarp over a leaky roof — it hides the problem and traps it. If water is coming through cracks, joints, or a failed flashing, paint will blister, peel, and the underlying spall will only get worse.
Before you lay down another coat, find and fix the source of water entry: repair flashing, seal joints, and replace failed caulk. Fix leaks first, then prep and paint. Otherwise you’re just delaying the next repair and spending money twice.
Using high-build impermeable coatings
Products like heavy elastomeric or rubberized coatings feel like a quick fix, but they can lock moisture inside the masonry. Trapped moisture expands and freezes, then forces the stucco apart — accelerating spalling rather than preventing it.
Avoid oil-based and non-breathable masonry paints if the wall has any moisture. Use breathable primers and finishes designed for stucco. If you’re unsure, test a small area or ask for a breathable product label — breathability matters when dealing with old or damp walls.
Safety, regulations, and environmental considerations during repairs
This section emphasizes safe repair practices by addressing lead paint precautions for older homes, implementing silica dust controls during grinding or removal, selecting appropriate PPE, and properly segregating, labeling, and disposing of hazardous waste in line with local regulations. It covers testing and containment for lead-based paints, treated abatement options when needed, and the importance of licensing and involving certified professionals for disturbances that exceed safe DIY thresholds. It also outlines practical workflow considerations such as water suppression, local exhaust ventilation, HEPA vacuums, dust barriers, and planful waste handling to minimize airborne contaminants.
Understanding these requirements matters because it reduces health risks, helps keep crews compliant with permits and environmental rules, and protects property values by preventing costly recalls or fines. For a DIY or jobsite reader, following these guidelines means clearer planning, safer work environments, and fewer surprises when inspections occur or when disposal options must be navigated. It also reinforces that certain conditions—like suspected asbestos or complex waste streams—warrant licensed abatement professionals and documented safety plans to ensure a responsible, compliant project from start to finish.
Lead-based paint testing and abatement basics
If your house was built before 1978, assume lead could be present and test before chipping, sanding, or scraping. Buy an EPA-recognized do-it-yourself test kit for a quick check, but remember kits can give false negatives.
If a test shows lead or you suspect it, call a certified abatement contractor. They have the training, containment methods, and clearance testing needed to keep your family safe. Don’t try large-scale removal yourself — improper work spreads dust and creates a bigger hazard.
Containment and cleanup are key: keep residents and pets out, seal work areas, and use HEPA vacuums and wet methods. Follow local disposal rules for lead-contaminated waste — your contractor will handle that if you hire one.
Silica dust mitigation and respirator guidance
When cutting, grinding, or removing stucco and concrete, control dust at the source. Use wet-cutting methods to keep dust down and attach a HEPA-rated vacuum to grinders when possible. These steps reduce the amount of airborne silica you breathe.
Wear a proper respirator. For most stucco grinding an N95 is the minimum, but for heavy or prolonged work use a P100 respirator or powered air-purifying respirator. Fit the mask correctly and replace filters as recommended.
Keep the work area ventilated and limit access. Use wet cleanup and HEPA vacuums for final cleanup. If you’re uncertain about exposure levels or the job is large, hire a pro experienced with silica controls.
Cost estimates and timelines for remediation options
This section contrasts remediation options—spot repair, recoat with removal, and full stucco replacement—by clearly defining what each entails (surface prep, removal of incompatible coatings, moisture barrier installation, and finish coat) and by offering ballpark cost ranges and typical project timelines for each approach. Costs encompass materials and labor and will vary with area size, stucco condition, accessibility, regional labor rates, and contractor discounting, with approximate ranges such as a few thousand for a targeted spot repair, mid-range for a recoat with removal, and substantially higher for full replacement, while timelines reflect prep, removal, cure, weather windows, and potential occupant downtime.
Understanding these drivers helps you plan, compare bids more effectively, and guard against common hidden costs such as permits, disposal fees, moisture testing, contingency allowances, and requirements for mock-ups. Typical durations range from a few days for spot repairs to several weeks for a full replacement, with weather constraints affecting scheduling and cure times. A bid should clearly state scope, warranty terms, contingency, moisture testing, and whether a mock-up or pilot area is required before full work proceeds.
Cost factors that drive price
Square footage is the first big one. More wall area means more materials and labor, and costs grow fast once you hit full-replacement territory. A small patch job will be a fraction of a full-wall job.
Access and site conditions matter. Scaffolding, tight corners, pitched roofs or second-story work add time and equipment costs. If crews need lifts or long set-ups, expect a higher bill.
The number of failed layers and any hidden damage drives price too. One thin crack is cheap. Multiple delaminated layers or rotted framing require peel-back and repair, which adds materials and trades. Regional labor rates also swing estimates—expect higher costs in big cities or high-cost states. Plan for variance depending on these variables.
Typical project timelines
Assessment and quoting usually take 1–3 days. That covers inspection, moisture/readings, and a written estimate. Simple jobs can be scoped in a day; complicated issues take a couple of site visits.
Spot repairs and localized patch work generally run 1–5 days. That includes prep, repair, dry time, and finishing. Small patches can be same-week turnarounds; larger patched areas may need curing time between coats.
Full removal and re-stucco projects commonly run 1–3+ weeks. Demolition, substrate repairs, lath/WRB install, base coats, finishing coats and proper cure times add up. Weather and permit timing can extend that schedule, so budget extra days when planning.
Estimated ballpark costs and timelines by option (for planning purposes only)
- Spot repair (localized patch, small area): typically $1,000–$4,000. Timeline usually 1–5 days, depending on patch size, surface condition, and cure time between coats. Key risks: reoccurrence if underlying moisture is not fully resolved.
- Recoat with removal of incompatible coatings (localized area or partial resurfacing): typically $6,000–$20,000. Timeline usually 1–3 weeks, including surface prep, removal of old coatings, moisture barrier installation, and finish coat cure. Includes moisture testing and mock-up requirements where specified.
- Full stucco replacement (extensive failure, large area): typically $20,000–$60,000+ and can be higher for multi-story or hard-to-access walls. Timeline usually 3–6+ weeks, factoring demolition, substrate repairs, lath/WRB installation, multiple coat cycles, and extended cure times. Weather windows and permitting can add to schedule.
Notes: these figures are ballpark ranges to help you plan bids. Actual costs will depend on area size, coating types, reveal conditions, access, permits, disposal, moisture testing, and any required mock-ups. Always require a written scope of work and a breakdown of materials, labor, and any contingency allowances in the bid.
When to DIY and when to hire a professional
Know when to roll up your sleeves and when to call in pros by following a clear threshold: minor chipping or hairline cracks may be tackled with DIY steps, while deep spalling, extensive moisture intrusion, or signs of structural concern typically require professional assessment and remediation. Use simple tests to diagnose, such as moisture checks, substrate soundness, and paint compatibility, and always weigh the need for permits and inspections before starting any major work. In short, this section helps you decide, based on damage extent, diagnostics, safety risks, and regulatory requirements, where you should invest your time and tools versus your budget for a pro.
Important safety note: DIY work should be limited to cosmetic or superficial repairs on dry, well-ventilated conditions. If you encounter high moisture, visible salt contamination, delaminating or bulging stucco, or any signs of structural movement, stop DIY efforts and hire a professional. Always use proper PPE, secure ladders, and avoid elevated work when you’re not trained or equipped for safe access. If moisture tests show persistent moisture or leaks, or if the substrate sounds hollow or unstable when tapped, treat it as a red flag and seek professional assessment. If required by your local codes, factor in permits and inspections before starting any major work.
Understanding the why behind the guidance matters because it protects you from risk, cost overruns, and failed repairs that recur after a DIY fix. The practical takeaway is a straightforward decision pathway: if you stay within minor repair thresholds, follow a focused prep-and-patch routine with compatible primers and proper curing; if not, assemble a vetted team—stucco contractors, licensed painters, and moisture specialists—and use a clear pro-selection checklist to compare experience, certifications, and past projects. This approach helps you move confidently from initial assessment to a durable finish, minimizing hazards and ensuring compliance with local codes while delivering lasting results for your property.
Signs you need a stucco/masonry specialist
If you see deep, stair-step or horizontal cracks that run through the wall and into the structure, that’s a red flag. Small surface hairline cracks are one thing; cracks that shift with settling or touch load-bearing elements are another.
Persistent high moisture—mold growth behind finishes, wet insulation, or efflorescence that returns after repairs—usually means the issue is beyond simple patching. Recurring damp often points to failed flashing, drainage, or hidden leaks that need a pro diagnosis.
Widespread delamination, bulging panels, or long stretches of loose stucco mean the bond has failed. When the finish is separating over large areas you’re into system replacement and structural attention, not a weekend patch job.
If structural components need repair, such as rotted framing, shifted lintels, or compromised supports, call a specialist. Those repairs affect safety and code compliance and often require permits and engineered fixes.
Questions to ask contractors and required qualifications
Ask how many years they’ve worked specifically with stucco and masonry, and request photos of recent jobs similar to yours. A good contractor will provide references and be willing to let you contact former clients.
Confirm they carry liability insurance and Workers’ Comp, and ask for proof. Also ask about warranties—what’s covered, length, and whether follow-up visits are included. A written warranty backed by a business license matters.
Ask about their remediation methods: how they handle flashing, drainage, substrate repair, and breathable finishes. Steer clear of contractors who only offer cosmetic fixes when the problem may be systemic.
Finally, verify they pull required permits or work with an engineer when needed. Contractors who understand local code and inspection requirements will save you time and future headaches.
Case studies and before/after examples (brief)
Three brief case sketches illustrate how incompatible coatings can accelerate stucco spalling, detailing the initial condition, diagnostic clues observed during inspection, the remediation chosen, and the end result in terms of durability and moisture control. Each scenario shows a concrete cause-and-effect chain: a moisture-laden substrate with a mismatched finish, an adhesion failure detected by a simple scratch test, and a porous base layer that invites rapid moisture migration. The before/after narratives emphasize measurable improvements in film integrity, stops to spalling, and longer service life after proper system matching and timely re-coating.
Readers get quick, DIY-friendly checks you can relate to on the job: moisture readings, coating adhesion tests, substrate porosity or cracking, and the temperature-humidity conditions at application. Remediation pathways present concrete, step-by-step options anchored in compatibility, including surface prep, coating removal if needed, priming, and proper re-coating intervals with matching finish systems. Takeaways emphasize avoiding incompatible products, following manufacturer guidelines, maintaining appropriate cure times, and scheduling regular inspections to prevent recurrence.
Small-area coating incompatibility resolved with stripping + breathable recoat
Paint blistering and hairline cracks showed up on a small porch wall after a contractor used an alkyd over a moisture-sensitive latex primer. I cut a test patch, scraped back to sound substrate and ran a solvent and adhesion test to confirm poor bond. The diagnostics proved the topcoat was incompatible and trapping moisture.
We stripped the failed topcoat in the problem zone, cleaned salts and dust, and let the wall dry. Then I applied a high-perm (breathable) base coat and a compatible acrylic finish. Adhesion tests passed before final coats went on.
Result: no return of blisters, even after a wet winter. The small, targeted repair saved time and money versus full rework, and it let the wall breathe so trapped moisture could escape.
Full re-stucco after trapped moisture and salt damage
A bay-facing wall had repeated peeling, efflorescence and soft stucco over a long run. Moisture meters and core pulls showed saturated insulation and salt migration from a failed flashing detail. Patching kept failing because the substrate was compromised throughout the area.
I recommended full removal of the damaged stucco, replacement of the ruined lath and flashings, and reinstalling a modern drainable WRB with new stucco layers. We used a salt-tolerant scratch coat and proper weep screeds at the base.
The replacement cured the chronic moisture path and stopped salt push-through. The wall now performs structurally and looks consistent. Going full re-stucco was the right call when the hidden damage was widespread.
Appendix: tools, materials checklist, and material specs explained
An appendix section summarizes tools, materials checklist, and material specs in plain language for planning and verification. Key tools are moisture meters to verify intrusion before coating, scrapers and wire brushes to remove failed coatings, a HEPA vacuum for dust control, and respirators with eye protection to keep workers safe during prep and application. The materials portion covers primer types suitable for stucco and concrete, breathable topcoats, compatibility notes on bonding agents and elastomeric versus acrylic paints, sealants for joints, and disposal requirements, plus quick pass/fail sniff tests, film thickness guidance, and typical cure times, with references to standards for moisture, permeability, adhesion, and VOC limits.
For DIY readers, this material explains not just what to use but why, linking tool cadence, storage tips, and safety reminders to real jobsite decisions. The quick-check workflow—inspect → test moisture → prep → select materials → apply primer/topcoat → document results—plus clear permeability and prep standards helps prevent spalling and promotes safer, more reliable outcomes.
Tools for DIY inspection and minor repair
Keep the kit simple and jobsite-ready. These tools cover most moisture checks, small removals, and safe cleanup without calling a pro.
- Moisture meter Measures moisture content in wood and drywall. Look for pin and pinless modes; readings under 15% are usually safe. Rental units cost $10–20/day; avoid cheap single-mode meters for hidden leaks.
- Scrapers & putty knives Remove loose paint, thinset, and soft damaged drywall paper. Use 1–3″ widths and a stiff blade for edges. Wear gloves and pry gently to avoid widening damage.
- HEPA vacuum Captures dust, mold spores, and loose debris. Choose a vac rated HEPA H13 or higher; shop rentals run $30–60/day. Don’t skip HEPA when sanding or cutting contaminated material.
- Disposable respirators Protect from dust and spores during disturbance. Use N95 for basic jobs, P100 for heavy contamination. Replace after heavy use and seal-check each time.
- Flashlight / inspection mirror Illuminate cavities, behind tubs, and under eaves. Bright LED with a magnetic or flexible mirror helps find hidden wet spots. Check batteries before starting and avoid relying on phone flash.
- Caulking gun & sealant Apply waterproof seal at joints and penetrations. Use a quality silicone or polyurethane rated for the substrate. Cut the tip to match the gap and tool the bead for full contact.
- Carbide utility knife Score and remove damaged drywall or flooring facings. Use fresh blades for clean cuts and less tearing. Keep a spare blade—dull ones cause jagged edges and bigger repairs.
- Portable infrared thermometer Spot-check cold/wet surfaces to find thermal anomalies. Aim for +/-2–3°C accuracy; it helps locate moist areas without probing. It’s optional but useful—under $50 for basic units.
Key material specs to look for on labels
Pick materials by spec, not brand. The right ratings keep repairs durable and prevent return problems like stains, bond failure, or cracking.
- Perm rating (perms) Shows vapor permeability of membranes and paints. Low perms block vapor; high perms allow drying. Use low-perm only where vapor control is needed—wrong choice traps moisture and causes rot.
- VOC content Indicates volatile organic compound levels in paints and adhesives. Look for low-VOC or zero-VOC for indoor work. Higher VOCs smell and may require ventilation or professional-grade PPE.
- Substrate compatibility Lists approved surfaces like concrete, gypsum, or wood. Match product to the substrate listed on the tech sheet. Using the wrong product leads to poor adhesion and premature failure.
- Adhesion & bond strength Gives peel or shear values for adhesives and primers. Higher values mean stronger, longer-lasting bonds. If a product lacks numbers, treat it as lower-performance and consider alternatives.
- Temperature & cure times Shows application and service temperature ranges plus cure time. Plan work to stay inside those ranges; low temps slow cure and weak bonds. Rush jobs in cold conditions often fail.
- Mildewcide / mold rating Indicates resistance to fungal growth for paints and sealants. Use mold-resistant products in wet areas like bathrooms. Skipping this can lead to staining and repeated remediation.
- Waterproofing class For membranes and coatings, look for tested classes (e.g., liquid-applied, sheet, ANSI/ASTM references). Higher class means better resistance to liquid water. Applying a non-waterproof product where waterproofing is required causes leaks and damage.
- Fire & smoke ratings Important for some interior materials and insulation. Check for ASTM or local code listings when finishing living spaces. Ignoring fire ratings can fail inspections and create hazards.

Conclusion
The key takeaway is simple: incompatible coatings can hide moisture problems and accelerate spalling, so you can’t rush repairs without first validating compatibility and substrate health. Do the safe, small-diameter tests first, confirm you’re not trapping water, and address any moisture or surface prep issues before you coat again.
Check in this order: visually inspect for existing damage, test a small area with compatible products and the recommended primer, verify the substrate is sound and dry, then proceed with a controlled repair or recoat plan. If a test area shows bubbling, cracking, or rapid moisture return, pause and reassess before expanding the work. Expect to document every step—surface condition, product brands, mixing ratios, and cure times—to avoid repeating mistakes.
Common mistakes to avoid include applying a new coating over a failed seal or damp stucco, skipping priming on porous surfaces, and choosing colors or coatings that trap heat and moisture. Always follow manufacturer instructions, wear proper eye and respirator protection, keep surfaces dry during application, and work in moderate temperatures to prevent premature curing or cracking. Never force a repair if moisture remains or if you detect efflorescence, soft spots, or hollow knocks—these are signs you’re not ready to coat.
If in doubt, call a professional when moisture intrusion is ongoing, the stucco shows extensive deterioration, or you’re faced with structural concerns. A pro can perform diagnostic tests, select truly compatible materials, and execute spot repairs or re-stucco with the right backing and details. Stay disciplined, test first, and you’ll protect your home’s shell, avoid costly callbacks, and finish with a durable, safer exterior. You’ve got this—start with a plan, do the checks, and proceed intentionally.
FAQ
What happens if you put the wrong paint on stucco?
The wrong paint can trap moisture and make stucco crack faster. It can also peel off and leave you with a bigger repair job later.
Why do some coatings cause stucco to spall?
Some paints don’t breathe. When moisture gets behind the coating, the freeze-thaw cycle pushes the stucco apart. That forces pieces to peel or flake off.
How can I tell if a coating is compatible with stucco?
Read the label for exterior use on masonry or stucco. If in doubt, ask the paint shop for a breathable, elastomeric or acrylic masonry paint. If it sounds cheap, it probably is.
What should I do to fix stucco that’s already spalling?
Stop painting over it until you repair the damage. Remove loose material, seal cracks, and let the surface dry. Then choose a breathable masonry paint and apply per the instructions.