
Introduction
Drywall alternatives are other wall materials you can use when traditional drywall isn’t the best fit for a room or budget. They include options like panels or boards that can be easier to install, repair, or finish in real-world projects. This intro keeps it practical and hands-on, focusing on what to expect and how to approach choosing and using them.
Common problems with drywall alternatives come from moisture, movement, or improper finishing, and the fixes are usually about sealing, securing, or re-surfacing. To test for issues, start with a visual check, listen for loose panels when you tap the wall, and look for staining or cracking; address findings by following the manufacturer’s directions or, if in doubt, checking local rules and best-practice steps before proceeding.
Key takeaways
- Assess moisture history and substrate condition before choosing drywall alternatives.
- Know common failure modes: cracking, sagging, delamination, and fastener pullout.
- Test methods: visualize damage, perform moisture tests, and probe substrate integrity.
- Plan for code, fire, and safety compliance with local requirements.
- Choose materials with compatibility to framing, sheathing, and finish systems.
- Budget realistic maintenance, anticipate repairs, and schedule periodic inspections.
- Avoid improper fixes; wear eye protection, gloves, and dust control measures.
Table of Contents
- Introduction
- Key takeaways
- Overview of Drywall Alternatives
- Common Problems Seen with Drywall Alternatives
- Root Causes and Risk Factors
- Testing and Inspection Methods
- Fixes and Repair Strategies
- Cost, Lifespan, and Long-Term Value
- Safety, Environmental, and Regulatory Considerations
- Planning, Selection, and Installation Best Practices
- Conclusion
- FAQ
Overview of Drywall Alternatives
Drywall alternatives are panels and systems used in place of traditional gypsum board. They’re selected for moisture resistance, fire ratings, or rapid construction timelines, depending on the project and environment. This intro covers what qualifies as an alternative and why it often makes sense on real jobsites.
Common types include cement board, gypsum board variants, plywood or OSB, plaster, fiber cement, magnesium oxide, and metal framing with panel systems. Each brings different traits like moisture tolerance, rigidity, weight, and install ease. We’ll compare core performance factors and outline typical installation considerations, including fasteners, barriers, substrate prep, and tool needs. A quick decision checklist helps homeowners and builders match materials to project type, finish, budget, and maintenance expectations. Testing, certification, and standards are touched on to guide when to consult a structural or code specialist.
What qualifies as a drywall alternative
A drywall alternative is any material used to replace traditional gypsum board for interior walls and ceilings. These materials share some basic properties like rigidity, weight, fire resistance, and moisture resistance but differ in their specific qualities and use-cases.
For instance, cement board is highly moisture-resistant, making it ideal for wet environments like bathrooms or showers. On the other hand, magnesium oxide boards offer excellent fire resistance, suitable for areas with strict fire safety regulations.
Plywood and OSB are rigid and strong, often used in unfinished basements or as a temporary wall solution due to their easy availability and install-ease. Plaster, though more labor-intensive, provides a unique aesthetic finish.
Fiber cement and metal framing with panels offer durability and long-term performance but may require additional considerations like moisture barriers or specific fasteners during installation.
Pros and cons at a glance
Drywall alternatives offer a range of benefits and drawbacks. Here’s a quick comparison:
Pros
- Moisture resistance: Ideal for bathrooms, kitchens, or unfinished basements.
- Fire resistance: Many options provide enhanced fire safety.
- Durability: Long-lasting performance in high-traffic areas or harsh environments.
- Unique aesthetics: Some materials offer distinctive finishes.
- Easy installation: Certain types can be installed faster than traditional drywall.
- Environmentally friendly: Some options are made from recycled materials or are more sustainable.
Cons
- Cost: Generally higher than standard drywall.
- Weight: Heavier materials may require additional structural support.
- Installation complexity: Some materials need specific tools, fasteners, or installation techniques.
- Dust: Certain materials generate more dust during installation.
- Aesthetics: Not all materials offer a smooth, seamless finish like traditional drywall.
- Maintenance: Some materials may require regular maintenance to prevent damage or deterioration.
Choosing the right material depends on your project’s specific needs, budget, and long-term maintenance expectations. Consider consulting local codes and available trades for expert guidance.
Common Problems Seen with Drywall Alternatives
We catalog typical failure modes by material type, including cement board, gypsum-based boards, fiber cement, plaster, brick or stone veneers, and MDF panels. Look for cracking, warping, mold or mildew, delamination, screw pops, staining, joint failures, and impact damage. Note which materials are most prone to each issue.
Causes vary from moisture intrusion and substrate movement to insufficient fasteners and improper joint treatment. We highlight testing and inspection methods DIY readers can use, plus when to pull in a pro. Practical remedies focus on reinforcing fastener patterns, moisture barriers, sealing and paint strategies, and joint rework, with clear limitations and warranty considerations. Maintenance tips are tailored to climates and use cases, helping readers compare cost, install complexity, and long-term durability across major materials.
Moisture- and Mold-Related Failures
Moisture is a common enemy of drywall alternatives. It causes swelling, promotes mold growth, and breaks down materials over time.
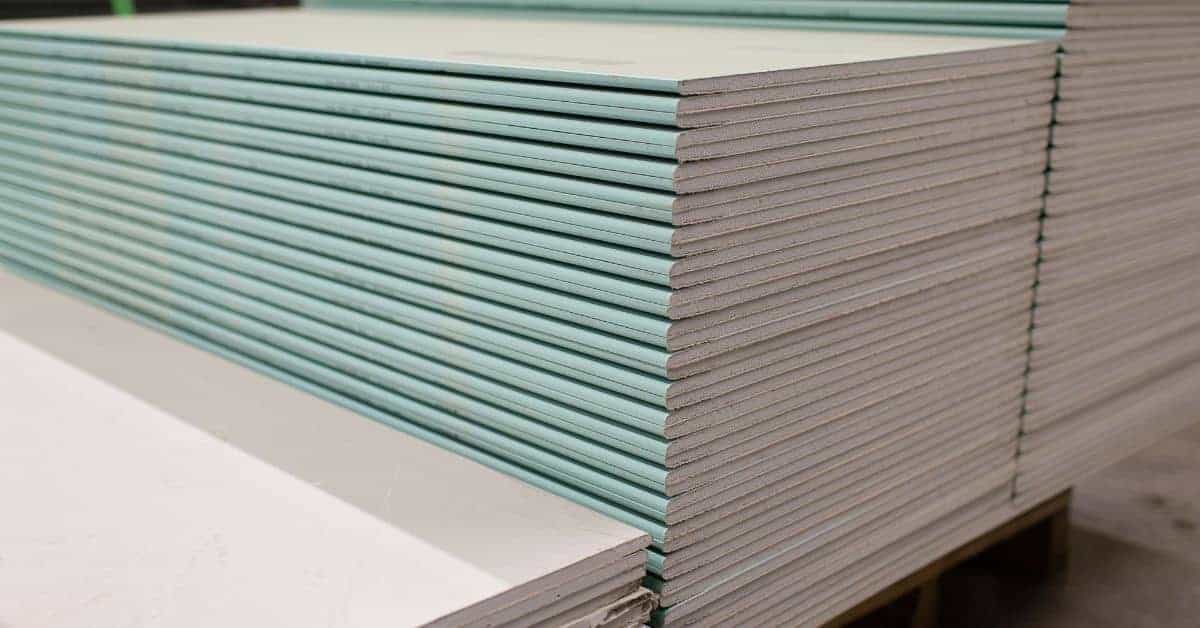
Cement board, often used in bathrooms and kitchens, can swell if not properly sealed or installed with expansion gaps. Gypsum-based boards are also susceptible to moisture damage, though they’re less durable than cement board.
Mold thrives in damp environments. It can grow on the surface of fiber cement, MDF panels, and other porous materials if not protected with paint or sealant. In severe cases, mold can cause delamination and structural damage.
Structural and Finish Problems
Cracks, joint separation, fastener failure, and surface delamination are common issues with drywall alternatives. These problems often stem from substrate movement, insufficient fasteners, or improper installation.
Cement board can crack due to excessive substrate movement or inadequate expansion gaps. Gypsum-based boards may experience joint failures if not properly taped and mudded. Fiber cement can delaminate if exposed to severe temperature swings or UV rays.
Plaster walls can crack due to settlement or inadequate reinforcement. Brick/stone veneers may experience impact damage or cracking from settling foundations. MDF panels are prone to screw pops and joint failures, especially in high-traffic areas.
Root Causes and Risk Factors
This section maps the core reasons problems occur in drywall alternatives, starting with moisture intrusion pathways and their impact. Identifying water sources, leakage sites, and vapor drive helps prioritize inspection points and remedies.
We diagnose root framing and substrate issues, including structural flatness, stud spacing, and sheathings that create misalignment or weaknesses. Thermal movement, edge clearances, and expansion gaps are analyzed to guide panel selection. Fastener strategy, including type, length, spacing, and corrosion resistance, is reviewed to prevent pull-out or cracking. We also check adhesive and finish compatibility to avoid delamination, plus consider site conditions that affect curing times and long-term durability.
Installation and workmanship errors
Proper installation is key to avoiding problems with drywall alternatives. Here are common mistakes to avoid:
- Wrong fasteners: Using the wrong type or size of fasteners can lead to pull-outs and cracks. Always use recommended fasteners.
- Inadequate backing: Insufficient support behind panels can cause sagging, warping, or even failure. Ensure proper framing and substrate.
- Poor seam treatment: Skimping on tape or joint compound can result in visible seams and cracks. Follow manufacturer’s guidelines for taping and finishing.
- Insufficient curing times: Rushing the drying process can cause delamination, warping, or weak bonds. Allow panels to cure as directed.
Attention to detail during installation will help prevent these common mistakes.
Material selection and environmental factors
Choosing the right materials for your climate and building use is crucial. Here are key considerations:
- Climate: Consider temperature swings, humidity changes, and freeze-thaw cycles when selecting materials.
- Humidity: High moisture levels can cause warping, swelling, or mold growth. Choose materials rated for high humidity areas.
- Wet rooms: Bathrooms and kitchens need materials resistant to water and steam. Use green board or other moisture-resistant panels.
- Exterior use: Exterior walls require materials that can withstand weathering, UV exposure, and temperature changes. Choose exterior-grade products.
- Incompatible materials: Some materials don’t play well together. Avoid mixing incompatible adhesives, primers, or finishes to prevent delamination or staining.
Matching materials to your specific environment will help ensure long-term performance and durability.
Testing and Inspection Methods
The scope here differentiates drywall from substrate issues and moisture-related failures, clarifying which tests DIYers can perform versus professional diagnostics. Visual cues guide the initial assessment.
Tools like moisture meters, infrared cameras, and surface moisture mapping help quantify conditions. Non-destructive adhesion and bond tests, plus simple pull or roll tests, aid in evaluating coatings without demolition. Document locations, environmental conditions, and timing to analyze trends, and know when lab or third-party testing is warranted for core samples or mold analysis. Safety, containment, and moisture management steps keep the job progressing while diagnosing. A clear reporting structure helps readers decide between repair and replacement.
Visual and Tactile Inspection Checklist
Before you grab any tools, use this checklist to visually inspect your walls. It’s quick and can help you prioritize areas for further testing.
- Moisture intrusion: Look for water stains, discoloration, or damp spots on the wall.
- Mold: Check for visible mold growth, musty odors, or a history of mold problems in the area.
- Bulging or cracking: Feel for soft spots and check for cracks, bulges, or delamination (when paper faces peel off).
- Efflorescence: Look for white, powdery deposits on the surface, which could indicate moisture intrusion.
- Fastener backouts: Check if screws or nails are popping out. This can be a sign of moisture-related issues.
- Odor: Smell the wall. A musty odor can indicate hidden mold growth.
- Wet spots after rain: Make note of any areas that stay wet longer than others after it rains.
- Previous repairs: Check if there are any existing repairs or patches, which could hide underlying problems.
Quick rule: If you find any of these issues, mark them down and prioritize those areas for further testing.
Tools, Tests, and When to Call a Pro
Now that you’ve done your visual inspection, it’s time to bring in some tools for more accurate testing. Here’s what to use and when to call in the pros.
- Moisture meters: Use both pin and pinless types to measure moisture content in the wall. Pinless meters are better for larger areas, while pin meters give more precise readings at specific points.
- Infrared camera: This tool shows temperature differences, helping you locate hidden moisture sources or insulation gaps.
- Probe: Use a small probe to poke holes in the wall and check for delamination or soft spots. Be careful not to cause more damage than necessary.
- Tape measure: Measure affected areas to keep track of their size and location.
- Red flag: high moisture readings (above 15%): If you’re getting consistently high readings, it might be time to call a pro for further assessment.
- Red flag: mold growth: If you see or smell mold, stop testing and contact a professional immediately. Mold can cause health issues and requires specialized handling.
- Red flag: asbestos concerns: If your home was built before 1980, there could be asbestos in the drywall. Do not disturb any suspect materials and call a licensed asbestos abatement contractor.
Quick rule: If you’re finding serious issues or aren’t sure about your readings, don’t hesitate to call a professional. It’s always better to be safe than sorry.

Fixes and Repair Strategies
Start by identifying failure types and root causes to choose the right path: moisture intrusion, movement, fastener issues, or mold. This informs whether patching or replacement is needed.
For sealing and moisture control, apply surface sealants, vapor barriers, and waterproof coatings as appropriate, and improve drainage to reduce recurrence. Re-fastening and joint rework focus on selecting correct fasteners, backer materials, and durable joints. Mold treatment emphasizes containment, cleaning, protective gear, and ventilation, with professional help when needed. Temporary fixes versus permanent solutions should align with a long-term repair plan and maintenance schedule to minimize repeat failures.
Small repairs and DIY fixes
For minor issues, don’t hesitate to tackle them yourself. Here’s how:
Patching: Use a joint compound or concrete patch for small holes. Apply with a putty knife, let it dry, then sand smooth.
Sanding: Lightly sand any rough spots using fine-grit sandpaper. Wipe off dust with a damp cloth.
Sealing and Replacing Screws: If screws are loose or missing, tighten them or replace with new ones. Use a sealant to prevent moisture intrusion at screw holes.
Know your limits: if damage is extensive, involves structural issues, or you suspect mold, stop and call a pro.
Major repairs and replacement guidance
For significant damage, follow these steps:
Replacing Panels: Remove damaged panels carefully. Cut new ones to size if needed. Ensure they’re properly aligned and secured.
Substrate Remediation: If the substrate (studs, drywall) is damaged, replace it. Check for rot or other issues before reinstalling.
Improving Framing/Ventilation: Ensure framing is square and secure. Improve ventilation to prevent future moisture buildup. Use vapor barriers where needed.
Correct Reinstallation: Follow manufacturer’s guidelines for reinstalling panels. Use the right fasteners, backer materials, and joint tape for a durable seal.
Cost, Lifespan, and Long-Term Value
Outline upfront costs by common drywall alternatives, including material considerations and typical labor expectations for DIY versus professional installation. Also account for any tools or accessories needed.
Compare long-term maintenance costs such as sealants, moisture barriers, repainting, and replacement cycles, noting how climate and use influence those expenses. Provide realistic lifespan estimates and connect them to warranty terms and typical deterioration patterns. A quick total-cost-of-ownership view helps readers weigh ROI, energy effects, insurance considerations, and resale value when choosing materials.
Cost drivers and budgeting tips
When comparing drywall alternatives, consider these cost factors:
Material price: Cement board ($2-$4/sq ft), fiber cement ($3-$5/sq ft), gypsum with coatings ($1.50-$3/sq ft), plaster ($3-$6/sq ft), tile-backed options ($4-$8/sq ft).
Labor: DIY installation can save 50% or more, but consider your skill level and time commitment.
Access: Hard-to-reach areas may increase labor costs. Finishing level: Higher-end finishes add to the cost.
Lifecycle and maintenance considerations
The lifespan of drywall alternatives varies:
Cement board & fiber cement: 50-100 years, low maintenance. Expect to repaint every 10-15 years.
Gypsum with coatings & plaster: 20-30 years, higher maintenance due to moisture susceptibility. Repaint every 5-7 years and address moisture damage promptly.
Tile-backed options: 75+ years, high maintenance due to grout cleaning and tile replacement. Expect to re-grout every 10-20 years.
Safety, Environmental, and Regulatory Considerations
Health and safety cover dust control during cutting, mold risk with moisture-damaged boards, proper PPE, and ventilation strategies for occupants and workers.
Fire ratings and codes explain when Type X or fire-rated assemblies are required and how different products affect resistance, including relevant standards and local implications. Environmental impacts cover formaldehyde and VOC concerns, recycled-content options, and gypsum recycling or disposal guidelines. We also outline regulatory aspects like labeling, inspections, and code compliance for new work and renovations, plus any local amendments and licensing requirements. Sourcing and sustainability compare durability and moisture performance across options, with notes on long-term environmental trade-offs.
Health and safety best practices
When handling drywall alternatives, prioritize your health and safety. Here’s how:
Personal Protective Equipment (PPE): Wear a respirator or dust mask when cutting to protect against silica dust. Gloves and goggles are also essential.
Contain hazardous materials: Seal off work areas, use plastic sheets, and keep doors closed to prevent dust from spreading throughout your home.
Mold remediation protocols: If you find moisture-damaged boards with mold growth, remove them immediately. Wear PPE, ventilate the area, and follow local guidelines for safe disposal.
Environmental impact and sustainability trade-offs
Consider these factors when choosing drywall alternatives to minimize your environmental footprint:
Embodied carbon: Some products have higher embodied carbon than others. Consider this in your decision-making process.
Recyclability: Opt for materials that can be recycled or reused at the end of their life cycle. Gypsum boards, for instance, are recyclable.
Off-gassing: Some boards emit volatile organic compounds (VOCs) and formaldehyde. Choose low-VOC or no-added-formaldehyde options to minimize off-gassing.
Eco-friendly alternatives: Consider cement board, specialty gypsum, or plaster – each has its own environmental pros and cons. Research and choose the one that best fits your sustainability goals.
Planning, Selection, and Installation Best Practices
Approach room-by-room criteria, using humidity, impact, fire rating, and aesthetics to guide material choice. Consider gypsum board alternatives, cement boards, fiber cement, plaster, and other options.
Use pre-installation planning to evaluate substrate condition, moisture barriers, acoustics, and any lead concerns, ensuring alignment with local code and HVAC. Substrate preparation focuses on flat, clean backing and addressing repairs, uneven surfaces, and appropriate fastener schedules. Detail fastening and attachment plans, movement joints, and proper edge clearances. Joint treatments and finishing cover sealants, mesh, tape, and coatings, with realistic drying, sanding, priming, and paint compatibility expectations. Finally, include durability testing, maintenance planning, and troubleshooting steps for common installation issues.
Common selection mistakes and how to avoid them
Before you start, know these common pitfalls. Avoiding them ensures a durable, safe finish.
- Choosing the cheapest for wet areas: Cheap materials won’t withstand moisture. Use cement boards or fiber cement in bathrooms and kitchens.
- Ignoring fire rating: Fire-resistant materials are crucial in certain rooms. Check local codes before choosing.
- Wrong fasteners: Using the wrong screws/nails can cause panels to warp or fall off. Follow manufacturer’s guidelines for each material type.
- Overlooking expansion joints: Not allowing for substrate movement can lead to cracking. Plan for expansion joints in large rooms and areas with temperature changes.
Remember, the cheapest option isn’t always the best. Prioritize durability and safety over cost.
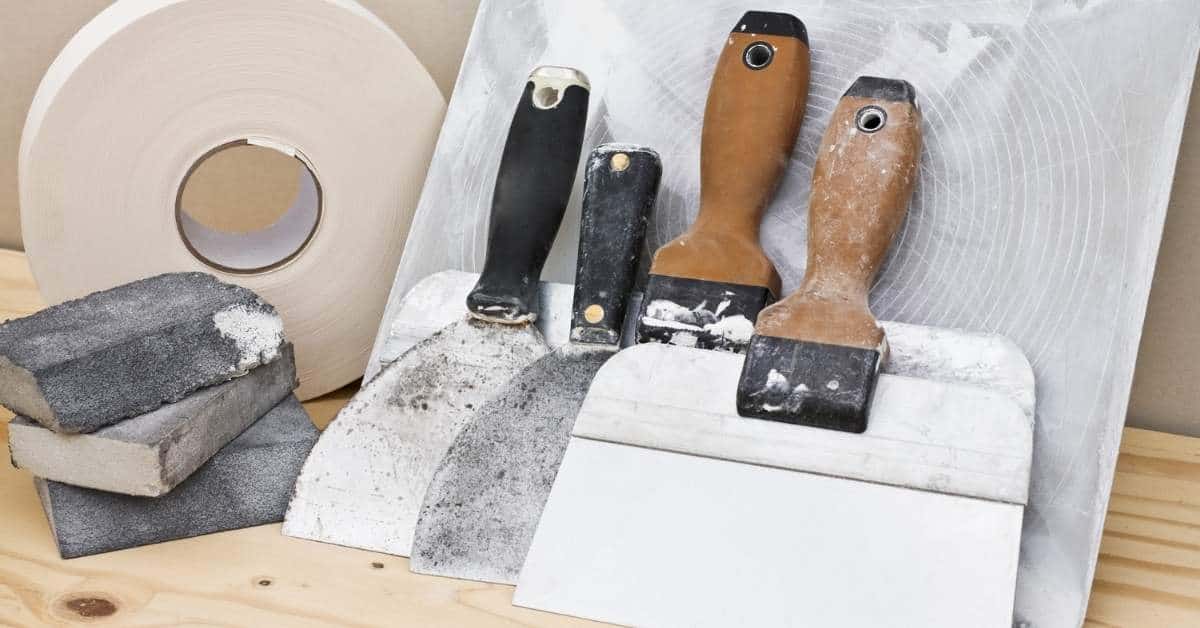
Tools and materials checklist for installers
Use this checklist before starting any installation to ensure you have everything needed for a successful job.
- Tape measure: Essential for accurate cutting and fitting. Skipping it leads to improper sizing.
- Level or laser level: Crucial for ensuring walls are straight. Without it, panels may not align properly.
- Utility knife or circular saw: For cutting materials to size. Using the wrong tool can damage materials.
- Screwdriver or drill: For securing panels to the substrate. Wrong tools can strip screws or cause damage.
- Sealant: Essential for preventing moisture intrusion and improving durability. Skipping it can lead to water damage.
- Tape (paper-faced or fiberglass): Necessary for reinforcing joints and preventing cracking. Without it, joints may split over time.
- Joint compound: Required for filling and finishing joints. Skipping it results in visible seams.
- Sandpaper (120-grit): Needed for smoothing joint compound and preparing surfaces for paint. Without it, paint may not adhere properly.
- Protective clothing: Essential for safety. Not wearing it can result in injuries.
Quick rule: Always check your tools and materials before starting. Missing something can lead to delays or poor results.
Conclusion
Choose a drywall alternative that fits the space, but put safety and long-term performance first. Do solid testing, fix the real causes, and follow install practices so the finish looks right and lasts.
Start by surveying the area, confirm moisture and structural conditions, pick a proven method, and then follow a practical sequence: test in a small spot, prep the substrate, install per manufacturer guidance, seal joints, inspect for gaps or drafts, and plan for finish work or touch-ups before you seal the room. Keep the work tight to plan, and document anything you replace or repair so future work stays consistent.
Common mistakes to avoid include rushing the testing phase, skipping moisture checks, and ignoring compatibility between materials and fasteners. Don’t mix incompatible products, and never skip safety gear or create hidden gaps that trap moisture or air. Work in well-ventilated areas, guard against dust, and verify temporary fasteners won’t damage the wall or framing as you test and install.
If the project involves high moisture, structural questions, or complex code requirements, call a professional before you push ahead. A pro can confirm material ratings, navigate building codes, and finish with a durable, safe result. Stay practical, stay careful, and you’ll finish confident and with a solid, lasting wall for years to come.
FAQ
What should I know about drywall alternatives for walls and ceilings?
Drywall alternatives exist, but each has pros and cons. Check how it handles moisture, impact, and fire risk, and compare with your space needs before choosing.
What common problems show up with drywall alternatives?
Problems include moisture damage, cracking, delamination, and poor fastener hold. These issues often trace to improper installation, high humidity, or poor substrate prep.
What are the main causes of issues with drywall and its alternatives?
Root causes are moisture exposure, temperature swings, thermal movement, and inadequate detailing at edges or joints. Also watch for subpar surface prep, wrong fasteners, or incompatible finishes.
How can I test for problems in walls or ceilings using drywall alternatives?
Use a moisture meter to spot hidden damp, inspect for soft spots or staining, and tap for hollow sounds that indicate voids or loosened layers. Verify installation meets product instructions and, if in doubt, check with the manufacturer or local guidelines.