
Introduction
Control joints are deliberate grooves that control where cracks form, while expansion joints separate slabs to accommodate movement. In practice, placement is planned during finishing to guide cracking, and timing depends on how the concrete cures and hardens. Always check manufacturer instructions and local rules for any specific requirements.
Spacing and type depend on the slab and how it will be used, with common options including contraction, isolation, and other joints. When planning, consider the limit of movement and the edge distances, and always verify guidance from product labels or local building codes. For a DIY approach, start with a clear plan and adjust as you observe curing, using basic tools and safe methods.
Key takeaways
- Define control joints vs expansion joints and their purposes in concrete slabs.
- Place control joints at anticipated contraction points; expansion joints at structure transitions.
- Plan joint spacing based on slab thickness and climate expectations, not fixed numbers.
- Cut control joints after surface cure trends; form expansion joints at design boundaries.
- Include different joint types: contraction, isolation, construction; explain when each is used.
- Safety: always wear PPE; keep chipping tools away from moisture; avoid hazards.
Table of Contents
- Introduction
- Key takeaways
- Overview — Purpose and Differences
- Placement: Where to Put Each Joint Type
- Spacing Guidelines and Depth for Control Joints
- Timing — When to Cut or Form Control Joints and When to Install Expansion Joints
- Materials, Fillers, and Sealants: Selection and Cost Considerations
- Installation Best Practices and Safety Considerations
- Performance Impacts, Long-Term Maintenance, and Troubleshooting
- Planning Checklist and Decision Guide for Homeowners and Contractors
- Conclusion
- FAQ
Overview — Purpose and Differences
Control joints, also called contraction joints, are deliberate cracks that give concrete a planned path to relieve shrinkage and tensile stresses as it cures. Expansion joints, or isolation joints, are gaps that absorb movement between slabs or between a slab and a structure. Understanding the physical reasons behind each joint helps you choose the right type for a given situation.
In typical practice, control joints aim to keep cracks tight and straight within a slab, while expansion joints accommodate movement from temperature changes and structural separation. Use cases span interior slabs, exterior slabs, sidewalks, and driveways, with signals like edge movement, door openings, or transitions guiding your choice. Timing, execution method, and spacing differ: saw-cut or pre-formed joints are used for control joints, while gaps are left or formed at interfaces for expansion joints.
What is a control joint?
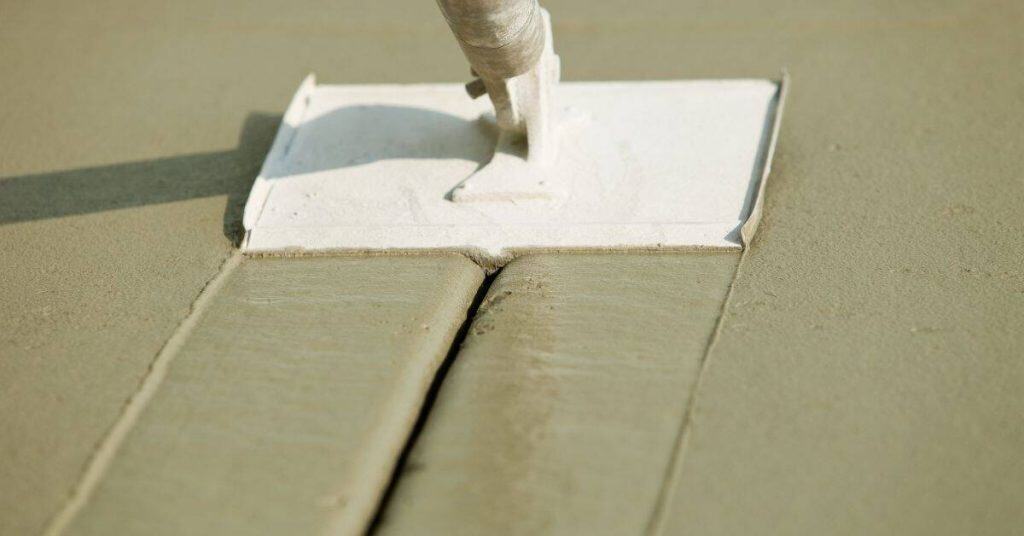
A control joint, also known as a contraction joint, is a planned, partial-depth cut made in concrete to direct shrinkage cracks to desired locations. It’s like giving the concrete a ‘start line’ for where it can crack.
Concrete shrinks as it cures and hardens. Without control joints, these shrinkage forces would cause random cracking throughout the slab. By creating control joints, we’re controlling where these cracks happen.
Key points: Partial-depth cuts, planned locations for shrinkage cracks, prevent random cracking.
What is an expansion (isolation) joint?
An expansion or isolation joint is a full-depth separation filled with compressible material to permit independent movement between slabs or between slab and structure. It’s like giving the concrete room to ‘breathe’ and move.
Concrete expands and contracts with temperature changes. Without expansion joints, these movements can cause stress and cracking. By creating expansion joints, we’re allowing the concrete to move freely without causing damage.
Key points: Full-depth cuts, filled with compressible material, allow for independent movement, prevent stress and cracking due to temperature changes.
Quick comparison table
Control Joints:
- Prevent random shrinkage cracks
- Typical in interior slabs, driveways, and sidewalks
- No filler needed; saw-cut to desired depth (usually 1/4 – 1/3 of slab thickness)
Expansion Joints:
- Accommodate movement from thermal expansion and structural separation
- Typical in exterior slabs, between different structures or materials
- Filled with compressible material (like foam, cork, or rubber); full-depth cut
Placement: Where to Put Each Joint Type
When planning, distinguish control joints from expansion joints across slabs, sidewalks, driveways, and building interfaces to set clear expectations. Control joints are typically spaced within interior and exterior slabs to manage shrinkage cracks, while expansion joints sit at edges, transitions, and where movement is expected between structures. Marking locations before pours keeps you aligned with future expansion paths and reinforcement.
Practical positioning covers interior slabs, exterior slabs, walkways, and junctions with walls or other structures. Align joints at doorways and transitions, and plan for changes in plane near edges or corners. Before pouring, use chalk lines or templates, and decide on timing for saw-cutting or tooling so joints are clean and straight.
Control Joint Placement Rules
Control joints are crucial to manage cracking in concrete slabs. Here’s how to place them:
Near Edges: Place control joints 1-2 feet from edges to prevent random cracking.
Changes in Slab Geometry: At changes in slab size, thickness, or direction, cut control joints to direct any potential cracks away from these points.
Re-entrant Corners: Place control joints at 45-degree angles to re-entrant corners (inside corners) to manage stress concentrations.
Expansion Joint Placement Rules
Expansion joints allow slabs to move independently. Here’s where to place them:
At Walls/Columns: Place expansion joints 1-2 inches from walls or columns to isolate the slab from these structures.
Between Pours: At construction joints between different pours, use expansion joints to prevent cracking due to temperature changes and shrinkage.
Long Continuous Runs: In long, continuous runs of concrete, place expansion joints every 60-80 feet to accommodate slab movement.
Planning with Slab Layout and Reinforcement in Mind
Coordinate joint placement with your slab’s layout, reinforcement, and anticipated loads:
Reinforcement: Align control joints with reinforcing bars to prevent interference. Avoid placing expansion joints over reinforcement.
Embedded Items: Place expansion joints around embedded items like pipes or manholes to isolate them from slab movement.
Load Paths: Plan joint locations to accommodate anticipated load paths and avoid compromising joint performance under heavy loads.
Spacing Guidelines and Depth for Control Joints
The core spacing idea is that the typical joint spacing in feet roughly matches two to three times the slab thickness in inches. For planning, translate that rule into a layout that fits the actual slab shape and anticipated movement. Use a simple worked example to picture how runs line up across a room or walkway.
Depth guidance sits around a quarter to a third of the slab thickness, accounting for whether you’re saw-cutting or forming joints. Environmental factors, exterior versus interior exposure, and climate all influence where you place joints and when you cut them. If the slab varies in thickness or carries heavy loads, adjust spacing accordingly and consider additional joints.
Rule-of-thumb spacing and variations
The core rule for control joint spacing is simple: aim for about 2 to 3 times the slab thickness in inches, measured in feet. So, a 4-inch thick slab would need joints spaced roughly every 8–12 feet. Here’s how you calculate it:
For a 4-inch slab: (4 inches * 12 inches/foot) / 3 = 16/3 feet ≈ 5.33 feet apart.
However, this rule has exceptions. Reduce spacing for high shrinkage mixes, heavy loads, or long narrow slabs to prevent excessive cracking.
Joint depth and geometry
Control joints should be cut or formed to a depth of about 1/4 to 1/3 of the slab thickness. This helps control cracking by allowing the concrete to shrink and move freely.
For saw-cut joints, aim for 1-inch deep cuts in a 4-inch thick slab. For formed joints, create grooves that are about 1 inch wide and 1 inch deep. This provides similar crack control while allowing for easier forming.
Remember, these depths are guidelines. Adjust as needed based on your specific mix design, environmental conditions, and load requirements.
When to add extra joints (complex shapes, control points)
Not all slabs are simple rectangles. In complex layouts, you’ll need to add extra joints in hotspots where cracking is more likely:
– Changes in slab width or length
– Corners and edges
– Openings for doors, windows, or other penetrations
At these spots, reduce joint spacing by up to half the normal distance. For example, if your usual spacing is 10 feet, consider adding extra joints every 5 feet in hotspots.
Timing — When to Cut or Form Control Joints and When to Install Expansion Joints
Timing frameworks separate early-entry sawing, conventional sawing, and formed joints. Early-entry is done within a short window after pour, while conventional sawing occurs later, with weather and curing affecting how long you can wait. Formed joints are planned differences that don’t rely on cutting after pour, but still depend on temperature and moisture control.
Expansion joints have their own timing, typically installed before pouring in key locations or after initial cure as required by movement risk. Temperature ranges, moisture conditions, and adhesive compatibility all influence when these joints go in. Weather and curing conditions can delay or accelerate jointing to prevent ragged edges and poor seal performance.
Cutting control joints: timing windows and methods
Timing is crucial when cutting control joints. There are three main methods:
Early-entry sawing (12–24 hours after pouring) can be done if the slab has set enough to resist raveling but is still soft for easy cutting.
Conventional sawing (24–48 hours or more) is typically used when the concrete has gained strength and won’t crumble during cutting. This method allows for deeper cuts.
In hot, dry conditions, evaporation speeds up the setting process, allowing earlier cutting. Conversely, cold weather slows down setting, delaying the timing of cuts.
Installing expansion/isolation joints: when to place and fill
Expansion joint installation can be done during pouring or immediately after, depending on the type of joint:
For formed joints, install the joint material before pouring. For saw-cut isolation joints, cut the slot first, then insert the joint material.
Filling and sealing expansion joints should be done after the initial cure (usually 28 days) but before final finishing. This ensures proper adhesion of the flexible filler with the concrete and allows for expected movement.
Cold- and hot-weather considerations
Weather conditions can significantly affect joint timing:
Hot, dry weather speeds up setting. Monitor the slab for signs of rapid drying to avoid premature cutting that could lead to raveling or ragged joints.
Cold weather slows down setting and can delay cuts. Keep an eye on the forecast and adjust your timeline accordingly. You might need to use heating blankets or other curing methods to maintain a consistent temperature.
Always check with local concrete experts for specific recommendations based on your location’s unique climate conditions.
Materials, Fillers, and Sealants: Selection and Cost Considerations
Define which fillers fit different joint sizes, exposures, and substrates, noting installation depth and compression requirements. Closed-cell foam, neoprene, bituminous board, and backer rod each have roles, and you should match them to expected movement. Choose backer material depth and ensure compatibility with your chosen sealant.
Compare sealants such as polyurethane versus silicone for elasticity, adhesion, cure time, UV resistance, and compatibility with primers or coatings. Cost drivers and life expectancy depend on environment and traffic; plan for replacement intervals and maintenance needs. Include installation steps like joint cleaning, substrate temperature, and accepting tolerances that balance expansion and control joints.
Expansion Joint Filler Options and Pros/Cons
Choosing the right expansion joint filler depends on joint size, weather exposure, and substrate type. Here are your options:
Closed-cell foam: Suitable for small to medium joints (1/8″ – 1/2″). It’s moisture-resistant but not UV-stable. Expect to pay around $0.30 – $0.50 per linear foot.
Neoprene: Good for medium to large joints (1/4″ – 3/4″). It’s durable, flexible, and resistant to moisture and UV. However, it’s pricier at around $0.60 – $0.80 per linear foot.
Bituminous board: Ideal for large joints (1/2″ and above). It’s tough, waterproof, and UV-resistant but can be messy to install. Prices range from $0.50 – $0.70 per linear foot.
Backer rod: Used in combination with other fillers for wide joints (1/2″ and above). It’s inexpensive ($0.20 – $0.40 per linear foot) but offers no protection on its own.
Sealants for Expansion and Control Joints
Flexible sealants protect against water intrusion. Here’s what you need to know:
Polyurethane: Great for both expansion and control joints. It’s elastic, adheres well, and resists UV. However, it takes longer to cure (24-72 hours) and isn’t suitable for wet areas without a primer.
Silicone: Ideal for expansion joints in wet areas like bathrooms or kitchens. It’s elastic, adheres well, cures quickly (1-6 hours), and resists UV. However, it doesn’t adhere to all surfaces and can be more expensive ($0.50 – $1.00 per linear foot).
Signs of sealant failure include cracking, peeling, or water intrusion. Reapply every 3-5 years for best results.
Cost Implications and Maintenance Lifecycle
Initial cost isn’t the only factor to consider. Here’s what drives long-term costs:
Traffic: High-traffic areas need more durable, expensive fillers and sealants.
Deicers and freeze-thaw cycles: These can shorten lifespan, especially in cold climates. Expect to replace fillers and sealants every 5-10 years under these conditions.
Maintenance frequency: Regular inspection and resealing (every 3-5 years) extends the lifecycle of your joints. Neglect can lead to costly repairs or replacement.
Installation Best Practices and Safety Considerations
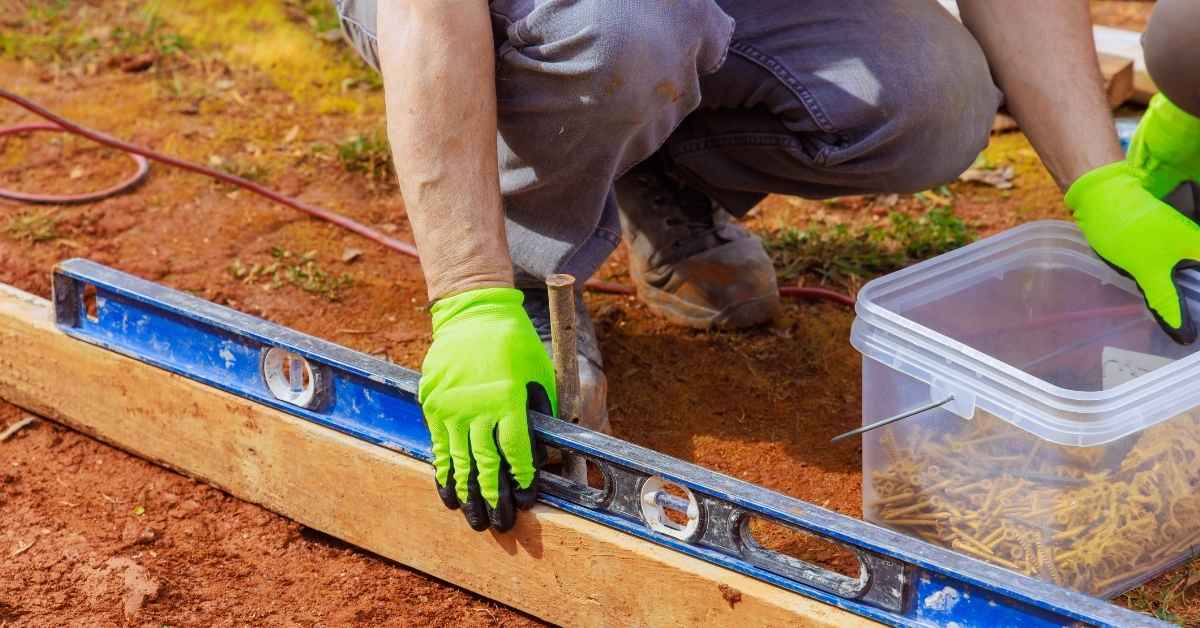
Plan joint locations before pour, using chalk lines or laser marks to align with slab size and use. Distinguish areas where expansion joints are required and coordinate with adjacent pours and existing joints. A solid plan prevents misalignment across pours and helps with later maintenance.
Equip yourself with the right tools and PPE, including saws, routers, backer rods, sealants, and protective gear. Cutting timing, depth, and spacing should follow product specs and standard practices, with dust control and dust collection in mind. Plan for weather-related risks and ensure safe, clean joints ready for filler and sealant.
Tools and materials checklist
Before starting any concrete jointing job, ensure you have the right tools and materials. This checklist helps you prepare.
- Saws (wet/dry): Inspect blades for wear; replace if needed to avoid binding or damaging joints.
- Diamond blade: Check condition; dull blades cause slow cutting and excessive heat.
- Router/groover: Ensure it’s in good working order; test on scrap wood before starting.
- Backer rods: Check size and type match joint width and depth. Wrong size leads to improper sealing.
- Sealants: Verify compatibility with concrete type and weather conditions. Incompatible sealants may fail prematurely.
- PPE (eye/ear protection, gloves): Inspect for damage; replace if necessary to ensure safety.
- Respirator: Check filter condition; use only with proper fit and training to avoid respiratory hazards.
- Fall/strip hazard controls: Ensure they’re in place to prevent accidents during cutting and filling.
Quick rule: Always inspect tools and materials before starting. Poorly maintained equipment leads to subpar results and safety risks.
On-site safety and quality-control checkpoints
Throughout the installation process, follow these checkpoints to ensure safety and high-quality joints.
- PPE: Wear appropriate gear; missing or damaged PPE increases injury risk.
- Dust control: Use water or dust collection systems to prevent inhalation hazards. Uncontrolled dust causes health issues.
- Water management: Keep the area dry during cutting and filling to avoid washout or improper curing. Wet conditions lead to poor joint performance.
- Avoid overcutting: Monitor cut depth; going too deep weakens slab, leading to cracking or failure.
- Verify joint depths/spacing: Measure regularly during cutting and filling. Incorrect spacing or depth causes improper stress relief and reduced lifespan.
- Document joint locations: Record as you go; accurate records help with future maintenance and repairs. Lost records cause confusion and delays.
Quick rule: Regular checks ensure safety, quality, and longevity of your joints.
Common installation mistakes to avoid
Learn from these common errors to prevent costly rework or premature failure of your concrete joints.
- Late cutting: Waiting too long allows concrete to harden, making cuts difficult and increasing the risk of slab damage. Cut early, as specified by product guidelines.
- Improper filler selection: Using wrong filler type or size causes improper stress relief, leading to cracking or joint failure. Match filler to joint width and depth.
- Joints too shallow: Inadequate depth prevents proper stress relief, causing cracks to form at the surface. Aim for 1/4 of slab thickness.
- Joints too far apart: Wide spacing causes excessive slab movement, leading to cracking or failure. Follow standard spacing guidelines based on concrete thickness.
Regularly review these mistakes and adjust your practices accordingly to ensure long-lasting, effective joints.
Performance Impacts, Long-Term Maintenance, and Troubleshooting
Control versus expansion joints influence crack paths, restraint at edges, and how the slab adapts to movement over time. Shrinkage, thermal expansion, and moisture movement all interact with joint type to affect durability. The right combination reduces distress and maintenance needs.
Maintenance covers selecting joint fillers and sealants, inspecting joints, and resealing when needed to prevent water intrusion. Troubleshooting checks for misidentified joint type, improper depth, debris, or sealant failure, with remediation steps like re-cutting or resealing as required. Consider when professional review is warranted for persistent cracking or irregular movement.
How joints affect structural and thermal performance
Control and expansion joints serve as stress relief zones, allowing concrete slabs to move without cracking. Properly placed joints accommodate both shrinkage and thermal movement.
Improper joint spacing or timing can lead to random cracking, slab buckling, or other structural issues. Too few joints cause excessive stress, while too many weaken the slab.
Control joints help direct where cracks will form due to shrinkage. Expansion joints accommodate thermal movement and prevent slabs from pushing against each other or restraints at edges.
Inadequate jointing can result in excessive curling or warping of slabs over time, affecting their performance and service life.
Inspecting and maintaining joints over time
Regularly inspect your concrete surfaces for signs of joint failure or movement. Look for cracks, gaps, or sealant deterioration.
Inspect every 6 to 12 months, depending on climate and slab use. Check for debris ingress, which can clog joints and prevent proper movement.
Clean out any debris using a wire brush or compressed air. If sealant has failed, remove it completely before applying new material. Keep joints free of weeds and other obstructions.
Maintenance intervals depend on joint type, climate, and traffic. Regular cleaning and resealing can extend the life of your joints significantly.
Repair options for failed joints or cracks
If you find a failed joint, address it promptly to prevent further damage. For minor issues, resealing may be sufficient. Remove old sealant, clean the joint, and apply new material according to manufacturer’s instructions.
For deeper cracks or severely damaged joints, consider full-depth joint replacement. Cut out the damaged area using a saw, then fill with fresh concrete and seal.
If cracking patterns indicate structural issues or slab heave, consult a professional engineer or repair specialist. They can assess the problem and recommend appropriate repairs.
Do not ignore signs of substrate movement. Address these promptly to prevent further damage and maintain your slab’s integrity.
Planning Checklist and Decision Guide for Homeowners and Contractors
Start with project scope, climate, loads, and expected movement to determine whether control joints or expansion joints are appropriate. Use a quick decision flow to decide when to use control joints, expansion joints, and where spacing and depth should lie. Keep alignment with future expansion paths and existing structures in mind.
Develop spacing and layout guidelines for typical residential and small commercial slabs, and outline timing windows for saw-cutting versus expansion joint installation. Include material choices, detailing, waterproofing considerations, and a practical project checklist that covers pre-pour prep, measurement validation, and common pitfalls to avoid.
Project checklist (pre-pour planning)
Before you pour, ensure everything is in order to avoid costly mistakes.
- Slab thickness: Confirm it’s right for your project. Too thin? Expect cracking.
- Expected use: Residential or commercial? Loads vary.
- Environmental factors: Climate affects joint choice and spacing.
- Reinforcement: Check placement, size, and coverage. Inadequate? Cracks may form.
- Joint layout: Plan control or expansion joints based on slab size.
- Formwork: Inspect for leaks, gaps, or weak points.
- Concrete mix: Order the right strength and air content.
- Joint materials: Have sealants, fillers, and backer rods ready.
Quick rule: Review all items before pouring to avoid costly rework.
Quick decision flow (control vs expansion vs isolation)
Choose the right joint type based on your slab’s needs.
- Slab size: Control joints for small residential slabs. Expansion for larger ones.
- Adjacency: Isolation joints needed where slabs meet walls or other structures.
- Thermal movement: Expansion joints handle movement better than control joints.
- Expected load: Control joints for lighter loads. Expansion for heavier ones.
- Edge conditions: Expansion joints needed at edges and corners.
Quick rule: If in doubt, consult an engineer or local code references.
When to consult an engineer or code/standards reference
Seek professional input for complex projects or unique situations.
- Large slabs: Consult ACI 302.1R-16 for spacing and depth guidelines.
- Unique loads: Check local codes for specific load-bearing requirements.
- Seismic activity:</> Refer to ASCE/SEI 7-16 for seismic design criteria.
- Special joint types: Consult ACI 223R-03 for isolation and other specialized joints.
- Fire resistance: Check local codes for fire-resistant joint requirements.
Quick rule: Always consult codes and standards, and consider seeking professional advice when needed.
Conclusion
Make the next concrete move with clear purpose: correct joints protect the slab, prevent costly cracks, and keep the surface looking right. Safety comes first, and proper timing and placement stop damage before it starts.
Check local rules and your plan, then map out where control joints and expansion joints go, confirm the depth and spacing, decide when to cut or form the joints, gather the right fillers and sealants, and lay out a quick safety checklist for you and any helpers. Inspect joints first, plan spacing and depth, and seal and test for leaks as you go.
Avoid rushing common pitfalls: don’t skip curing time before joint work, don’t ignore substrate movement or misjudge soil or base stability, and don’t mix sealants or fillers beyond what the project requires. Use proper PPE, test a small area, and keep work within your comfort zone to prevent irreversible mistakes. If you’re unsure about slab movement, load conditions, or weather impacts, it’s wise to call a professional rather than push on and risk damage.
When in doubt, getting an expert opinion early can save time and money and still leave you with a solid, durable verdict. Stay focused, follow the plan, and you’ll finish strong with a joint system that performs well for years. You’ve got this, and the end result will show it.
FAQ
What is the difference between control joints and expansion joints in concrete?
Control joints are planned cracks that guide where the concrete will crack. Expansion joints isolate slabs to allow for movement from temperature and moisture changes. They serve different movement needs, so don’t substitute one for the other.
Where should I place each joint type, and when should I install them?
Place control joints where cracking would be unsightly or structurally problematic, usually across the width of a slab. Install expansion joints at transitions between slabs, at openings, and where there are large changes in restraint. Check manufacturer instructions or local guidance for timing, but don’t delay long after pouring; plan during placement and finishing.
How should I space and depth-control joints, and what should I consider for timing?
Spacing and depth depend on slab size, thickness, and climate. Follow product guidelines and local advice, and plan joint placement before finishing. If in doubt, consult the concrete supplier or contractor for safe ranges and how they apply to your project.
What filler materials are used for expansion joints, and how do I choose?
Expansion joints use compressible fillers and sealants that stay in place and seal against moisture and debris. Choose fillers and sealants based on movement range, weather exposure, and manufacturer guidance. Always read the label and follow installation steps from the maker or local rules.