
Introduction
Yellow water leaking from your roof indicates a roofing issue that needs diagnosis and repair.
You’ll learn the common causes of yellow water, how to test for leaks safely, and practical fixes or maintenance steps you can take to stop the leak and protect your home.
Key takeaways
- Yellow leakage often indicates iron or algae contamination, not pure water.
- Inspect for rust-colored stains on shingles and outdoor gutters to pinpoint source.
- Test water by letting sample sit and observe sediment, color, odor changes.
- Common fixes: clean gutters, reseal flashing, replace compromised shingles, improve drainage.
- For persistent yellow water, contact a licensed plumber or roofer for diagnostic tests.
- Budget 2x to 4x typical repair costs if multiple issues appear.
Table of Contents
- Introduction
- Key takeaways
- What “yellow water” from a roof leak actually means
- Primary causes of yellow roof leaks
- How to inspect your home to locate the source
- Simple tests to identify the contaminant and leak path
- DIY fixes for the most common yellow-water causes
- When to call a pro: diagnostic services and professional repairs
- Cost estimates, budgeting, and prioritizing repairs
- Common mistakes to avoid and long-term prevention
- Conclusion
- FAQ
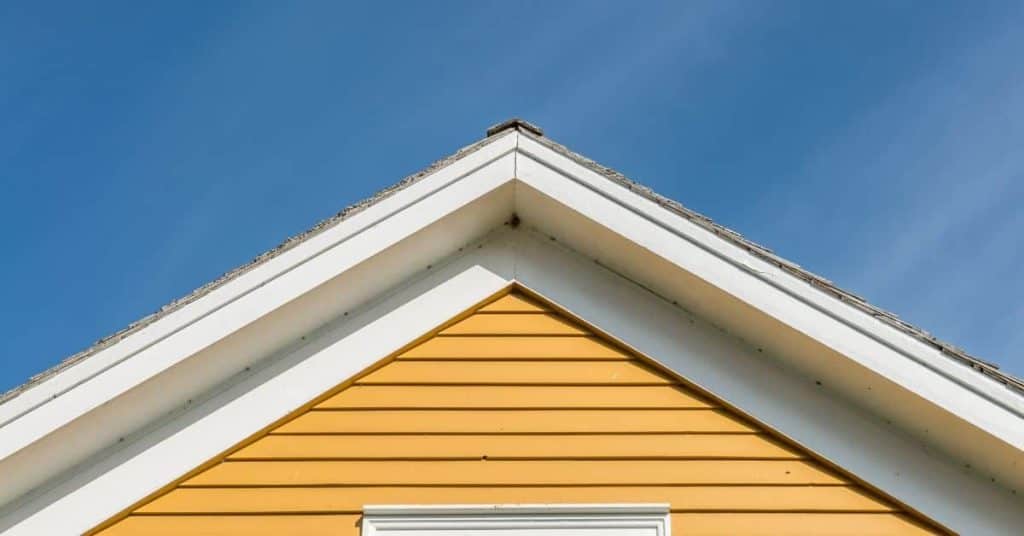
What “yellow water” from a roof leak actually means
Yellow water from a roof leak isn’t the same as clear, rainwater. It often signals minerals, rust, or organic staining in the run‑off, and colors can range from yellow‑green to amber or brown depending on what’s dissolving or settling along the way. Distinguish it from clear leakage by looking for tint changes after rain and by noting where the color appears—drips near joints and along gutter lines often tell a different story than clean, fresh water would.
Rust‑colored runoff usually points to iron or corroding metal components, while biologically tinted water—greenish or muddy—suggests algae, mold, or organic debris mixing with moisture. Lime or cement residues can create pale yellow halos near joints, which is a common sign of mineral carry‑over rather than a single source leak. Health and safety-wise, color alone isn’t a guarantee of danger, but it should cue you to wear PPE and avoid skin contact with unknown staining, since biofilm or contaminated runoff can occur.
Common visual characteristics to identify yellow water
Yellow water from a roof leak can come in various shades, ranging from a light yellow-green tint to darker amber or brown hues. The key is spotting the difference between clear water and colored runoff. Yellow water often indicates the presence of minerals, rust, algae, pollen, or organic staining.
Look for specific patterns after rainfall. Rust-colored runoff usually points to iron components like metal flashing or nails starting to corrode. If you see greenish or muddy tones, it’s likely due to algae, mold, or other organic matter growing on your roof. Lime and cement residues can also create pale yellow halos near joints and seams.
Pay attention to whether the discoloration is migrating over time or appears fresh after each rain event. This can help you pinpoint if there’s an ongoing issue versus a one-time incident. Fresh stains are often more vivid, while older ones might fade but leave behind persistent marks that indicate long-term leakage issues.
Remember, yellow water isn’t just about the color—it’s also about what it tells you about your roof’s condition and potential health risks. Keep an eye out for these signs to stay ahead of any major problems.
Why color matters for diagnosis
The color of the water leaking from your roof can provide crucial clues about its source and potential health risks. Rust-colored runoff, for example, typically indicates iron components like metal flashing or nails that are corroding. This is a clear sign you need to address rusting metals before they cause more damage.
Greenish or muddy tones usually suggest the presence of algae, mold, or other organic matter growing on your roof. These can be harmful not just for structural integrity but also because biofilm and mold spores can pose health risks if they enter your home through leaks.
Pollen and other organic staining might appear as a yellowish tint, often seasonal in nature. This is less concerning structurally but still important to clean up regularly to prevent long-term damage or discoloration.
Understanding these visual cues helps you diagnose the root cause of your roof issues more accurately. It’s essential for both immediate repairs and ongoing maintenance to keep your home safe and dry.
Primary causes of yellow roof leaks
Yellow water on a roof line usually points to a mix of sources: aging roof material, rusting or damaged flashings, clogged gutters, biological growth like algae or lichen, and degraded insulation that allows condensation to tint areas. It can also come from plumbing backflow or mineral runoff, so you’re diagnosing a few possible culprits rather than one simple leak. Look for staining on shingles, underlayment, or attic surfaces to map where the yellow paint happens and what it’s touching.
This matters because chasing the wrong cause wastes time and can let damage keep spreading. Start on the roof with flashing seams, nail heads, and any step-footing, then inspect gutters for rust or blockages and check for water staining near vent stacks or plumbing lines in the attic. Use simple tests like a garden hose on suspected sections or a dye test for backflow if plumbing is involved, and consider a moisture meter or infrared scan to locate hidden wet areas before you replace parts or insulation.
Biological and organic causes (algae, mold, pollen, bird or rodent droppings)
Yellow water from your roof can often be traced back to biological growth like algae, lichen, moss, or even mold. These organisms thrive in damp environments and can turn runoff yellow as they break down organic matter on the surface of your shingles.
Bird droppings and rodent waste also contribute to this discoloration over time. When these materials mix with rainwater, it stains your roof and gutters, leading to a telltale yellow hue that can seep into your attic or walls.
To diagnose biological causes, look for patches of green, black, or dark brown growth on the roof surface. Check around vents, chimneys, and other areas where moisture tends to accumulate. If you notice these signs, clean them off using a pressure-safe method or specialized roof cleaner to prevent further damage.
Metal corrosion, rust, and flashing failures
Rust from metal components like flashings, fasteners, or HVAC units can cause yellow water leaks. Rust typically appears as a reddish-brown residue that turns water orange to yellow when it mixes with rain.
Inspect your roof for signs of corrosion around nails, screws, and flashing seams. Pay special attention to areas where metal meets wood or other materials, such as valleys, chimneys, and vents. These spots are prone to moisture buildup and can lead to rust formation over time.
If you find rusty components, replace them immediately with galvanized or stainless steel alternatives that resist corrosion better than standard metals. This will help prevent further damage and ensure your roof stays watertight.
Interior-sourced contamination (plumbing, HVAC drain lines, insulation breakdown)
Sometimes yellow water isn’t coming from the roof at all but rather from inside your home. Issues like aging plumbing systems, clogged condensate lines, or deteriorated insulation can mimic a roof leak.
Check for signs of moisture damage near plumbing fixtures and vent stacks in your attic. Look for yellow stains on sheathing or insulation that indicate water has been seeping through from below rather than above.
To address these issues, clean out clogged condensate lines and replace any damaged or degraded insulation. If you suspect a plumbing problem, consult with a professional to ensure proper venting and drainage are in place to prevent future leaks.
How to inspect your home to locate the source
Start inside, usually in the attic or topmost space, to locate yellow-water staining and trace it back to its source. Map stained areas to roof penetrations and note whether stains align with rain, HVAC cycles, or plumbing activity, photographing every finding with date and time.
Exterior work matters too, but indoor checks help you separate interior leaks from external sources. Plan inspections around rain events, use a dye-free reference to confirm source areas, and document with photos while staying safe—ladders, fall protection, and professional help if the source remains unclear.
Step-by-Step Process
This sequence helps you methodically find the source of yellow water leaks in your home.
- Prepare safety gear: wear gloves, hard hat, and harness if needed. Check ladder for stability before use.
Reason: Safety first to prevent falls or injuries during inspection. - Start inside: Look at ceilings and walls for stains, especially near vents, chimneys, and plumbing fixtures.
Quick check: Take photos of any yellow water marks with date and time. - Inspect attic space: Check insulation and roof decking for wet spots, mold growth, or condensation issues.
Reason: Wet insulation can indicate a leak above. Confirm HVAC systems are functioning properly to avoid false positives. - Check exterior roofline: Look at shingles, flashing around vents and chimneys, and inspect gutters for clogs or damage.
Quick check: Use binoculars if needed to spot issues from the ground without climbing. - Clean up tools and secure access points: Return all items back to storage safely after inspection is complete.
Reason: Preventing tripping hazards and ensuring no further damage occurs during cleanup.
Interior inspection: ceilings, walls, attic, and vents
Use this checklist when you notice yellow water stains inside your home or suspect an interior source of contamination.
- Look for stains: Check ceiling corners and around fixtures. Confirm with photos.
Note: Missing this step can delay identifying the leak’s origin. - Inspect walls: Look at baseboards, windowsills, and near plumbing lines. Mark any discoloration.
Note: Disregarding wall checks may overlook significant water damage. - Check attic insulation: Feel for wet spots or mold growth. Confirm with a moisture meter if available.
Note: Ignoring this step can lead to undetected structural issues. - Inspect roof penetrations: Look at vent caps, chimney flashing, and skylights for damage or gaps.
Note: Overlooking these areas may result in ongoing leaks. - Photograph findings: Take clear photos of all stains with date and time. Document any HVAC or plumbing issues.
Note: Failing to document can complicate insurance claims later on.
Quick rule: Always photograph your findings for future reference and potential repairs.
Exterior inspection: roof surface, flashings, vents, gutters, and nearby trees
Use this checklist when you suspect an exterior source of yellow water leaks.
- Inspect shingles: Check for missing granules or curling edges. Confirm with a close look at the roof surface.
Note: Overlooking damaged shingles can lead to ongoing leaks. - Check flashings: Look around chimneys, vents, and skylights for gaps or rust. Use binoculars if necessary.
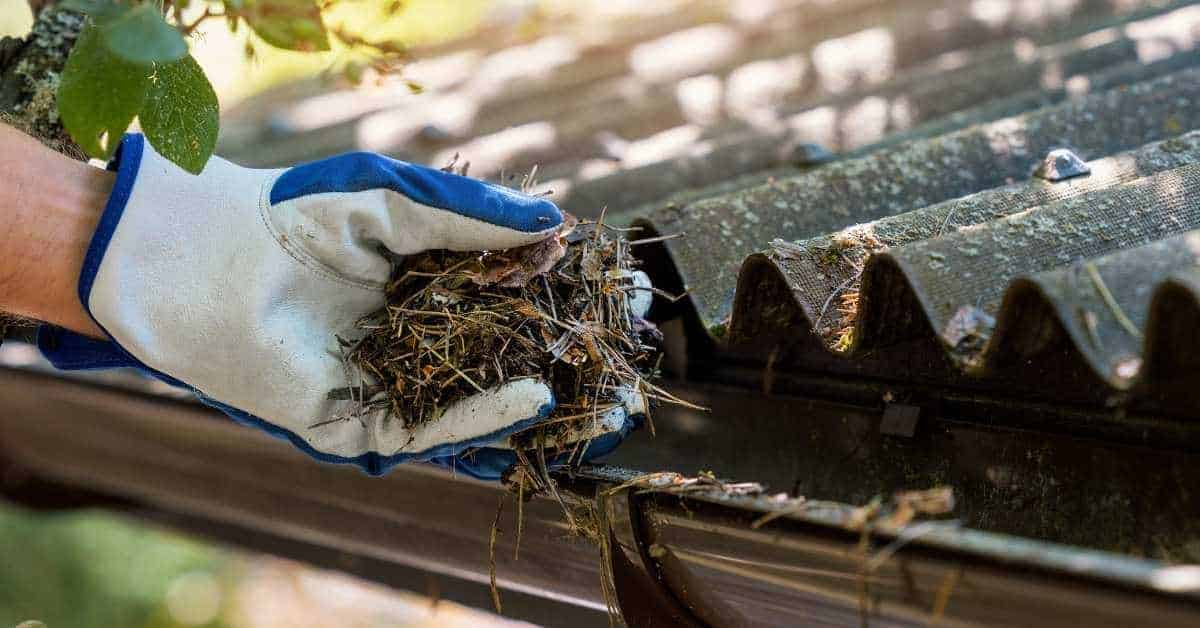
Note: Neglecting this step may result in water intrusion behind the flashing. - Inspect gutters: Check for clogs, sagging sections, or loose connections. Confirm with a visual sweep of the gutter system.
Note: Overlooking these issues can cause water to back up and damage fascia or siding. - Look at nearby trees: Inspect branches overhanging roof areas. Check for organic debris that could clog gutters or vents.
Note: Missing this step may lead to ongoing blockages causing leaks.
Quick rule: Always inspect the entire exterior surface and surrounding environment for potential issues.
Simple tests to identify the contaminant and leak path
These simple in-home tests help you tell whether what you’re seeing is a contaminant or a leak path. Use tests like a water color catch, paper towel smear, a UV flashlight, and a moisture meter, but shut off water and wear PPE before you observe anything in potentially hazardous areas. Apply clean water to suspected surfaces, collect runoff in a clear container, and note any color changes or residues to guide your next moves.
The tests give you a practical map of likely leak paths (rake, ridge, penetrations, valleys) and help you identify contaminant clues without tearing into walls. They also help you decide if a DIY fix is reasonable or if a professional inspection is warranted, with a simple field-safety reminder and a quick materials checklist to keep on hand.
Rooftop Water Test Method Adapted for Yellow Water
Before you start, make sure the water supply is turned off inside your home to prevent any accidental damage from interior leaks. Grab a garden hose and position it near the suspected leak area on your roof. Have a helper stand by inside to watch for signs of water intrusion.
Start with a small stream of water and gradually increase as needed. Watch closely for where the water is pooling or running off, noting any changes in color as it moves through different materials. If you see yellow runoff, that’s a clear sign something’s amiss on your roof.
Remember to wear proper safety gear like gloves and goggles when handling hoses and observing leaks. Stay alert and communicate clearly with your helper inside the house to pinpoint the exact location of any issues.
Collecting Water Samples for Quick Tests
To get a better idea of what’s causing yellow water, collect samples in clear containers from different areas where leaks are suspected. Take note of the color, smell, and any visible particles or sediment.
Inside your home, use a basic pH test kit to check if the water is acidic or alkaline. This can give clues about whether metal corrosion or biological growth might be involved in causing yellow stains.
If you suspect more serious contamination like bacteria or chemicals, it’s best to send samples to a lab for professional analysis. Labs can provide detailed reports on what contaminants are present and how severe the issue is.

DIY fixes for the most common yellow-water causes
This section covers the practical, homeowner-friendly fixes for the most common yellow-water issues you’ll see on a roof: clogged gutters and downspouts, algae and organic buildup, flashing leaks around vents, and mineral staining from vent openings, with a recommended DIY sequence that starts with clearing and flushing, then resealing or replacing compromised flashing, inspecting and replacing damaged shingles, and finally clearing roof vents or caps to restore proper drainage. You’ll find safety-first steps woven in: use the right PPE, verify ladder stability, avoid working on wet or icy surfaces, and know when to stop and call a pro for high‑risk areas or extensive damage, especially when conditions aren’t favorable.
The goal is to give you a clear path to reduce discoloration and buildup while preventing future issues, so you can tackle the job in logical order and minimize recurring problems. This matters because proper cleaning, sealing, and venting maintenance prevents recurring staining and helps your roof drain correctly, saving you time and avoiding more costly repairs later; the right tools, compatible sealants, and a simple schedule make this doable, while also setting a safety mindset to keep you out of harm’s way.
Cleaning and Sanitizing Organic Buildup and Stains
To tackle yellow water caused by algae, mold, or other organic growth on your roof, start with a thorough cleaning. Use a diluted solution of bleach and water or an oxygen-based cleaner like hydrogen peroxide for safer alternatives. Mix one part bleach to nine parts water in a bucket.
Apply the solution using a stiff brush or sprayer, making sure not to damage shingles. Let it sit for at least 15 minutes before rinsing thoroughly with clean water. This process will help kill off any harmful organisms and remove stains. Remember to wear protective gloves and eyewear when handling chemicals.
After cleaning, inspect the roof surface for any remaining signs of organic buildup or discoloration. If issues persist, consider applying a specialized algaecide designed specifically for roofs. These products are less harsh than bleach but still effective against stubborn growths.
Sealing and Repairing Metal Flashings and Fasteners
To address yellow water leaks around roof vents or chimneys, start by cleaning the area thoroughly. Remove any rust with a wire brush or sandpaper. Once clean, apply a primer to prevent further corrosion.
Next, reseal or replace compromised flashings using high-quality sealant compatible with your roofing material. Use a caulk gun to ensure a tight seal around all edges and joints. For severely damaged areas, consider replacing the flashing entirely with new metal that has been treated against rust.
If you find corroded fasteners, remove them carefully and replace with galvanized or stainless steel alternatives which offer better resistance to moisture and salt exposure. This will help prevent future leaks caused by loose or failing connections between roof components.
Temporary Interior Containment and Stain Treatment
To manage active yellow water leaks inside your home, place buckets under dripping areas to catch the water. Use duct tape or plastic sheeting to create temporary patches over ceiling holes until repairs can be made.
Once the leak is stopped, clean up any remaining moisture with a wet/dry vacuum and dehumidifier to prevent mold growth. For stains left on ceilings or walls, scrape off loose debris and wash down surfaces using mild soap and water.
After cleaning, prime affected areas with an appropriate primer designed for damaged drywall or plaster. Allow the primer to dry completely before applying a fresh coat of paint that matches your existing decor. This will help hide any discoloration caused by previous leaks while providing long-lasting protection against future damage.
When to call a pro: diagnostic services and professional repairs
Call a pro when you face large or persistent leaks, signs of structural trouble like sagging ceilings or warped decking, suspect contaminants such as hazy water or odd odors, or when your own DIY fixes have made things worse. A diagnostic visit from a licensed roofer or contractor will map moisture, inspect roof assemblies, attic spaces, and ceilings, and document fasteners, seals, and potential intrusion paths to guide the repair plan.
The visit typically includes moisture mapping or infrared checks, testing for hidden leaks, and a risk assessment that spells out hazards like mold, electrical risks, or weakened framing, along with how those risks affect safety, indoor air quality, and insurance or warranty considerations. Pros offer leak diagnosis, roof deck and flashing work, underlayment installation, chimney or vent sealing, gutter analysis, and help with permits or warranties where applicable, plus practical guidance on keeping the repair scoped and compliant.
What a professional inspection includes
A pro will come out when you’ve got leaks that DIY can’t fix, signs of damage, or if there’s something weird like yellow water with an odor. Here’s what they’ll do:
- Infrared scan: Detects hidden moisture in the roof deck and attic.
- Moisture mapping: Identifies wet spots that need repair.
- Climb-and-roof check: Inspects flashings, shingles, and vents for damage.
- Laboratory testing: Analyzes water samples to find contaminants.
- Sealant inspection: Checks the condition of all sealants around penetrations.
- Deck integrity test: Looks for signs of rot or structural issues.
- Vent and chimney check: Ensures proper sealing to prevent leaks.
- Gutter analysis: Inspects gutters and downspouts for blockages.
- Attic inspection: Checks insulation, rafters, and ceiling for damage.
- Flashlight test: Shines light into dark areas to spot leaks.
- Photos and notes: Documents all findings for repair planning.
Quick rule: If you see signs of major issues, don’t wait—call a pro right away.
Choosing the right contractor and questions to ask
When picking a roofer, make sure they’re licensed, insured, and have experience with your specific roof issues. Ask about their process for handling biological contamination like mold or rust.
Questions you should always ask include:
How long have you been in business? What’s your warranty policy on repairs?
Do you offer a written estimate of the work to be done? Can I see samples of your previous work and customer references?
Quick rule: Always verify that they’re qualified before signing any contract.
Cost estimates, budgeting, and prioritizing repairs
Estimate diagnostics from a quick initial inspection to non-invasive leak tests and pinpointing, and know what can push charges higher—travel, attic access, and multiple zones. Compare DIY fixes like sealants or minor patches with pro work for flashing, underlayment, or deck replacements, and understand the payoff and risk of each path. Use a budgeting plan that prioritizes leaks by severity and aligns with upcoming weather windows.
Plan a step-by-step funding method with a prudent contingency and clear prioritization criteria. It matters because timely fixes prevent bigger damage, reduce risk to your structure, and help you stage work across seasons without emptying the wallet all at once.
Cost breakdown by repair type (gutter/flashings/roof patch/replace)
The cost to fix a leaking roof can vary widely depending on the extent of damage and materials needed. For instance, fixing gutters or flashings typically ranges from $100 to $500, with higher costs if there’s extensive rust or debris buildup.
When it comes to patching your roof, expect to pay around $200-$700 for a single repair area. This includes materials like shingles and sealants, plus labor. If you need to replace an entire section of the roof due to severe damage, costs can soar from $1,500 up to several thousand dollars depending on your roof’s size and material.
Replacing the whole roof is a major expense, usually starting at around $3 per square foot for basic materials like asphalt shingles. More premium options such as metal or slate roofing will bump that price significantly higher. Remember, steep roofs are harder to work on and thus more expensive.
Insurance, warranties, and documenting damage
To get your yellow-water leak covered by insurance, you need solid proof of the damage. Take clear photos showing water stains, mold growth, and any structural issues like sagging or rotting wood.
Your home insurance policy typically covers roof leaks if they’re sudden and accidental, but not routine wear-and-tear. Check your policy documents for specific details on coverage limits and deductibles. If you have a warranty from the roofing contractor who installed your roof, that might also cover repairs.
To increase your chances of getting an insurance claim approved, document everything meticulously. Include dates when leaks were first noticed, any previous repair attempts, and all communication with contractors or adjusters. Keeping detailed records will help prove your case if there’s ever a dispute over coverage.
Common mistakes to avoid and long-term prevention
Homeowners slip into common traps like skipping attic checks, masking stains instead of fixing the underlying leak, and relying on harsh or inappropriate cleaners. Those cosmetic fixes won’t stop water intrusion, and delaying repairs after initial signs invites bigger problems. Identify and separate cosmetic fixes from real repairs, and commit to practical long‑term prevention.
Set up a simple seasonal inspection habit, keep gutters and downspouts clear, and ensure attic ventilation and moisture barriers are in place. When you clean, use non-bleach, non-acid cleaners, ventilate the space, and avoid mixing chemicals; document any temporary fixes for follow-up. Know when to DIY versus call a pro by leak size, roof age, attic access, and mold or structural concerns.
Seasonal maintenance checklist and tools/materials
Use this checklist every spring and fall to catch potential roof issues before they turn into leaks.
- Ladder: Check for stability; replace if wobbly or damaged. Skipping can lead to falls.
- Moisture meter: Test attic floors and walls for dampness. Missing this step means undetected water damage.
- Roof-safe cleaner: Clean gutters, downspouts, and roof surface; use non-bleach formula to avoid damaging shingles. Neglecting cleaning can cause clogs and leaks.
- Caulk gun with sealant: Repair small cracks in flashing or siding. Ignoring these gaps lets water seep into walls.
- Replacement flashing: Have on hand for damaged areas; install new pieces to prevent water intrusion at vulnerable spots like chimneys and valleys.
- Rope line kit: Securely tie off ropes for safe access to higher roof sections. Not using can lead to injury or damage.
- Roof rake: Clear snow from edges after heavy storms; prevent ice dams that cause leaks. Missing this step means more water damage.
- Ladder stabilizers: Ensure ladder is secure and level on uneven ground. Skipping can result in falls or injuries.
Quick rule: Always have the right tools ready to tackle small issues before they become big problems.
Visual checkpoints and routine inspection schedule
Inspect your roof monthly, after storms, and seasonally to catch yellow-water causes early and prevent recurrence.
- Ridge cap flashing: Look for loose or missing pieces; secure with nails or screws. Neglecting this can cause major leaks at the peak of the roof.
- Shingle condition: Check for curling, cracking, or missing shingles; replace as needed. Overlooking these signs means more water seeps in over time.
- Gutters and downspouts: Ensure they are clear and securely attached; clean out debris regularly. Clogged gutters can cause roof damage and leaks.
- Flashing around chimneys, vents, and valleys: Inspect for gaps or rusted areas; repair with new flashing if necessary. Ignoring these spots means water gets in at critical junctions.
- Soffits and fascia boards: Look for signs of rot or damage; replace as needed to prevent moisture buildup. Neglecting this can lead to extensive wood decay.
- Attic ventilation: Check that vents are clear and functioning properly; ensure proper airflow to reduce condensation. Poor ventilation means more moisture in the attic.
- Roof deck integrity: Look for signs of sagging or soft spots; address any issues immediately. Ignoring this can lead to major structural damage.
Quick rule: Regular visual checks catch small problems before they become big ones, saving you money and hassle in the long run.

Conclusion
When yellow water shows up, the message is simple: understand the source, test it carefully, and fix it before it rots more structure or ruins finishes. Safety and durability come first, so don’t skip a test or push a repair that could leak again or cause more damage.
Now, do this in order: start with a careful attic and exterior check to locate the likely path, look for saturated wood, warped decking, damaged flashing, or clogged gutters, then run small, controlled tests to identify the contaminant and how water travels, plan fixes from the easiest to the most involved, and budget for materials, tools, and any needed permits or professional help. Work methodically, document what you find, and fix one issue at a time so you can see what actually stops the yellow water.
Avoid common mistakes: don’t guess about the contaminant or rush repairs in bad weather, don’t seal or patch leaks without testing first, and don’t mix temporary fixes with permanent repairs. Always work with a clear safety plan—use stable ladders, keep a buddy nearby, and test materials on a small area before full use. If you’re unsure about the source or the integrity of the roof deck, pause and reassess before proceeding.
If the problem is complex, or you keep finding new leaks after a fix, it’s time to call a pro for diagnostics and professional repairs. Resolve the most urgent issues first, then schedule a longer-term plan that fits your budget. Stay steady, follow the tests, and you’ll keep the roof and interior dry for years to come.
FAQ
Why is water yellow when it leaks from my roof?
The yellow color usually means something is washing down the roof or gutters. It can be rust, algae, minerals, or dirty water from dirty gutters. Check what’s on the roof and in the gutters to spot the cause.