
Introduction
Quick tests and durable repairs can solve roof leaks for good.
This guide walks through practical inspection steps, common warning signs, and reliable repair approaches you can apply to different roof types to prevent repeat leaks.
Key takeaways
- Inspect attic and exterior after storms to locate active moisture paths.
- Identify source by tracing water runoff to highest roof penetration point.
- Clean and dry surface thoroughly before applying any patch or sealant.
- Use compatible repair products and follow manufacturer cure times for lasting seal.
- Verify repair with controlled rainfall or hose test and observe for leaks.
- Schedule preventive maintenance: clean gutters, trim overhangs, and inspect flashing annually.
Table of Contents
- Introduction
- Key takeaways
- Why Quick Detection Matters
- How to Identify the Leak Source (Step-by-Step)
- Tools and Materials Checklist
- Preparing the Roof Surface for Repair
- Quick Repair Methods That Last
- Testing and Verifying the Repair
- Preventive Maintenance to Avoid Future Leaks
- Cost Considerations and When to Upgrade
- Conclusion
- FAQ
Why Quick Detection Matters
Quick detection matters because finding leaks early keeps moisture from spreading, stops mold from taking hold, and prevents hidden wood rot or structural damage from progressing. In severe weather regions, speed is crucial, and both residential and commercial roofs demand a fast triage approach.
Use simple checks like surface staining, buckling, attic dampness, or a musty odor to spot trouble fast. If you find signs, prioritize sealing temporarily if allowed, and decide whether to call a pro or arrange a quick moisture check. Always check the label or manufacturer instructions for any tool you use.
Signs of an Active Leak
Spotting the signs early can save you big headaches down the road. Look for water stains on your ceiling or walls, especially around chimneys and skylights. If you see any sagging in the roof deck or blistering paint inside, those are clear red flags.
Outside, check for missing shingles, damaged flashing, or visible cracks in the roofing material. Mold growth is another big indicator—especially if it’s black and spreading fast. Don’t ignore these signs; they’re telling you there’s a leak.
Prioritize your investigation based on severity. If water is dripping inside, that’s an emergency. Use a flashlight to check attics or crawl spaces for dampness or musty odors. A moisture meter can help pinpoint wet spots quickly. Address these issues fast before they cause bigger problems like wood rot and structural damage.
When to Call a Professional
Sometimes, the job is too big or risky for DIY work. If you see extensive water damage, major structural issues, or electrical hazards, it’s time to call in the pros.
If your roof warranty is still valid, any repairs must be done by a licensed professional to keep coverage intact. Also, if the leak involves complex areas like valleys, chimneys, or skylights, leave it to someone with experience.
Don’t try to fix leaks during severe weather conditions unless you’re fully prepared and have safety gear. If in doubt, err on the side of caution and get a professional opinion before things get worse.

How to Identify the Leak Source (Step-by-Step)
Identify the leak in a clear steps sequence: start with a visual exterior check, then trace from inside, and finish with controlled water tests to confirm the source without guessing. Pay special attention to skylights, flashing, roof penetrations, vents, and transitions since these spots are common troublemakers.
This approach saves you time and protects the roof and interior from unnecessary work. It also helps you document findings clearly, use a non-invasive tracing method, and avoid guessing when water acts differently with wind or heat. Keep safety front and center, follow the label directions on any test method, and note what you observe with photos or diagrams.
Step-by-Step Process
This sequence helps you methodically find the leak source, ensuring safety and accuracy.
- Check weather conditions; avoid testing in strong winds or rain. Wear proper gear: gloves, hard hat, non-slip boots.
- Inspect roof visually for obvious damage: missing shingles, cracked flashing, worn sealant. Take photos and notes.
- Trace water stains inside to likely entry points on the roof; mark these spots with chalk or tape.
- Set up a soaker hose or misting system at marked areas; have a partner monitor for leaks from below.
- Document findings: take more photos, sketch diagrams. Compare notes and images to pinpoint exact leak location.
Interior-to-Exterior Trace Method
Start by identifying water stains or drips inside the house. Follow these marks up through the attic space, marking suspected spots on the roof.
Use a flashlight to inspect ceilings and walls for dampness patterns. Note any discolored areas that suggest water entry points.
In the attic, look for wet insulation or dark stains around vents, skylights, or chimneys. Mark these locations clearly with chalk or tape.
Controlled Hose Test and Partner Check
Set up a soaker hose on the roof at marked areas where leaks are suspected. Have a partner inside to watch for water entry points.
Start with light misting, gradually increasing pressure if no immediate signs of leakage appear. Monitor each area for 5-10 minutes before moving to another spot.
If you see water entering the house, mark this location precisely and document it with photos or diagrams. This helps pinpoint the exact leak source.
Tools and Materials Checklist
Keep this short checklist handy: safety gear, measurement and basic tools, leak-identification aids, sealants and patch materials, and flashing plus fasteners. For each category, note whether you’re grabbing DIY-grade items or stepping up to pro-grade when the job is bigger or the roof is more demanding. Use manufacturer instructions and labels to decide what’s appropriate, and don’t mix parts that aren’t compatible.
This matters because the right gear and materials save time, reduce mess, and prevent drift into bigger repairs. PPE and fall-prevention routines protect you on the roof, while choosing the right sealant and patch material determines whether a temporary fix holds or a proper repair is needed. Pay attention to roof type and repair scope when selecting flashing, nails or screws, and fasteners, and always check the label or datasheet for temperature range, cure times, and compatibility with asphalt shingles, metal, or flat membranes.
Safety Gear and Access Equipment
Before you start any roof work, make sure you have the right safety gear to protect yourself from falls and injuries.
- Gloves: Wear sturdy gloves to protect your hands. Check that they fit snugly but allow for dexterity.
- Eyewear: Use goggles or a face shield to prevent debris from getting in your eyes.
- Respirator: If you’re working with materials like asphalt, wear a respirator to avoid inhaling fumes. Confirm it fits properly and is rated for the task.
- Harness and lanyard: Use a full-body harness with an anchored lanyard to prevent falls. Check that all straps are secure before climbing.
- Ladder setup: Ensure your ladder extends at least three feet above the roof edge for safe entry/exit. Confirm it’s on firm ground and secured properly.
- Weather check: Avoid working in wet or windy conditions that could compromise safety. Check weather forecasts before starting work.
- Hazard pre-check: Inspect the roof for loose shingles, nails, or other hazards. Confirm these are removed or secured to prevent accidents.
Quick rule: Always wear full PPE and set up your ladder safely before climbing onto the roof.
Sealants, Patches, and Fasteners — What to Use When
Choosing the right sealant or patch material is crucial for a lasting repair. Here’s what you need:
- Silicone caulk: Great for sealing gaps in metal roofs. Confirm it’s applied evenly and allowed to cure properly.
- Polyurethane foam: Ideal for filling large voids or cracks. Check that it expands correctly without leaving gaps.
- Roofing cement: Use this for patching asphalt shingles. Ensure it bonds well with the existing surface.
- Self-leveling sealant: Perfect for flat roofs like TPO and EPDM. Confirm it fills low spots evenly without sagging.
- Metal flashing tape: Use on metal roofs to prevent water intrusion. Check that it adheres well around corners and edges.
- Asphalt shingle patches: For small repairs on asphalt roofs. Ensure they match the existing material for a seamless look.
- Rubberized roof patch kit: Ideal for RVs or rubber roofs. Confirm that it adheres well to prevent leaks.
Quick rule: Always choose materials compatible with your roof type and apply them according to the manufacturer’s instructions.
Preparing the Roof Surface for Repair
Preparing the roof surface for repair starts with a clear plan: assess safety prerequisites, gather the right PPE, establish a weather window, and secure safe access before you touch a shovel or put a ladder on. Then you scrub the surface clean, remove moss and debris, lift and scrape away old sealant or coatings, and make sure the area is dry, flat, and ready for the patch material to stick. Finally, inspect the decking underneath for soft spots or signs of rot and check edges, penetrations, and joints to spot any flashing or repair needs before you start the actual patch.
This prep matters because good adhesion and a watertight seal depend on a solid, dry base and on knowing what you’re up against before you apply patch materials. Taking the time to verify drying, remove failing coatings, and note problem areas saves you from rework, leaks, and extra trips up the ladder once you start repairs. Keep in mind that conditions and product instructions matter, so check labels and manufacturer guidance on drying times, compatibility, and flashing repair options when you plan the job.
Cleaning and Surface Prep Best Practices
Before you start any repair work, it’s crucial to clean the roof thoroughly. Use a garden hose with a spray nozzle set on low pressure or a soft-bristled broom to remove dirt, debris, moss, lichen, and old sealant. Avoid using high-pressure washers as they can damage your roofing material.
After cleaning, make sure the surface is completely dry before applying any new materials. Use a moisture meter or check for visual cues like wet spots or condensation to ensure there’s no lingering moisture. If necessary, plan for an extended drying period, especially in humid conditions.
A dry and debris-free roof is essential for proper adhesion of patch materials. Make sure the surface is flat and accessible so you can work safely without tripping hazards or obstacles that could interfere with your repair process.
Inspecting for Hidden Damage
Once the roof is clean and dry, it’s time to inspect the underlying decking for any signs of damage. Use a screwdriver or similar tool to probe around nails and screws to check for soft spots that might indicate rot or water intrusion. If you find areas where the wood feels spongy or easily penetrable, these are red flags.
Soft spots in the decking can compromise your repair efforts significantly. In such cases, it’s best to replace the damaged sections rather than trying to patch over them temporarily. This ensures a long-lasting fix and prevents further water damage from occurring underneath.
If you notice any sagging areas or significant warping of the roof deck, this also signals deeper issues that need addressing. These signs often indicate extensive rot or structural weakness requiring professional intervention for proper repair or replacement.
Quick Repair Methods That Last
Quick repairs for leaks fall into two paths: temporary fixes and permanent fixes, chosen by leak severity and your roof type, and they cover flashing, shingles, and membranes with practical steps you can actually do on a DIY basis. This section walks you through identifying damaged flashing, preparing the surface, and selecting the right approach—whether resealing, replacing with compatible materials, patching shingles with matching material, or laying down a membrane when appropriate—so you can stop water intrusion now and set up a durable repair plan.
Understanding when a fix is truly temporary versus permanent matters because it saves you time, money, and repeated headaches after the next storm. You’ll get practical guidance on what to inspect, how to match materials, and how to plan for safe work and proper curing, so you can extend repair life without overcomplicating things. Always check product labels and manufacturer instructions for your specific substrate and climate, and be ready to escalate to a full membrane or roof replacement if the leak or roof condition calls for it.
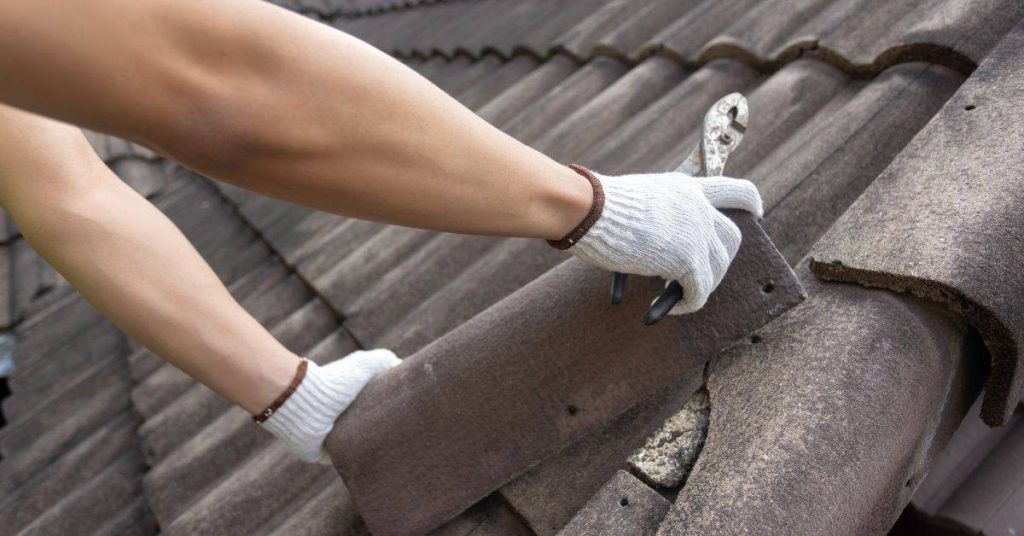
Flashing and Penetration Repairs
To fix flashing around chimneys, vents, skylights, and roof-mounted equipment, start by identifying any damaged or missing pieces. Clean the area thoroughly to ensure a strong bond when resealing or replacing the flashing.
If you’re just sealing small gaps, use urethane sealant for its durability and flexibility. For larger repairs, replace the entire piece with compatible metal flashing that matches your roof’s style. Ensure new flashing fits snugly around penetrations and slopes away from them to direct water flow properly.
Proper geometry is key—flashing should always slope downward and outward from the penetration to prevent water pooling. Use roofing cement or screws to secure it, but avoid over-tightening which can cause damage.
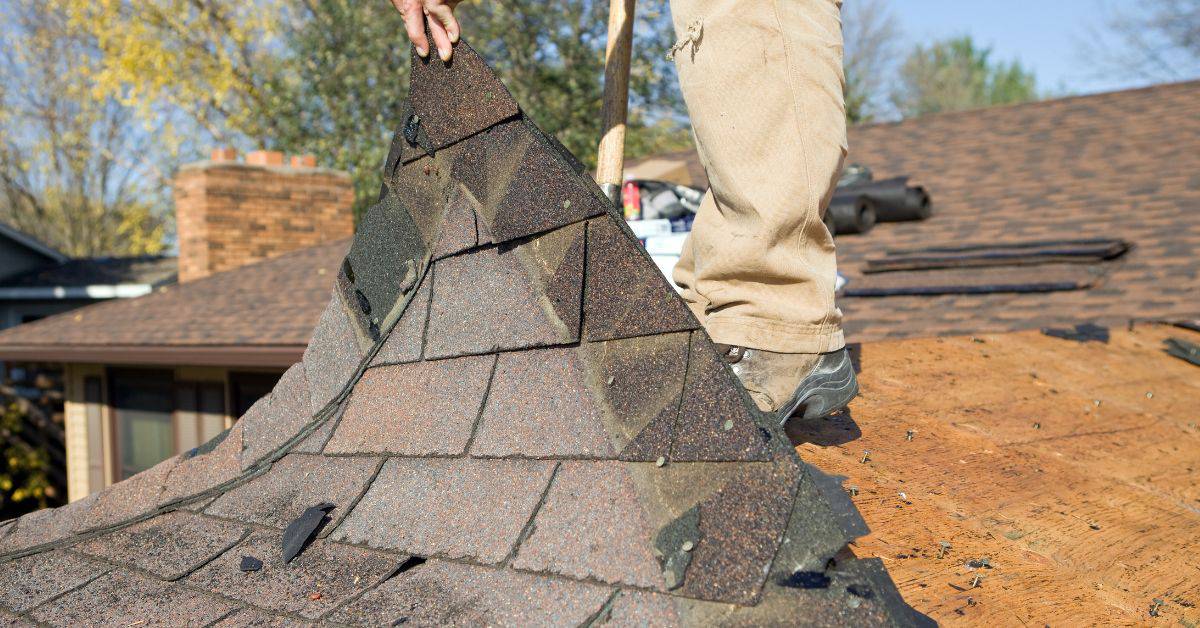
Shingle and Asphalt Roof Patches
To patch a shingle roof, start by lifting the damaged shingles carefully to expose the underlying layer. Use matching materials for best results; if you can’t find an exact match, go with something close in color.
Cut your patch material slightly larger than the hole and place it over the opening. Seal all edges with roofing cement or compatible sealant to prevent water intrusion. Reinforce patches by securing them with roofing nails or staples.
After sealing, inspect neighboring shingles for any gaps or cracks that might need attention too. If you spot a large area of damage, consider replacing an entire row of shingles rather than just patching individual spots.
Membrane and RV Roof Repairs
Membrane roofs like TPO or EPDM require a different approach. For small tears, use self-leveling sealants that adhere well to rubber surfaces. Apply the patch material over the tear and smooth it out evenly.
For larger repairs, cut a patch from compatible membrane material and apply adhesive underneath before placing it in position. Ensure there are no wrinkles or air bubbles under the patch for a seamless repair.
RV roofs often use similar materials but may need specialized patches designed specifically for these surfaces. Follow manufacturer instructions closely when applying any sealants or patches to ensure longevity of your roof repairs.
Testing and Verifying the Repair
The key idea here is to verify the repair thoroughly after you finish it. Use a visual checklist to confirm sealant and patches are tight, flashing and gutters are sound, and adjacent shingles or coating show no gaps. Run a controlled water test by applying water in targeted patterns to test areas and document when and where you see any dripping or seepage, then monitor interior moisture as you go.
Doing this matters because it catches problems before they worsen and guides what to fix next. Keep notes with photos, measurements, dates, and weather context, and track changes over time with interior moisture checks or an infrared scan if you have one. Adhere to a simple timeline: check right after, then again in the next few days, within the first week, and then on a regular basis through the first stretch of months to confirm the repair holds and to flag any risk signs like new leaks or staining.
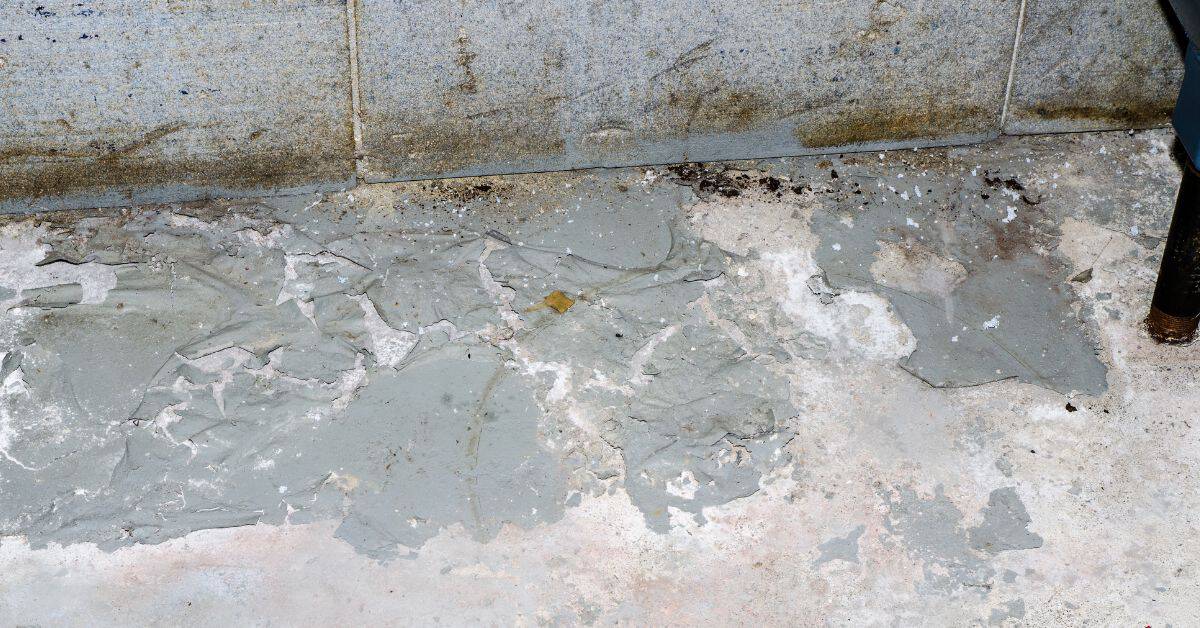
Short-Term Leak Tests
After you’ve patched up your concrete, it’s time to run a quick test to see if the repair holds water. Grab a garden hose and aim it at the spot where you made the fix for about 15 minutes. This is just enough time to check if there are any immediate leaks or cracks forming.
While the water’s on, check base compaction. If the ground underneath your repair isn’t solid, the water pressure can cause it to shift and crack again. Also, look for any bubbling or seepage around the edges of your patch. These are signs that the repair needs more work.
If everything looks good after this test, let the area dry completely before doing a longer-term check in a few days. But if you spot any issues right away, don’t hesitate to fix them now while it’s still fresh in your mind and materials are handy.
Follow-Up Monitoring Plan
After you’ve completed your repair and done the initial short-term leak tests, it’s crucial to keep an eye on things. Set a reminder for yourself to re-inspect the area in 24–72 hours post-repair. This check is key to catching any immediate issues that might not have shown up during your quick test.
Seasonal checks are also important, especially after harsh weather like freezing winters or heavy rains. These conditions can stress out even well-done repairs and expose weaknesses you didn’t see before. Make a note in your calendar for these seasonal inspections to ensure the repair holds strong over time.
Preventive Maintenance to Avoid Future Leaks
Plan a year‑round maintenance calendar with seasonal tasks and a regular inspection cadence. Do biannual professional checks plus quarterly self‑inspections, and focus on routine items like checking shingles, flashing around vents and chimneys, gutters and downspouts, roof edges, ventilation openings, skylights, and attic signs of moisture.
Keeping on top of small repairs—reseal flashing seams, re‑secure loose fasteners, clean and repair gutters, and fill minor cracks—stops leaks before they start. Document everything with a photo log and notes on dates, weather, and coating or warranty limits, so you know when to intervene.
Seasonal Maintenance Checklist
Use this checklist every season to keep your roof in top shape and prevent leaks.
- Spring: Clean Gutters
Clean out debris from winter storms. Check for clogs that can cause water overflow and damage. - Summer: Inspect Shingles
Look for missing or damaged shingles. Loose ones can lead to leaks during heavy rains. - Fall: Clear Leaves
Remove leaves from gutters and roof surface. Clogged gutters cause water to back up under the shingles. - Winter: Check Ice Dams
Inspect for ice dams at eaves and valleys. They can force water underneath shingles, causing leaks. - Spring: Seal Flashing
Check around chimneys and vents for gaps or cracks in flashing. Re-seal as needed to prevent moisture intrusion. - Summer: Tighten Fasteners
Inspect all fasteners securing roof elements like skylights and vent pipes. Loose ones can lead to leaks over time. - Fall: Inspect Skylights
Check for cracks or gaps around the frame of your skylight. Seal any openings before winter’s freeze-thaw cycle. - Winter: Check Attic Ventilation
Ensure attic ventilation is clear and working properly to prevent moisture buildup inside the roof structure.
Quick rule: Regular checks save big headaches later on.
Common Mistakes to Avoid
Avoid these common DIY errors that can lead to costly repairs down the road.
- Over-relying on Tape
Don’t just slap on tape as a quick fix. Use proper sealants and flashing for lasting protection. - Inadequate Surface Prep
Clean and dry surfaces before applying any materials. Dirty or wet areas won’t bond properly. - Improper Sealant Choice
Select the right type of sealant based on roof material and location. Using the wrong one can cause more damage. - Skiping Inspections
Regular checks catch small issues before they become big problems. Neglect leads to major repairs.
Prevent these mistakes by planning ahead, using quality materials, and following proper procedures.
Cost Considerations and When to Upgrade
Costs vary with the repair scope, materials, roof type, and how easy the roof is to access. You’ll see a wide range because a minor leak sealant or patch is priced differently from hardware, coatings, or multi-step fixes. Check the label or datasheet for exact figures, and compare how many quotes you need to get a true picture; typical guidance is to consider the overall scope and material choice when weighing repair versus replacement.
This matters because small fixes can be a smart guard against bigger problems, but gaps in the roof or aging structure may push you toward partial or full replacement later. Get multiple quotes, ask what’s included, and verify contractor credentials and warranties. Look for maintenance tips to extend life, signs a temporary fix is failing, and red flags like structural concerns or persistent leaks after repairs.
Temporary Patch vs. Permanent Repair vs. Replacement
When you spot a leak, the first decision is whether to go for a quick fix or something more substantial. A temporary patch might be enough if the damage is minor and isolated, like a small hole from a nail or screw. These patches are usually made with roofing cement or tar strips and can last several months.
A permanent repair, on the other hand, involves replacing damaged shingles or flashing to ensure long-term protection against leaks. This option is more costly but offers peace of mind knowing your roof will hold up through multiple seasons without issues. A permanent fix typically includes new materials and labor costs that reflect a higher level of work.
When considering replacement, it’s important to weigh the condition of your entire roof system. If you have widespread damage, aging shingles, or structural concerns, a full replacement might be necessary. A new roof can cost significantly more upfront but offers better insulation and durability over time, often paying for itself through energy savings and reduced maintenance.
Insurance, Warranties, and Documentation
Before you start any repair work, it’s crucial to document the damage thoroughly. Take photos or videos of the affected areas from different angles to provide clear evidence for insurance claims if needed. Keep detailed records of all repairs made, including materials used and labor costs.
Check your homeowner’s policy coverage limits and exclusions related to roof repairs and replacements. Understand what is covered under warranties provided by manufacturers versus contractors. Make sure any warranty agreements specify the extent of coverage and how long it lasts.
When obtaining estimates from contractors, ask for written quotes that include all costs involved in the repair or replacement job. Verify their credentials through references or online reviews to ensure you’re working with a reputable professional who stands behind their work.
Conclusion
Take action with care. A durable fix means safe roofs, solid seams, and a clean look that lasts through the next season.
First, skim the area you can access safely, note any moisture or staining, then follow a practical sequence: verify the leak source, prepare the surface, apply the chosen repair method, test in a controlled way, and recheck after a rain or dye test. Keep the surface dry, apply only approved materials, and seal up edges so water can’t sneak behind the repair.
Common mistakes to avoid are rushing a repair without identifying the exact source, skipping surface prep, and ignoring safety. Work from solid ground or a stable, supported ladder setup, wear shoes with good grip, and never step on wet or damaged sections. Test each step on a small area before moving on, and keep kids and pets away from the work zone.
If the roof is steep, or you uncover multiple leaks, or the repair would require major flashing work or structural changes, bring in a pro. Otherwise, you can finish stronger by sticking to the plan, documenting what you did, and inspecting after the next heavy rain. Stay practical, stay safe, and you’ll protect the home and your budget.
FAQ
How can I tell if my roof is leaking?
Look in the attic for water stains or damp spots. Check ceilings for new brown or dark marks and listen for dripping sounds. A fast drip means you likely have active water entry you need to address.
Are quick tests safe to do myself?
Yes, if you stay off a wet roof and use proper eye and hand protection in the attic. Don’t climb on a slick surface or when it’s actively raining. Don’t force open loose flashing or boards.
What should I do first if I see a leak during rain?
Use a tarp or plastic sheeting to cover the affected area from the outside if you can reach it safely. Move valuables away and place a bucket under the drip. Tarping is a temporary fix, not a cure.
When should I call a pro?
If water is dripping fast, there’s visible roof damage, or you can’t access the leak safely, call a roofer. Also call in if you’re unsure about flashings or vent pipe sealing. Hot work or climbing with fear of falls is a red flag to bring in a pro.