
Introduction
Sealants for basement wall penetrations are methods and products used to seal around pipes and conduits where they pass through basement walls, including boots and collars that direct and seal at the entry point. The goal is to create a flexible, water-resistant line of defense against damp concrete and leaks. Start by understanding that the substrate and environmental conditions will drive the choice of sealant and installation steps.
Common issues include water migrating around fittings and through porous concrete, especially when the surface is damp or cracked. Installing boots and collars correctly means ensuring a clean, sound edge, following manufacturer instructions, and choosing a sealant compatible with concrete and humidity levels. If you consider polyurethane foam injections, confirm it is appropriate for your gap size and surface condition, and that you follow product directions and local rules for application and curing. When in doubt, check labels and talk to the supplier or a pro about suitable options and safe application practices.
Key takeaways
- Choose sealants suited for damp concrete and avoid silicone on active leaks.
- Install boots or collars flush to wall surface before sealing penetrations.
- Polyurethane foam injections flow into voids but require careful surface prep.
- Always wear PPE; clean, roughen surfaces, and follow manufacturer guidelines.
- Identify failed plugs early; replace with compatible anchors and sealants.
- Consult local codes and document warranties; DIY risks include ongoing seepage.
Table of Contents
- Introduction
- Key takeaways
- Why Basement Wall Penetrations Leak
- Types of Sealants and Materials for Concrete Penetrations
- What Actually Bonds to Damp Concrete — Adhesion Principles
- Step-by-Step Installation for Boots, Collars, and Sealants
- Polyurethane Injection for Through-Wall Leaks — When and How
- Identifying and Repairing Failed Water Plugs and Other Voids
- Cost Comparison, Project Planning, and When to Call a Pro
- Long-Term Maintenance, Warranties, and Common Mistakes to Avoid
- Conclusion
- FAQ
Why Basement Wall Penetrations Leak
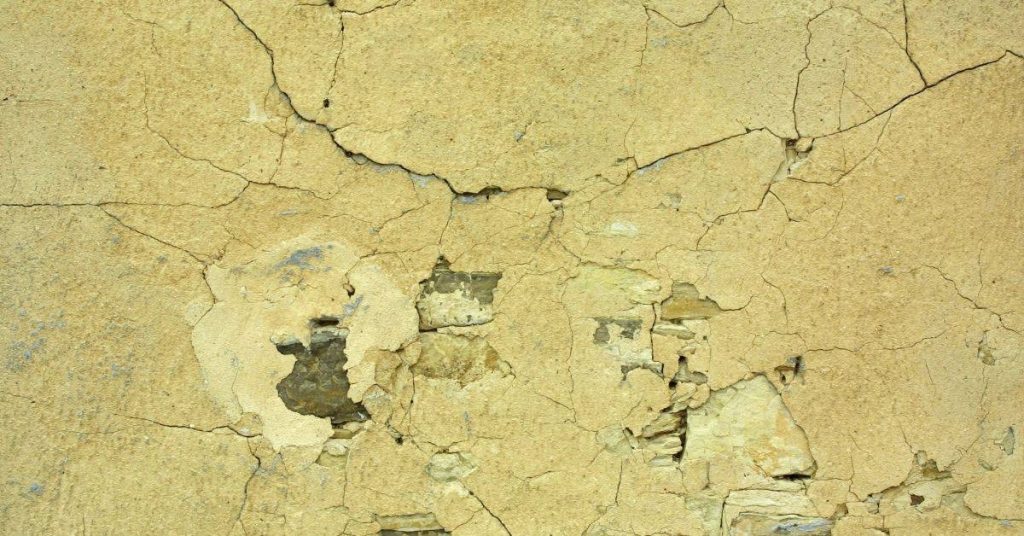
Piercing a foundation wall with a bore or installed fitting often creates a continuous void that can carry water straight through to the interior. These penetrations disrupt the wall’s integrity and leave a persistent leak path even when surface seals look solid. Pipes, conduits, and lines can act like channels for moisture behind the seal.
Common initial attempts like water plugs in the annulus, mortar packing, or simple caulk tend to fail in damp, hydrostatic conditions and with wall movement or settle-in over seasons. Look for voids behind fittings, lack of backer material, and poor bonding to damp concrete as early warning signs. Planning should focus on bonds that tolerate moisture, proper surface prep, and verified seal integrity before backfilling or finishing.
How penetrations are installed and where gaps occur
When we drill through foundation walls for pipes, conduits, or sleeves, we create a hole that’s bigger than the penetration itself. This leaves an annular gap – a continuous void around the pipe.
The typical installation method involves pushing the pipe through the wall, leaving this gap unsealed. It might look tight from the outside, but water can still find its way in and follow this path right into your basement.
Here’s what you’re dealing with: an opening that goes straight through your foundation wall, inviting water to come on in whenever there’s hydrostatic pressure or heavy rain.
Common failure modes (water plug crumble, differential movement, corrosion)
The initial seals we put in place – water plugs, mortar packing, or simple caulk – often fail over time. Here’s why:
Water plug crumble: Water plugs can absorb moisture and swell, then dry out and shrink. This cycle causes them to crumble and break apart, creating gaps for water to seep through.
Differential movement: Foundations shift over time due to soil settlement or temperature changes. This movement can cause the penetration to move relative to the wall, breaking any seal that was there.
Corrosion: Metal fittings and pipes can corrode over time, especially in damp conditions. As they rust, they expand and push against the surrounding concrete, cracking it and allowing water to enter.
Types of Sealants and Materials for Concrete Penetrations
Weigh the main material families for penetrating seals: polyurethane injection resins, elastomeric caulks, silicone, polysulfides, butyls, and mechanical boots or collars. Each has its pluses and limitations in basement walls that stay damp or wet. The right choice depends on crawlspace-like humidity and expected movement around fittings.
Prepare damp concrete surfaces with the appropriate primers, backer rods, and adhesion promoters to maximize bond strength. Installation methods vary from injection kits to boot/collar systems, with curing times and textures that influence paintability and finish. Be ready to troubleshoot bonding failures on damp substrates and decide when mechanical boots are the better route than chemical sealants.
Polyurethane Foam and Injection Resins
Polyurethane products, both two-component and single-component, are popular choices for sealing basement wall penetrations due to their ability to expand and bond in voids. They’re great for filling gaps around pipes and wires.
Two-component systems offer better control over expansion rate and cure time. They’re ideal for larger gaps and dynamic movement situations, like where pipes shift with temperature changes.
Single-component products are easier to use but have less control over expansion. They work well in static leaks and smaller gaps.
Both types bond well to damp concrete, making them suitable for high-humidity basements. However, they’re not resistant to waterborne pathogens or solvents, so they’re not recommended for sewer/wastewater exposure.
Elastomeric Sealants, Silicones, and Polysulfides
These materials offer varying degrees of elasticity, adhesion, and resistance to UV and chemicals. They’re typically applied as caulks or sealants.
Elastomeric sealants are highly elastic, making them ideal for dynamic movement around pipes. They bond well to damp concrete but aren’t resistant to UV or chemicals, so they’re best used indoors.
Silicones offer excellent UV and chemical resistance but have limited elasticity. They work well in static leaks and where exposure to sunlight or cleaning agents is a concern. However, they don’t bond as well to damp surfaces.
Polysulfides are highly elastic and resistant to chemicals but not UV. They’re good for dynamic movement and sewer/wastewater exposure but should be used indoors due to their UV sensitivity.
Mechanical Boots, Collars, and Compression Fittings
These provide a physical barrier around penetrations. They’re often used in conjunction with sealants to ensure a watertight seal.
Rubber neoprene boots are flexible and resistant to chemicals but not UV. They’re great for dynamic movement situations and can be used outdoors, but they should be painted to protect from UV.
Metal collars offer a rigid barrier but aren’t as flexible as rubber boots. They’re ideal for static leaks and where a rigid structure is needed. However, they require a good sealant to prevent water intrusion at the collar-concrete interface.
Compression fittings use pressure to create a seal. They’re useful in situations where a tight fit isn’t possible with other methods. They often require additional sealants for complete protection against leaks.
What Actually Bonds to Damp Concrete — Adhesion Principles
Porosity and pore structure of damp concrete control moisture movement and adhesive uptake, and they can help or hinder bonding depending on the product. Open, absorbent substrates are not inherently better; the chemistry must match the substrate. Your product label will say what it tolerates.
Contaminants like dust, laitance, efflorescence, or oils affect adhesion, so plan to remove or neutralize them before sealing. Consider surface energy, wetting behavior, and how different chemistries respond to damp conditions to guide your testing and primer choices.
Surface chemistry and moisture tolerance of sealants
Not all sealants are created equal when it comes to damp concrete. Some are formulated for wet substrates, while others need a drier surface to cure properly.
Silicone and polyurethane sealants often have better moisture tolerance. They can bond to damp surfaces due to their hydrophobic nature, which means they repel water. However, this doesn’t mean they’ll stick perfectly in all cases.
Epoxy and acrylic sealants, on the other hand, typically require a drier substrate. They’re hydrophilic, meaning they attract water, which can interfere with their curing process. Applying these to damp surfaces may lead to poor adhesion or even delamination over time.
Best practices to improve bonding on damp surfaces
While you can’t always wait for concrete to dry completely, there are steps you can take to improve adhesion on damp surfaces.
Brush off any loose material and remove visible contaminants like efflorescence or oil. Then, use a low-pressure air gun or heat gun to dry the surface as much as possible without causing excessive evaporation that could lead to cracks.
Applying a primer or skim coat designed for damp surfaces can also help. These products penetrate and bond better than regular primers, improving adhesion. Some even create a micro-porous layer that allows moisture to escape while preventing water from entering.
Mechanical anchoring with expansion bolts or powder-actuated fasteners can also help improve grip on damp surfaces. These create a physical bond, reducing the reliance on chemical adhesion alone.
Step-by-Step Installation for Boots, Collars, and Sealants
Start with a site assessment: identify moisture sources, note existing penetrations, and check boot or collar condition. Document substrate texture and nearby drainage. Decide what upgrades are needed and ensure clearances and ventilation comply with safety rules before work begins.
Match boots, collars, and sealants to damp concrete and possible continuous exposure. Plan the sequence to avoid trapped water: clean surfaces, install any water control measures first, then seal. Follow a careful surface prep protocol and use proper curing conditions for the chosen products.
Step-by-Step Installation Process
Follow this clear, numbered sequence to replace or install boots/collars and apply bonded sealants safely and effectively.
- Inspect the site: Identify moisture sources, existing penetrations, and potential ice/water pressures. Document current boot/collar condition, substrate texture, etching, and nearby drainage or sump access.
- Gather tools and materials: Ensure you have compatible boots, collars, sealants rated for damp concrete, backer materials, primers, and safety gear.
- Prepare surfaces: Gently clean to remove dust, efflorescence, and loose material. Patch cracks if indicated. Achieve a stable, dry, dust-free surface.
- Install water control measures: Install any new boots or collars with proper seating and sealant bead placement before sealing.
- Apply bonding sealant: Apply sealant to the concrete surface and boot/collar interface. Ensure uniform bead height, no gaps, and proper compression with backer rod if needed.
- Cure and protect: Implement curing windows, protect from rain or humidity, and test for leaks after backfill or pressure testing.
- Inspect and document: Verify adhesion and seal integrity by probing joints and observing edge bonding. Document compliance with manufacturer guidelines and code expectations.
Tools and materials checklist
Use this list before starting work to ensure you have the right tools and consumables for a successful job.
- Drill/driver: For installing boots, collars, and mixing sealants. Ensure it’s compatible with your fasteners.
- Injection gun: For applying sealant evenly and accurately.
- Backer rod: To fill gaps and support sealant bead. Choose the right size for your joint width.
- Primer: Compatible with concrete and chosen sealant to improve adhesion.
- Sealant: Polyurethane or silicone, rated for damp concrete and continuous water exposure.
- Boots/collars: Compatible with pipe material and code-compliant clearances.
- Personal Protective Equipment (PPE): Gloves, safety glasses, and protective clothing to prevent injuries and chemical exposure.
- Tape measure: To ensure accurate boot/collar sizing and sealant application.
- Cleaning supplies: For preparing surfaces: mild detergent, water, brush, and towel.
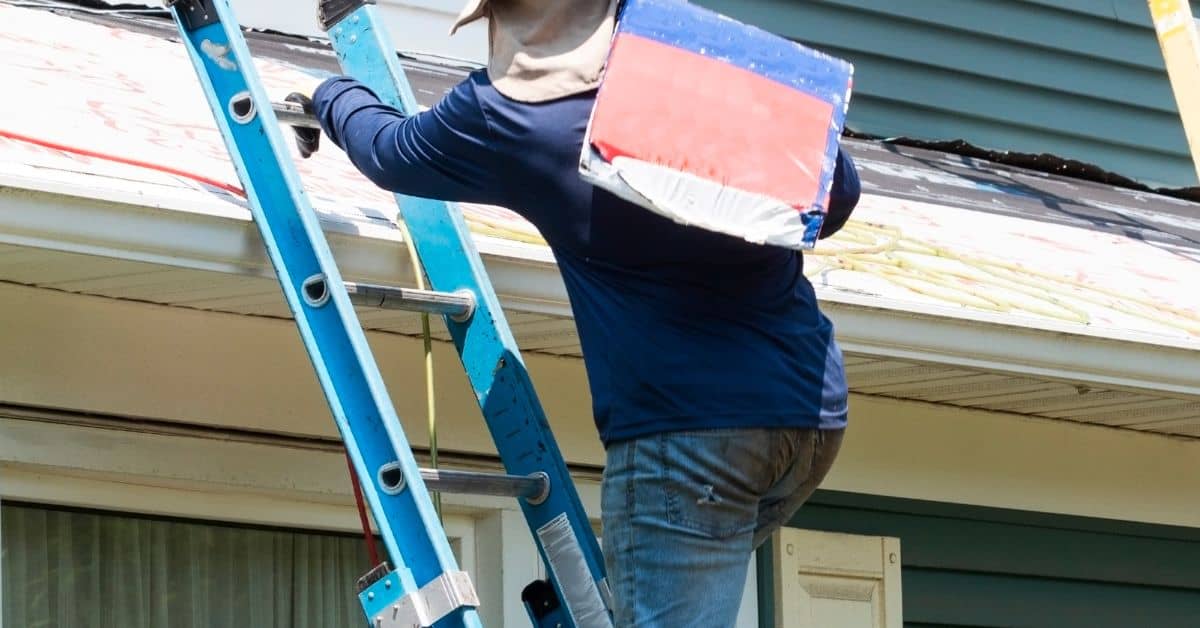
- Safety gear: Ladder, safety harness (if working at height), and ear protection if using power tools.
Quick rule: Always verify compatibility between materials and pipe/concrete surfaces to prevent failures.
Prep, application, and visual checkpoints
Use this checklist during surface preparation, sealant application, and final inspection to ensure a proper seal and cure.
- Surface cleanliness: Ensure surfaces are free of dust, efflorescence, and loose material. A quick wipe test with a damp cloth should leave no residue.
- Crack filling: Apply concrete patch to any cracks wider than 1/8 inch before sealing.
- Moisture threshold: Check moisture levels with a moisture meter. Sealants perform best on surfaces with less than 20% relative humidity.
- Backer rod placement: Insert backer rod into joints, ensuring it’s centered and compressed slightly to support the sealant bead.
- Sealant application: Apply sealant evenly along boot/collar interface and joint using an injection gun. Maintain a uniform bead height with no gaps or voids.
- Edge bonding: Ensure sealant bonds to concrete surface and boot/collar interface by probing joints gently with a blunt tool.
- Curing conditions: Protect sealed areas from rain, humidity, and extreme temperatures during the curing period as per manufacturer guidelines.
- Leak testing: After backfill or pressure testing, observe for any signs of leaks around boots/collars and sealant joints.
Quick rule: Always follow manufacturer guidelines for surface preparation, application, curing, and inspection to ensure a lasting seal.
Polyurethane Injection for Through-Wall Leaks — When and How
Polyurethane injection is a practical option for through-wall leaks when you have active water intrusion around penetrations, conduits, or pipes and the substrate is damp but not badly corroded. It works best with accessible injection points and a clean, tolerably dry surface, using through-wall kits, ports, and dispensing gear to push resin into voids and up against the leak path. Expect the resin to expand on contact with moisture and to bond to concrete and to the pipe or conduit, providing a seal as you inject in stages and monitor pressure.
This matters because it gives you a targeted, interior repair that can stop leaks without full-wall demolition, but you must follow a careful workflow: prep the area and ventilate, PPE up, map likely leak routes, install access points, choose the resin type, and perform sequential injections while watching pressure and movement. You’ll need to understand the basics of how the resin cures in damp conditions, how long it takes under your ambient temperature, and what finishes or sealants are appropriate for surface clean-up and backfilling once the area is stable. If you’re unsure about exact timings, mix ratios, or product specs, check the label or datasheet and follow the manufacturer instructions and any local guidance.
How injection works and product limitations
The polyurethane injection process is like filling a void with expanding foam. It’s effective when the leak size is within range.
Typical limits: Injection works best on leaks up to around 1/2″ in diameter, and voids no larger than about 3/4″.
It’s not suitable for large cracks or where water pressure is high. Check the product label for specific limitations.
Factors affecting success: Injection relies on good flow paths and sufficient pressure. If the leak’s complex, you might need multiple ports.
Safety precautions and ventilation when injecting
Alright, listen up. Safety first, then we get to work.
Gloves, eye protection, and a respirator are your best mates here. Check the product label for specific recommendations on PPE. You don’t want polyurethane in your eyes or lungs, trust me.
Now, ventilation. You need it, plain and simple. Open windows, use fans, whatever you’ve got. We’re talking about chemicals here, so keep exposure to a minimum. And for goodness’ sake, avoid uncontrolled resin extrusion. Keep an eye on those injection points and make sure the resin goes where it’s supposed to.
Lastly, don’t be a hero. If you’re feeling lightheaded or something ain’t right, stop what you’re doing and get some fresh air. Safety first, remember?
Identifying and Repairing Failed Water Plugs and Other Voids
The diagnostic goal is to distinguish crumbled or failed water plugs from active seepage and from structural cracks. Look for crumbly plug material, damp patches, efflorescence, seepage patterns, and any odor. Establish a baseline condition before planning repairs.
Follow a practical inspection workflow: check surfaces and penetrations, note moisture readings, and monitor during rainfall. For repairs, choose options based on severity, such as resealing plugs, boots, or collars, or using injections for leaks, and address cracks with appropriate injections or hydraulic cement for immediate control if needed.
Diagnostic signs and test methods
Start by drying out the area. This helps distinguish moisture from seepage. Look for:
– Crumbly plug material
– Salt efflorescence (white, powdery deposits)
– Damp patches or stains
– Seepage patterns
– Musty odor
Perform these simple tests:
– Dye test: Apply a water-based dye around penetrations to trace leaks.
– Probing: Gently probe around conduits with a screwdriver or awl to locate voids.
– Small drill holes: Drill tiny holes (1/8″ or smaller) at suspected leak points to verify.
Repair options by severity: re-pack, inject, replace
Match repair methods to the severity of damage:
Minor voids: Re-pack with proper mortar. Mix a stiff batch and force it into the void using a small trowel or putty knife.
Through-wall leaks: Use polyurethane injection. Drill small holes, insert ports, and inject expanding foam to seal the leak (refer to earlier section for detailed process).
Large/structurally compromised penetrations: Replace boots/collars or use compression fittings. If the penetration is damaged, remove it, prepare the surface, and install a new boot or collar.
Cost Comparison, Project Planning, and When to Call a Pro
Costs hinge on product type, required equipment, labor, and access challenges. Material choices for boots, collars, and sealing systems, plus any resin chemistry, drive the base price. Plan for contingencies tied to basement access and moisture management needs.
Weigh DIY viability versus professional help by assessing risk factors like active leaks or large penetrations. Draft a simple project plan with sequencing, inspections, and permits, and document the scope to keep the budget realistic and transparent.
What to check and safe budget ranges
Before you start, use this checklist to ensure you’re prepared. It’s crucial for a successful job and staying within your budget.
- Local product prices: Check with local suppliers for competitive pricing on sealants, backer materials, and adhesives.
- Rental equipment costs: Estimate the cost of renting any necessary tools or mast equipment. Don’t forget safety gear like respirators.
- Labor rates: If planning to hire help, check local labor rates.
- Project size: Measure all penetrations to ensure you have enough materials and time allocated.
- Access complexity: Assess if you’ll need ladders, scaffolding, or mast equipment for high or awkward openings.
- Moisture levels: Test moisture content in the concrete. High moisture may require specialty products or additional prep work.
- Warranty and code requirements: Check if your project needs to meet specific codes or warranties.
- Weather conditions: Plan around weather, as it can impact both product application and curing times.
Quick rule: For small jobs with simple penetrations and low moisture, expect to spend $100-$500 on materials. Moderate jobs may require rented tools and additional labor, pushing the budget up to $1000-$3000. Complex professional interventions can range from $3000 and above.
When to hire a specialist
While DIY is great for many basement wall penetration projects, there are times when it’s best to call in the pros. Here are some signs to look out for.
Active high-pressure leaks: If water is actively leaking under pressure, it may be a sign of a larger structural issue that requires professional attention.
Repeated failures after DIY attempts: If you’ve tried sealing penetrations before and they keep failing, it might be time to bring in an expert. They can diagnose underlying issues you may have missed.
Structural movement or electrical/plumbing scope: If your project involves structural movement, or if it requires work on electrical or plumbing systems beyond simple sealing, it’s best to hire a professional to ensure the safety and integrity of your home.
Long-Term Maintenance, Warranties, and Common Mistakes to Avoid
Set a practical maintenance cadence with visual checks and moisture tests. Use a straightforward inspection checklist focused on boots, collars, and penetrations for cracks, gaps, or staining. Keep a log of findings for trend tracking.
Warranties vary in scope and duration, and exclusions often hinge on maintenance gaps or improper installation. Be prepared to contact manufacturers or professionals when issues arise, and retain purchase receipts, batch numbers, and installation dates for claims and future work.
Inspection checklist and maintenance tasks
Regularly inspect your basement wall penetration seals to ensure their effectiveness. Use this checklist for a thorough check-up.
- Visual Inspection: Check boots, collars, and penetrations for cracks, gaps, blistering, or new staining.
- Moisture Test (biannually): Use a moisture meter to test the concrete around seals. High readings indicate potential issues.
- Efflorescence Check: Look for white, powdery deposits on the surface, which may signal water intrusion.
- Discoloration Check: Inspect for any discoloration or staining that wasn’t there before.
- Mold Growth Check: Check for signs of mold growth around seals, especially in damp areas.
- Substrate Movement Check: Look for cracks or movement near penetrations that could compromise the seal.
- Document Findings: Take photos, note dates, and record severity to track changes over time.
- Touch-ups (as needed): Address minor issues promptly to prevent them from worsening.
Quick rule: Regular inspections and prompt touch-ups are key to maintaining effective penetration seals.
Common installation mistakes and how to avoid them
Preventing common mistakes can extend the lifespan of your basement wall penetration seals. Here’s what to watch out for:
- Neglecting Prep: Inadequate surface preparation can lead to seal failure. Always clean, dry, and prime surfaces before applying sealants.
- Wrong Product Choice: Using incompatible or non-damp-rated products on wet surfaces can cause premature failure. Always choose products suitable for damp concrete.
- Over-reliance on Packing: Relying solely on packing materials like backer rods can lead to improper sealing. Ensure proper application and curing of sealants as well.
- Compromised Boots or Collars: Failing to replace damaged boots or collars can allow water intrusion. Inspect these components regularly and replace if necessary.
By avoiding these common mistakes, you’ll ensure a longer-lasting, more effective seal for your basement wall penetrations.
Conclusion
Seal failures around basement penetrations are almost always solvable when you choose the right method, do the work carefully, and respect damp concrete. The goal is a durable, watertight seal that won’t trap moisture or crack with temperature changes.
First, identify the penetration type and select boots or collars that fit well, test fit before committing, clean and lightly rough the surface, use a compatible sealant and follow its cure times, then install and seal in the correct order. After installation, verify the seal by applying water pressure or a simple leak test in a controlled area, and plan for maintenance checks and any follow-up injections if you detect movement or settling.
Common mistakes to avoid include shortcuts that skip surface prep, using the wrong sealant for damp concrete, and rushing cure times or overloading joints. Always keep safety in mind: wear eye protection, ventilation as needed, and test a small area first to confirm compatibility and bonding before committing to the full install.
If you’re unsure about passive leaks behind unexpected voids, or if you’re facing continuous through-wall leaks or large voids, it makes sense to call a pro rather than push ahead. With careful planning, clear steps, and practical maintenance, you’ll protect the basement and keep the project on track, and that confidence is the actual payoff.
FAQ
What types of sealants are best for basement wall penetrations?
For gaps that move or settle, use a sealant that stays flexible. Polyurethane foams or caulks labeled for exterior use are common options; silicone works well on non-porous surfaces, but check compatibility with damp concrete. Always read the label and follow the manufacturer instructions for curing times and temperature ranges.
What are the most common issues with water leaks around pipes and conduits?
Gaps around boots and collars are a frequent culprit. Poorly seated or damaged boots allow water to bypass the wall, especially as pressure changes. Voids behind a collar or insufficient backing material can also trap moisture and leak over time.
How do you install boots and collars correctly?
Clean and rough up the area around the penetration. Secure the boot or collar tight to the wall, with proper backing and sealant at all contact points. Then fill any remaining gaps with an appropriate sealant, following the product’s cure instructions and avoiding over-application that can pinch or crack.
How does polyurethane foam injection work, and when should you consider it?
Foam injections fill voids and create a pressure-basting seal behind the wall. They’re useful for larger gaps or when water is actively leaking through a void. Follow exact product directions and wear proper safety gear; if in doubt, consult the label or a pro for guidance.