
Introduction
Call the right professional promptly to handle a roof leak and prevent further damage.
You’ll learn how to recognize urgent signs, what information to gather, and practical steps and tips to guide the repair process and avoid common mistakes.
Key takeaways
- Assess leak location by interior staining and ceiling sag before climbing on roof.
- Prioritize safety: use harness, stable ladder, helper, and weather-free conditions.
- Document signs: cracked flashing, damaged shingles, clogged gutters, and animal activity.
- Prepare a basic toolkit: caulking, putty knife, flashing tape, sealant, gloves.
- Do not over-apply sealant; track leak progression and ventilate attic space.
- When in doubt, stop and consult a licensed roofer to avoid structural damage.
Table of Contents
- Introduction
- Key takeaways
- Quick Decision Guide — Call or DIY?
- Identifying Signs of Roof Damage Early
- Safety Measures and Equipment Checklist
- Tools and Materials Checklist + Material Specs
- Step-by-Step DIY Leak Repair Guide
- Common DIY Mistakes and How to Avoid Them
- Quality Assurance and When to Hire a Pro
- Bonus: Time Planning, Budgeting, and Next Steps
- Conclusion
- FAQ
Quick Decision Guide — Call or DIY?
Decide if a repair is DIY or requires a pro by weighing risk, cost, and task complexity. If the job could threaten structure, fire, or water damage, or needs ladder work or moisture assessment, call a licensed pro. There are clear red flags that demand immediate professional intervention.
A simple flow helps you choose: Low risk/simple fixes DIY, Moderate risk seek inspection or second opinion, High risk/urgent contact a pro right away. Keep a quick checklist handy and gather photos, measurements, and leak history before a visit. When in doubt, call a pro.
When to Call a Roofer Immediately
If you spot any of these red flags, don’t hesitate—call a professional right away. Active leaks that cause ceiling stains or standing water are clear signs of immediate danger. Structural issues like sagging roofs or visible damage from severe storms also require expert attention.
Ignoring these warning signs can lead to extensive property damage and even pose safety risks. Insurance companies often prefer to see work done by licensed professionals, so getting a pro involved early can save you hassle later on.
Mold growth, electrical hazards, or exposed roof decking are other urgent issues that demand professional intervention. These conditions not only threaten your home’s integrity but also pose significant health risks.
DIY-appropriate Repairs and When They Save Money
For minor issues like loose or missing shingles, a competent homeowner can often handle repairs themselves. Replacing damaged flashing around chimneys or vents is another task that DIYers frequently tackle successfully.
Making sure you have the right tools and materials is key to doing these jobs safely and effectively. Always check local building codes before starting any work to avoid legal issues down the line.
While small repairs can save money, it’s important to assess whether the task falls within your skill set. If unsure, seeking a second opinion from a professional might be wise to prevent bigger problems later on.
Cost and Time Comparison: DIY vs Professional
The decision between doing it yourself or hiring a contractor often boils down to cost versus time. For simple repairs, the materials needed for DIY fixes can be relatively inexpensive compared to professional labor costs.
However, when you factor in your own time and effort, the equation might tilt towards hiring a pro. Professionals have experience that allows them to complete tasks efficiently, which can save you days or even weeks of work.
Variables like roof size, complexity of repairs, and availability of materials will affect both cost and time estimates. A small patch job may be quick and cheap DIY-wise, but larger projects often justify the expense of professional services.
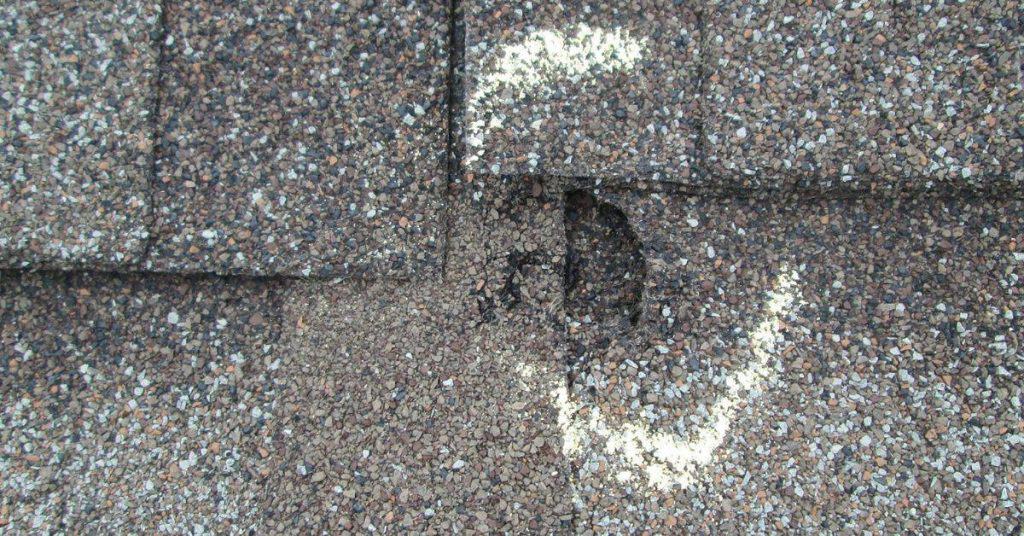
Identifying Signs of Roof Damage Early
Roof damage often shows up before you get a real leak. Look for curled shingles, granule loss, dark streaks on ceilings, or water stains that appear after a dry spell. Also check indoors for bubbling paint, warped ceilings, musty smells, or sudden attic moisture rises, plus subtle cues like granules in gutters or moss on shingles.
Regular checks and a simple quarterly DIY rhythm pay off. Seasonal timing matters—peel back the cover a bit after winter thaws and after heavy storms, and keep a photo log and notes by area to track changes. If leaks persist after rain, icicles form, hail dents show up, or plaster cracks despite minor visible damage, escalate to a pro.
Exterior Visual Checkpoints
Use this checklist after winter thaw and post-storm to catch early signs of roof damage.
- Curling shingles: Look for edges lifting. If ignored, water can seep under tabs.
- Granule loss: Check gutters for missing granules. Loss means shorter lifespan and leaks.
- Dark streaks on ceilings: Note any discoloration inside from outside damage.
- Inexplicable water stains: After dry spells, check for new marks that appear suddenly.
- Gutters with granules: Indicate shingle wear and tear. Clean gutters regularly to confirm.
- Moss on shingles: Check roof slopes for green patches. Moss can trap moisture and cause decay.
- Slight slope discoloration: Look for uneven coloring across the roof surface.
- Moisture on sheathing: From attic access, check if wood is damp or discolored.
Quick rule: Regular checks save big repairs later.
Interior Clues and Attic Inspection
Inspect your attic after winter and before summer to catch hidden damage early.
- Bubbling paint: Check walls for blisters. May indicate moisture seeping through roof.
- Peeling wallpaper: Look for sections lifting off the wall. Moisture can cause this issue.
- Warped ceiling boards: Notice any warping or bowing in attic ceilings.
- Musty odors: Smell musty air, indicating mold growth from roof leaks.
- Sudden attic moisture: Check for condensation on rafters and insulation.
- Daylight through boards: Look for gaps where light shines through. This shows structural issues.
Quick rule: Attic checks prevent major roof problems.
Advanced Detection Techniques
Use moisture meters to pinpoint wet spots and thermal imaging cameras for hidden leaks. Binoculars or drone photos can help inspect hard-to-reach areas.
Maintain a photo log of your roof’s condition over time, noting any changes that occur after storms or seasonal shifts.
Infrared detection is key for finding moisture behind walls and under shingles without tearing into the roof. This saves money on unnecessary repairs.
Safety Measures and Equipment Checklist
Safety is the priority. Do a quick risk check before you climb: weather, roof condition, and your health, and stop if conditions worsen. Wear proper PPE, set up a solid ladder, and use fall protection in risky areas.
Keep tools tethered, manage debris, and have a plan for emergencies. Knowing when the risk outweighs the benefit helps you avoid a fall and a costly mistake.
Essential Personal Protective Equipment (PPE)
Before you start any roof work, make sure your PPE is ready and properly fitted.
- Hard hat: Wear it to protect from falling objects; check for a snug fit with chin strap fastened.
- Safety glasses or goggles: Prevent debris from entering eyes; ensure lenses are clear and unscratched.
- Non-slip boots: Have good traction on soles; inspect for wear, replace if needed.
- Cut-resistant gloves: Protect hands from sharp edges or nails; check for fit and comfort.
- Long sleeves: Cover arms to prevent sunburn or cuts; ensure they’re not too tight.
- Fall protection harness: Use if working at height over 6 feet; secure anchor points correctly.
Quick rule: Always wear PPE and check for proper fit before starting work.
Ladder and Access Safety Rules
Setting up your ladder correctly is crucial to prevent falls and injuries.
- Sturdy ladder: Use a rated, non-slip ladder; check for stability and secure footing.
- 4:1 angle: Maintain proper ladder tilt; use the 4-to-1 rule (four feet up for every one foot out).
- Tie-off points: Secure top of ladder to a stable structure; ensure bottom is steady on solid ground.
- Spotter present: Have someone hold the base while climbing; maintain three points of contact at all times.
- Safe entry/exit: Climb and descend slowly, facing the ladder; avoid overreaching or leaning too far.
- Avoid scaffolding: Use only if necessary and properly set up; otherwise call a pro for high-risk areas.
Quick rule: Always use proper ladder setup techniques to prevent falls.
Weather and Site Conditions to Avoid
Check weather forecasts before starting any roof work to ensure safe conditions.
- Dry, cool days: Optimal for repairs; avoid wet or icy surfaces that can cause slips.
- No high winds: Wind speeds under 15 mph are best; strong gusts can blow you off balance.
- Safe temperature range: Work between 40°F and 90°F; extreme heat or cold affects safety and efficiency.
- Avoid rain or snow: Wet surfaces increase risk of falls; wait until conditions dry out.
- No ice buildup: Ice on roof edges can be slippery; ensure all ice is cleared before climbing.
Quick rule: Only work in safe weather and site conditions to prevent accidents.
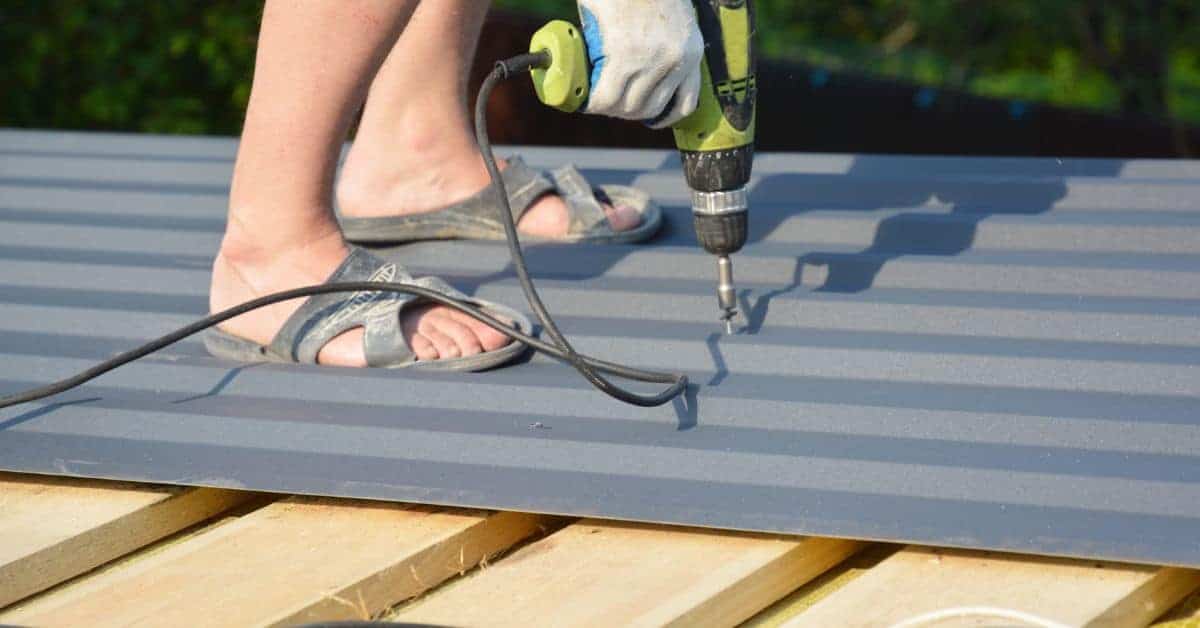
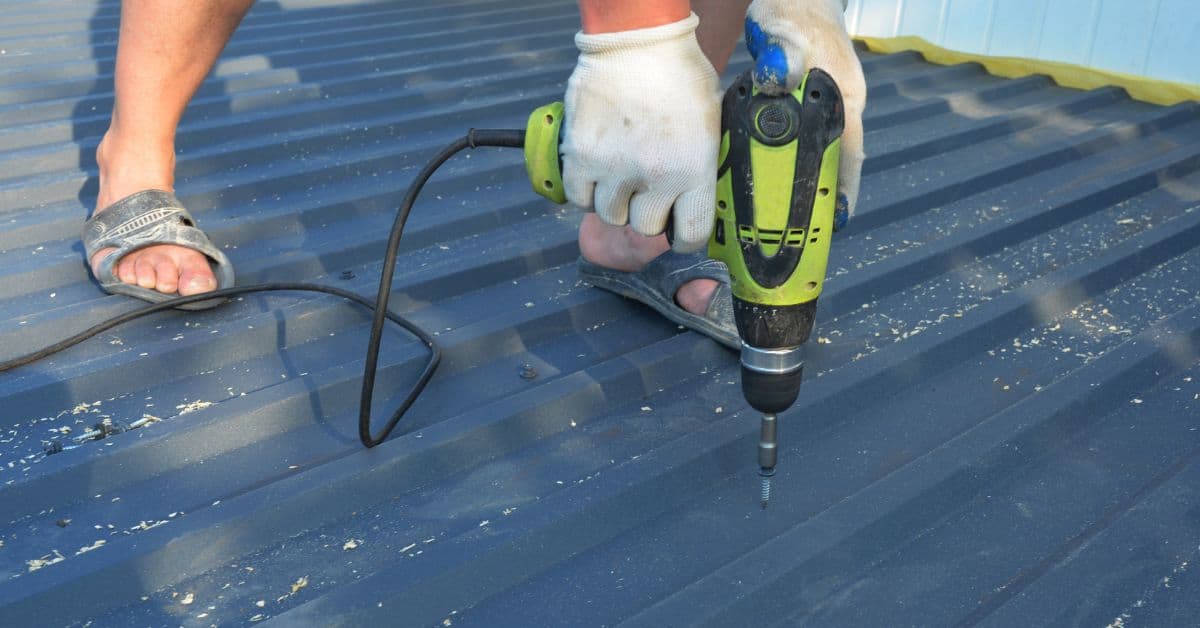
Tools and Materials Checklist + Material Specs
This section lays out a categorized tools and materials checklist for common leak repairs, with notes on compatibility with asphalt, tile, metal, and flat roofs. It groups tools by task—inspection, removal, sealing, and finishing—plus safety gear and a small first-aid kit. It also covers material specs like sealants, patch compounds, membranes, and adhesives, plus how to match them to roof type and substrate.
Use the guide to plan your purchases, estimate quantities by area, and store materials in a dry, shaded spot. Check labels and manufacturer instructions for temperature ranges, cure times, and ventilation, and look for compatibility with your roof and substrate. If something seems off for your roof type, consider delaying the project or calling a pro.
Basic Tool Kit for Shingle and Flashing Repairs
Use this checklist before tackling shingle repairs or flashing issues to ensure you have everything needed.
- Hammer: Check it’s sturdy enough to drive nails without bending. Missing a hammer means wasted time hunting one down.
- Roofing Nails: Ensure they’re galvanized for rust resistance and the right length for your shingles. Using wrong nails leads to leaks.
- Pry Bar: Make sure it’s long enough to reach under shingles without bending. A weak pry bar means wasted effort.
- Roofing Cement: Confirm it’s suitable for asphalt shingles and has good adhesion properties. Using the wrong cement can cause leaks.
- Utility Knife: Ensure it’s sharp enough to cut through tar paper easily. Dull knives waste time and effort.
- Caulking Gun: Check that it holds silicone or acrylic sealant well without leaking. A faulty gun means wasted material.
Quick rule: Always have a backup of each tool in case one fails.
Materials by Roof Type (Asphalt, Metal, Tile)
This checklist helps you choose the right materials for your roof type to ensure proper repair and longevity.
- Sealant: Check it’s compatible with asphalt shingles. Wrong sealant can cause leaks or damage.
- Patch Compound: Ensure it has high tensile strength for wind uplift resistance. Weak compound leads to failure.
- Metal Flashing Tape: Confirm it’s UV resistant and suitable for metal roofs. Poor tape causes corrosion.
- Tile Adhesive: Check that it’s flexible enough for tile movement without cracking. Rigid adhesive can break tiles.
Quick rule: Always read the label to ensure compatibility with your roof type and substrate.
When to Buy vs. Rent Specialty Tools
This checklist helps you decide whether to purchase or rent tools based on frequency of use and cost-effectiveness.
- Magnetic Nail Gun: Rent if rarely needed, buy if frequent repairs. Saves time but expensive upfront.
- Lifts for Roof Access: Rent unless doing multiple jobs. Buying is costly without regular use.
- Roofing Shovel: Buy if you do a lot of roof work. Rental can be inconvenient and pricey.
Quick rule: Assess your needs before buying to avoid unnecessary expenses.
Step-by-Step DIY Leak Repair Guide
This section lays out a clear, ordered workflow for diagnosing and repairing a typical shingle leak, with checkpoints to verify each step and avoid rework. Start with a safety-first plan, then move through prep, exterior inspection, and a disciplined repair sequence that ends with a water test at the target area. You’ll secure loose shingles, reseat or reseal tabs, replace damaged shingles, fix flashing, address drainage, and verify each fix before moving on.
Following this approach helps you spot active leaks versus cosmetic stains, map suspected paths, and prevent missed steps that cause rework. It gives you a practical path from interior clues to exterior repairs and back to verification, so you know you’re not guessing. It also emphasizes documenting conditions, using controlled water tests, and rechecking moisture later to confirm the repair stuck and to guide any preventive measures like gutter maintenance or attic ventilation. If conditions worsen or safety can’t be maintained, you’ll know when to abort and call a pro.
Step-by-Step Repair Process
This sequence guides you through safely diagnosing and fixing a roof leak, from prep to final cleanup.
- Assess weather conditions. Ensure it’s dry and safe for work.Quick check: No rain or wind.
- Set up safety measures: wear PPE, secure ladder, clear workspace.Quick check: Tools within reach, no tripping hazards.
- Inspect interior ceiling stains to map leak paths. Use a flashlight and moisture meter if available.Quick check: Note all stained areas.
- Evaluate shingles for damage: loose, cracked, or missing pieces.Quick check: Mark damaged spots with chalk.
- Remove damaged shingles carefully to expose the leak source.Quick check: No further roof penetration.
- Replace damaged flashing and reseal around vents and chimneys.Quick check: Flashing fits snugly, no gaps.
- Apply sealant along valleys and seams for a watertight repair.Quick check: Sealant is evenly spread, no bare spots.
- Reinstall new shingles over the repaired area. Ensure proper alignment.Quick check: Shingles are securely in place.
- Conduct a water test to verify repairs hold under pressure.Quick check: No leaks after simulated rain.
Assessment and Preparation
Start by mapping the leak path from inside your home. Look for stains on ceilings or walls that indicate water entry points.Note: Use a flashlight to pinpoint exact locations.
Next, head outside to visually inspect the roof. Check shingles for damage such as missing granules, cracks, or gaps around flashing and chimneys. Document any issues you find with photos or notes.Note: This helps track repairs over time.
Clean up your work area by removing debris and setting up safety barriers if needed. Ensure a clear path to the roof for easy access during repair work.Note: Have all tools and materials ready before climbing the ladder.
Repair Execution (Shingle/Flashing/Sealant Techniques)
To fix a leak, start by removing any damaged shingles. Carefully lift and replace them with new ones to maintain the roof’s integrity.Note: Use roofing cement for added security.
Next, inspect and repair or replace flashing around chimneys, vents, and other protrusions. Ensure all flashing is properly sealed and aligned to prevent water from seeping in.Note: Overlap new flashing with existing material for a tight seal.
Finally, apply roof sealant along valleys and seams where shingles meet. Use a caulking gun to spread the sealant evenly, ensuring no gaps or bare spots remain.Note: A good seal is key to preventing future leaks.
Final Inspection and Short-term Testing
After completing repairs, conduct a thorough inspection of the work area. Use this checklist to ensure everything is watertight:
- Water test: Simulate rain conditions to check for leaks.
- Nail checks: Ensure all nails are secure and flush with shingles.
- Flashings re-inspected: Confirm flashing is properly sealed around vents and chimneys.
- Sealant coverage: Verify sealant is evenly applied along valleys.
- Shingle alignment: Check new shingles are correctly positioned and aligned with existing ones.
Quick rule: Monitor the repair area for 24-48 hours after testing to ensure no leaks reappear.
Common DIY Mistakes and How to Avoid Them
Common homeowner mistakes often come from underestimating how complex a roof can be, tackling tasks from a ladder with little protection, and skipping simple weather checks or a basic pre-work plan. These missteps can lead to accelerated water intrusion, hidden damage, and makeshift repairs that fail when the next rain comes, so pause, check the basics, and set a clear plan before you touch a tool.
This section explains what to watch for, why it matters, and how to prevent problems with practical steps you can actually follow on a DIY project. You’ll learn to create a weather window, set up stable ladders with fall protection, gather tools, wear proper gloves and eye protection, and outline a simple stepwise plan so you don’t miss a critical detail or skip a safety check when fatigue or urgency sets in.
Mistakes that Compromise Water Tightness
Avoid these common errors to ensure your roof remains watertight and structurally sound.
- Improper flashing installation: Flashing is crucial for directing water away from vulnerable areas. Ensure it’s properly installed with correct overlap and sealing.
- Underlapping shingles: Shingles should always overlap to prevent water intrusion. Check that each row of shingles covers the one below it.
- Overuse of sealant: Sealants can degrade over time if used excessively, weakening your roof’s integrity. Use only where necessary and follow manufacturer guidelines.
- Incorrect fastener placement: Fasteners should be placed in the center of each shingle to ensure proper adhesion. Avoid placing them too close to edges or seams.
Maintaining these details will help prevent water damage and prolong your roof’s lifespan.
Safety and Scope Underestimation Errors
Avoid underestimating the complexity of roofing repairs and neglecting safety measures to ensure a safe and successful repair job.
- High-risk ladder work: Tackling high areas from ladders can be dangerous. Use stable scaffolding or harnesses for added security.
- Safety gear omission: Always wear proper PPE, including gloves and eye protection, to prevent injuries.
- Weather checks skipped: Repairing in bad weather can lead to additional damage. Wait until conditions are favorable before starting work.
- Scope reassessment ignored: Reassess your repair plan if the job becomes more complex than expected. Don’t hesitate to call a professional when needed.
Maintaining these practices will keep you safe and ensure repairs are done correctly.
Documentation and Insurance Pitfalls
Avoid common mistakes that can affect your insurance claims process and the integrity of your repair documentation.
- Inadequate photo evidence: Document all damage with clear photos before repairs. This helps support any future insurance claims.
- No written estimates kept: Keep detailed records of materials used and costs incurred for accurate claim submissions.
- Poor repair documentation: Clearly document the steps taken during repairs, including dates and materials used, to avoid disputes later on.
- Continuing work without insurance approval: Pause DIY efforts if your insurer needs additional information or inspections. This prevents complications in claim processing.
Maintaining thorough documentation will protect your rights and ensure proper compensation from insurers.
Quality Assurance and When to Hire a Pro
Quality assurance starts with simple diagnostics you can do, like watching water staining patterns, using a moisture meter, and noting any flashing or deck failures. Track what happens after a storm over 24–72 hours and then 1–2 weeks to see if DIY fixes hold. Have clear criteria: persistent leaks, widespread deterioration, cracked flashing, mold, or deck damage mean hire a pro.
Vet contractors by checking licensing, insurance, references, and local work. Get written estimates that spell out scope, timeline, and warranty terms, and keep photos and a problem chronology as you compare. Documentation and a clear contract help you avoid surprises and stay safe.
Post-repair Quality Checks and Maintenance Plan
After completing your roof repair, it’s crucial to conduct a thorough quality check. Start by walking around the perimeter of your home with a flashlight, looking for any signs of water intrusion or new damage. Pay special attention to areas where you made repairs, like flashing and valleys.
Maintaining your roof involves regular inspections every six months to catch issues early. Keep an eye out for cracked shingles, missing granules, or damaged flashing during these checks. In colder climates, inspect after winter storms for ice dams and icicles that can cause leaks.
Seasonal maintenance is key. Clean gutters twice a year—spring and fall—to prevent water buildup. Trim overhanging branches to reduce wear from falling debris. And don’t forget to check the attic regularly; signs of moisture or mold indicate your repair needs attention.
A well-maintained roof can last decades longer than one neglected. By staying vigilant, you ensure that any DIY fixes hold up and keep your home dry and safe.
How to Vet and Choose a Roofer
Choosing the right roofer is critical for quality work. Start by checking their licensing and insurance status through your state’s contractor board or local government website. A reputable company will have no problem providing proof of both.
Ask for references from past clients, especially those who had similar issues to yours. Contact these references and ask about the roofer’s punctuality, workmanship quality, and customer service. Look for testimonials online as well—happy customers often leave reviews on social media or review sites like Yelp.
Get multiple estimates and compare them side by side. A good estimate will detail the scope of work, materials used, labor costs, and warranty terms. Be wary of contractors who lowball prices; they might cut corners on quality to make a profit.
Red flags include vague or incomplete bids, pushy sales tactics, or reluctance to provide references. Trust your gut—if something feels off, move on to another contractor until you find one that fits the bill.
Preparing for a Professional Visit (What to Document)
When scheduling a professional visit, gather all necessary documentation beforehand. Take clear photos of any visible damage from different angles and heights. Include close-ups showing the extent of wear or water intrusion.
Note down the exact location of each issue on your roof using measurements if possible. This helps contractors pinpoint problem areas quickly without guesswork. Also, write a brief chronology detailing when you first noticed issues and any DIY repairs attempted so far.
Collect previous repair receipts and warranties related to your roof. These documents provide context for the contractor’s assessment and can expedite insurance claims if needed later on. Make sure all information is organized neatly in one place before their arrival.
By being prepared, you ensure that contractors have a clear understanding of what needs fixing right from the start. This saves time and ensures accurate estimates based on actual conditions rather than assumptions.
Bonus: Time Planning, Budgeting, and Next Steps
Plan a practical timeline from first inspection to final repair that clearly marks milestones like inspection, temporary fixes, material procurement, actual repair, and follow-up, and build in realistic buffers for weather, scheduling gaps, and contractor availability. Sort your budget into tiers: immediate temporary fixes, essential repairs, and optional long-term upgrades, with a contingency you monitor and reallocate if surprises pop up. Keep temp fixes focused on safety and water diversion, and escalate to permanent repairs only when the scope is clear and the risks justify it.
This matters because a solid plan keeps the project moving and prevents budget creep, especially when weather or access delays pop up. A simple prioritization method helps you rank issues by safety risk, potential water damage, and likelihood of worsening, turning that into a practical work plan and procurement list. Use a lightweight planning checklist and document everything—photos, notes, measurements, and receipts—to speed up estimates and conversations with insurers or warranty providers.
Quick Temporary Fixes and Their Limits
Tarps are a go-to for immediate water diversion. Secure them well with ropes or clips to prevent wind damage, but don’t rely on tarps long-term—aim for no more than one week. If leaks persist, move to patching with roofing cement and flashing tape. This can buy you another few weeks, but it’s not a permanent fix.
Temporary fixes are crucial when immediate action is needed, like during heavy rain or winter storms. However, they should never replace proper repairs. Always aim to schedule professional help within days of applying temporary measures to avoid further damage.
Remember, safety first—don’t climb on a wet or icy roof. Use ladders and harnesses correctly if you must access the roof temporarily for inspection or minor patching.
Budget Template and Prioritization
Use this budget checklist to estimate costs before starting any repair work. It helps in planning and managing funds effectively.
- Materials cost: List all needed items, check prices at local stores or online; add a contingency of 5-10% for unexpected expenses.
- Labor estimate: Factor in your time if DIYing, or contractor rates if hiring out. Include travel and setup times.
- Tools rental: Rent necessary tools like ladders, scaffolding; check availability and costs ahead of time.
- Permits: Check local regulations for permits needed; fees vary by area.
- Insurance claims: Document all expenses to support insurance claims if applicable.
- Contingency fund: Set aside 5-15% of total budget for unforeseen issues, like hidden damage or bad weather delays.
Quick rule: Always overestimate costs and underestimate time to avoid financial strain during repairs.
When to Schedule Full Replacement vs Repair
The decision between repair and replacement hinges on several factors. If your roof is nearing the end of its lifespan—typically around 20-25 years—or if damage covers more than a third of the roof, consider replacing it.
Repeated leaks in the same area often signal deeper issues that repairs can’t fix. Structural damage or widespread rot also point towards replacement rather than patching up individual spots.
Replacing an entire roof is costly but offers long-term benefits like better insulation and reduced maintenance. Weigh these against ongoing repair costs to make a practical decision.

Conclusion
Safety, durability, and appearance ride on what you do next. Stay disciplined, respect the signs, and act only within your skill and the weather window you can control.
Begin with a simple, practical checklist: assess the leak area from ground level, confirm weather is stable, pull together your Safety first plan, hands-on tools, and patch materials, then step through the repair in the exact order you planned, test a small area first, and clean up thoroughly. If anything feels uncertain, don’t press on—document the evidence, double-check your measurements, and proceed only after you’re confident in each step.
Two common mistakes to avoid are rushing in without a solid plan and ignoring safety rules or weaker roof sections you discover along the way. Always keep a steady pace, use fall protection or a spotter when on a roof, and stop if you notice structural signs beyond a simple seal. When the problem seems bigger than a DIY fix, call a pro sooner rather than later. With careful planning and prudent choices, you’ll protect your home and finish with confidence.
If you’re unsure, remember this: you can tackle small repairs now, but professional help is the right move for major or recurring leaks. Keep the plan, stay safe, and you’ll move from uncertainty to a solid, lasting result.
FAQ
Who should I call first if I have a roof leak?
If you have an active leak, contact a licensed roofer or a reputable roofing company. If the water is coming through a ceiling, call a contractor even if the weather looks clear. Do not wait for rain to fix the leak.
Is it safe to DIY a roof leak repair?
You can do basic quick fixes, but many leaks need professional repairs. Climbing on a wet roof is dangerous. If you must inspect, stay off the roof and focus on stopping water from coming in with tarps or buckets.
What are common mistakes homeowners make with leaks?
Common mistakes are climbing on a fragile roof, using the wrong sealant, and delaying a proper repair. Another mistake is assuming cosmetic fixes solve the problem. Don’t trust temporary patches for long-term leaks.
What should I expect when I hire a roofer for a leak?
The roofer should inspect both the roof and attic for the source. Expect a written assessment and a clear plan with materials and cost. Ask about warranties and the timing of the repair before work starts.