

Introduction
Rabbeting ceiling tiles is shaping the tile edge so it rests flush against the surrounding trim for a neat seam. Common causes of gaps include misaligned gridwork, sagging tiles, or edges cut too bluntly. Check the tile edges for burrs or uneven cuts and inspect the installation for any misalignment.
To test for high spots, run a straight edge along several tiles and note where the edge doesn’t sit flat. For fixes, reseat misaligned tiles, trim the rabbets with proper tools, or adjust the frame to settle the tiles evenly. If you’re unsure about the right approach, check the tile label or manufacturer instructions and follow local rules.
Key takeaways
- Rabbeting is when slightly recessed edges reveal gaps around ceiling tiles.
- Inspect lattice/grid alignment and moisture signs before deciding on fixes.
- Turn off electrical power near fixtures and wear safety goggles during tests.
- Temporary fixes include adjusting tiles and sealing visible gaps with proper caulk.
- Permanent repair may require resupporting grid or replacing affected tiles.
- Maintain consistent humidity and avoid rapid temperature swings to prevent recurrence.
Table of Contents
- Introduction
- Key takeaways
- What Is Rabbeting in Ceiling Tiles?
- Common Causes of Rabbeting
- Visual Checkpoints for Diagnosing Rabbeting
- Simple on-Site Tests to Confirm Cause
- Immediate Temporary Fixes and Preventive Steps
- Permanent Repair and Replacement Options
- Tools and Materials Checklist
- Maintenance and Long-Term Prevention
- Conclusion
- FAQ
What Is Rabbeting in Ceiling Tiles?
Rabbeting is a specific edge condition where tile edges appear to sit in or behind the surrounding grid rather than flush with the face. It is different from warping, sagging, or edge delamination, which have other visible cues. You’ll see it most often with certain tile types.
Stay practical by noting which material you’re dealing with—mineral fiber, gypsum, metal, or PVC—since each handles moisture and temperature differently. When in doubt, check the product label or manufacturer instructions to confirm the correct installation profile for your tile type.
Rabbeting vs. other edge problems
Rabbeting isn’t the only issue you might face with ceiling tiles. Let’s clear up some confusion.
Warping happens when a tile curves or twists in the middle, not just at the edges. You’ll see it as a wavy surface.
Sagging is when a tile droops in the middle due to excessive weight or age. It’s usually gradual and affects the entire tile, not just the edges.
Edge delamination occurs when the layers of a tile separate at the corners or sides. Unlike rabbeting, it doesn’t cause the edge to lift up.
How rabbeting develops over time
Rabbeting doesn’t happen overnight. It’s a gradual process that starts small and gets worse with time.
Moisture, heavy loads on the tiles, or repeated thermal cycling can trigger it. Here’s how it progresses:
1. Small edge lift: You might first notice tiny gaps between the tile edges and the ceiling grid.
2. Edge separation: Over time, these gaps grow larger, and the tile edges start to separate from the grid.
3. Pronounced rabbeting: If left untreated, the tile edges lift higher, creating a noticeable ‘rabbet’ or step at the edge of each tile.
Common Causes of Rabbeting
Moisture intrusion tops the list, especially when a ceiling area gets damp or a humid environment persists. Improper storage or installation habits can also trigger rabbeting as edges bow or seat oddly. Thermal movement and mechanical stress contribute as seasons and vibrations shift the grid.
Incompatibilities between trim or grid systems can force misalignment that looks like rabbeting. For accurate cause pinning, verify with the manufacturer’s guidelines and the specific grid system you used. Consider local rules about moisture control in ceilings when assessing the issue.
Moisture-related causes (humidity, leaks)
Excess moisture is a common culprit behind rabbeting ceiling tiles. Here’s what to look for:
High humidity levels can cause tiles to absorb water and swell up, deforming their edges over time. If your room’s relative humidity consistently exceeds 60%, consider investing in a dehumidifier.
Leaks from above or around the tiles can also lead to rabbeting. Inspect your ceiling for signs of water damage, such as stains or peeling paint. If you find any, address the leak promptly to prevent further damage.
Installation and handling errors
Proper installation is key to preventing rabbeting. Here are some mistakes to avoid:
- Incorrect cutting: Be sure to use the right tools and techniques when cutting tiles to prevent chipping or weakening their edges.
- Over-tight grid compression: Tightening the suspension grid too much can cause it to push against the tile edges, leading to rabbeting. Make sure your grid is secure but not overly tight.
- Uneven support: Inadequate or uneven support from the ceiling structure can cause tiles to sag and their edges to warp over time.
- Rough handling: Dropping, banging, or otherwise mishandling tiles during installation can damage their edges and lead to rabbeting. Always handle tiles with care.
By avoiding these common installation errors, you can help prevent rabbeting in your ceiling tiles.
Material and compatibility issues
The composition of your ceiling tiles, as well as the materials used with them, can impact their longevity and appearance. Here are some material-related factors to consider:
- Tile composition: Some tile types are more susceptible to rabbeting than others. For example, gypsum-based tiles may swell when exposed to moisture, while fiberglass-reinforced polymer (FRP) tiles are generally more resistant.
- Coatings and adhesives: Ensure that the coatings and adhesives you use are compatible with your tile type. Using incompatible products can lead to weak bonds, staining, or other issues that may contribute to rabbeting.
- Trim materials: Incompatible trim materials can cause edges to separate or distort over time. Always choose trims that are designed for use with your specific tile type.
Visual Checkpoints for Diagnosing Rabbeting
Begin with the edges and seams where tiles meet the grid; look for edges that look tucked or recessed. Check the grid fit around the perimeter and at internal joints for gaps or unusual spacings. Observe whether surrounding ceiling conditions show signs of moisture or movement.
Inspect the tiles for any bowing or curvature along the edges and compare adjacent tiles for consistency. Note any misalignment between tiles and their supports, and assess whether trimming or gaps exist at the edges. When in doubt, reference the tile data sheet for tolerances.
Edge inspection techniques
Before you start any work on your rabbet joints, use this checklist to inspect the edges. This will help you identify any issues early and save you from expensive rework.
- Check rabbet depth: Measure the depth of the rabbet using a tape measure or a combination square. It should match the specified depth (check your plans or manufacturer’s instructions).
- Look for delamination: Inspect the edge for any signs of delamination, where the layers of material are separating. Tap gently with a hammer; listen and look for any hollow sounds.
- Uniform vs. localized problems: Check if the issues are uniform along the entire edge or if they’re localized to specific areas. This can help you determine if it’s a manufacturing issue or something that happened during installation.
- Check for cracks: Look for any hairline cracks at the edges. These can grow and compromise the joint’s integrity.
- Inspect for warping: Check if the edge is warped or twisted. This can make it difficult to create a tight rabbet joint.
- Check for moisture damage: Look for any signs of water damage, such as discoloration or soft spots. Moisture can weaken the material and cause problems with the rabbet joint.
- Verify edge straightness: Use a level or a straightedge to check if the edge is straight. A crooked edge can lead to a poor fitting rabbet joint.
- Check for foreign objects: Inspect the edge for any nails, screws, or other debris that could interfere with the rabbeting process.
Quick rule: Always inspect both pieces that will be joined by a rabbet joint. Issues can often be hidden on one side and only become apparent when you’re trying to join them.
Inspecting above the tile and grid
Before you start rabbeting, use this checklist to inspect above the tile and grid. This helps identify potential issues that could cause expensive rework down the line.
- Check for roof/pipe leaks: Look for water stains or mold on the ceiling or walls around your work area. Confirm by checking the attic or pipe chases for any signs of moisture.
- Inspect insulation contact: Ensure insulation is in good condition and properly installed, touching both the roof/ceiling and the grid. Check for gaps or compressed insulation that could cause air leaks.
- Check grid alignment: Make sure the grid is level and plumb. Use a torpedo level to check horizontal members and a plumb bob for vertical ones.
- Inspect grid distortion: Look for any bowing, sagging, or twisted grid members. This could indicate structural issues that need addressing before rabbeting.
- Check grid-to-wall clearance: Ensure there’s enough space between the grid and walls to accommodate your chosen rabbet width. Typically, this is 3/8″ to 1/2″.
- Verify tile size and type: Double-check that you have the correct tiles for your project. Confirm they’re in good condition with no cracks or chips.
- Check grid-to-ceiling clearance: Make sure there’s enough space between the grid and ceiling to accommodate your chosen rabbet width plus tile thickness. Usually, this is 1/4″ to 3/8″.
- Inspect grid fasteners: Check that all grid fasteners are tight and secure. Loose or missing fasteners can cause grid distortion over time.
Quick rule: Always inspect above the tile and grid before starting any rabbeting work. Skipping this step could lead to costly rework, poor air quality due to leaks, or even structural issues if grid problems are ignored.
Simple on-Site Tests to Confirm Cause
Use a moisture meter to get a reference reading where you suspect moisture. Compare it to a dry area of the same type and height. Perform a tape-removal adhesion test on a suspect edge to gauge how well the world holds the tile in place.
Set up a controlled humidification scenario in a small area and observe any changes in edge seating. If you can, simulate load or weight on a joint to see if that exposes tissue yielding or edge movement. Always verify tool readings against product guidance and local rules.
Moisture meter testing protocol
First, ensure your moisture meter is calibrated. Then, follow these steps:
1. Test the ceiling tiles at their edges where rabbeting might be occurring. Take readings every 6 inches along the edge.
2. Compare these readings with those taken in the middle of the tile and on the grid. A significant difference (usually more than 3% relative humidity) could indicate moisture-driven rabbeting.
3. If readings are high, retest after a few days to confirm it’s not just a temporary spike. Consistently high readings warrant further investigation.
Adhesion and coating checks
Start by visually inspecting the edges of the tiles for any signs of flaking, peeling, or discoloration. These could indicate failing edge coatings.
Next, perform a gentle tape-removal adhesion test. Apply a small piece of painter’s tape to the edge, press firmly, then pull it off quickly. If coating comes off with the tape, your coating might be failing.
For non-destructive testing, use an infrared thermometer to check for temperature differences between the edges and the rest of the tile. Significant differences could indicate moisture or other issues causing rabbeting.
Immediate Temporary Fixes and Preventive Steps
Contain the affected area to stop further moisture intrusion—seal exposed gaps and reduce air flow where practical. Re-support edges that appear to have sagged so the tiles seat evenly again. If tiles are stubborn, carefully compress them back into the grid without forcing extra stress on the joint.
Limit movement by stabilizing the surrounding grid and trimming any loose edges if permitted. Establish a plan to dry the area, such as controlled airflow or dehumidification, and document what you observe for the permanent repair.
Drying and humidity control
First, ensure safety. Turn off power to lights and fans near the affected area.
Open windows and use fans to ventilate. If it’s humid outside, use a dehumidifier set to 50% relative humidity (RH). Too low can dry out tiles too fast, causing them to crack.
Never point heat sources directly at the tiles. This can cause rapid drying and warping.
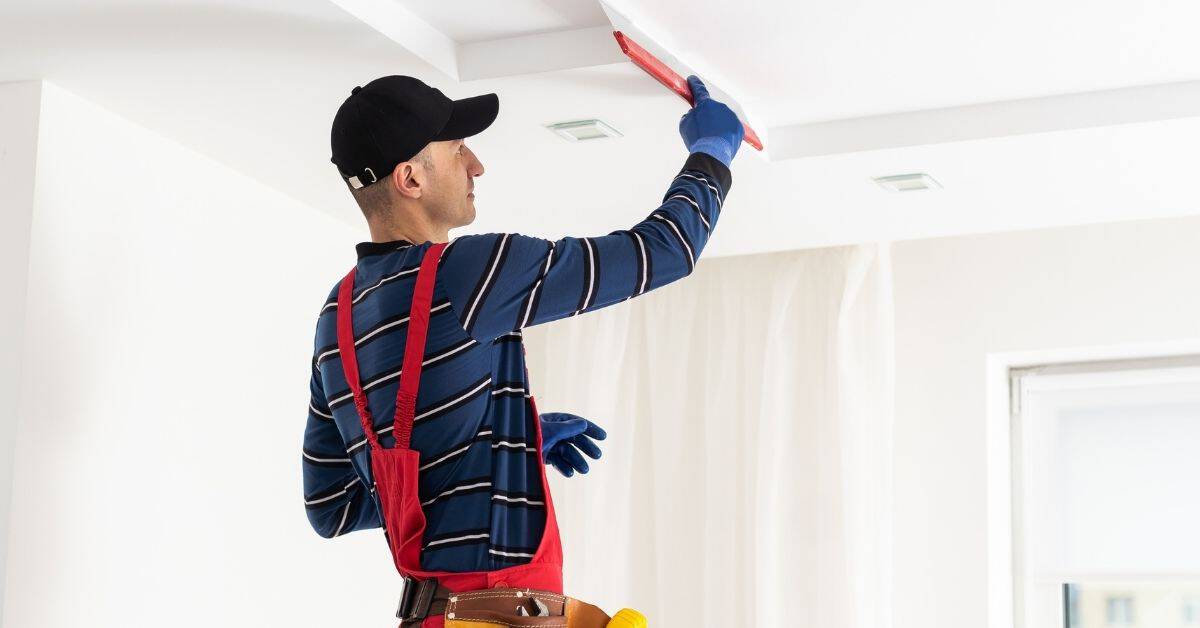
Re-seating and edge support techniques
Gently lift the rabbeted tile using a flathead screwdriver or a thin pry bar. Be careful not to damage the tile further.
Clean any debris from under the tile. Apply construction adhesive along the edges where it meets the grid. Press it back into place, ensuring it’s level and flush with neighboring tiles.
For temporary support, use shims or support clips at the corners of the tile. Tighten gently to avoid putting new stress on the tile.
Permanent Repair and Replacement Options
Weigh repair versus replacement based on edge damage, availability, and matching acoustical or fire ratings. Methods may include edge trimming, patching, or resealing edges to restore flush seating. Consider full replacement if there are widespread edge issues or if the grid and tile compatibility is compromised.
Follow the manufacturer guidance for patching and sealing materials and ensure any replacement tile matches the existing acoustical and fire specifications. Verify with data sheets and local requirements before finalizing the repair plan.
When to repair vs. when to replace
Deciding between repairing and replacing ceiling tiles depends on several factors.
Repair: Suitable for minor issues, localized damage, or single tile problems. It’s cost-effective and less disruptive.
Replace: Consider full replacement if there are multiple damaged tiles, extensive water damage, or when tiles don’t match the existing ones due to age or availability. Also, check building codes and performance requirements.
Step-by-step replacement procedure
This sequence helps safely remove and replace affected tiles while maintaining grid alignment.
- Turn off power to the room. Remove damaged tile by gently lifting it up and away from the grid.
- Inspect the area above the tile for any signs of moisture or damage before proceeding.
- Clean the grid where the tile was removed using a damp cloth.
- Measure, cut, and install new tile, ensuring it matches the existing ones in size and design. Re-seat the tile onto the grid, pressing gently but firmly.
- Re-check grid alignment after installing each new tile to ensure they’re level and evenly spaced.
- If you encounter any structural damage or complex issues, stop and call a professional.
Tools and Materials Checklist
Gather a moisture meter, humidity gauges, and basic sealants suitable for ceiling tiles. Have compatible trim or grid components on hand, plus replacement tiles if needed. Include safety gear like gloves and eye protection to work cleanly and safely.
Keep a small utility knife for precise edge trimming and a straightedge to verify seating. Check labels and product data sheets for compatibility with your tile type and grid system before purchases.
Material specs and compatibility tips
Before you start, make sure your materials are compatible and suitable for your project.
- Check RH tolerance: Ensure tiles can handle your area’s humidity. Skipping this might lead to warping or delamination.
- Fire rating: Check if it meets local building codes. Safety first!
- Tile dimensions: Measure twice, cut once. Wrong sizes cause gaps and rabbeting.
- Temperature range: Tiles should withstand your area’s temp extremes to prevent cracking.
- Adhesive compatibility: Ensure adhesive works with your tile type. Mixing can cause adhesion issues.
- Trim and edge pieces: Make sure they match your tiles’ size and design for a seamless look.
- Sealant choice: Pick one suitable for your tile material to prevent moisture intrusion.
- Grid system: Ensure it’s compatible with your tiles’ size and weight. Incompatibility can lead to sagging or collapse.
Quick rule: Always double-check product labels and consult manufacturers if unsure.
Safety and handling best practices
Your safety and the longevity of your tiles depend on proper handling. Here’s what to do:
- PPE: Wear gloves, goggles, and a dust mask when cutting or removing tiles.
- Dust control: Use wet saws or sanding with water to minimize dust. Inhalation can cause health issues.
- Tile material disposal: Recycle where possible. Some materials, like asbestos-containing tiles, need special handling due to toxicity.
- Heavy lifting: Use helpers or machinery for large tiles to prevent injury and damage.
- Edge protection: Handle edge pieces carefully to avoid chipping or breaking.
- Storage: Stack tiles flat, with spacers between layers to prevent warping during storage.
- Cleanliness: Keep work area clean to prevent accidents and ensure proper adhesion of new tiles.
- Ventilation: Ensure your workspace is well-ventilated when using adhesives or sealants. Fumes can be harmful.
Quick rule: Always prioritize safety over speed. A few extra minutes spent on precautions can save you from costly mistakes and injuries.
Maintenance and Long-Term Prevention
Set up routine inspections to catch early edge movement and moisture issues before they escalate. Control environmental factors that drive expansion and contraction, such as humidity and temperature swings. Practice consistent installation methods to reduce future rabbeting.
Adopt a standard procedure for checks after major renovations or climate events. Use approved sealants and compatible trims, and document any changes for future reference and potential warranty needs. Always align with local codes and manufacturer guidance for ongoing protection.
Seasonal and post-remediation checks
After fixing rabbeting issues, it’s crucial to re-inspect your ceiling tiles. Do this:
Immediately after repair: Check for any signs of recurrence. Make sure the fix has held.
Every season change: Humidity shifts can trigger rabbeting. Inspect during spring and fall, when humidity fluctuates most.
Upgrades and design considerations
To prevent future rabbeting, consider these upgrades:
Moisture-resistant tiles: Specify tiles with high moisture resistance in your procurement. This reduces the risk of rabbeting.
Alternative grid designs: Some grid systems offer better support and less chance of rabbeting than others. Consider this when designing or replacing your ceiling system.
Specify tolerances: In your procurement, specify tight tolerances for tile size and grid dimensions to minimize gaps where rabbeting can start.
Conclusion
Rabbeting is a telltale sign that the ceiling system isn’t behaving. Addressing it now protects safety, keeps tiles looking right, and stops small issues from becoming costly repairs.
Check in plain terms: inspect a small area first for loose edges or corners, note whether tiles lift or sag, look for moisture or warped edges, perform a light push or tap test to gauge rigidity, verify the framing and supports are solid, and then address obvious gaps or misfits before moving to a permanent repair. Do this in a logical order: scan, test, then decide if you can fix it on site or if you need to swap tiles or reinforce the frame, and always test after any adjustment.
Common mistakes to avoid are forcing tiles back in when the edge is swollen or damp, using the wrong adhesive or fasteners, and ignoring moisture or structural signs. Always keep safety first: shut off power to any nearby fixtures if you’re near electricals, work in a well-ventilated area, and test any temporary fixes on a small patch before full-scale reuse. If the problem involves warped framing, persistent moisture, or dozens of tiles, don’t push forward—call a professional and prevent bigger damage.
FAQ
How do I confirm moisture is the root cause before replacing tiles?
Look for water stains or dark spots on the tiles and ceiling texture. Check humidity and any visible roof or plumbing leaks, then follow the manufacturer’s guidance for drying and repairing the area before re-installing tiles.
What’s the safe way to remove and replace rabbits without causing more damage?
Suspend work from a stable ladder or scaffold and support the grid. Remove one tile at a time, lift edges gently, and avoid prying adjacent tiles or bending the surrounding framework.
Can I reuse old tiles after fixes are done?
Inspect each tile for edge warping, distortion, or sagging. If any tile shows damage, replace it with a compatible tile per the label, datasheet, or manufacturer instructions.
How can I prevent rabbits from returning after repair?
Address moisture and improper installation first, ensure proper ventilation, and seal any gaps around the tiles as recommended by the product label. Plan for ongoing maintenance to catch issues early and keep the ceiling dry.