
Introduction
Commercial roof coatings can extend roof life and reduce energy costs when applied and selected correctly.
This article explains how to choose materials, outlines the key application steps, and highlights common mistakes to avoid so you can make informed, practical decisions.
You’ll learn how to evaluate roof condition, compare coating types, and implement a safe, effective coating project.
Key takeaways
- Choose coating type matched to substrate, climate, and surface cleanliness.
- Prepare roof by cleaning, repairing leaks, and addressing ponding before coating.
- Apply primer where recommended, maintain uniform thickness, and avoid over-application.
- Inspect seams, penetrations, and flashings; seal gaps to prevent leaks.
- Document warranty terms, expected service life, and required maintenance intervals.
- Protect occupants, follow OSHA, and verify compliant drainage and fire ratings.
Table of Contents
- Introduction
- Key takeaways
- What are commercial roof coatings?
- Benefits and trade-offs of different coating materials
- Preparing a commercial roof for coating
- Step-by-step application process
- Common mistakes and how to avoid them
- Safety, compliance, and quality assurance
- Maintenance, inspection schedule, and troubleshooting
- Cost considerations, budgeting, and warranties
- Conclusion
- FAQ
What are commercial roof coatings?
Roof coatings are thin, protective layers applied over existing roofs to seal and shield the surface. They aim to waterproof, block UV damage, resist hail or foot traffic, and improve energy performance, all while extending the roof’s life without a full reroof. You’ll see several families—elastomeric, silicone, acrylic, polyurethane, and rubberized—each with its own strengths; coatings are typically chosen when the substrate is sound but needing protection, not when the roof is structurally failing and in need of replacement.
In practice, pick a coating that matches your roof type (metal, single-ply membranes, built-up roofs) and climate, and follow the manufacturer’s specs for priming, curing, and compatibility. The job hinges on thorough surface prep, correct priming if required, and applying with the intended method (brush, roller, or spray) within safe temperature and wind limits; plan for proper drainage and a post‑application inspection to catch any misses. Do not skip steps—common mistakes include skipping prep, using the wrong primer, or ignoring warranty rules, as these can doom the coating and waste money.
Coating types overview
Elastomeric coatings are popular for their flexibility and durability, making them ideal for metal roofs where they can withstand extreme temperature changes. Silicone coatings, on the other hand, offer excellent UV resistance and are perfect for single-ply membranes due to their ability to form a seamless barrier.
Acrylic coatings provide good water protection and are often used on built-up roofs because of their ease of application and quick drying time. Polyurethane coatings excel in areas with heavy foot traffic or harsh weather conditions, offering superior chemical resistance and durability.
Rubberized coatings are great for low-slope roofs where they can create a rubber-like surface that is highly resistant to punctures and UV damage. Each type of coating has its own set of pros and cons, so it’s important to choose the right one based on your roof’s specific needs and conditions.
How coatings extend roof life vs. replacement
Coatings can significantly extend the lifespan of a commercial roof by providing UV protection, waterproofing, and reinforcing seams to prevent leaks. This is especially true for roofs that are still structurally sound but need an extra layer of protection against environmental factors.
The key mechanism behind this longevity is the coating’s ability to shield the underlying substrate from harmful UV rays and water damage, which can otherwise lead to degradation over time. However, if your roof has significant structural issues or extensive damage, a full replacement might be necessary instead of just applying a coating.
When deciding whether to coat or replace, consider factors like the age of the roof, current condition, and expected maintenance costs. A thorough inspection by a professional can help determine if a coating will restore your roof’s functionality without major repairs.

Benefits and trade-offs of different coating materials
Coating materials come in several classes, and they trade durability, reflectivity, cost, and maintenance. Acrylic elastomeric, silicone, polyurethane, and polyurea each wear differently; asphalt/bitumen and rubber/EPDM options fit certain roofs. For DIY planning, use acrylic for budget and heat relief, silicone for ponding and long weathering, and polyurea or polyurethane where durability matters.
Your climate, roof type, and substrate drive what sticks and for how long. Check labels and manufacturer instructions for adhesion, cure, and recoat intervals, and plan for cleaning and patching. Keep a simple maintenance plan, budget for occasional re-coats, and avoid bad practice like patching without proper surface prep.
Energy and sustainability advantages
Reflective coatings like acrylic elastomeric can slash cooling costs by bouncing sunlight away, keeping your roof cool. This is especially useful if you’re in a sunny climate where air conditioning bills are high.
Cool roofs not only save money but also reduce the urban heat island effect, making cities cooler overall. Plus, some areas offer rebates for installing these energy-efficient coatings to encourage sustainability.
The long-term environmental benefits of reflective coatings include reduced carbon emissions and lower energy consumption over the roof’s lifespan. This makes them a smart choice if you’re looking at both immediate savings and long-term impact.
Longevity and performance expectations
The typical lifespan of commercial roof coatings can range from 5 to 20 years, depending on factors like the type of coating used and how well it’s maintained. For instance, silicone-based coatings often last longer than acrylic ones due to better UV resistance.
Substrate condition is crucial too—poorly prepared or damaged surfaces will shorten your roof’s life no matter what coating you use. Similarly, harsh climates with frequent freeze-thaw cycles can degrade the coating faster if it’s not designed for such conditions.
To extend performance and longevity, ensure that coatings are applied correctly by professionals who know how to prep the surface properly and apply multiple layers as needed. Regular maintenance like cleaning and patching minor damage will also keep your roof in top shape longer.
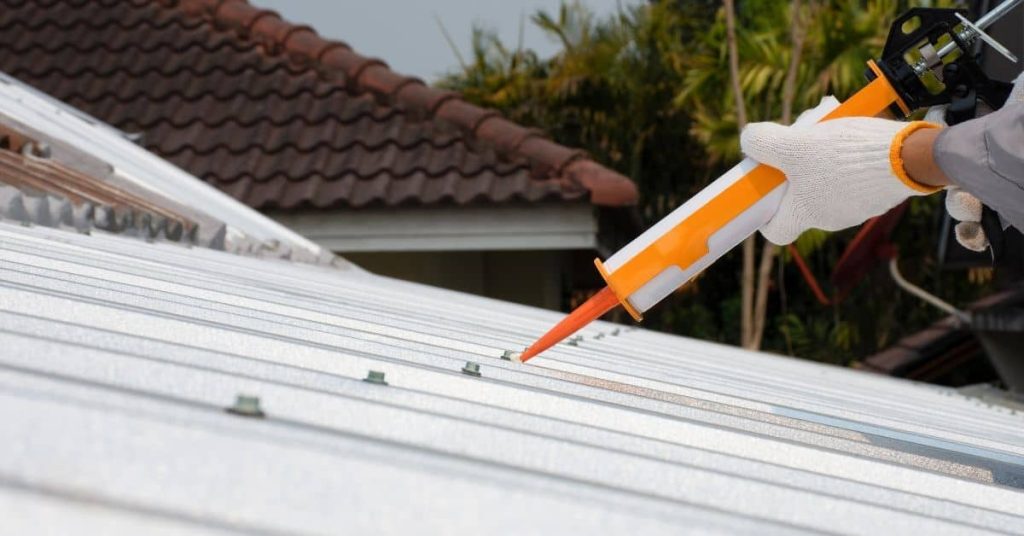
Preparing a commercial roof for coating
Start with a thorough pre-application inspection, focusing on membrane condition, flashing integrity, loose or missing fasteners, drainage issues, and any compromised seams that could kill coating adhesion. Identify the repairs and substrate prep you’ll need: patch cracks, replace damaged insulation or boards, reseal flashings, address ponding, and ensure the deck is flat and uniform. Make a note of cleaning needs and contamination risks so you can plan cleaning and surface preparation as a single, coordinated step.
For cleaning and contamination control, map out debris removal, use power washing or solvent cleaning as needed, and check for oil or chemical residues that would prevent adhesion. Run moisture assessment with non-destructive tests or moisture mapping, check interior dampness and historic leak hotspots, and confirm the deck is dry before coating. Finish with a safety, weather, and planning plan: a site-specific safety plan, lockout/tagout, fall protection, any permit considerations, a clear weather window, and a detailed pre-coating checklist for the crew.
Detailed inspection checklist before coating
Use this checklist right after a roof survey but before any repairs or cleaning.
- Membrane condition: Look for splits, blisters, and delamination. Confirm with touch tests; skips can lead to leaks.
- Ponding water: Check low spots for standing water. Use a level if needed; ponding can cause damage over time.
- Flashing integrity: Inspect around vents, chimneys, and other penetrations. Look for gaps or rust; skipping this can lead to leaks.
- Fastener checks: Ensure all fasteners are tight and not loose. Tap them with a hammer if unsure; loose ones can cause membrane damage.
- Seam assessments: Inspect all seams for splits or lifting edges. Use a mirror to check underside; compromised seams allow water in.
- Drainage issues: Confirm drains are clear and functioning. Test with water if needed; blocked drains cause ponding.
- Insulation condition: Check for missing or damaged insulation boards. Look under the membrane; poor insulation reduces roof life.
- Patch material readiness: Have all patch materials on hand. Confirm types and quantities; lack of supplies delays work.
Quick rule: Always inspect before you coat to catch issues early.
Tools and materials checklist
This list covers everything needed for roof coating preparation, from cleaning to repairs.
- Power washer: Rent or buy depending on job size. Use it to clean the surface thoroughly; dirt can prevent adhesion.
- Patch kits: Have all necessary patch materials ready. Confirm types and quantities; missing patches delay work.
- Solvent cleaner: For tough residue removal. Check compatibility with membrane; skipping this step leaves contaminants.
- Fall protection gear: Rent if needed, but always have it on site. Use harnesses and lanyards; safety is non-negotiable.
- Primer materials: Ensure primers are available for all areas needing them. Confirm types and quantities; skipping primer can reduce coating life.
- Sprayer or roller: Choose based on coating type. Test equipment before use; malfunctioning tools waste time.
- Weatherproof tarps: For protecting non-coating areas. Use them to cover sensitive spots; exposure can damage surfaces.
- PPE: Masks, gloves, and safety glasses for all crew members. Confirm availability before starting work; PPE is mandatory.
Quick rule: Have everything ready before you start coating to avoid delays.
Step-by-step application process
The step-by-step application process starts with a solid surface: clean, repair cracks or ponding, and check for moisture so the coating has a reliable base. Then plan mixing and batch management, note primer-to-coat ideas, and decide if you’ll mix in the field or use pre-mixed options, keeping an eye on temperature and viscosity targets. Next comes primer selection and application, with a simple tackiness test and a method that gives even coverage, whether you roll, squeegee, or spray. Finally, lay out the coat sequence, edges and detailing, then plan for curing, environmental controls, and contingencies so the finish holds up over time.
This matters for a DIYer because following a clear order reduces surprises like pinholes, holidays, or adhesion failures. Understanding curing times between coats, ambient and substrate temperatures, humidity, and wind or dust helps you schedule work and avoid wasted effort. It also pays to document what you did—record batch numbers and dates, perform post-cure checks, and know how to handle touch-ups or remedial work if issues show up after the coating dries.
Step-by-Step Process
This sequence ensures your roof coating job is done right, from prep to finish.
- Clean the surface thoroughly and repair any cracks or ponding areas. Check for moisture with a meter.
Quick check: Surface should be dry and free of debris. - Mix the primer according to manufacturer instructions, ensuring it’s at the right temperature and viscosity.
Quick check: Primer should flow smoothly without lumps or streaks. - Apply primer using a roller, squeegee, or airless sprayer for even coverage. Test surface tackiness before applying coats.
Quick check: Primer layer should be uniform and dry to the touch. - Apply base coat according to mil thickness specifications, ensuring complete coverage without gaps.
Quick check: Coats should overlap slightly at edges for full coverage. - Cure each coat as per manufacturer guidelines. Monitor temperature and humidity levels during curing.
Quick check: Check that the coating is dry before applying next layer. - Inspect the roof after final coat for any defects like pinholes or holidays, and touch up as needed.
Quick check: Use a moisture meter to confirm no wet spots remain.
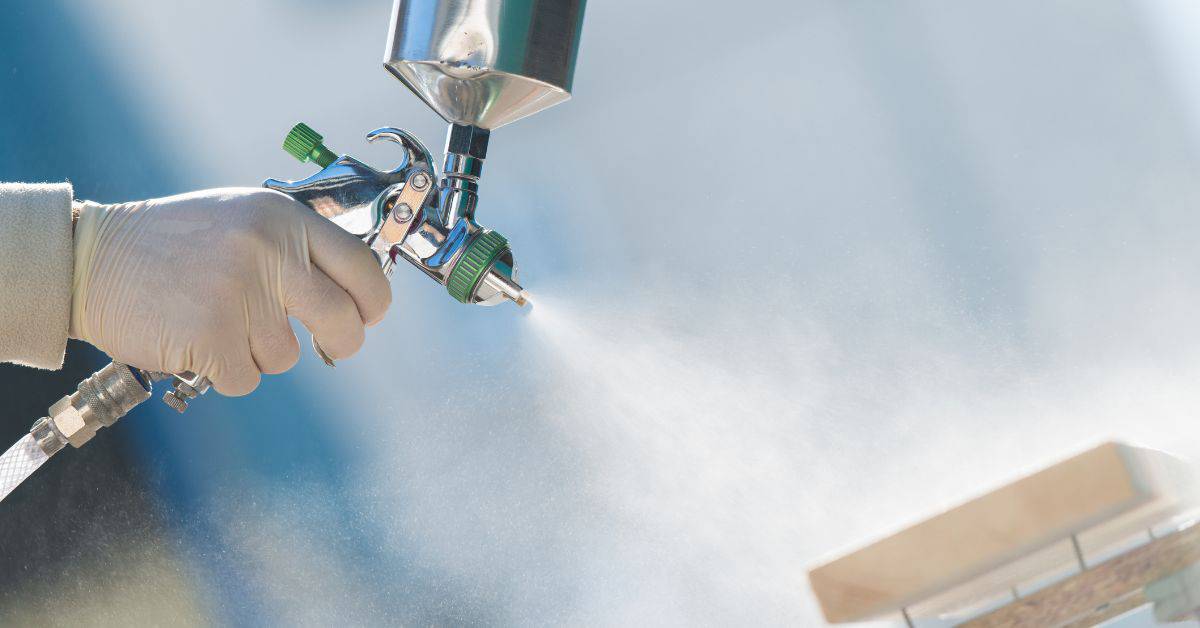
How to apply coatings correctly (roller vs. sprayer vs. squeegee)
Select the right tool based on your roof’s condition and coating type. For smooth surfaces, a roller or airless sprayer works well for even coverage. Squeegees are great for textured roofs where you need to fill in dips and valleys.
Roller application requires steady pressure and overlapping strokes to avoid streaks. Sprayers offer faster coverage but require careful setup and maintenance of equipment. Use a squeegee with a consistent motion, ensuring full coverage without leaving lines or gaps.
Avoid over-applying coating in one area, which can lead to sagging or uneven drying. Keep an eye on the weather forecast to avoid applying coatings during high winds or extreme temperatures that could affect adhesion and curing.
Weather, temperature, and curing considerations
Maintain optimal conditions for coating application. Avoid applying coatings when temperatures are too low (below 50°F) or too high (above 90°F). High humidity can slow drying time and affect adhesion.
Cure times vary by product but generally range from a few hours to overnight. Monitor temperature and humidity levels closely during curing, as these factors significantly impact the coating’s performance.
If conditions change mid-job, such as sudden rain or high winds, take immediate action: cover exposed areas with tarps or move work indoors if possible. Adjust your schedule based on weather forecasts to ensure a smooth application process without compromising quality.
Common mistakes and how to avoid them
The main point here is to pin down the top failure causes—poor prep, wrong material, insufficient coating thickness, bad weather, and unskilled applicators—and lay out practical corrective actions and preventative checks you can actually use on every project. Expect clear steps for fixing each issue, plus simple, repeatable checks the crew can run before, during, and after the work to keep things on track. Don’t rely on hope; you want a short, hands-on plan you can follow without guesswork or last-minute surprises.
This matters because skipping surface prep or using the wrong product for your substrate doomed to delamination, trips to rework, and longer project times eat into your budget and safety. A rigorous, DIY-friendly surface verification checklist, clear coating-thickness targets, and straightforward environmental guidelines help you avoid common missteps like skipping priming, neglecting repairs, or improper mixing and brooming, while giving you practical ways to measure progress. The goal is a simple quality-control workflow—daily inspections, pre-application cross-checks, mock-ups, correct mixing and application technique, proper handling around flashings and penetrations, and a post-application test and documentation—that keeps you out of trouble and produces a durable, serviceable coating. If in doubt, check the product label or datasheet for specifics and tailor your plan to your substrate and climate conditions.
Contractor and specification pitfalls
Hiring the wrong contractor or using incorrect specifications can lead to costly mistakes. Here’s how to avoid them:
- Vet certifications. Ensure contractors have proper training and experience with commercial roof coatings. Ask for proof of certification from recognized industry bodies.
- Acknowledge warranties. Check that the contractor is authorized by coating manufacturers to use their products, which ensures warranty coverage.
- Review detailed specs. Make sure all specifications match the project requirements and are up-to-date with current standards. Consult a professional if unsure.
- Avoid cutting corners. Don’t compromise on quality by opting for cheaper materials or shortcuts that can lead to premature failure of the roof coating system.
By taking these steps, you’ll ensure your commercial roof coating project is done right and lasts longer.
<h3Mistakes during the application phase can compromise the integrity of your roof coating. Here’s how to avoid them:
- Inadequate mixing. Properly mix coatings according to manufacturer instructions to ensure uniform consistency and performance. Use a mechanical mixer if needed.
- Missed seams. Ensure all joints, laps, and edges are thoroughly coated to prevent water intrusion. Double-check these areas during application and before moving on.
- Improper overlap. Apply coatings with the correct lap width as specified by the manufacturer to avoid thin spots or gaps that can cause leaks.
- Blisters and bubbles. Address any blisters immediately by cutting them open, cleaning the area, and reapplying fresh coating. This prevents moisture entrapment and future damage.
Maintaining vigilance during application will help ensure your roof coating system performs as expected for years to come.
</h3
Safety, compliance, and quality assurance
Safety, compliance, and quality assurance come together on every job. Expect clear on-site safety practices, permit awareness, VOC control, environmental rules, and a solid QA plan that covers pre-, mid-, and post-application checks. You’ll see defined steps for surface prep, adhesion tests, humidity and temperature windows, and bite-sized documentation that keeps the project traceable and accountable.
This matters because skipping safety or proper testing can cost you time, money, and a good finish. Following a simple, repeatable QA framework helps catch issues early, guides coating selection to meet environmental requirements, and creates clear records for warranties and future work. In practice, you’ll know what to test, when to test it, and how results drive decisions, rework, and safer jobsite habits for you and your crew.
Personal protective equipment and fall protection
On a commercial roof, safety starts with the right gear. Here’s what you need:
- Gloves: Protect hands from chemicals and rough edges. Use nitrile or rubber gloves rated for chemical resistance.
- Harnesses: Fall protection is mandatory. Rent a full-body harness with D-rings and lanyards.
- Hard hats: Prevent head injuries from falling objects. Look for ANSI-approved models.
- Safety glasses: Shield eyes from splashes, dust, and debris. Use goggles with side shields.
- Steel-toed boots: Provide foot protection against sharp edges and heavy loads. Ensure they’re slip-resistant too.
Testing and acceptance criteria
To ensure your roof coating job meets quality standards, follow these steps:
Start with adhesion tests using pull-off testers or tape checks. These tools verify the coating sticks properly to the surface.
Next, visually inspect for uniform coverage and no defects like blisters, pinholes, or cracks. Use a flashlight to spot issues in low light.
Document your work thoroughly with photos, notes on test results, and any corrective actions taken. This documentation is crucial for warranties and future reference.
Maintenance, inspection schedule, and troubleshooting
Establish a clear maintenance cadence: plan an annual professional inspection and quarterly visual checks by on-site staff, with a recorded log of findings and repairs to track coating life. Focus routine inspections on surface integrity, seams and flashings, ponding, UV wear, moisture signs, and adhesion clues, plus optional coating-thickness checks if your kit allows.
Keeping up with this schedule helps catch problems early and avoids bigger failures down the line, which saves you time and money. A written log and timely repairs also support better preventive measures before rough weather or temperature swings, and they reinforce proper installation and warranty considerations. If you find issues, classify them by cause, follow simple repair steps for minor damage, and know when to escalate to full re-coats or professional help.
Seasonal and annual maintenance tasks
Use this checklist during your quarterly visual inspections and after major weather events.
- Clean gutters: Clear debris to prevent water overflow. Check for clogs monthly.
- Inspect drains: Ensure they’re free of blockages. Use a mirror if needed.
- Remove debris: Sweep or vacuum loose materials off the roof. Leaving it can cause wear and tear.
- Check for blisters: Look for raised areas that could indicate trapped moisture. Address them before they peel.
- Evaluate coating thickness: Use a gauge if available to ensure adequate coverage. Thin spots may need re-coating.
- Inspect membrane seams: Check for splits or gaps in the protective layer. Fix any issues immediately.
- Look for ponding areas: Identify low points where water collects and address them before they cause damage.
- Assess UV wear: Look for signs of fading or cracking due to sun exposure. Re-coat if necessary.
- Check flashings: Ensure metal pieces around roof edges are secure and not rusting. Loose or damaged ones can leak.
- Note substrate staining: Any dark spots could indicate moisture intrusion under the coating. Address promptly to prevent further damage.
Quick rule: Document all findings and repairs in a maintenance log for future reference.
Common post-application issues and fixes
This checklist helps identify and address common problems that may arise after applying roof coatings.
- Peeling coating: Check for blisters or moisture under the surface. Re-seal any gaps to prevent further peeling.
- Ponding water: Identify low spots causing standing water. Install drainage solutions like scuppers or channels.
- Seam failures: Look for splits in membrane seams. Apply a sealant to repair and reinforce the area.
- Edge lifting: Inspect coating around roof edges for peeling. Re-apply sealant to secure loose areas.
- Fastener issues: Check screws or bolts for movement or corrosion. Tighten or replace as needed.
- Grit loss: Look for bare spots where the protective layer is worn away. Apply a new coat of grit material over affected areas.
- UV damage: Assess coating for signs of cracking or fading due to sun exposure. Re-coat if necessary to maintain integrity.
- Mildew growth: Clean organic matter off the surface using mild detergent and water. Avoid harsh chemicals that can harm the coating.
Quick rule: Address minor issues promptly to prevent bigger problems down the line.
Cost considerations, budgeting, and warranties
Cost is driven by roof size, substrate repairs, coating chemistry, primers, insulation, and access needs such as cranes or lifts. Those factors swing quotes a lot and often drive schedule. Plan a staged budgeting approach that separates inspection/repairs, priming, coating, and post-application checks, with contingencies for unknowns and seasonal pricing effects.
Understand warranties: what they cover, typical durations, and what can void them, plus transferability and required documentation. Hidden costs like permits, scaffolding, edge detailing, drainage work, downtime, and weather delays can surprise you if not planned for. Use a pre-bid checklist, compare multiple quotes, and require a documented maintenance plan to keep the project on track and the warranty valid.
How to get accurate estimates
To get an accurate estimate for your commercial roof coating project, you need to provide detailed information about the current state of your roof. Start by having a professional inspection done to assess any necessary repairs or substrate issues. This will help contractors understand what prep work is needed before applying coatings.
When talking with contractors, be clear about the size and layout of your roof. Mention if there are any unique features like skylights, HVAC units, or other protrusions that might affect access or material application. Also discuss your budget range so they can tailor their proposal accordingly.
Ask for a detailed breakdown of costs including materials, labor, equipment rentals (like scaffolding), and any additional services such as insulation installation.
Don’t hesitate to ask questions if something isn’t clear in the estimate. Make sure you understand what’s included versus excluded from each line item. This will help avoid surprises later on during the project.
Understanding warranty and maintenance agreements
Warranties for commercial roof coatings typically cover two main areas: material defects and workmanship issues. Material warranties usually last longer than those covering application quality, which can range from one to five years depending on the manufacturer.
The key is understanding what voids coverage under these warranties. Common exclusions include improper surface preparation, incorrect installation methods, or neglecting regular maintenance as outlined by the coating supplier.
Always follow the recommended care plan, which often includes periodic inspections and cleaning to keep your roof in top condition.
Maintenance agreements are crucial for extending warranty validity. These plans ensure that any necessary repairs or recoating is done promptly, preventing small issues from becoming major problems down the road. Make sure you have a clear understanding of what’s covered under these agreements and how often maintenance needs to be performed.

Conclusion
Protecting the roof means safety, durability, and a clean, lasting finish you can rely on. Do the work with planning, conservative steps, and attention to how the coating will stand up to weather and use.
First, perform a practical, end-to-end check: inspect the roof surface for damage and memory of previous coatings, clean and dry the surface, repair any cracks or blisters, choose a coating that matches the roof material and climate, mask edges and flashings, keep people and vehicles off the area, apply any required primer at the right temperature, follow the recommended coverage rates and application pattern, apply in the correct order and curing conditions, and finish with a thorough inspection and documented maintenance plan.
Two common mistakes to avoid are trying to coat a wet or dirty surface and exceeding or skimping on coverage or cure times. Always wear proper safety gear, keep a clear, dry work area, and never work on a roof alone if you feel unsure, as a fall can be fatal and mistakes can trap moisture or cause peeling that leads to costly repairs.
If you are unsure about roof condition, coating compatibility, or local code requirements, or if there are complex penetrations or wide-area sealing in play, consider bringing in a professional before you push ahead. Stay disciplined, follow the plan, and you’ll extend life, protect the building, and stay within budget.
FAQ
What coating materials are common for commercial roofs?
Most roofs use acrylic, silicone, or polyurethane coatings. Each has its own strengths depending on sun exposure, temperature, and the roof surface. Check which one matches your roof type and climate before buying.
Do I need primer before applying the coating?
Some roofs need primer. If the surface is smooth or porous, primer helps the coating stick and last. If in doubt, read the coating’s data sheet or ask the supplier.
What steps should I follow for proper application?
Start with a clean, dry surface. Repair any leaks or damage first, then apply the coating in the directions on the product. Work during the manufacturer’s recommended weather window and finish with a complete, even coat.
What mistakes should I avoid with roof coatings?
Avoid skipping surface prep, using the wrong coating for your roof type, and ignoring safety gear. Do not apply over wet or icy decks, and don’t rush the cure times dictated by the product.