
Introduction
Discovering a roof leak can be stressful, but knowing the timeline of tests and repairs can help you plan effectively. This guide walks you through quick, safe inspections and durable fixes based on how long each task takes.
From initial detection to final repair, understanding the duration of each step helps you prioritize, allocate resources, and ensure your roof is secure in no time.
Roof Leak Timeline: Quick Tests & Repairs by Duration
When a leak strikes, time is of the essence. Here’s a step-by-step timeline to help you locate the source and repair your roof efficiently:
- Immediate Action (Under 1 Hour): Inspect attic or upper reference points for water stains or drips.
- Quick Tests (1-3 Hours): Check flashing, sealant around vents and chimneys, and examine shingles or siding for wear. Test small, accessible areas for leaks using a garden hose.
- Repair Timeline (Varies by Cause):
- Shingle replacement: 1-3 hours per shingle
- Flashing repair: 2-4 hours
- Underlayment replacement: 3-5 hours per square foot
- Seasonal Maintenance (Annually): Clean gutters, trim branches, and inspect attic ventilation.
By following this timeline, you’ll minimize interior damage, ensure durable repairs, and maintain your roof’s longevity.
Key takeaways
Preparation time for each repair can vary based on the cause of the leak. For instance, replacing shingles may take longer if there are multiple damaged ones, affecting the overall timeline.
- Early detection saves interior damage; inspect attic and ceilings after storms.
- Identify common culprits: missing shingle granules, damaged flashing, and vent leaks.
- Use safe access, sufficient lighting, and non-slip footwear during inspections.
- Shingle or flashing repairs should follow manufacturer guidance and local codes.
- Seal joints with compatible sealant, replace damaged underlayment, and re-secure fasteners.
- Seasonal maintenance: clean gutters, trim branches, and inspect attic ventilation yearly.
Table of Contents
- Introduction
- Key takeaways
- Why Early Roof Leak Detection Matters
- Common Causes of Roof Leakage
- Quick, Safe Tests to Locate the Leak Source
- Safety Precautions Before Inspecting or Repairing
- Durable Repair Methods by Cause
- Seasonal Maintenance Checklist to Prevent Leaks
- Common DIY Mistakes and How to Avoid Them
- Tools, Materials Checklist and Visual Checkpoints
- Conclusion
- FAQ
Why Early Roof Leak Detection Matters
Early roof leak detection matters because delaying it lets water slip past shingles into ceilings and framing, where problems start small and quickly become big, costly repairs. A small drip can lead to mold growth, wood rot, and weakened structure, and those issues don’t just ruin the roof—they threaten the rooms below and the life of the house. Taking action early reduces the scope of work, keeps interior conditions safer, and lengthens the roof’s life by stopping damage before it spreads.
From a health view, mold and poor indoor air quality affect families, kids, and allergy or asthma sufferers, so catching leaks sooner is as much about safety as it is damage control. Practical checks like visible attic spotting, ceiling stains, and tool-assisted readings with a moisture meter or infrared camera help you triage leaks without overhauling the roof. Set a simple cadence—seasonal checks and post-storm surveys—and know when to call in a pro; early action dries up bigger repairs, preserves energy, and keeps long-term costs down.
Hidden consequences beyond the ceiling
When you spot a leak, it’s easy to think fixing the immediate issue is all that’s needed. But what happens above your head in the attic can be just as critical. Water damage isn’t limited to the roof itself. It seeps into insulation, causing it to lose its effectiveness and potentially leading to mold growth.
The real danger comes from unseen rot. Once water gets through the shingles or flashing, it starts eating away at wooden supports and rafters. This weakens your home’s structure over time, making repairs more extensive and costly.
Another overlooked risk is compromised electrical wiring. Wet insulation can lead to shorts and other hazards that could put your family in danger. Regular checks help catch these issues early before they become major headaches.
Cost implications of delaying repairs
The longer you wait, the bigger the bill. A small leak that’s caught early might just need a patch or two. But if it goes unchecked for months, the damage spreads and becomes much harder—and more expensive—to fix.
For example, a minor repair could cost around $500-$1,000 depending on materials and labor. If you wait until the roof needs full replacement due to extensive water damage, that number can balloon to $10,000 or more. Plus, there’s the added expense of repairing interior walls, ceilings, and possibly even replacing furniture.
Insurance might cover some costs if your policy includes water damage, but it often comes with deductibles and exclusions. Early action not only saves money on repairs but also reduces stress over potential insurance claims and disputes.
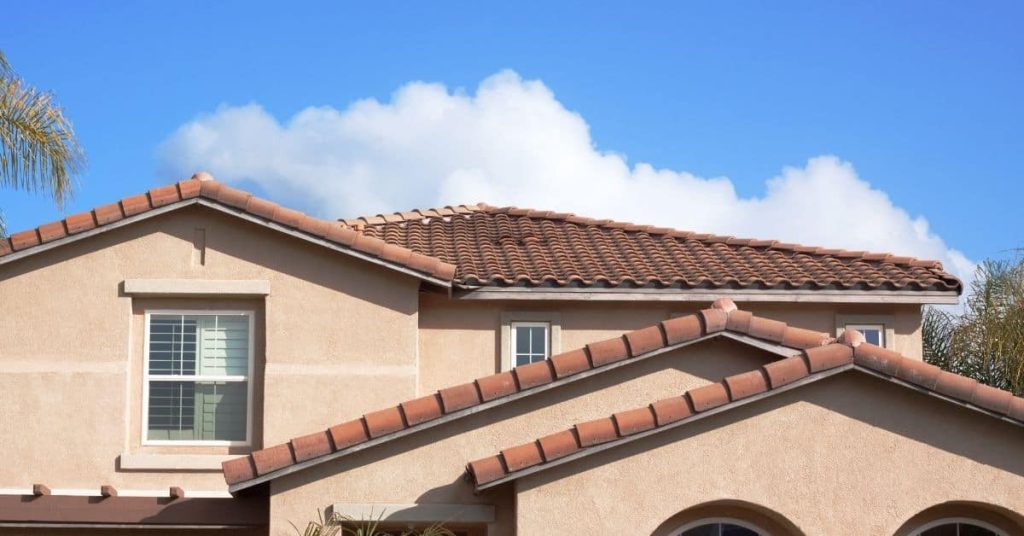
Common Causes of Roof Leakage
Roof leaks usually come from a few obvious, inspectable causes that you can spot and test from a safe stance, using a simple ladder and a flashlight to peer at seams from below. Start with wear and tear, flashing failure, and damaged or curling shingles, plus problems at roof penetrations such as vents and plumbing vent pipes—these areas tend to show telltale signs first. Don’t ignore gutters, sagging water routes, or ponding on flat or low-slope roofs, because poor drainage concentrates moisture and can force leaks to find weak spots.
Understanding why these issues matter helps you prioritize small, first-fix checks before you chase bigger repairs, and it keeps you from chasing shadows on the roof. Drainage and ventilation are tied to many leaks: clogged or sagging gutters, misdirected or broken downspouts, poor attic ventilation, ice dams in cold weather, and how vent and soffit interactions can create condensation and slow leaks into the attic space. Also look at roof-mounted gear and penetrations—satellite dishes, HVAC units, skylights, vent flashings—where common failure modes show up and early signs like staining, loose flashing, or unusual airflow can save a lot of grief.
Failure at roof penetrations and flashings
Flashings around vents, chimneys, and plumbing pipes are critical for preventing leaks. Over time, these metal strips can corrode or come loose due to expansion and contraction from temperature changes.
Look for signs of water stains near the edges where flashings meet shingles. Also check if there’s any rust or gaps between flashing pieces. These small issues can turn into big problems during heavy rain or snow melt.
Another common area is around skylights and roof-mounted equipment like satellite dishes. Make sure these are securely fastened and the seals aren’t cracked or missing. If you see water pooling near any of these areas, it’s a clear sign that repairs are needed.
Material and installation issues
The quality of materials used on your roof can significantly impact its durability against leaks. Shingles that aren’t rated for your climate or installed improperly will fail sooner than expected.
- Shingle degradation: Look for curling, cracking, or missing shingles. These indicate wear and tear from weather exposure. Replace any damaged areas to prevent further water intrusion.
- Underlayment failure: Poor quality underlayment can allow moisture through even if the shingles look fine. Check for stains on ceilings below roof penetrations where underlayment might be compromised.
- Improper installation: Overlapping shingles incorrectly or failing to install proper ventilation can lead to leaks. Ensure that all shingles are securely nailed and properly aligned with no gaps between them.
- Inadequate sealant: Missing or deteriorated sealants around flashing, chimneys, and vents allow water to seep in. Reapply high-quality sealant where needed to prevent future leaks.
Quick, Safe Tests to Locate the Leak Source
This section gives quick, homeowner‑friendly tests to locate a leak source fast, with safety non‑negotiables front and center. Start with a contact‑free exterior check of flashing, joints, and drainage, then follow interior clues by tracing staining patterns toward a vertical path, and finish with a controlled water test using a garden hose on low pressure while an assistant watches from inside. Stop immediately if you encounter high‑risk signs—active water intrusion near wiring, unstable surfaces, or any sign of structural trouble—and call a pro.
This approach helps you narrow the leak without heavy probing, reduces guesswork, and gives you a simple record of findings to share with a pro if needed. Keep notes, mark water paths, and note any temporary fixes you try, because documentation saves time and prevents repeating risky steps. Use this as a guide, but don’t push beyond your comfort or training; when in doubt about electrical, gas proximity, or unseen damage, stop and call a professional.
Indoor detective work first
Start your leak hunt from the inside. Look for water stains, mold growth, and wet insulation on ceilings and walls. These clues can pinpoint where rain or snow is seeping through.
Tapping the ceiling with a screwdriver can reveal hollow spots indicating moisture damage. Check the attic too; look for damp areas in the insulation that might show up as darker patches or feel cold to the touch.
Notice any patterns? If water stains form a line, it often means there’s a hole directly above. Drip marks on walls usually mean water is coming from a higher point and running down.
Remember, safety first. Don’t climb into your attic without proper lighting and support for the floor joists. And if you see any signs of structural damage or electrical hazards, stop right there and call in the pros.
Controlled water test on roof and gutters
This is a hands-on way to find leaks. Use a garden hose set to low pressure, starting at your suspected leak zones. Move the nozzle slowly across the area while someone watches inside for signs of wetness.
Isolate sections by covering other parts with plastic sheeting or tarps. This helps you pinpoint exact spots where water enters. Start from high points and work down, checking valleys, skylights, chimneys, and gutters.
If you see water pooling in one spot but not others, that’s likely your leak source. Check around vents, flashings, and roof edges too. If the hose test confirms a weak point, mark it with chalk for later repair.
Always keep an eye on the weather forecast before testing. Don’t do this if there’s any chance of rain or wind. And never climb onto slippery surfaces without proper footwear and safety gear.
Eliminate non-roof sources
Before you assume the leak is from your roof, check other possible culprits like plumbing leaks or HVAC condensate lines. Cracks in masonry walls can also let water inside.
Inspect pipes and joints for signs of moisture damage or corrosion. Look under sinks and around toilets for wet spots that might indicate a hidden leak. Check the attic for any dampness near ductwork or air conditioning units.
If you find issues with your plumbing, HVAC system, or masonry walls, address those first before tackling the roof. Sometimes fixing these can solve your water problem without ever touching shingles or flashing.
Remember to document everything you find. Take photos and make notes of where leaks are coming from so you can track progress as you fix each issue. This helps ensure no detail is missed in your leak-finding mission.
Safety Precautions Before Inspecting or Repairing
Before you climb, recognize that fall hazards and electrical risks are the top concerns, and you minimize them by choosing a stable, level surface, setting up the ladder correctly, and wearing the right PPE. Maintain three points of contact, secure the ladder with stabilizers or a helper, and avoid standing on the top rungs or extending too far from the ladder as you work. Check the weather and surface conditions—only dry, calm days on solid, dry shingles or decking—and know when to call a licensed roofer for steep pitches, structural concerns, or any potential electrical work.
Wear a helmet, gloves, safety glasses, and non-slip boots, use fall protection where required, and keep tools secured in a belt or bag to stay out of your way while you move. Maintain a clear work zone, work with a buddy when possible, and pause if you notice water intrusion, significant damage, or signs of mold that signal a professional assessment is wiser. If you’re unsure about limits, electrical risks, or hazardous conditions, opt for ground-based checks or hire a licensed roofer rather than pushing through risky work on uncertain surfaces.
Ladder and fall-safety checklist
Use this quick checklist before setting up your ladder for any roof work.
- Level surface: Check the ground is flat. Uneven ground can cause a slip.
- Secure base: Anchor the bottom of the ladder to prevent movement. Use stakes or sandbags if needed.
- Ladder angle: Set up at 4:1 ratio, meaning four feet out for every one foot up. Avoid setting it too steep.
- Three points contact: Always have three body parts touching the ladder while climbing. Missing this can lead to falls.
- Top rungs: Never stand on the top two rungs of a stepladder or the highest three steps of an extension ladder.
- Ladder stabilizers: Use stabilizer bars for extra support, especially in windy conditions. Missing this can cause tipping.
- Avoid icy surfaces: Ice makes any surface slippery and dangerous. Delay work until ice melts.
- Harness or safety line: Wear a fall-arrest system if working on steep roofs over 20 feet high. Not using it risks serious injury.
Quick rule: Always check your ladder setup before climbing to avoid falls and injuries.
Electrical and structural hazard warnings
Before you start, look for any signs of electrical hazards like exposed wires or damaged insulation. If you see these, stop work immediately and call an electrician.
Also check the roof structure for sagging boards or missing shingles that indicate underlying damage. This could mean there’s a bigger issue with your roof deck or framing.
If you notice mold growth or water stains inside your attic, it might be a sign of hidden leaks or structural problems. These issues are best left to professionals who can safely assess and repair them.
Durable Repair Methods by Cause
Durable repair starts by pairing the actual cause with a long‑lasting method (flashing replacement, shingle repair, sealants, underlayment patching, gutter repair, ice‑dam mitigation, vent/collar replacement). Use one clear method per issue and know when a temporary fix is enough versus when full replacement is needed. Plan for sequencing so you don’t chase leaks in the wrong order, and avoid wasted materials by addressing the root cause first.
A quick cause-detection checklist helps you pick the right repair first time: visualize entry paths, check attic moisture, note staining patterns, water entry location, and confirm whether the issue aligns with flashing, shingles, or gutters. Weather, roof height and slope, and the chosen method will shape material choices, required tools, safety steps, and whether you can DIY safely or should hire a pro; always read the product label, manufacturer instructions, and consider warranty and local rules. If leaks persist, signs of structural damage appear, or you see recurring water intrusion, plan for full replacement or professional help, and document what you did so you can defend your approach if warranty or inspection questions come up.
Flashing and Penetration Repairs
To fix leaks around roof penetrations like chimneys, skylights, or vents, start by removing old flashing. Use a pry bar to gently lift the shingles and remove any damaged metal pieces. Clean the area thoroughly before applying new flashing.
For chimneys, install step flashings that overlap each other and the base of the chimney. For vent pipes, use rubber collars or metal boots designed for your roof type. Make sure all seams are sealed with a high-quality roofing cement to prevent water from seeping in.
If you notice signs of structural compromise like sagging around penetrations, it’s time to call in a professional. DIY repairs can be effective for minor issues but major damage requires expert attention.
Shingle, Tile, and Membrane Repairs
To repair damaged shingles or tiles, first lift the damaged piece and remove any nails. Insert a new one that matches your roof’s style and color. Apply roofing cement under the nail heads to ensure a watertight seal.
For single-ply or built-up membrane roofs, use a heat gun to melt patches into place for seamless repairs. Ensure you have the right materials and tools before attempting this repair yourself. If unsure about your roof type or condition, consult an expert.
Mismatched shingles can also indicate underlying issues like improper installation or material failure. Check for consistent damage patterns across multiple areas of the roof to confirm if a patch is sufficient or if full replacement is needed.
Gutter, Drainage, and Attic-Ventilation Fixes
Clogged gutters are a common cause of roof leaks. Clear out debris regularly to ensure water flows freely away from your home’s foundation. Use a gutter scoop or leaf blower to remove leaves and other blockages.
Consider installing rain diverters at the downspout outlets to direct water further away from your house. This prevents pooling near the base of walls, which can lead to leaks over time.
To improve attic ventilation, ensure that soffit vents are not blocked by insulation or debris. Proper airflow helps reduce moisture buildup and ice dams in colder climates. If you notice persistent condensation or mold growth in your attic, it’s a sign that better ventilation is needed.
Seasonal Maintenance Checklist to Prevent Leaks
This seasonal maintenance checklist helps you spot and prevent leaks before they bite. Spring focuses on cleanup and inspection; summer covers debris management and vent checks; fall rechecks gutters and sealant; winter targets freeze‑thaw risks and proactive tuning, plus know when to call a pro.
By sticking to these cycles, you address gutters, flashing, and sealants before problems stack up. It also gives you practical DIY checks and clear signs to bring in a pro, plus reminders to keep debris and ventilation in balance for moisture control.
Pre-winter and Ice-Dam Preparation
Use this checklist before winter sets in to prevent ice dams from forming.
- Check attic insulation: Ensure it’s thick enough; gaps mean heat loss, leading to ice dam formation.
- Inspect roof ventilation: Confirm soffit and ridge vents are clear for airflow; blocked vents trap warm air under the roof deck.
- Clear snow from eaves: Remove at least 2 feet of snow from roof edges; neglecting this lets ice dams build up.
- Seal gaps around chimneys: Check and reseal any gaps or cracks to prevent heat loss; missing seals can cause major ice dam issues.
- Check downspout clearance: Ensure gutters are clear and downspouts direct water away from the foundation; clogged systems lead to overflow and ice dams.
- Inspect roof shingles: Look for curled or missing shingles that let in cold air; damaged shingles can cause leaks under ice dam pressure.
- Evaluate attic moisture levels: Check for signs of condensation on beams or insulation; high humidity means potential ice dams and water damage.
- Install roof heating cables: Place cables along the eaves if you’ve had issues with ice dams before; skipping this can lead to costly repairs.
Quick rule: Prepare your roof for winter by sealing gaps, clearing snow, and ensuring proper ventilation to prevent ice dam formation.
Post-Storm and Spring Inspection Routines
Use this checklist after major storms or in early spring to assess roof condition and clear drainage paths.
- Inspect shingles: Look for missing, cracked, or curled shingles; damaged ones can lead to leaks if left unchecked.
- Check flashing around vents: Ensure no gaps or rusted areas; compromised flashing lets water in and causes damage.
- Clean gutters: Remove debris from gutters and downspouts; clogged systems cause overflow, leading to leaks.
- Evaluate roof slope: Confirm proper drainage away from the house; improper slope directs water towards walls or foundation.
- Inspect skylights: Check for cracks or missing seals around them; compromised skylights can let in rainwater.
- Clean attic vents: Ensure they are free of debris and functioning properly; blocked vents reduce airflow, causing moisture buildup.
- Check roof valleys: Look for any debris accumulation that could cause water to pool; cleared valleys prevent leaks.
- Evaluate chimney cap: Confirm it’s secure and in good condition; a damaged or missing cap lets rainwater into the chimney.
Quick rule: After storms or early spring, inspect roof for damage and clear drainage paths to prevent future leaks.
Common DIY Mistakes and How to Avoid Them
Common DIY patches fail when you rush in without diagnosing the root cause and end up treating symptoms, not the structure, including any surrounding sheathing or sagging deck boards. Diagnose first: identify roof deck damage, flashing failure, joints, and condensation, then select materials that truly match your roof type (shingle, metal, or flat) and the local climate, and verify compatibility with existing flashing and joints. Don’t patch in dangerous spots, insist on thorough surface prep, avoid single‑layer patches or patching leaking joints without addressing the underlying damage, and document any observed movement or staining for future reference.
Attic clues matter too, so take a careful look at insulation, vapor barriers, and signs of moisture from inside to guide the repair scope and prevent surprises on the outside, and note ventilation pathways if present. Know when a repair is only temporary and plan for full replacement or professional assessment, while documenting locations, moisture history, and planned follow‑ups after weather events, and align priorities with future repairs and budget constraints. Doing it right saves time and money, but sloppy work repeats the damage, so keep safety, diagnosis, and the use of appropriate materials at the top of your list, and never assume a patch is permanent; set a plan for follow‑up inspections.
When a temporary patch creates false security
A temporary fix can give you peace of mind but it’s only a band-aid if the underlying issue isn’t addressed. Watch for signs like recurring leaks, water stains reappearing, or moisture in your attic.
If you see these red flags, plan a full repair right away. Identify the root cause—whether it’s damaged flashing, loose shingles, or deteriorated membrane—and replace or reinforce those areas properly.
Remember, a lasting fix means addressing all contributing factors and using materials that match your roof type and climate conditions. Don’t let temporary patches fool you into thinking the problem is solved.
Wrong materials and poor workmanship
The right materials are crucial for a lasting repair. Using incompatible sealants or underlayments can lead to cracking, staining, and weak bonds that won’t hold up.
- Sealant type: Use the correct sealant for your roof material—like butyl tape for metal roofs—and check its UV resistance rating.
- Mastic thickness: Ensure mastic is thick enough to fill gaps and bonds well with both surfaces. Too thin can lead to leaks.
- Underlayment quality: Verify the underlayment’s durability and compatibility with your roof type, especially in high-wind areas.
- Nail size: Use nails that match the thickness of your roofing material for proper penetration depth. Too short can lead to lifting or pulling out.
- Safety precautions: Always wear protective gear and follow safety guidelines when handling materials like sealants, which can be toxic if not used properly.
Tools, Materials Checklist and Visual Checkpoints
This section lays out a practical, homeowner-friendly tools and materials checklist you can use during inspections and common repairs, plus clear visual checkpoints to document damage for insurance or bids. It also includes a concise safety note and boundaries for what you can DIY and when to hire a pro.
You’ll find quick, safe inspection steps and a categorized list of items—inspection gear, basic repairs, temporary fixes, and permanent materials—with sensible quantities to have on hand. Use the visual checkpoints to capture photos like attic signs, flashing, ridge lines, gutters, interior stains, and ceiling patches, and keep a simple labeling system to streamline bids. A plain photo log helps note dates, locations, leak angles, and suspected causes for contractor bids.
Essential tools and materials for quick tests and fixes
This checklist helps you quickly identify and address minor roof leaks without risking your safety or causing further damage.
- Ladder with stabilizers: Ensure safe access to the roof. Skipping this can lead to serious injury.
- Hose with nozzle: Test suspected leak areas for water entry points. Missing this step means undetected leaks.
- Flashlight or headlamp: Illuminate dark corners and under shingles for thorough inspection. Neglecting lighting can hide critical issues.
- Binoculars: Inspect high spots without climbing. Overlooking these areas leaves potential damage unseen.
- Rubber gloves: Protect your hands from sharp edges and chemicals. Not wearing them risks cuts and chemical burns.
- Screwdriver set: For tightening loose flashing or securing temporary patches. Missing this tool can lead to ineffective repairs.
- Sealant tube (silicone-based): Seal small gaps around chimneys, vents, and other penetrations. Skipping sealants leaves leaks unsealed.
- Tarp or heavy-duty plastic: Cover large areas temporarily until permanent fixes are made. No cover means ongoing water damage.
Quick rule: Always prioritize safety over speed when performing roof inspections and repairs.
Photo and measurement guide for insurance/contractor quotes
This checklist ensures you capture all necessary details to expedite accurate contractor bids or insurance claims.
- Attic stains: Document water marks on ceiling joists. Missing this can delay repairs.
- Ridge line photos: Capture the peak of your roof for alignment issues. Neglecting these shows poor documentation.
- Gutter damage: Take pictures of any missing or damaged sections. Overlooking gutters means potential water overflow.
- Flashing details: Focus on areas around chimneys and vents. Missing flashing photos complicates repair estimates.
- Shingle patterns: Show the layout and condition of shingles. Not capturing this can lead to incorrect material orders.
- Interior patches: Document any temporary fixes or stains inside walls. Ignoring these delays proper assessment.
- Leak angles: Capture photos from multiple angles showing water entry points. Missing angles confuses repair directions.
- Measurements: Note distances and dimensions of damaged areas. Skipping measurements leads to inaccurate bids.
Quick rule: Take clear, well-lit photos with detailed labels for each area inspected.

Conclusion
Take action now with clear, durable steps: fix the source, not just the drip, and keep your home dry, safe, and looking good.
Start with a simple, practical flow: inspect the attic or upper reference points first, check flashing and sealant around vents and chimneys, examine shingles or siding for wear, clear gutters and downspouts, then test small, accessible areas for leaks before committing to a repair. Plan your work around dry weather, wear proper safety gear, and use the right materials for the job. If any step feels unsafe or if water shows up in unexpected places, pause and reassess rather than forcing a fix.
Common mistakes to avoid are rushing a patch, using the wrong sealant for the surface, or skipping the seasonal maintenance that keeps problems from starting. Always work from a solid ladder, keep three points of contact, and never pull on live wiring or overly wet surfaces. Do not over-tighten fasteners or sealants, and don’t ignore signs of structural damage or widespread staining—those point to bigger issues.
If water keeps coming in after a DIY fix, or you see roof or attic damage, seek a professional. Large patches, heavy sagging, or repeated leaks warrant an expert eye. When in doubt, slow down, verify safety, and call in help before a bad repair becomes costly. Stay steady, follow the checks you’ve learned, and you’ll keep the roof and home dry without needless risk.
FAQ
What causes roof leaks in the first place?
leaks come from worn flashing, damaged shingles, or gaps where the roof meets vents. water finds the path of least resistance, so a small issue can drip in many places. fix the real problem, not just the stain on the ceiling.
Can I tell where a leak starts by looking inside the attic?
Yes, check for wet or dark corners, stained wood, and mold. follow the trail to the highest point you can see from above. but don’t assume the water is coming from that exact spot on the roof.
Is it safe to seal a leak with roof cement or sealant?
Sealants can buy you time, but they’re not a fix for a real leak. they fail in rain or wind and hide muscled damage. use them only as a temporary measure while you plan proper repairs.
What’s a quick repair that lasts longer than a patch job?
Replace damaged shingles and seal flashing properly. clean rust or loose nails, then secure with correct nails and roofing cement or sealant where needed. if you’re unsure, call a pro—cheap shortcuts cost more later.