

Introduction
Water damage can hide in hidden spots around your home, and finding and fixing it early helps prevent mold.
The guide walks through practical steps to identify common risk areas, how to assess moisture, and tips to act quickly before mold starts.
Key takeaways
- Check for persistent musty odors and visible staining near water sources.
- Inspect exterior entry points for gaps, cracks, and damaged flashing after storms.
- Look behind drywall and trim for bubbling paint, stains, or soft spots.
- Check under appliances for leaks, pooled water, or mold-prone spills during use.
- Inspect subfloors and crawlspaces for dampness, musty air, or warped boards.
- Review HVAC ducts and attic spaces for condensation, mold odors, or rusted connections.
Table of Contents
- Introduction
- Key takeaways
- Quick indicators and health risks to watch for
- Exterior entry points (roof, siding, windows, doors)
- Inside walls, behind drywall, and under trim
- Under and behind major appliances and fixtures
- Floors, subfloors, crawlspaces, and basements
- HVAC systems, ductwork, and attic spaces
- Investigating after flooding or major leaks: methodical steps
- Preventive maintenance and seasonal checks
- Conclusion
- FAQ
Quick indicators and health risks to watch for
Watch for both obvious water stains and hidden signs of moisture, like peeling paint, warped materials, efflorescence, soft spots, and condensation patterns. Note that some signs show up under sinks, behind appliances, behind drywall, around windows, or near HVAC units. Distinguish immediate cues such as musty odors and recent dampness from longer-term indicators like mold growth, so you catch problems early and limit costly remediation.
Early detection matters because it lets you intervene before extensive damage and health risks stack up. For DIY readers, start with simple checks: flashlight tests for staining, feel soft areas, and take quick moisture readings in walls or cabinets, then document findings for you and a contractor. If signs persist or spread, or you notice ongoing symptoms, plan professional mold remediation and review ventilation, leaks, and condensation controls to keep it from coming back.
Visual and Olfactory Warning Signs
When it comes to spotting water damage, your eyes are often the first line of defense. Look for discoloration, which can appear as dark spots or streaks on walls, ceilings, and floors. Bubbling paint is another clear sign that moisture has seeped into the surface, causing the paint to lift and blister.
Sagging ceilings are a red flag indicating significant water damage behind drywall. This could be due to leaks from above or within the structure itself. Don’t ignore these signs; they’re your home’s way of telling you something is wrong.
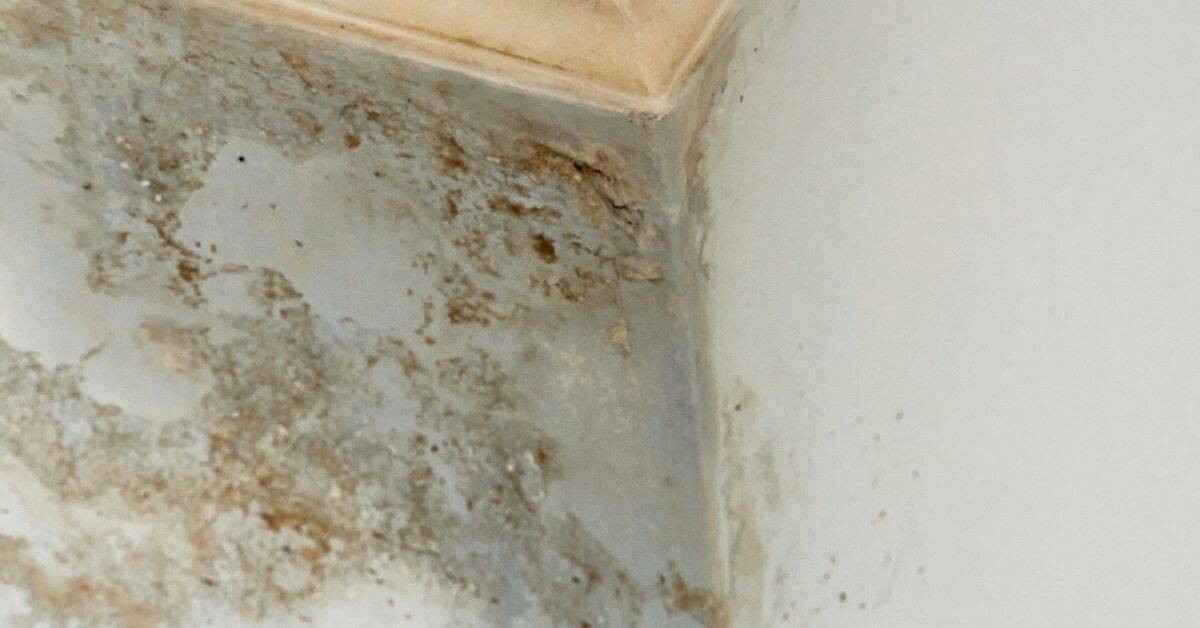
Musty odors are another key indicator, often signaling hidden mold growth in areas like under sinks, around windows, and behind appliances. A musty smell can be a precursor to more serious issues if not addressed promptly.
Health Effects of Mold Exposure
Mold exposure can lead to various health issues, including allergic reactions such as sneezing, runny nose, and itchy eyes. Respiratory problems like wheezing, coughing, and shortness of breath are also common among those sensitive to mold.
Long-term exposure may cause more severe symptoms, impacting cognitive functions with headaches, memory issues, and concentration difficulties. If you experience these symptoms regularly, especially after being in damp environments, it’s crucial to investigate for hidden water damage.
While this guide isn’t medical advice, if your health deteriorates or symptoms persist despite cleaning up visible mold, consult a healthcare professional immediately. Early detection of mold can prevent further health complications and costly remediation efforts down the line.
Safety Precautions Before Investigating
Before diving into any investigation, ensure you have proper personal protective equipment (PPE). Wear gloves to protect your hands from mold spores and other contaminants. A mask or respirator is essential for breathing clean air while inspecting areas with potential mold growth.
Eyewear like safety glasses can prevent irritants from entering your eyes during inspection. If you encounter a strong musty odor, ventilate the area thoroughly before proceeding to reduce exposure risks.
Remember, if you see extensive mold or suspect significant water damage beyond your control, it’s best to stop and call in professionals. They have the expertise and equipment to handle such situations safely without risking further health issues for yourself or others living in the home.

Exterior entry points (roof, siding, windows, doors)
Exterior entry points like the roof, siding, windows, and doors can channel rainwater into hidden pockets when flashing fails or seals gap. Water can hide in cavities, soffits, under siding, window sills, and door thresholds, especially after storms.
After a storm, start outside and document what you find: inspect shingles and flashing, check siding for gaps, evaluate window/door seals, and review gutters for blockages or overflow. Look for observable signs like staining, efflorescence near foundations, moss growth, swollen trim, warped siding, or damp odors near exterior walls to know what needs closer inspection or professional help.
Roof, gutters, and flashing
Start your exterior inspection by checking the roof for missing shingles, cracked tiles, or damaged flashing. A quick glance at the attic can reveal water stains on the underside of the roof deck, which means rain is finding its way in.
Gutters are another critical area to inspect after a storm. Clogged gutters can cause water to overflow and seep into your home through weak spots like improperly sealed flashing or gaps around chimneys. Look for any signs of water damage on the ceiling below the roof’s edge.
Flashing is a key component in preventing water from entering at vulnerable points such as valleys, vents, and skylights. Check that it’s properly installed and not lifted by debris or ice dams. If you spot staining around these areas, it likely means water has found its way into the attic space.
Remember, addressing issues early can prevent costly repairs down the line. Don’t wait for mold to appear before taking action.
Siding, trim, and window/door perimeters
Gaps around windows and doors can let in a lot of water, especially during heavy rains. Check for any cracks or gaps where the siding meets these openings. Also, look at the caulking around windows and doors to ensure it’s still intact.
Rotting wood is another big red flag. Soft spots on trim or siding indicate moisture has been seeping in over time. This can lead to more serious issues like mold growth inside walls if left unchecked.
Hidden staining behind siding is a telltale sign of water intrusion. Use a screwdriver to gently pry back the edge of the siding and look for dampness or discoloration that might not be visible from the outside.
Maintaining these areas can save you big headaches later on, so take time to inspect them regularly after storms or during seasonal checkups.
Exterior faucets, hose bibs, and AC sleeves
Don’t forget about the small entry points like exterior faucets and hose bibs. These fixtures can develop leaks over time due to wear or improper installation.
Air conditioning units often have sleeves that penetrate through walls, providing another potential pathway for water to enter your home. Check around these sleeves for any signs of moisture or mold growth inside the wall cavity.
Water from leaking faucets and hose bibs can migrate behind siding or into crawlspaces, causing hidden damage over time. Look for damp spots near these fixtures or unusual odors coming from nearby walls.
Maintaining these areas is crucial to prevent water intrusion and subsequent mold growth. Regular checks and timely repairs are key to keeping your home dry and healthy.
Inside walls, behind drywall, and under trim
Inside walls, behind drywall, and under trim hide moisture pathways that can breed mold before you see it. Common routes show up around windows, behind drywall after leaks, under baseboards, and behind cabinets or tiles where plumbing runs. Use non-invasive checks first—thermal imaging and moisture meters—then probe or sample only if readings warrant it.
Understanding these hidden spots helps you catch problems early and plan a safe fix. The right approach saves drywall, trim, and finishes, and guides whether you need professional interior cavity inspection, mold testing, or remediation planning. Keep photos, dated readings, and area maps as you document findings and plan temporary containment, ventilation, and next steps.
Around plumbing chases and pipe penetrations
Check around pipes where they enter walls, especially in bathrooms, kitchens, and laundry rooms. These areas are prone to leaks due to wear or improper installation.
Use a moisture meter to test the drywall near pipes for any signs of dampness. If you find wet spots, it could be from a slow leak that’s not visible on the surface. Don’t ignore small issues; they can turn into major problems over time.
If your meter shows high readings or if there are water stains around pipe penetrations, consider calling in a professional to assess and fix the issue before mold sets in.
Behind cabinets and built-ins
Cabinets and other built-in furniture can hide moisture issues behind them. Areas like vanity units around sinks or kitchen cabinets near plumbing fixtures are common trouble spots.
To check without removing everything, use a moisture meter to scan the wall surface behind these items. Look for signs of water damage such as bubbling paint or wallpaper peeling away from the wall.
If you suspect hidden moisture, carefully probe around edges and corners where condensation might collect but isn’t visible. Document any findings with photos and readings before proceeding further.
Signs of hidden wall damage
Localized high humidity, peeling wallpaper, concentrated staining, or increased pest activity are all signs that moisture might be hiding inside your walls. These clues indicate potential water damage that needs attention.
Use a thermal imaging camera to spot cold spots on the wall surface which can suggest hidden dampness behind drywall. Cold areas often mean there’s condensation or standing water trapped somewhere in the cavity.
If you notice any of these signs, it’s crucial to act fast before mold starts growing unseen. Document your findings and consider professional help for a thorough inspection and remediation plan.
Under and behind major appliances and fixtures
Under and behind major appliances and fixtures, you’ll find the places leaks hide: water supply lines, drain connections, hoses, and seals on washing machines, dishwashers, refrigerators, water heaters, and toilets. Look for leaks at the points where panels, feet, or cabinetry can mask moisture, and use quick-access checks to spot active drips or dampness before mold has a chance to take hold. The goal is to identify and prioritize the most likely leak points so you can act fast and keep mold risk low.
This matters because hidden leaks often show up only after they’ve caused staining, rust, or moisture pockets in concealed cavities. To safely expose hidden areas, shut off power and water as needed, remove access panels or kick plates, and inspect for moisture and signs of active leaks. Do simple, practical checks: visually scan for wetness or mineral deposits, wipe with a dry towel to feel for dampness, and consider a moisture meter or humidity readings in concealed spaces, plus a temporary tray or test under the appliance to catch drips before they become a bigger problem.
Washing machines and laundry hookups
Start by turning off the water supply valves for your washing machine. Check both the hot and cold hoses, looking for any signs of wear or bulges that could indicate a future leak. Feel around the base of the washer where it meets the floor; if you feel moisture or see wet spots, there’s likely an issue with either the drain hose or one of the supply lines.
Inspect the rubber gaskets and clamps securing the hoses to both the machine and the wall connections. These parts can degrade over time, especially in humid laundry rooms. If any of these components look worn out, replace them immediately. Also, check for a small drain pan or tubing that catches overflow from the washer’s drum; if it’s not there, consider installing one.
Finally, take a peek under your washing machine to see if water is pooling on the floor. If you find moisture here, look closely at the connections between the hoses and the machine. A simple fix might be tightening loose fittings or replacing worn-out parts. Remember, it’s better to replace rubber hoses every five years to prevent unexpected leaks.
Dishwashers, refrigerators, and water-connected appliances
Begin by turning off the power at your circuit breaker for any appliance you plan to inspect. For dishwashers, check around the water inlet valve where it connects to the supply line. Look for signs of dampness or mineral buildup that could indicate a leak.
Underneath the dishwasher, there’s usually a small pan or drain area called the cistern or sump. Inspect this space carefully; any moisture here means you have an active leak somewhere in your system. Similarly, check behind and around the fridge where it passes through walls for water lines and ice maker connections.
For refrigerators, focus on the kick panel area at the bottom front of the unit. This is often a hidden spot where leaks can go unnoticed until they cause significant damage. Use a dry towel to feel for moisture or wetness; if you find any, it’s time to investigate further and address the issue promptly.
Toilets, sinks, tubs, and showers
The wax ring at the base of your toilet is a critical area for leaks. Check around this seal where it meets the floor or wall flange; any cracks or gaps can let water seep into hidden cavities behind walls. If you notice dampness or stains here, there’s likely an issue with the wax ring that needs immediate attention.
Inspect all plumbing connections under sinks and tubs for signs of leakage. Look closely at the supply lines where they connect to valves and faucets; these are common spots for leaks due to worn-out washers or loose fittings. Also, check around drain pipes and P-traps for any pooling water or dampness.
Finally, don’t overlook grout and caulk joints in showers and bathtubs. Over time, these can deteriorate and allow water to seep behind tiles and into walls. A simple visual inspection is often enough to spot issues here; if you see cracks or gaps, reseal them as soon as possible.
Floors, subfloors, crawlspaces, and basements
Hidden damage under floors and in substructures often starts with water. Groundwater, poor grading, sump pump hiccups, and plumbing seepage creep into crawlspaces and basements, then work up into joists and subflooring without obvious immediate signs. Look for early hints before you lift anything: damp spots around thresholds, musty smells, staining along walls, and sections where framing looks soft or unusual. Start your inspection by the exterior perimeter, then move to interior walls, and finally plan for access to the subfloor. Keep moisture sources as your priority so you don’t chase dry rot you can’t fix without stopping the water first.
This matters because finding trouble early lets you plan proper mitigation and avoids wasting effort on a bad patch job. Expect to see sagging boards, warped plywood, rusted fasteners, musty odors, and localized mold growth that point to hidden damage. Check areas under exterior doors and thresholds, along foundation walls, around plumbing stacks and fixtures, and near HVAC components, using safe access methods for each. Bring a moisture meter and infrared camera if you have them, wear PPE, and document with clear photos and labeled notes. Have a quick plan for containment, drying, and reporting so you can decide what to fix first and what to replace.
Flooring and Subfloor Indicators
When checking for water damage under your flooring, start by looking for soft spots where the floor feels spongy or bounces when you walk on it. Use a screwdriver or similar tool to gently probe these areas; if the wood is wet or mushy, there’s likely hidden moisture underneath.
Another sign of trouble is buckling in the flooring boards. This can happen when water has caused the subfloor to swell and warp. Also, look for stains on the underside of your floorboards or any discoloration that might indicate previous leaks or seepage.
To test further without damaging your floors, use a moisture meter to check the wood’s moisture content. If you find high readings, it’s time to take action before mold sets in. Remember, early detection is key to preventing costly repairs down the line.
Crawlspace and Foundation Checks
In your crawlspace or basement, look for signs of moisture barriers failing such as wet soil, standing water, or damp insulation. A good indicator is also a musty smell, which often signals mold growth.
Check the condition of any vapor barrier material; it should be intact and not torn or punctured. If you find damage, repair it immediately to prevent further moisture intrusion.
To test for elevated humidity levels, use an infrared camera or hygrometer. High readings can indicate condensation issues or poor ventilation that needs addressing. Simple tests like placing a damp cloth on the ground overnight and checking for mold growth can also help identify problem areas.
Sump Pumps and Drainage Systems
To ensure your sump pump is working correctly, test it regularly by pouring water into the pit to see if it activates. Also, check for any backup systems like battery-powered pumps or float switches that can kick in during power outages.
Inspect exterior grading around your home’s foundation; it should slope away from the walls to direct water away from the structure. Any low spots or flat areas could cause water to pool and seep into your basement.
Finally, make sure gutters are clear of debris and properly attached to prevent overflow that can lead to flooding in basements and crawlspaces. Regular maintenance on these systems is crucial for preventing future water damage issues.
HVAC systems, ductwork, and attic spaces
Hidden moisture in ducts, plenums, and attic insulation often starts with condensation, clogged drip pans, or leaks in AC lines and roof penetrations. These leaks can push moisture into hard-to-see spots and only show up later as mold or unusual odors. You’ll want to spot early signs like condensation on ducts, damp insulation, or musty attic smells before bigger problems creep in.
This matters because quick, practical checks can stop a small leak from becoming a mold headache. Focus on safe power-down, then visually inspect ducts, attic access, drip pans, and condensate lines for dampness or loose fittings, and test for hidden leaks around elbows and plenums with simple tools. If you see damp insulation or persistent odors, address leaks, seal joints, and boost attic ventilation, but know when to call a licensed pro for complex fixes.
Air handler, condensate lines, and drip pans
Start by turning off the power to your HVAC system at the breaker. Once it’s safe, head over to the air handler unit and inspect the condensate drain pan for any signs of rust or standing water. If you see either, that’s a red flag.
Next up is checking the condensate lines. Use a flashlight to look inside them; if they’re clogged with algae or debris, clear them out. A wet vacuum can help here. Also, check for any leaks where the line connects to the pan or drain pipe. If you spot any water dripping from these connections, seal them up tight.
Finally, take a look at the drip pans and lines themselves. Any signs of mold growth? That’s another warning sign. Clean it out thoroughly with a solution like vinegar and water before drying everything completely to prevent future issues.
Ductwork and vents
Inspect your ducts for any visible signs of moisture or condensation. If you see droplets forming on the inside, that’s a clear indicator of hidden water damage. Also, pay attention to unusual odors coming from your vents; musty smells often point to mold growth.
If you notice damp spots or corrosion around duct joints and elbows, it could mean there are leaks somewhere in the system. Tighten any loose connections and seal them with HVAC-approved mastic tape to prevent further moisture intrusion.
Lastly, if your ducts are visibly dirty or have a musty smell inside, consider professional cleaning. This can help remove mold spores and improve air quality throughout your home.
Attic insulation and roof deck
Start by checking the attic for any signs of water damage on the roof deck or in the insulation. Look for wet spots, mold growth, or discolored areas that might indicate a leak.
Moldy rafters or beams are another clear sign of moisture intrusion. If you spot this, it’s time to investigate further and find out where the water is coming from—whether it’s through roof penetrations like chimneys or vents.
Proper attic ventilation is key here too. Check that your soffit and ridge vents aren’t blocked by insulation or debris. Good airflow helps prevent condensation buildup, which can lead to more serious issues down the line.
Investigating after flooding or major leaks: methodical steps
After a flood or major leak, act in order: shut off the water source if safe, power down affected circuits, and wear PPE before entering. Start documenting damage with photos and note visible intrusion, odors, and hazards, then begin drying and know when to call pros if electrical safety is compromised or contamination is suspected.
Keep airflow going and moisture under control by opening openings and using fans and a dehumidifier, but avoid blasting or spreading water to clean areas. Check hidden and high‑risk spots like under sinks, behind appliances, inside walls, and crawl spaces, so you don’t miss mold risk or structural damage, and call a pro if moisture sticks around after basic drying or mold appears.
Immediate emergency steps
First things first, if you notice a major leak or flood, your top priority is safety. Turn off the power to affected circuits if it’s safe to do so and shut down the water source immediately. Wear protective gear like gloves, masks, and eye protection before entering any flooded areas.
Relocate valuables and important documents to dry locations right away. Take photos of all visible damage for insurance documentation purposes. Remember, insurance companies need proof of the extent of the damage to process your claim effectively.
Once you’ve secured immediate safety, start documenting everything. Snap pictures of water levels, stains, and any potential hazards like soaked insulation or damaged drywall. This will be crucial when dealing with insurance adjusters later on.
Drying and monitoring process
The next step is to reduce humidity levels as quickly as possible. Open windows, use fans, and set up dehumidifiers to circulate air throughout the affected areas. Aim for a relative indoor humidity below 50% within the first few days.
Keep an eye on moisture levels with hygrometers or similar tools. Check your appliances’ manuals for specific drying instructions, as some may have unique requirements. Avoid over-drying or spreading water to unaffected parts of your home.
Monitor the drying process closely. If you notice any signs of mold growth or if moisture remains after 48–72 hours despite your efforts, it’s time to call in professionals. They can provide more advanced equipment and techniques to ensure thorough drying and prevent future issues.
When to hire professionals
If you encounter extensive water damage or suspect sewage contamination, it’s crucial to call in professional help. Professionals have the expertise and equipment needed for safe remediation of such hazards.
Significant structural damage also warrants a contractor’s attention. They can assess whether repairs are necessary and ensure that your home is structurally sound again. Additionally, if you or anyone living with you has compromised immune systems, professional intervention is essential to avoid health risks.
When hiring professionals, make sure they provide detailed assessments and clear timelines for their work. A good contractor will also offer guidance on preventing future water damage and maintaining your home’s integrity moving forward.
Preventive maintenance and seasonal checks
Set up a year-round preventive maintenance cadence that ties gutter cleaning, grading, drainage checks, appliance inspections, and HVAC tune-ups into one calendar with reminders. Create a seasonal calendar (spring, summer, fall, winter) that lists specific tasks, frequencies, and quick-win actions to minimize moisture risk before problems show up. Keep essential moisture-control practices in view: proper grading and downspout extensions, leaks, penetrations around doors/windows, and vapor barriers where they matter.
This matters because a simple, repeatable plan reduces surprises and protects the home without guesswork. It also helps you coordinate HVAC, plumbing, and appliances, document service history, and keep humidity in check with budget-friendly reminders. When you spot red flags like staining, musty odors, buckling, or condensation, know what to check and when to call a pro if needed.
Monthly and seasonal checklist
Use this checklist every month to stay ahead of potential water damage issues.
- Gutter cleaning: Check for debris; ensure proper flow. Neglecting gutters can lead to roof leaks or foundation cracks.
- Downspout extensions: Ensure they direct water away from the house. Short extensions cause water pooling near your home’s walls.
- Roof inspection: Look for missing shingles, damaged flashing. A leaky roof can lead to costly repairs and mold growth.
- Hose bibs winterizing: Drain and insulate outdoor faucets. Failure to do so can cause pipes to burst in freezing weather.
- Grading around foundation: Ensure proper slope away from the house. Improper grading leads to water pooling at your home’s base.
- AC maintenance: Check filters and coils for cleanliness. Dirty units reduce efficiency, leading to higher energy bills and potential breakdowns.
- Ventilation checks: Ensure all vents are clear and functional. Blocked vents can cause condensation buildup inside walls.
- Ductwork inspection: Look for leaks or blockages. Leaky ducts waste conditioned air, increasing energy costs.
Quick rule: Regular checks prevent big problems down the road.
Simple DIY fixes and materials checklist
This list helps you tackle small repairs before they become major issues.
- Caulk gaps: Seal around windows and doors. Neglecting this can lead to drafts and water seepage.
- Hose replacement: Swap out old garden hoses. Cracked or worn-out hoses can cause leaks, leading to water damage.
- Flashing repair: Fix damaged roof flashing. Leaks from faulty flashing can cause extensive interior damage.
- Ventilation screens: Replace torn or missing screens. Missing screens allow pests and debris into your home’s ventilation system.
- Duct tape for leaks: Seal small ductwork holes. Ignoring these can lead to significant energy loss and condensation issues.
- Drainage pipe replacement: Replace cracked or broken pipes. Leaks from drainage systems can cause water pooling around your home’s foundation.
Quick rule: Small fixes now save big headaches later.
Common mistakes to avoid
Avoid these common errors that can lead to costly water damage and mold issues.
- Painting over stains: This hides the problem, not fixes it. Always find and address the source of moisture before painting.
- Ignoring musty odors: These often indicate hidden mold growth. Addressing these early can prevent health risks and extensive damage.
- Delaying hose replacement: Old hoses can burst or leak, causing water damage. Replace them annually to avoid issues.
- Skippping gutter cleaning: Debris buildup leads to overflow and leaks. Regular cleaning prevents these problems.
Avoiding these common mistakes saves you time, money, and stress in the long run.

Conclusion
Water trouble runs deep. If you handle it right, you stop damage, protect health, and keep your home looking solid.
Now move through a quick, practical check: start at obvious signs and exterior entry points, then peek behind drywall and trim, inspect under appliances, check floors and subfloors, pull back crawlspace or basement areas, and finally review HVAC, ductwork, and attic spaces. If you’ve just had flooding or a big leak, follow a steady, methodical sequence and document what you find as you go. Keep safety front and center and test small areas before you commit to bigger work.
Common mistakes to avoid are rushing to dry or cover up issues before you know the full scope, ignoring hidden leaks behind walls or under fixtures, and using improper methods or tools that can make things worse. Always wear appropriate PPE, shut off water or power when a shutdown is advised, test any material in a small area first, and pause if you see discolored ceilings, strong odors, or exposed wiring.
If damage is widespread, you’re unsure about the extent, or you spot mold, electrical or gas hazards, call a professional rather than pushing ahead alone. Stay steady, follow the checks, and you’ll keep the project on track and your home safe. You’ve got this—steady steps produce solid results.
FAQ
What spots should I check first for hidden water damage?
Start with ceilings, walls, and floors near any water sources. Look around bathrooms, kitchens, laundry areas, basements, and under sinks. Signs to spot include stains, peeling paint, soft or spongy spots, and warped surfaces.
How can I tell if water damage is recent or old?
Fresh damage often comes with dampness, a musty smell, and wet patches. Old damage may feel dry but still show stains or crumbling material. If mold starts growing, that usually means moisture has been present for a while.
What mistakes should I avoid doing?
Don’t ignore stains or leaks. Don’t dry with heat or cover up the problem. Don’t seal cracks or hide water without fixing the source first. Quick fixes usually mean bigger problems later.
What tools help me inspect safely and accurately?
Use a bright flashlight to see hidden areas, a moisture meter to check humidity in wood and drywall, and a basic notebook to track locations. For wood, moisture around under 12 percent is typically considered dry; drywall often shows moisture at higher readings. If readings are uncertain, call a pro to confirm before repairs.