
Introduction
Installing stucco window sills with drip edges and end dams is a crucial step in waterproofing your home’s exterior. But how long does this process take? Let’s break down the timeline so you can plan your DIY project effectively.
Whether you’re a seasoned DIYer or a first-timer, understanding the duration of each step will help you allocate time and resources appropriately.
For the full guide, see Stucco at Window Sills: Drip Edges, End Dams, and How to Stop Staining Below.
Timeline for Installing Stucco Window Sills with Drip Edges and End Dams
The total timeline for this project can vary depending on factors like the size of your windows, weather conditions, and your familiarity with the tools. Here’s a step-by-step breakdown to give you an idea of how long each phase might take:
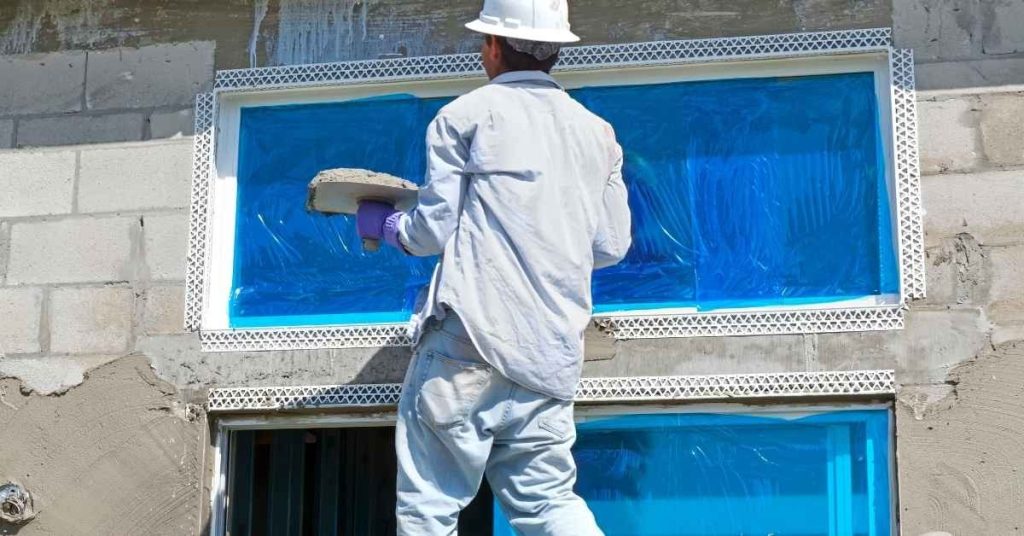
- Preparation (1-3 days): Gather materials, clear the work area, and inspect the current condition.
- Flashing Installation (2-4 hours per window): Install flashing under siding and above sill courses to create a waterproof barrier.
- Drip Edge Installation (1-2 hours per window): Design, cut, and install drip edges to channel water away from windows.
- End Dams and Back Dams (30 minutes – 1 hour per window): Install end dams at the corners and back dams behind the stucco to prevent water tracking.
- Finishing Touches (30 minutes – 1 hour per window): Apply sealant, ensure proper ventilation, and perform final inspections.
These timeframes are approximate and can change based on your specific situation. For example, if you’re working on a large house with many windows or have complex flashing requirements, the project may take longer.
Key takeaways
Proper preparation is key to staying on schedule. Allocating enough time for gathering materials and inspecting the current condition can help prevent delays later in the process.
- Install a drip edge below window sills to shed water away.
- Use end dams at sill corners to stop water tracking behind stucco.
- Confirm flashing laps, weeps, and overlaps align with weather barrier details.
- Wear eye and skin protection when cutting or installing flashing.
- Prevent staining by detailing continuous ventilation and drainage paths away from siding.
- Always follow manufacturer guidance and local code rules for material compatibility.
Table of Contents
- Introduction
- Key takeaways
- Why Staining Occurs Below Stucco Window Sills
- Materials, Standards, and Compatibility to Check First
- Tools and Materials Checklist for New Work and Repairs
- Flashing Fundamentals for Stucco at Window Sills
- Designing and Installing Effective Drip Edges
- End Dams and Back Dams: How and When to Use Them
- Step-by-Step Procedures: Retrofit Repairs and New-Construction Detailing
- Visual Checkpoints, Testing, and Common Mistakes to Avoid
- Conclusion
- FAQ
Why Staining Occurs Below Stucco Window Sills
Water that reaches the below-sill zone follows a few predictable paths: capillary migration through porous stucco, gravity-driven runoff from the sill face, and wind-driven rain that lingers at the drip edge. Small details like slope, drainage-plane continuity, and uninterrupted flashing turn those paths from manageable into destructive.
Common failure modes include missing or compromised drainage planes, blocked or absent end dams, and flashing interruptions that allow lateral flow or trapping of moisture. The visible stains—rust from corroding metal, white efflorescence from dissolved salts, and dark organic staining from persistent dampness—appear in different places and at different times; use their patterns to trace the moisture route and check the relevant assembly components.
How water moves through stucco assemblies
Stucco is porous, so it can absorb and move moisture. This happens in three ways:
Capillary action: Water climbs up the tiny pores like a wick. It can reach below sill areas if not properly stopped.
Gravity-driven water: Heavy rain or melting snow runs down, pooling where it meets obstacles like sills or trim.
Wind-driven rain: Strong winds push water into gaps at the drip edge, accumulating there and potentially seeping behind.
The roles of sills, drip edges, and end dams
These components work together to protect your walls:
Sills: They catch water running off the roof and direct it away from the wall. Missing or improperly sloped sills let water pool and seep behind.
Drip edges: These extend beyond the wall face, encouraging water to drip off rather than sneak behind. Without them, wind can drive rain into gaps.
End dams: They block water from traveling along the top of the sill and into the wall. Missing or improper end dams let moisture seep in at the joints.
Materials, Standards, and Compatibility to Check First
Choose materials for drip edges, end dams, flashing, lath, and finishes with their interfaces in mind: metal flashing should mate with the WRB and sealants, lath must accept the stucco finish, and drip edges should project far enough to shed water. Before buying, review product data sheets and manufacturer instructions to confirm material compatibility, corrosion protection, and installation sequence for each item.
Also verify applicable standards and local requirements—refer to building codes, ICC/IBC guidance, and relevant ASTM or industry standards—as these affect acceptable materials and detailing. Maintain a short compatibility checklist on site (metal type vs. sealant chemistry, substrate, corrosion resistance, finish compatibility) and document any deviations so you can resolve conflicts before sourcing materials.
Suitable metals, plastics, and membranes
Choose materials for drip edges, end dams, and flashing that can stand up to moisture and weathering. Here’s what works:
Corrosion-resistant metal, like galvanized steel or aluminum, is a good choice. It’s durable and long-lasting.
For non-metal options, consider PVC or other plastic materials. They won’t rust but may not be as strong as metals.
Self-adhered membranes can also work well. They stick directly to the substrate, creating a tight seal. But ensure they’re compatible with your stucco and sealants.
Sealants, fasteners, and lath considerations
Select the right sealants and fasteners to ensure your stucco stays put and doesn’t leak.
Use silicone-based sealants for their durability and flexibility. They resist UV rays and won’t crack over time.
For fasteners, stick with stainless steel or hot-dipped galvanized options. These won’t corrode and can handle outdoor conditions.
When it comes to lath, you’ve got two main choices: metal or wood. Metal is more durable but can be noisier when it expands and contracts with temperature changes. Wood is quieter but less durable. Choose based on your project’s needs and local codes.
Tools and Materials Checklist for New Work and Repairs
Assemble basic hand tools (trowel, hammer, pry bar, chisel), measuring/layout tools (level, speed square, chalk line), and power tools (drill/driver, oscillating multi-tool) plus a small kit for cutting and bending flashing. Include PPE—eye/ear protection, gloves, a dust mask or respirator, and fall protection when working at height—and a dust collection or disposal plan for cleanup.
Stock flashing and drip-edge options (aluminum, galvanized, stainless, self-adhesive membranes), exterior-grade sealants and backer rod, patch mortars and stucco basecoat mixes, repair mesh, and replacement sill flashing for corroded parts. Before starting, verify substrate condition, compatibility between flashing and WRB/housewrap, and follow a prep-to-finish sequence that preserves drainage paths and avoids common failure points.
Safety gear and jobsite precautions
Before you start any work, ensure you have the right safety gear and follow these job site precautions.
- Eye protection: Wear safety glasses or goggles to protect your eyes from debris and dust.
- Ear protection: Use earplugs or earmuffs when using power tools.
- Gloves: Protect your hands with work gloves suitable for the task at hand.
- Dust mask/respirator: Wear a dust mask or respirator to protect against concrete dust and other particles.
- Fall protection: When working from heights, use fall arrest systems and follow safety guidelines.
- Proper disposal: Use designated bags for debris and concrete dust to maintain a clean job site.
- Metal flashing handling: Be cautious when cutting and installing metal flashing to prevent injury.
- Stucco mix handling: Follow manufacturer’s guidelines for safe mixing, application, and cleanup of stucco mixes.
Quick rule: Always prioritize safety. If you’re unsure about any aspect, consult a professional or the manufacturer’s guidelines.
Recommended consumables and small fittings
Having these consumables and small fittings on hand will help you detail your stucco work properly.
- Backer rod: Use this to fill gaps before applying sealant. Choose the right size for your application.
- Fasteners: Have compatible fasteners for securing flashing, lath, and other components.
- Flashing adhesive: Use a compatible adhesive to secure metal flashing in place.
- Drip cap profiles: Choose drip caps that match your window sill profile and are compatible with your stucco system.
- Sealant: Have exterior-grade urethane or silicone sealants on hand for sealing joints and gaps.
- Primer: Use a compatible primer to prepare surfaces before applying sealants or other materials.
- Corner beads: Have corner beads ready for protecting outside corners and creating clean lines.
- Repair mesh: Keep repair mesh on hand for patching damaged areas.
Quick rule: Always check compatibility of consumables with your specific stucco system to ensure a lasting result.
Flashing Fundamentals for Stucco at Window Sills
Sill flashing’s role is to intercept and redirect water into the drainage plane and away from the wall face; it must integrate seamlessly with the WRB and drip edge to do that job. Continuity of the WRB and proper sealant compatibility are critical—any gaps or incompatible materials create pathways for staining-causing moisture.
Correct lap sequencing—WRB, primary sill flashing, then drip edge oriented to shed water—ensures overlaps shed water toward the designed drainage path. Check for common pitfalls in the field such as gaps, poor adhesion, missing end dams, or undersized flashing, and follow a simple verification checklist to confirm continuous drainage and proper overlap before closing the assembly.
Sill flashing types and proper sequencing
The primary sill/top flashing is your first line of defense. It’s a continuous piece that runs along the entire length of the window opening, lapping onto the WRB.
End dams are crucial here. They’re flashed pieces that go over the jambs, preventing water from sneaking in at corners.
The underlayment comes next, overlapping the primary flashing and extending up the wall. This helps shed water towards the drainage paths.
The drip edge goes on last, lapping over everything else. It’s designed to direct water away from the building, preventing staining below the sill.
Laps, terminations, and transitions to cladding
At the jambs and head, flashing should terminate with a turn-up or turn-down. This helps prevent water from getting behind the flashing.
Integrate the flashing with your exterior finish by ensuring it’s properly sealed at all transitions. Use compatible sealants for best results.
Avoid traps at transitions by maintaining a continuous drainage plane. Ensure weep screeds are installed correctly to facilitate proper drainage.
Proper spacing of flashing laps is key. Overlaps should be staggered and wide enough to ensure water is shed towards the drainage paths, not trapped behind the flashing.
Designing and Installing Effective Drip Edges
A drip edge at a stucco sill gives water a clean break away from the wall, reducing splash and staining and working with end dams and flashing to control lateral flow. Placement is key: the drip should sit so water leaves the wall face and integrates with sill flashing and the lath termination without being bridged by mortar or trim.
Common profiles include bent metal lips, formed vinyl caps, and pre-formed metal drip caps; choose a profile compatible with the stucco assembly and resistant to corrosion in your climate. Measure, cut, fasten, and seal accurately, maintain slope, and test runoff; if you see gaps, incorrect height, or poor integration with the flashing, correct those before finishing the surface.
Selecting the right drip-edge profile and placement
The drip edge’s profile and placement are crucial for effective water management. Here’s what to consider:
Profiles: Common profiles include straight, curved, or L-shaped designs. Straight edges are simple but may not control splash as well. Curved or L-shapes offer better splash control but can be more complex to install.
Placement: The drip edge should project slightly beyond the stucco surface (1/4″ – 3/8″) to ensure water breaks away cleanly. Too far out, and it catches wind; too close, and water may cling to the wall.
Installation best practices and key tolerances
Proper installation ensures your drip edge works as intended. Follow these steps:
Fastening: Use appropriate fasteners (nails, screws) spaced evenly along the drip edge. Don’t over-tighten; leave some ‘give’ for expansion.
Sealing & Slope: Seal joints with recommended sealant to prevent water intrusion. Ensure a proper back-slope (1/4″ – 3/8″ per foot) away from the wall, following product specs.
Overlaps & Tolerances: Overlap drip edges at least 2″ where they meet. Maintain consistent tolerances for a clean, effective water break.
End Dams and Back Dams: How and When to Use Them
End dams and back dams stop lateral flow and prevent splash-back into side joints and openings; they’re a small component that controls how water exits the sill area. Use formed stucco dams when matching the finish and movement characteristics is critical, or metal/membrane dams where a positive waterproof barrier is required.
Size and place dams so they tie into the sill flashing and drip edge and accommodate weeps or drainage paths; align heights and extend them into the opening enough to block lateral flow. Install dams in the correct sequence with flashing, seal joints carefully, and watch for failures like cracking, misalignment, or bowing that indicate a repair is needed.
Constructing end dams in stucco finishes
End dams in stucco finishes are formed using stop beads, cheeks, or setting screeds. These help control lateral flow and prevent splash-back at window openings.
Stop Beads: Nail these along the top of your window opening’s sides before applying lath. They create a dam that stops the stucco mix from flowing off the sides.
Cheeks: These are formed by bending lath around the sides of the opening, creating a vertical dam. Ensure they’re aligned with drip edges for proper water management.
The end dams should extend into the opening frame about 1-2 inches to ensure effective blocking of lateral flow. Integrate them with your finish coat for a seamless look and long-term performance.
Metal and membrane end-dam options
For higher-risk exposures or retrofit situations, preformed metal end dams or self-adhered membranes can be used as an alternative to formed stucco dams.
Preformed Metal End Dams: These are typically made of galvanized steel or aluminum. They’re ideal for new construction where they can be integrated into the design and flashing sequence. They provide a robust barrier against lateral flow and splash-back.
Self-Adhered Membranes: These are great for retrofit situations or when you need to match an existing finish. Apply them over the window opening’s sides, ensuring they extend into the frame about 1-2 inches. They create a waterproof barrier that prevents staining below the sill.
Regardless of your choice, ensure proper alignment with drip edges and flashing for continuous waterproofing around the sill. Always follow manufacturer guidelines for best results.
Step-by-Step Procedures: Retrofit Repairs and New-Construction Detailing
Start diagnostics by tracing staining patterns to likely failures—missing flashing, absent drip edge, compromised end dams, or capillary movement through cracked stucco—and note whether the job is retrofit or new work. Assess materials, plan containment and debris control, and identify what must be removed to access the flashing without damaging surrounding stucco unnecessarily.
Remove failed flashing, clean and dry the cavity, install correct sill pans/drip edges and end dams, integrate flashing with the WRB and lath, and seal transitions with compatible sealants and backer rods. Finish with verification tests (water spray or visual inspection), document the repairs, and cross-check details against manufacturer instructions and local code before closing the assembly.
Step-by-Step Repair Process
This step-by-step guide walks you through the process of repairing and preventing staining below your window sills, ensuring a durable and long-lasting solution.
- Preparation: Safety first! Wear appropriate gear. Clear the area. Cover nearby plants.
- Diagnose: Use our inspection checklist to find the root cause of the problem.
- Remove failed components: Carefully take out damaged flashing, drip edges, end dams, and sealants.
- Install new components: Replace with correct materials, following our detailed guides on flashing, drip edges, and end dams.
- Seal and integrate: Use recommended sealants and backer rods. Ensure continuous drainage paths and proper slope.
- Clean up: Remove debris. Inspect your work. Test for leaks.
- Document: Note changes made, materials used, and any warranties that apply.
Inspection and Diagnostic Checklist
Use this checklist when you first notice staining to determine the cause and plan your repair strategy.
- Clean the area: Remove dirt and debris to see clearly.
- Probe test: Gently probe around the stain. Soft or crumbling material indicates damage.
- Check behind trim/flashings: Carefully remove any damaged trim. Inspect flashing for gaps, tears, or improper laps.
- Look at sealants: Check for cracks, peeling, or missing sealant.
- Inspect drip edges: Ensure they’re present and functioning properly.
- Check end dams: Make sure they’re intact and correctly installed.
- Examine stucco: Look for cracks, holes, or other signs of damage.
- Consider capillary rise: If staining is consistent with water rising from the ground, you may need to address exterior drainage.
- Note existing materials: Record the type of stucco, siding, and window for future reference.
Quick rule: Always inspect behind trim and flashings. Many problems hide here.
Repair Sequence for Stopping Staining
Follow this sequence to repair and prevent staining at your window sills:
1. Remove finish: If necessary, carefully remove damaged stucco around the sill.
2. Replace/extend flashing: Install proper head flashing, side flashing, and sill pan/drip edge. Ensure they’re integrated with your WRB and lath/ties.
3. Install drip/end dams: Add or replace end dams to control water flow at the ends of the sill.
4. Reinstate stucco: Apply new stucco, following our guidelines for a smooth, durable finish. Allow proper cure/dry times before final inspection and testing.
New-Construction Detailing Workflow
This workflow ensures your new window sills are properly flashed, detailed, and finished for long-term performance:
1. Rough opening prep: Prepare the rough opening according to code. Ensure it’s square, plumb, and level.
2. WRB flashing: Install a continuous weather-resistive barrier around the opening, lapping properly at corners and transitions.
3. Sill flashing: Install sill pan/drip edge and side flashing, ensuring they’re integrated with your WRB and lath/ties.
4. Drip edge install: Secure the drip edge in place, following our best practices for proper placement and tolerances.
5. Finish application: Apply stucco finish, ensuring it’s properly integrated with your flashing system and end dams. Allow proper cure/dry times before final inspection and testing.
Visual Checkpoints, Testing, and Common Mistakes to Avoid
Onsite, look for flashing gaps, corroded metals, missing drip edges, blocked weeps, and stains that follow horizontal lines or corners—these are immediate red flags. Simple tests like a controlled water spray at the sill, dye tests, and flashlight inspections behind trim help confirm whether the drainage path and flashing are working.
Prioritize fixing absence of back dams, improper flashing laps, stucco installed over flashing, and insufficient slope—these are the most common causes of staining. Maintain a short pre-install and post-install checklist for visual passes, perform a water test, and correct the highest-risk errors first before finishing the finish coat.
Visual checklist and simple water tests
Use this checklist after installing your roofing system to ensure everything is in place and working as it should. It’s best to do these checks on a dry day, but before any rain.
- Check flashing laps: Ensure all flashings are lapped correctly with the upper piece covering the lower one by at least 2 inches. This prevents water from getting behind the flashings.
- Verify drip projection: Make sure the bottom edge of your roofing material extends beyond the drip edge by at least 1/4 inch to ensure proper drainage and prevent water from getting under the shingles.
- Inspect continuous WRB coverage: Check that the weather-resistant barrier (WRB) is laid continuously without any gaps or tears. This protects your roof structure from moisture.
- Test drip edge for proper slope: Pour a small amount of water onto the drip edge to ensure it flows off smoothly and doesn’t pool. If water pools, adjust the drip edge’s angle.
- Check roof vents for obstruction: Ensure all roof vents are clear of debris or obstructions that could hinder proper ventilation.
- Inspect valleys for proper metal installation: In valley areas where two roof planes meet, ensure the metal valley flashing is properly installed to direct water towards the lower edge.
- Test roof drainage with a garden hose: Simulate real-world conditions by running water along your roof’s length. Watch for any leaks or signs of poor drainage.
- Check gutters and downspouts: Ensure all gutters are securely attached, sloped properly, and that downspouts direct water away from the foundation.
Quick rule: Always remember, a little prevention goes a long way. Regular visual checks and simple tests can save you from costly repairs down the line.
Top installation mistakes and preventive fixes
Use this checklist during and after your concrete installation to avoid common pitfalls. Catch these issues early to save time, money, and rework.
- Missing back dams: Check all corners and edges for back dams. These prevent water from seeping behind the slab. If missing, install them now using rigid foam or plywood.
- Improper flashing laps: Inspect all flashings at joints and intersections. Ensure they overlap correctly (staggered) to direct water outwards. Wrong laps can cause leaks.
- Wrong fasteners: Verify that all anchors, bolts, or screws used are suitable for concrete and meet the required holding strength. Incorrect fasteners may pull out, leading to structural issues.
- Inadequate curing: Check if the newly poured slab is properly cured (kept moist) for at least 7 days. Insufficient curing can cause cracking and reduced durability.
- Uneven surface: Inspect the finished surface for low spots or high points. Uneven surfaces can lead to water pooling, tripping hazards, and structural problems over time.
- Incompatible materials: Ensure all admixtures, aggregates, and cement used are compatible and meet local standards. Using incompatible materials can result in weak concrete with reduced lifespan.
- No control joints: Look for control joints (slots cut into the slab) at regular intervals. These help control cracking due to shrinkage. If missing, consider cutting them now.
- Insufficient reinforcement: Check if the required amount and type of rebar or mesh is used. Inadequate reinforcement can cause structural failure under heavy loads.
Quick rule: Always follow manufacturer instructions and local building codes to avoid installation mistakes.
Conclusion
Take control of leaks and staining by following solid, repeatable steps: focus on proper flashing, drip edges, and end dams so water stays outside the wall and doesn’t stain the interior or window sill.
First, verify compatibility and safety before you touch it. Check materials against the existing wall, clear the work area, gather flashing and drip-edge parts, end dams, a compatible sealant, and the basic tools you need. Inspect the current condition, set up a safe work space, install flashing with a clear slope away from the sill, fit a drip edge under the sill, place end dams or back dams where needed, and perform a test with water on a small area before you do the full job. Do the work in logical steps and dry time between stages, and keep the area clean so you can spot problems early.
Common mistakes to avoid are skipping flashing or relying on paint to fix water flow, using the wrong sealant or incompatible materials, and neglecting a proper water-test or slope. Safety rules are simple: don’t work on wet surfaces, wear eye and hand protection, use a sturdy ladder, and test a small area first to confirm the fix won’t cause other damage. Never rush the cure times or yank back dams once they’re set; a rushed job will fail and cost more down the line.
If you find extensive water intrusion behind the stucco, damaged substrate, or you’re unsure about meeting local standards, call a professional. When in doubt, slow down, verify compatibility, and proceed only after you’ve confirmed the plan works in a controlled test area. Stay practical, stay safe, and you’ll protect the sill and the wall for years to come.
FAQ
Do drip edges matter at stucco window sills?
Yes. A proper drip edge directs water away from the stucco and sill. Check product labels and manufacturer instructions to ensure compatibility with your weather barrier and flashing system.
How do you place end dams at window sill corners?
End dams seal the sill corners and help stop water tracking behind the stucco. Use materials and sealants labeled as compatible with stucco and flashing; follow the manufacturer instructions for corner details and overlaps.
What is the right flashing technique to prevent water infiltration?
Flash the sill and window rough opening with a continuous, overlapped layer that ties into the weather barrier. Rely on the product instructions for overlaps, fastening, and any drip edge integration to avoid gaps.
How can I prevent staining below stucco around window sills?
Keep flashing intact and ensure drainage paths are clear. Use compatible materials and finishes, and check labels for stain resistance and compatibility with stucco and sealants; fix any leaks promptly to minimize staining.