
Introduction
Deck ledger through stucco means installing the ledger board and flashing so water shed from the deck doesn’t get behind the stucco; it’s a retrofit move to tie the ledger into the house while preserving the wall’s drainage plane. This usually involves removing a section of stucco and lath to access the sheathing or installing a detail that creates a waterproof seam, but check product labels and local rules for compatibility. Do not assume every wall assembly is the same—confirm what’s behind the stucco before fastening through it.
This is a hands-on job you can do with basic carpentry and flashing skills, but it pays to be methodical: cut back only what you need, use corrosion-resistant fasteners, and make continuous overlaps with your flashing. If you’re unsure about materials, substrate condition, or whether the wall needs a membrane, stop and check manufacturer instructions or consult a pro so you don’t trap water inside the wall.
Key takeaways
- Confirm stucco condition and ledger access before cutting; avoid hidden water damage.
- Design a continuous flashing plane that preserves drainage and prevents water intrusion.
- Inspect structure, sealant compatibility, and WRB termination with approved manufacturer guidance.
- Wear eye protection and gloves; de-energize nearby utilities before any cutting.
- Use proper tools and sleeves; support stucco edge during retrofit to prevent cracks.
- Test drainage path after installation; monitor for leaks at roof-to-wall junctions.
- Schedule inspections after rainfall and seasonal changes; address flashing gaps promptly.
Table of Contents
- Introduction
- Key takeaways
- Why Cutting a Ledger Through Stucco Is High-Risk
- Retrofit Strategy Overview and Design Goals
- Pre-Work Inspection and Diagnostic Checklist
- Tools and Materials Checklist for a Safe Retrofit
- Step-by-Step Retrofit Flashing Procedure (Work Sequence)
- Flashing Terminations, Laps, and WRB Integration Details
- Common Pitfalls and How to Avoid Them
- Inspection, Maintenance, and Troubleshooting After Retrofit
- Conclusion
- FAQ
Why Cutting a Ledger Through Stucco Is High-Risk
Cutting a ledger through stucco commonly severs the continuous weather-resistive barrier and creates a direct path for water to reach the sheathing and framing. That breakthrough concentrates moisture at the ledger connection and often exposes fasteners and framing members to accelerated decay.
If the WRB is not re-established and a proper through-wall flashing is not installed, the risk is not just cosmetic staining but long-term structural compromise and hidden rot. Verify specific material compatibility and flashing details against the product label or manufacturer instructions before assuming a simple patch will suffice.
Stucco-clad wall anatomy and the drainage plane
Behind your stucco finish, there’s a layer of scratch or brown coat, then lath, followed by a water-resistive barrier (WRB) with an air gap, and finally sheathing. The WRB creates a drainage plane that lets moisture escape while keeping bulk water out.
The key here is the continuous WRB. It’s what protects your wall from moisture intrusion. When you cut through it for a deck ledger, you’re creating a potential weak point.
Typical failure modes observed with ledger retrofit
When a ledger penetrates stucco, moisture can get trapped behind it. This leads to all sorts of problems:
– Moisture gets trapped and can’t escape, leading to rot and mold.
– Fasteners corrode from the inside out.
– Stucco cracks as it tries to accommodate the ledger’s movement.
Worst case? You might not see any of this until it’s too late – like when your deck suddenly sags or collapses. That’s why getting the retrofit right is so crucial.
Retrofit Strategy Overview and Design Goals
The retrofit strategy focuses on restoring WRB continuity, installing a reliable through-wall flashing that slays water past the ledger, and keeping a drained cavity or gap behind the cladding. The goal is to move moisture away from the ledger, allow any incidental water to escape, and preserve inspectability for future maintenance.
Design objectives include durable laps and terminations, a clear drainage path, and accessibility for future checks or repairs. Confirm flashing material properties and recommended lap dimensions with the manufacturer’s product data sheet or local practice before selecting components.
Primary performance objectives
The primary goals of our retrofit strategy are clear and non-negotiable. We’re here to prevent bulk water from entering your wall, preserve capillary drainage so moisture can escape naturally, isolate fasteners from any lingering dampness, and ensure that everything we do is replaceable for future maintenance.
Let’s break these down:
Preventing bulk water entry is our top priority. We’ll achieve this by restoring the continuity of your wall’s weather-resistant barrier (WRB) and installing a through-wall flashing that directs water outwards.
Preserving capillary drainage means maintaining an effective gap or drainage plane behind the stucco to allow any trapped moisture to escape. We won’t mess with this; we’ll work around it.
Isolating fasteners from moisture is crucial to prevent rot and rust. We’ll use appropriate flashing details and sealants to keep them dry.
Lastly, allowing replaceability ensures that you can access and maintain your ledger board in the future without damaging the stucco or compromising drainage. This means using fasteners that can be removed and replaced easily, and keeping our work accessible for inspections.
Strategy trade-offs and constraints
Before we dive into the nitty-gritty of our retrofit strategy, let’s acknowledge some practical constraints that might influence our choices.
Preserving your existing finish is likely a priority. We’ll do our best to keep the stucco intact and looking good, but remember, cutting through it is inevitable for installing proper flashing. Expect some minor repairs afterwards.
Access can be a challenge when working on an existing structure. We might need to remove or temporarily disassemble certain elements to get our job done right. Be prepared for some temporary inconvenience.
Budget is always a consideration. Our strategy aims to balance cost-effectiveness with long-term performance. We’ll use durable, affordable materials and minimize waste, but keep in mind that quality flashing details might add up.
Understanding these trade-offs and constraints helps us make informed decisions about our retrofit strategy. It’s a balancing act, and we’re here to help you navigate it.
Pre-Work Inspection and Diagnostic Checklist
Start by documenting existing conditions: stucco thickness, WRB type and condition, sheathing condition behind openings, fastener exposure, and any visible staining or soft spots. Probe and tap the substrate and ledger zone to detect rot, and photograph everything for a retrofit plan and future reference.
Certain conditions—extensive sheathing decay, multiple compromised stud bays, or stucco that cannot be removed without damage—may rule out a simple retrofit and require more invasive repairs. When in doubt about hidden damage or load-bearing adequacy, consult a structural or building-envelope professional and check local code or manufacturer guidance.
Visual and documented checkpoints
Before you start, use this checklist to document the current state of your stucco wall and ledger. This helps plan your retrofit and avoid surprises.
- Photograph: Take pictures of the entire area from different angles. This helps track progress and identify issues later.
- Stucco cracks: Note any hairline or larger cracks. They could indicate movement or moisture intrusion.
- Existing flashing: Check for old or damaged flashing. It might need replacement.
- Ledger attachment: Inspect how the ledger is attached to the wall. Look for screws, bolts, or other fasteners.
- Rot or staining: Check for signs of rot on the ledger or staining on the stucco. These indicate moisture issues.
- Water stains: Note any water stains on the interior walls. They could suggest a leaky ledger.
- Deck condition: Assess the deck’s overall condition. Any damage might affect your retrofit plan.
- Flashing at base: Check the flashing at the bottom of the wall. It should direct water out and away.
Quick rule: If you find extensive cracks, rot, or staining, consider consulting a professional before proceeding.
Moisture probing and non-destructive testing
Use this checklist to check for moisture and confirm the substrate’s condition without causing damage.
- Moisture meter: Use it on both sides of the stucco. High readings suggest moisture intrusion.
- Selective probing: Gently probe around fasteners and cracks to check for soft spots or rot.
- Wall cavities: If accessible, check inside wall cavities for signs of moisture or damage.
- Wood-to-wood contact: Check where the ledger meets the wall. Moisture can wick up here.
- Invasive inspection: If readings are high but visuals are good, consider invasive testing to confirm.
Quick rule: If moisture readings are consistently high, consult a professional before proceeding with your retrofit.
Structural ledger and fastener assessment
Before you install new flashing, ensure the ledger and its fasteners are sound. Here’s how to check:
- Ledger condition: Inspect the ledger for signs of rot, warping, or damage.
- Fastener type: Check the type of fasteners used. They should be appropriate for the application and substrate.
- Fastener spacing: Ensure fasteners are spaced correctly according to building codes.
- Fastener condition: Check fasteners for signs of corrosion or damage. Replace if necessary.
- Ledger-to-wall contact: Ensure the ledger is securely attached to the wall with no gaps.
- Structural engineer: If you’re unsure about any aspect, consult a structural engineer.
Quick rule: If you find extensive damage or are unsure about any aspect, stop work and consult a professional.
Tools and Materials Checklist for a Safe Retrofit
Gather cutting tools for stucco and sheathing, corrosion-resistant fasteners, compatible through-wall flashing materials, WRB repair membranes, sealants rated for the flashing and substrate, and shims or spacers to restore a drainage gap. Include personal protective equipment: eye protection, dust respirator, gloves, and knee protection for working at deck height.
Verify compatibility between flashing, sealant, and WRB by checking product documentation and following manufacturer instructions for adhesion and overlap. If a material’s suitability is unclear, list options in a safe range (e.g., metal flashing types or bonded membranes) and check the product label or data sheet before purchase.
Flashing material options and selection guidance
Use this checklist before purchasing flashing materials to ensure you get the right ones for your retrofit project. This will help prevent water intrusion and costly rework.
- Check material type: Compare metal (like aluminum or copper) vs flexible membranes (EPDM, TPO, etc.).
- Verify compatibility with stucco: Check manufacturer info to ensure the flashing is designed for use with stucco. Some metals can corrode or stain stucco.
- Check sealant compatibility: Ensure the flashing is compatible with your chosen sealant. Different materials require specific adhesives or sealants.
- Inspect material thickness: Measure or check the material’s gauge/thickness to ensure it’s suitable for your application and local building codes.
- Check UV resistance: Ensure the flashing has adequate UV protection, especially if it will be exposed to sunlight. Quick test: Check if it’s marked as “UV-resistant” or look up its UV rating.
- Avoid galvanized metal for stucco: Galvanized metal can stain and corrode when in contact with stucco. Stick to aluminum, copper, or flexible membranes.
- Check flashing width and length: Measure your openings (windows, doors) to ensure the flashing is wide enough to cover the entire opening and extend onto the wall at least 4-6 inches.
- Inspect flashing edges: Check if the flashing has factory-applied sealant or tape on its edges. If not, you’ll need to apply your own before installation.
Quick rule: Always check manufacturer instructions and local building codes to ensure you’re using the right materials and following approved methods for your specific project.
Fasteners, sealants, and corrosion protection
Use this checklist before you start your retrofit to ensure you’ve got the right materials for a safe, long-lasting job.
- Check anchor bolts: Ensure they’re rated for your wall’s load. Check manufacturer instructions or local building codes to confirm.
- Verify fasteners’ corrosion resistance: Look for stainless steel (304/316) or galvanized fasteners. Check product labels for clear markings.
- Match sealant type to substrate: Ensure your sealant is compatible with the surfaces it’s bonding, e.g., silicone for non-porous surfaces like metal and glass.
- Check sealant’s movement capability: Ensure it can handle the expected joint movement. Check manufacturer data sheets for movement ranges.
- Verify primer use (if needed): Some sealants require a primer to ensure proper adhesion. Follow manufacturer instructions.
- Check fasteners’ spacing: Ensure they’re spaced appropriately to support the load. Check local building codes or consult an engineer if unsure.
- Ensure sealant’s UV resistance (if exposed): If your sealant is exposed to sunlight, ensure it has good UV resistance. Check product labels for claims.
- Check sealant’s application temperature range: Ensure the temperature is within the sealant’s recommended application range. Check manufacturer instructions.
Quick rule: Always follow manufacturer instructions and local building codes to ensure your fasteners, sealants, and corrosion protection measures are up to snuff.
Safety, scaffolding, and surface protection
Use this checklist before starting any retrofit work to ensure a safe job site and protect adjacent finishes.
- Hard Hat: Check for proper fit and no cracks. A hard hat is your first line of defense against falling objects.
- Eyes Protection: Ensure safety glasses or goggles are clean, unscratched, and provide adequate protection from debris.
- Fall Protection: If working at heights over 6 feet, check that personal fall arrest systems (PFAS) are in place and functioning properly. Follow manufacturer’s instructions for inspection.
- Scaffolding: Inspect scaffolding before use. Check for level platforms, secure guardrails, and proper planking. Ensure it can support the required load.
- Ladders: Check ladders for stability, secure footing, and no defects. Ensure they extend at least 3 feet above the landing.
- Drop Cloths: Lay out drop cloths or plastic sheeting to protect adjacent floors and finishes from concrete dust and debris.
- Tape Off Areas: Use painter’s tape to protect trim, baseboards, and other vulnerable surfaces. This helps prevent damage during work.
- Ventilation: Ensure proper ventilation is in place to control concrete dust. Check that fans are working and positioned correctly.
Quick rule: Always prioritize safety first. If you’re unsure about any equipment or procedure, consult the manufacturer’s instructions or a local safety expert before proceeding.

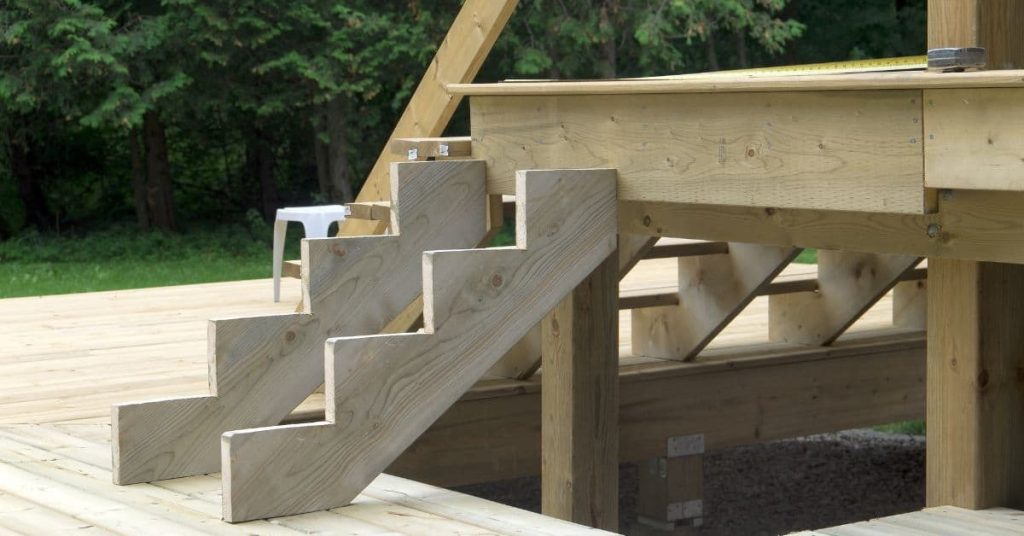
Step-by-Step Retrofit Flashing Procedure (Work Sequence)
Begin with a small, controlled demo: remove stucco and lath only to the extent needed to expose the ledger and nearby WRB, preserving as much cladding as possible. Repair or replace any decayed sheathing or framing discovered, then install a continuous through-wall flashing that extends over the ledger and under the intact WRB above.
Build laps from the weather-facing surface inward and top-to-bottom, restore the WRB over the flashing, reattach the ledger using proper fasteners through the flashing where required, and finish with appropriate backer and stucco repairs. Keep the drainage plane clear, and follow manufacturer lap and termination instructions for every material used.
Step-by-Step Process
This section guides you through the practical steps of retrofitting flashing on your deck ledger through stucco, preserving drainage and preventing moisture issues.
- Preparation: Safety first! Clear the area, set up scaffolding, and protect surfaces. Gather tools and materials listed in the checklist.
- Inspection: Revisit your pre-work inspection. Check for any changes or new concerns before proceeding.
- Main Work: Follow the controlled removal of stucco procedure to expose the WRB. Then install through-wall flashing and create a back-block, ensuring continuity with the WRB above.
- Ledger Reinstallation: Remove the ledger board if necessary. Reinstall it with proper isolation from moisture using the methods described in this section.
- Finishing Touches: Repair stucco, integrate new flashing, and clean up. Double-check your work to ensure everything is secure and watertight.
Controlled removal of stucco and exposing WRB
Carefully remove just enough stucco to access the water-resistive barrier (WRB) without damaging adjacent finishes or lath. This ensures a solid base for your new flashing.
Start by scoring the stucco in a grid pattern using a utility knife. This makes removal easier and reduces dust.
Gently chip away the scored stucco using a cold chisel and hammer, working from the top down to prevent damaging the lath below. Be patient; it’s better to remove small pieces carefully than to risk destabilizing the wall.
Stop when you’ve exposed enough WRB to install your flashing. Inspect the exposed area for any damage or gaps that need repair before proceeding with flashing installation.
Installing through-wall flashing and back-blocking
Establish a continuous flashing that ties into the WRB above, diverting water to the exterior. Then create a back-block or drip edge to preserve drainage.
Cut your flashing material to size, ensuring it extends at least 4 inches above and below the ledger board. Install it using corrosion-resistant fasteners, following the manufacturer’s instructions. Seal seams with flashing tape or mastic.
Create a back-block by installing a piece of rigid foam or other drip edge material behind the flashing. This prevents water from wicking back into the wall and preserves your drainage plane.
Ensure your flashing is continuous, well-sealed, and properly sloped to direct water outwards. Inspect your work thoroughly before moving on to ledger reinstallation.
Reattaching ledger and restoring finishes
Reinstall the ledger board with proper isolation from moisture to prevent future issues. Then repair stucco and integrate the new flashing into your finish.
Use corrosion-resistant fasteners and ledger hangers to reinstall the ledger, ensuring it’s properly spaced from the wall for drainage. Apply a bead of sealant along the ledger-wall joint before installing flashing to prevent water intrusion.
Repair stucco by mixing new material to match your existing finish. Apply it carefully, following the manufacturer’s instructions and blending it with the surrounding wall to create a seamless look.
Integrate the new flashing into your finish by tuck-pointing or using other appropriate methods. Ensure the finished surface is smooth, even, and free of gaps that could allow water intrusion.
Flashing Terminations, Laps, and WRB Integration Details
Terminations should direct water onto the flashing and away from the wall assembly: tie the flashing into the WRB above and seal side laps so water sheds onto the flashing, not behind it. Always lap the weather-facing material over the one beneath it and maintain the WRB on top of the flashing where required by the flashing type and local practice.
Where different materials meet, use compatible sealants and transition membranes and follow the manufacturer’s recommended lap dimensions and fastening patterns. If lap length or termination detail is critical to performance, check the product data sheet or the manufacturer instructions to confirm acceptable configurations.
Lapping order and shingle-style sequencing
When installing your retrofit flashing, follow a top-to-bottom, inboard-to-outboard sequence. This ensures water is shed outward, away from the wall.
Start at the top, near the deck ledger. Lap each strip of flashing over the one below it, creating an overlapping ‘shingle’ effect.
This way, any water that gets behind the upper layer will still be directed down and out by the layer beneath it.
Remember, each lap should be at least 4 inches. This gives enough overlap to ensure proper drainage.
Vertical and horizontal terminations at corners and jambs
At corners, vertical transitions, and interfaces with doors/windows, ensure your flashing terminates properly to avoid pinched drainage.
For vertical terminations, lap the flashing from the top down. This allows water to drain freely.
At horizontal transitions, like at the bottom of a wall or under windows/doors, turn the flashing up and outboard, creating a ‘kickout’ that directs water away from the structure.
Never tuck your flashing in behind trim or let it end flush with a surface. This can trap water and lead to leaks.
Integrating with existing exterior elements
When installing your retrofit flashing, you’ll need to interface it with other exterior elements like gutters, stair stringers, and deck ledger plates. Do this carefully to avoid creating water traps.
At gutters, turn the flashing up and outboard under the gutter. This creates a kickout that directs water away from the wall.
For stair stringers, flash around them, lapping the flashing over the stringer to direct water down and out.
At the deck ledger plate, ensure your flashing laps over it, creating a tight seal. This prevents water from getting behind the ledger and causing rot.
Common Pitfalls and How to Avoid Them
Frequent mistakes include cutting away too much stucco, failing to re-establish a continuous WRB, underlapping flashing, and using incompatible sealants that degrade prematurely. These errors tend to trap moisture or route it into the structure rather than out to the exterior.
Avoid these issues by planning minimal demo, labeling and photographing junctions before disassembly, using tested material pairings, and following manufacturers’ lap and termination guidance. When unsure about a material pairing or sealant adhesion, check the product documentation or ask the manufacturer.
Avoiding moisture traps and capillary breaks
Improper laps, over-reliance on sealant, or lack of drainage gap can create moisture traps leading to rot and structural damage. Here’s how to avoid these common pitfalls:
- Proper laps: Flashing laps should go up and under, never side by side. This ensures water runs off rather than being trapped.
- Sealant backup: Don’t rely solely on sealant to keep out moisture. Use it as a backup to proper laps and drainage.
- Drainage gap: Maintain a 1/4″ to 3/8″ gap between the ledger and stucco for drainage and ventilation.
- Weep screeds: Install weep screeds at the bottom of the stucco to allow moisture to escape.
By following these steps, you’ll prevent capillary breaks and keep your deck dry and durable.
Preventing stucco cracking and finish mismatch
Minimizing stucco cracks during cuts and blending new repairs with existing texture and color can be challenging. Here are some tips to help:
Crack prevention: When cutting stucco, use a wet saw with a diamond blade to minimize cracking. Score the surface first, then snap it off.
Matching finish: To blend new repairs, match the existing texture and color as closely as possible. Use a small sample of the old stucco to create a new batch that matches. Apply the new stucco in thin layers, allowing each to cure before applying the next.
Patience is key: Stucco takes time to cure properly. Don’t rush it, or you’ll risk cracking and finish mismatch.
Corrosion, galvanic reaction, and material compatibility
Material choices can significantly impact the longevity of your retrofit flashing. Here’s what to consider:
- Separate metals: Avoid contact between different metals to prevent galvanic reactions that cause corrosion.
- Corrosion-resistant fasteners: Use stainless steel or hot-dipped galvanized fasteners with a zinc coating of at least 2.5 mils.
- Flashing material: Choose flashing made from materials like stainless steel, copper, or plastic that won’t corrode easily.
- Avoid aluminum: Aluminum reacts with other metals and can cause severe corrosion. Avoid using it in retrofit flashing applications.
- Spec ratings: Look for fasteners and flashing with a corrosion resistance rating of at least C4 or better.
By selecting compatible materials and following these guidelines, you’ll prevent corrosion, maintain structural integrity, and extend the lifespan of your retrofit flashing.
Inspection, Maintenance, and Troubleshooting After Retrofit
Create a simple inspection schedule to check flashing terminations, visible sealant joints, and the underside of the ledger for staining or movement after winter and after heavy rain events. Look for signs of trapped moisture—soft wood, peeling paint, bulging stucco, or persistent dampness—that indicate the flashing or WRB may be compromised.
For troubleshooting, start by isolating the source of leaks and checking laps and sealant continuity; repair small issues promptly and keep records and photos of repairs. If moisture problems persist, consult product instructions and consider a professional evaluation to avoid repeated short-term fixes.
Visual checkpoints and seasonal checks
Regularly inspect your deck ledger through stucco retrofit to ensure everything is in tip-top shape. Here’s a quick checklist.
- Check for stains: Discoloration could indicate water intrusion or rust. Inspect around flashings, laps, and terminations.
- Inspect sealants: Ensure they’re intact and not cracked or missing. Reapply if needed.
- Look for movement: Any gaps between the ledger and stucco could allow water entry. Tighten any loose screws or bolts.
- Examine stucco finish: Cracks can let water in. Repair with matching stucco mix.
- Spring check: After winter’s freeze-thaw cycle, inspect for any new cracks or damage.
- Fall check: Before cold weather sets in, ensure all sealants are intact and no gaps exist.
Quick rule: Inspect annually, especially after severe weather events.
Diagnosing leaks and targeted repairs
Leaks can be tricky to find. Here’s a systematic approach to isolate the source.
- Water test: Spray water around flashings, laps, and terminations. Look for entry points or drips inside.
- Check sealants: Cracked or missing sealants can cause leaks. Repair as needed.
- Inspect WRB: Tears or holes in the water-resistive barrier could allow water intrusion.
- Examine fasteners: Loose screws or bolts can let water in. Tighten if necessary.
- Check for ice dams: In winter, melting snow and refreezing can cause leaks at the roof-deck interface.
Quick rule: If you can’t find the leak, consider hiring a professional with infrared or other specialized leak detection equipment.
When to call a professional or structural engineer
Some issues require expert evaluation. Here’s when to seek help.
- Significant rot: If you find extensive wood rot, it’s time to call a pro. They can assess the extent of damage and recommend repairs.
- Structural compromise: Warping, sagging, or other signs of structural failure need immediate attention from an engineer.
- Ambiguous load path: If you’re unsure how loads are being transferred, consult a structural engineer. They can provide clarity and ensure safety.
Quick rule: When in doubt, it’s always better to err on the side of caution and consult a professional.
Conclusion
Staying safe and keeping the deck drainage intact is the bottom line. A proper retrofit protects the ledger, the structure, and the look of your home, so you finish with a durable, leak-free result.
Make your move with a simple, real-world checklist: inspect the area and confirm a solid surface to work from, prepare all tools and materials, dry-fit flashing and WRB details, locate every ledger penetration and plan termination points, perform a controlled test in a small area, then execute the flashing sequence in the right order and seal the edges after confirming drainage paths remain clear. Do the work in small, deliberate steps and verify each stage before moving on; Safety first and test before finishing are non-negotiable rules you follow every day on the job.
Common mistakes to avoid are trying to beat the weather with rushed patches, skipping the pre-inspection and WRB integration, or skimping on terminates and laps. Keep areas dry during work, use the right flashing and sealant for your climate, and never seal a joint without proving drainage remains intact and the flashing is properly lapped. If anything feels beyond your comfort zone or you uncover hidden rot or structural damage, pause and seek a pro—there’s no shame in knowing when to call it. Stay steady, follow the sequence, and you’ll protect the deck for years to come.
When in doubt about access, structural signs, or hidden damage, call a qualified tradesperson rather than forcing through unsafe improvisation. With careful planning and disciplined execution, you’ll finish cleanly, keep the stucco intact, and preserve drainage while avoiding costly mistakes.
FAQ
How do I verify the flashing and drainage setup will work with stucco after the retrofit?
Check the manufacturer’s instructions for the flashing material and the ledger connection. Make sure the flashing is rated for exterior use and compatible with stucco substrates. Follow local rules and the project label to confirm proper installation orientation and drainage paths.
What should I do to maintain drainage after the retrofit?
Ensure there is a clear path for water to shed away from the ledger and into proper drainage routes. Keep weep systems or drainage channels open and unobstructed. Recheck after rain or pressure washing to confirm water flows away from the ledger and does not pond behind trim or stucco.
What are the common failure modes I should watch for during inspection?
Look for water staining, staining at the ledger line, or loose flashing; these indicate improper Flashing seating or seals. Check for cracked or damaged stucco near the flashing and ensure sealants remain intact. If you see rust, bulging caulk, or gaps, address them before completion.
When should I call a pro even if I’m handy with this work?
If the project exposes unknown structural damage, uncertain ledger attachment, or you’re unsure about flashing compatibility with your stucco system. If you encounter persistent leaks or unclear drainage paths, get a professional opinion. Always defer to manufacturer instructions and local site requirements when in doubt.