
Introduction
Basement subfloor panels are a layer installed over concrete to create a usable, raised floor surface. They can help smooth out uneven slabs and give you a stable base for finishes. Keep in mind moisture and proper fasteners matter, and follow manufacturer guidance.
Pros include a more comfortable surface and a straightforward path to finishing the room. Cons can be added height, cost, and potential moisture or mold if not installed right. If problems show up, check for moisture intrusion, seal gaps, relevel where needed, and follow the panel maker’s instructions for fasteners and underlayment.
Key takeaways
- Identify subfloor panels by type and check for moisture before any work.
- Inspect fasteners and edge gaps; loose panels cause squeaks, trip hazards, injuries.
- Repair fixes should follow manufacturer guidance; use compatible materials and sealants.
- Prevent moisture via proper drainage, vapor barriers, and controlled indoor humidity.
- Document inspection findings and plan repairs to avoid recurring basement panel issues.
- When in doubt, consult local building codes and a qualified contractor.
Table of Contents
- Introduction
- Key takeaways
- Quick Overview: What Basement Subfloor Panels Are
- Pros and Cons of Each Panel Type
- Material Specs and Standards Explained
- Common Basement Subfloor Problems and Causes
- How to Inspect and Diagnose Problems (Tools and Visual Checkpoints)
- DIY Fixes for Common Problems (Step-by-Step Guidance)
- Preventive Measures and Best Installation Practices
- When to Repair Vs. Replace — Decision Criteria and Cost/Time Considerations
- Conclusion
- FAQ
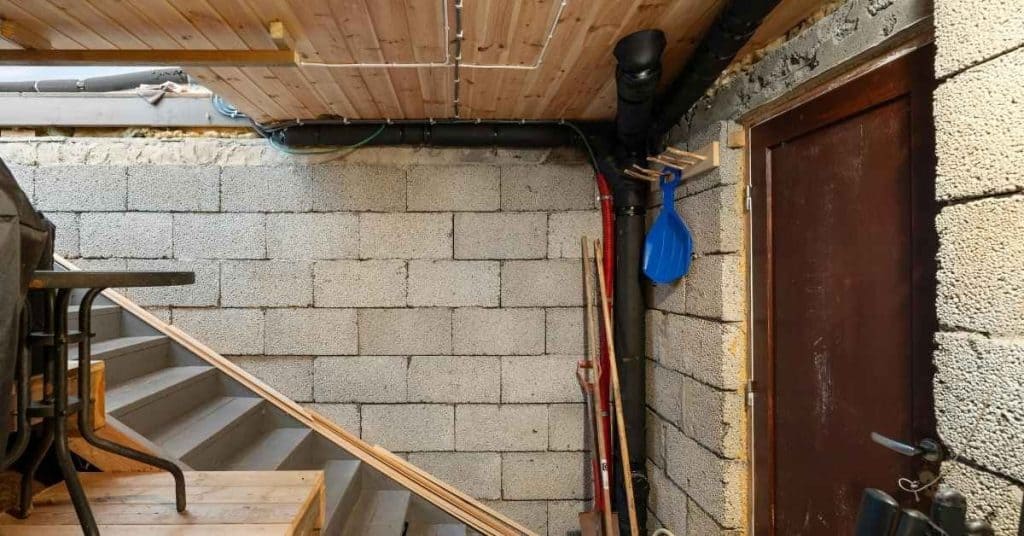
Quick Overview: What Basement Subfloor Panels Are
Basement subfloor panels are the layer installed above a concrete slab or over joists to create a floating or finished floor surface. They come in various panel types that serve to smooth out irregularities and improve comfort underfoot. Homeowners install them to add insulation, improve warmth, and provide a stable base for final flooring.
When choosing panels, consider how they sit on the existing basement floor and the intended finish. This intro is meant to set expectations for what you’ll see in the rest of the article. For exact product guidance, check the label, manufacturers’ instructions, or local code requirements before buying.
Common panel types (engineered wood, plastic composite, cement board, sleepers)
Basement subfloor panels come in various materials. Each has its own strengths and best use-cases.
Engineered Wood: These are made from plywood or oriented strand board (OSB). They’re strong, stable, and affordable. They perform well over concrete slabs due to their flatness and ability to handle moisture.
Plastic Composite: Made from recycled plastic and wood fibers, these panels are durable, moisture-resistant, and won’t rot or warp. They’re great for crawl spaces with high humidity.
Cement Board: These are made from cement and fiberglass mesh. They’re heavy-duty, dimensionally stable, and excellent for radiant floor heating systems. They work well over concrete but can be more expensive.
Sleepers (Joist Boards): These are dimensional lumber installed perpendicular to joists in framed crawl spaces. They provide a solid base for subflooring and allow for easy running of plumbing or electrical lines.
Where panels are installed (over concrete slab vs. framed crawl space)
Basement subfloor panels are installed in two main contexts: over a concrete slab or in a framed crawl space.
Over Concrete Slab: Here, panels sit directly on the slab. The slab provides stability and support. Moisture management is crucial to prevent panel warping or rot. Use moisture barriers and ensure proper ventilation.
Panels like engineered wood and cement board perform well here due to their flatness and moisture resistance. Plastic composite can also be used but may require additional support for large spans.
Framed Crawl Space: In this context, panels are installed over joists in a crawl space. This provides a level surface and allows for easy access to utilities below.
Sleepers or engineered wood panels can be used here. Plastic composite may not provide the same level of support for large spans without additional framing.
Pros and Cons of Each Panel Type
This section breaks down the practical advantages and drawbacks you’ll care about, such as moisture resistance and insulation. The goal is to help you compare panels quickly. Look for what matters most in your basement environment and budget.
Keep in mind that installation ease, durability, and repair options vary by type. Always verify specifications on the product data sheet or manufacturer instructions before purchasing. Consider local rules that may affect what you can install in a basement setting.
Pros explained
Concrete panels, also known as tilt-up or precast panels, offer a range of benefits to homeowners. They’re quick to install, which means less time with hammers and saws on your property.
Thermal comfort is another plus. These panels provide good insulation, keeping your home cool in summer and warm in winter. That’s a big deal when you’re paying those energy bills.
Panels also level out any unevenness in your foundation. They sit on top of it, so if your base isn’t properly compacted, the panels will show every bump and dip. So, check that compaction before you pour.
The final benefit is that these panels let you finish your floors right away. No waiting for concrete to cure on site. That’s a big plus when you’re eager to move in or start using your space.
Cons and trade-offs
Alright, let’s talk about the flip side. Each panel type has its drawbacks.
Moisture can be a real pain. Some panels, like OSB, are more susceptible to moisture than others. Check your local climate and consider using treated or water-resistant options if you’re in a humid area.
Panels add height to your walls. This isn’t usually an issue, but check your door heights before you start. You don’t want to end up with doors that won’t close properly.
Some panels can give off odors, especially when new. This is usually nothing to worry about, but if it’s bothering you, consider ventilating the area or using low-odor options. Always check manufacturer instructions for any specific warnings.
Material Specs and Standards Explained
Understanding material specs helps you avoid surprises after installation. Focus on thickness, density, and water resistance as key indicators of performance. These factors influence durability and how the panel handles moisture in a basement.
Before buying, consult the standards or manufacturer specs that apply to the panels you’re considering. If the information isn’t clear, ask for product documentation or check the label for guidance. Local building requirements may also specify acceptable ratings for basement assemblies.
What to check on product labels and spec sheets
Before you buy, make sure the panels are right for your job. Here’s a quick checklist.
- Manufacturer-recommended uses: Check if they’re meant for basements.
- Warranty limits: See how long it’s covered and what voids it.
- Recommended adhesives/fasteners: They’ll work best with these.
- Panel dimensions: Ensure they fit your subfloor layout.
- Thickness: Check it matches your needs and other materials.
- Density: Higher density means better strength, but can be heavier.
- Water resistance rating: Check it’s suitable for basements.
- Installation instructions: Read them to prep your site right.
Quick rule: Don’t skip checks. Wrong panels can lead to costly mistakes.
Moisture testing and compatibility
Basements can be damp. Test your concrete’s moisture level before installing panels.
Concrete moisture conditions: Use a calcium chloride test to find out. It’ll tell you the relative humidity (RH) of your slab.
Panel moisture tolerance: Check manufacturer specs. They’ll give you the RH limit for their panels.
Compare your results with the panel’s tolerance. If they’re not compatible, consider using a moisture barrier or wait until conditions improve.
Common Basement Subfloor Problems and Causes
Basement panels can face moisture intrusion, mold growth, cupping, or squeaks. Delamination and swelling are also common in damp environments. Each issue usually points to a root cause like moisture control gaps or improper installation.
Relating the problem to its cause helps you pick the right fix, whether it’s drying, reseating, or replacing panels. When in doubt, document symptoms and consult product instructions or a professional for safe remedies that won’t void warranties.
Moisture and Mold Growth
Water vapor, leaks, and high humidity are the main culprits behind basement subfloor problems. Here’s what to look for:
Staining: Water stains on your subfloor panels or ceiling below indicate moisture intrusion.
Mold: Visible mold growth is a clear sign of excessive moisture and humidity. It can appear as black, green, or white spots.
Regularly inspect your basement for these signs. If you find any, address the moisture source immediately to prevent further damage.
Movement and Instability
Squeaks, gaps, and flexing in your subfloor can be caused by several factors:
Improper Fastening: If panels weren’t secured properly to the concrete slab or framing, they may move around over time.
Insufficient Support: Inadequate support from joists or sleepers can lead to flexing and instability.
Thermal Movement: Changes in temperature cause materials to expand and contract, which can lead to squeaks and gaps. Ensure your subfloor is designed to accommodate this movement.
Delamination, Swelling, and Adhesive Failure
These issues occur when glue breaks down or materials are incompatible:
Delamination: Surface separation occurs when the adhesive bond between panels fails. You’ll see gaps between panels or peeling at the edges.
Swelling/Buckling: Incompatible materials or excessive moisture can cause panels to swell and buckle, leading to an uneven subfloor surface.
If you notice these issues, check your panel material compatibility and ensure proper installation techniques were used. Address any moisture problems promptly to prevent further damage.
How to Inspect and Diagnose Problems (Tools and Visual Checkpoints)
A practical inspection starts with a moisture meter, flashlight, and straightedge. Use a pry bar cautiously to check panel seating and edge gaps. Record visible signs of staining, warping, or loose fasteners as you go.
Note readings and visual cues in a simple log so you can track changes over time. If readings indicate elevated moisture, verify with the product label or manufacturer guidance before proceeding with repairs.
Step-by-Step Process
Before starting any repair or improvement work on your concrete surfaces, use this checklist to inspect and diagnose problems. This will help you understand the root cause of issues and prevent expensive rework.
- Preparation: Ensure you have safety gear (gloves, goggles, ear protection) and necessary tools (trowel, chisel, hammer, tape measure, level).
- Visual Inspection: Walk around the area to spot cracks, chips, discoloration, or uneven surfaces. Check for signs of water damage or movement.
- Measure Cracks: Use a tape measure to determine crack width and length. Most hairline cracks (less than 1/8″) are normal, but wider ones may indicate structural issues.
- Check Crack Patterns: Diagonal or zigzag cracks suggest settlement problems; horizontal cracks might indicate excessive water pressure behind the wall.
- Test for Delamination: Tap the surface with a hammer. A dull thud could indicate delamination (separation of concrete layers).
- Check Rebar Exposure: If rebar is exposed, it’s a sign of significant wear or structural damage.
- Inspect Drainage: Ensure water drains away from the structure. Poor drainage can cause foundation issues and concrete deterioration.
- Check Expansion Joints: Make sure they’re intact, filled, and aligned. Damaged or missing joints can lead to cracking.
Quick rule: Always address any signs of water damage or movement promptly, as they can worsen over time and cause costly repairs.
Quick visual checkpoints before pulling panels
Before you start tearing into your walls, use this checklist to quickly identify any potential issues. This will help you avoid costly surprises and rework.
- Check for staining: Look for discoloration or dark spots on the walls. These could indicate water damage or mold growth. If present, probe further to determine the extent of the problem.
- Inspect for efflorescence: White, powdery deposits on the surface may signal water intrusion. Check if it’s easily removable; if so, there might be a more serious issue behind the wall.
- Examine raised joints: Joints that are higher than the surrounding area could indicate movement or settling of the structure. This requires further investigation to assess the cause and extent.
- Feel for soft spots: Gently press on the walls with your hands or use a screwdriver to poke at the surface. Soft or spongy areas may suggest rot, mold, or other hidden damage.
- Check for cracks: Hairline fractures can be signs of minor settling, while wider gaps may indicate more significant structural issues. Document and measure any cracks found.
- Inspect electrical outlets: Check if they’re tight against the wall and functioning properly. Loose or damaged outlets could hint at problems behind the scenes.
- Examine baseboards: Warped, cracked, or separated baseboards might indicate moisture issues, settling, or other underlying problems.
- Look for signs of pests: Holes, gnaw marks, or droppings can indicate the presence of rodents or insects. These could cause damage to the structure and should be addressed before proceeding.
Quick rule: If you find any of these issues, don’t ignore them. Addressing problems early can save you time, money, and headaches in the long run.
Using tests and measurements to pinpoint causes
Before you start any repairs, use this checklist to test and measure common concrete problems. This helps you understand the cause and avoid expensive rework.
- Check moisture content: Use a moisture meter to check if your concrete is too wet or dry. Too much moisture can lead to cracking and delamination, while too little can cause scaling. Aim for 4-6% moisture content.
- Measure joint spacing: Use a spacing gauge to ensure joints are properly spaced. Improper spacing can cause excessive cracking. The general rule is 24-30 times the slab thickness on center.
- Test for delamination: Tap the surface with a hammer. If it sounds hollow, there may be delamination – when the concrete separates from its base. This requires immediate attention to prevent further damage.
- Check for cracks: Inspect for hairline cracks (less than 0.1mm wide) and wider cracks. Hairline cracks can widen over time, while wider cracks may indicate structural issues that need professional inspection.
- Measure slab thickness: Ensure your slab is the correct thickness. Too thin slabs can crack under pressure, while too thick slabs can cause excessive curling and cracking at the edges.
- Check for curling: Look for edges lifting off the substrate. This is caused by improper curing or excessive drying. Curling can lead to cracking and delamination.
- Test for scaling: Use a wire brush to check if the surface flakes off easily. If it does, your concrete may be suffering from surface scaling, which requires immediate repair to prevent further damage.
- Check for discoloration: Discolored areas can indicate efflorescence (salt deposits) or other contaminants that can weaken the concrete over time. Clean and test these areas with a pH indicator to determine the cause.
Quick rule: If you find any of these issues, don’t rush into repairs. First, understand the root cause by checking local rules, manufacturer instructions, or consulting a professional. This ensures your repairs last and prevent further damage.
DIY Fixes for Common Problems (Step-by-Step Guidance)
Spot drying, replacing a damaged panel, and reseating fasteners are common DIY options when feasible. Start with the least invasive fix to preserve existing underlayment and structure. Follow safety guidelines for mold exposure and dust control during work.
Surface mold remediation should be done with the correct products and precautions; avoid disrupting the structural layer or creating new gaps. Always refer to the panel manufacturer’s instructions for approved repair methods and limitations.
Step-by-Step Repair Process
Follow these practical steps to fix common basement subfloor problems safely and effectively.
- Preparation: Safety first! Wear gloves, safety glasses, and a dust mask. Clear the area and turn off power to nearby outlets.
- Inspection: Revisit your initial diagnosis. Check for moisture, mold, movement, or delamination.
- Main Work: Address each problem one by one – dry out moisture, replace damaged panels, secure loose fasteners, etc.
- Cleanup: Sweep and vacuum the area. Dispose of any damaged materials properly.
- Final Checks: Ensure all repairs are secure and level. Recheck for signs of recurring issues.
Fixing isolated moisture damage and mold spots
Contain the affected area to prevent spread. Ventilate well before starting work.
Safety first! Wear protective gear – gloves, safety glasses, and a respirator rated for mold spores.
Dry out the area using fans or dehumidifiers. Clean with a solution of water and detergent, then apply an EPA-registered mold killer. Replace any damaged panels.
Repairing squeaks, gaps, and loose panels
Tighten loose fasteners first. If that doesn’t work, add shims or blocking to level the floor.
Use construction adhesive and screws to secure panels. Ensure they’re tight against each other and the framing below.
For persistent squeaks, apply a bit of wood glue into the gap, then drive a screw through the panel and into the joist below. Fill any remaining gaps with caulk or spackling compound.
Replacing delaminated or swollen panels
Remove damaged panels carefully, keeping the substrate intact. Scrape off any remaining adhesive and clean the area.
Inspect the joists for signs of rot or damage. If necessary, replace them before installing a new panel.
Apply construction adhesive to the substrate and joists. Align the new panel and secure it with screws. Ensure it’s level and flush with surrounding panels.
Preventive Measures and Best Installation Practices
Long-term prevention centers on controlling moisture beneath the subfloor and choosing appropriate underlayment. Ensure a solid, dry base and proper ventilation in the basement space. Good detailing at edges and joints minimizes future failures.
Use specified fasteners and adhesives, maintain correct expansion gaps, and manage humidity as part of ongoing maintenance. For installation specifics, consult product data sheets and follow any local installation standards.
Site prep and moisture management before installation
Before you start mixing concrete, ensure your site is ready. Here’s what to do:
Check base compaction. Your slab should be level and solid. Use a screed board and straight edge to check. If it’s not right, fix it now.
Moisture management is crucial. In basements or damp areas, install a vapor barrier. Check your local building codes for recommendations on materials and installation. Keep humidity below 60% before pouring. Use a hygrometer to monitor.
If you’re pouring over an existing slab, ensure it’s dry. Concrete doesn’t like moisture. If in doubt, test with a simple moisture meter from your local hardware store.
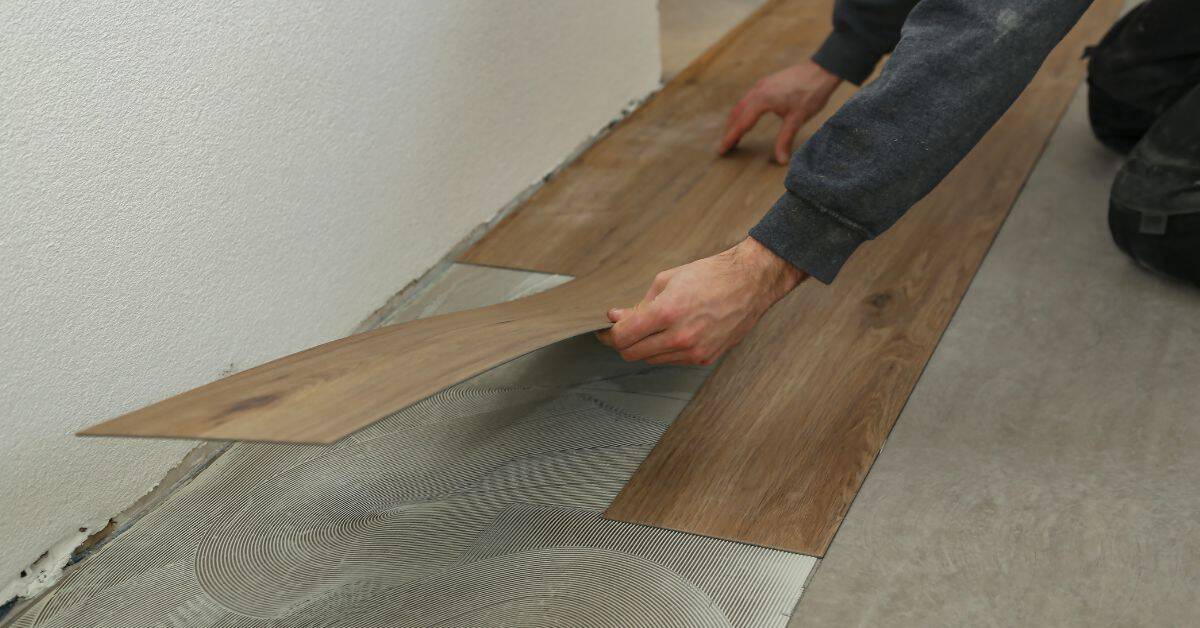
Installation details that reduce future repairs
Listen up, DIYers. Proper installation is your best defense against costly repairs down the road. Here’s what you need to focus on:
Spacing and Fastening Patterns: Don’t be stingy with those screws or nails. Follow manufacturer guidelines for spacing, usually around 6-8 inches apart. And don’t forget to stagger your fasteners in a ‘stair-step’ pattern for added strength.
Perimeter isolation is another must-do. It’s like drawing a line in the sand against moisture and bugs. Use foam or other approved materials to create a barrier around the edges of your concrete, keeping water out and pests away from your slab.
Follow Instructions: I know it’s tempting to wing it, but trust me, you’ll thank yourself later if you take the time to read those installation instructions. They’re there for a reason – to help you get it right the first time. So, grab a coffee and give ’em a good read.
When to Repair Vs. Replace — Decision Criteria and Cost/Time Considerations
Decide between repair and replacement by assessing the extent of damage and the presence of ongoing moisture. Small areas or isolated failures often respond to targeted fixes. Widespread issues or persistent moisture may require panel replacement.
Consider the long-term risk and potential hidden damage when choosing a path forward. Use the manufacturer guidance and local rules to inform timing, scope, and cost expectations before starting work.
Red flags that mean replacement is needed
If you spot any of these signs during your inspection, it’s time to consider full replacement.
Widespread mold: A few spots can be treated, but extensive growth indicates a recurring moisture problem that won’t go away with repairs alone.
Structural rot: If the subfloor has softened or crumbled under your touch, it’s structurally unsound and must be replaced.
Persistent moisture after mitigation: If you’ve addressed water issues before but they keep coming back, the subfloor may have been compromised, requiring replacement.
Repeated failures: If you’re constantly repairing the same areas, it might be more cost-effective to replace the entire subfloor to prevent ongoing maintenance.
Budgeting and timeline expectations
Before you start any work, understand what you’re getting into. Here’s what affects cost and schedule:
Access: If your basement is only accessible via a narrow staircase or through a small door, expect higher labor costs due to the extra time and effort required.
Extent of demo: The more panels you need to remove, the longer the job will take. Keep in mind that removing old subfloor can be messy and time-consuming.
Subfloor prep or waterproofing: If your basement needs additional moisture management measures before installing new subfloor, this will add to both cost and timeline.
To get accurate quotes, get multiple estimates from reputable contractors. Also, compare warranties – a longer warranty might mean higher upfront costs but could save you money in the long run.
Conclusion
Focus on getting a subfloor that stays dry, flat, and solid. A well-installed panel system protects the basement finish, reduces squeaks, and keeps moisture from sneaking into living spaces.
First, walk through a simple checklist: verify moisture levels and drape tests in the work area, confirm panel type and thickness, dry-fit the layout, fix any framing or plywood misalignments, seal joints and seams, fasten per spec with the correct connectors, then recheck for level and moisture before sealing or finishing. If anything shows water intrusion, soft spots, or uneven panels, address it before you proceed and test again after any fix.
Common mistakes to avoid include skipping a moisture test or barrier, using the wrong fasteners or an improper length, and over-tightening fasteners which can warp panels. Don’t cut corners on ventilation, drainage, or edge supports, and always test a small area first to confirm there’s no hidden rot or mold. If the project requires cutting or structural changes beyond basic fixes, or if you see persistent water problems, call a professional instead of forcing a DIY push.
When it makes sense to bring in an expert, do so early for complex framing, significant moisture issues, or panels that don’t stay flat after fixes. Stay methodical, document what you did, and you’ll finish with a durable, safe basement that looks right and lasts. You’ve got this—check, fix, seal, and verify, then move forward with confidence.
FAQ
How do I choose the right basement subfloor panel for my space?
Check the panel label and manufacturer instructions for moisture tolerance and installation method. Match the panel to your basement conditions and follow local rules or best-practice guidance. If in doubt, compare options and ask for exact recommendations from the supplier.
What should I look for during a moisture and vapor barrier check before installing?
Look for signs of dampness, standing water, or condensation on walls and floor. Ensure the vapor barrier is intact, properly overlapped, and installed according to the panel maker’s directions. If you’re unsure, review the product label or instructions for your setup.
What are the telltale signs a panel needs replacement rather than repair?
Watch for warped or delaminated panels, soft spots underfoot, or ongoing mold growth. If there are repeated failures in the same area after fixes, replacement is usually the safer route. Always verify with the panel’s manufacturer guidance.
How should I fix a panel that has minor gaps or unevenness?
Use approved shims or spreaders per the panel instructions to level the surface. Secure the panels with the recommended fasteners and check for movement after fastening. If gaps persist, double-check that you’re using the correct panel type and installation method per instructions.