

Introduction
Ice dams occur when melted snow refreezes at the eave, driving water against exterior stucco and risking damage. In winter, heat loss through the roof and improper insulation can fuel that melting, while lingering dammed water can seep behind the stucco. This article explains the problems, the common causes, and practical ways to spot signs early.
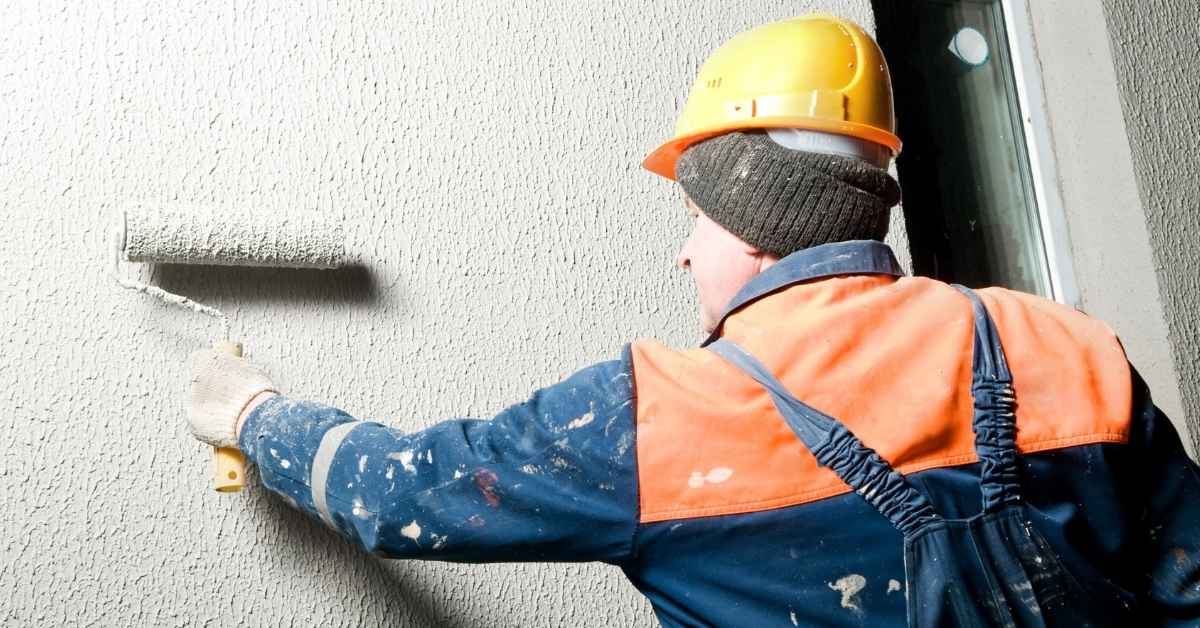
Testing for moisture in stucco can involve a simple moisture meter or probing for soft, damp areas, but follow product instructions and local rules. Fixes range from improving attic insulation and sealing leaks to addressing damaged stucco and applying proper flashing and waterproofing, but do not start work without understanding the area and safety considerations. Watch for health risks like mold or mildew and check label guidance or local codes before proceeding, and when in doubt, consult a professional.
Key takeaways
- Ice dams form when attic heat melts roof snow and refreezes at edges.
- Stucco cracks and voids invite moisture trapped behind siding during freeze-thaw.
- Moisture behind stucco leads to staining, rot, and potential mold growth.
- Use moisture testing methods like surface tests and probe readings to diagnose.
- During winter, apply temporary barriers and remove roof ice to reduce leaks.
- Never climb icy roofs; risk of falls requires proper fall protection.
- Consult professionals for long-term stucco and roof repairs; safety hazards exist.
Table of Contents
- Introduction
- Key takeaways
- How Ice Dams Form and Why Stucco Homes Are Vulnerable
- Typical Water Damage Patterns from Ice Dams on Stucco Walls
- Health and Indoor Air Quality Risks from Ice-Dam-Related Moisture
- Testing and Diagnostic Methods for Moisture Behind Stucco
- Immediate Fixes and Temporary Mitigation During Winter
- Permanent Repairs and Best-Practice Fixes for Stucco and Roof Systems
- Preventative Strategies, Maintenance, and Low-Cost DIY Options
- Insurance, Liability, and When to Hire a Professional
- Conclusion
- FAQ
How Ice Dams Form and Why Stucco Homes Are Vulnerable
Ice dams start with heat loss from the attic and roof. Snow on the roof melts as warm air escapes, then refreezes at the eaves to form a dam. Blocked drainage from clogged gutters or downspouts keeps meltwater from exiting the roof system.
Roof and attic conditions drive dam formation through heat-leak pathways, insulation gaps, and roof geometry that concentrates water at the edges. Stucco surfaces can be more vulnerable because of their porosity and moisture transfer pathways, which may hide hidden leaks behind the cladding. Check roof and gutter condition, attic ventilation, and fascia details that funnel water toward vulnerable edges, and look for early indicators like temperature differences or damp spots nearby.
Roof and Attic Dynamics
Ice dams start with heat loss from your roof and attic. Warm air rises, heating the underside of your roof. This melts snow on top.
Insulation gaps let more warm air reach the roof. Inadequate ventilation traps this heat. Meltwater runs down, refreezes at the colder eaves, forming ice dams.
The geometry of your roof can concentrate meltwater at edges, feeding ice dam growth. Proper insulation and ventilation are key to stopping this cycle.
Weather and Site Conditions that Increase Risk
Heavy, wet snow sticks together and doesn’t slide off. Freeze-thaw cycles turn meltwater into ice at the eaves. Warm days and cold nights create ideal conditions for ice dams.
Wind can blow snow onto your roof, increasing melt. South-facing roofs get more sun, melting snow faster. Steeper pitches send meltwater rushing down, forming larger dams.
These factors work together to increase the risk of ice dams. Understanding them helps you prepare.
Stucco-Specific Vulnerabilities
Stucco is porous. It absorbs water, letting it seep behind the cladding. Cracks in the finish let more water enter. Poor flashing details around windows and doors can channel water into your walls.
EIFS (Exterior Insulation and Finish Systems) stucco has drainage limitations. Water can get trapped behind it, causing hidden damage. Regular inspections are crucial to catch moisture intrusion early.

Typical Water Damage Patterns from Ice Dams on Stucco Walls
Water from ice dams enters through roof flashing, penetrations, and misaligned soffits, then moves into the stucco assembly and interior finishes. Water often travels to corners, window perimeters, and door openings where seals fail or are stressed. Exterior cracks and overhang gaps can guide moisture into the wall plane.
Expect progressive damage: surface staining and efflorescence, paint bubbling, darkening and mold, and eventual deterioration of paper-facing or gypsum layers. If behind stucco there is rot or soft substrate, framing may begin to weaken. External and internal checkpoints help identify leaks before structural concerns rise.
Exterior Signs and Failure Modes
Ice dams can cause visible damage to your stucco exterior. Here’s what to look for:
Staining and efflorescence indicate water intrusion. They appear as dark streaks or white, powdery deposits on the surface.
Hairline cracks may seem minor but can let in significant amounts of water. Delamination, where the stucco starts to peel off, signals severe damage and should be addressed immediately. Check your roof’s flashing too; if it’s damaged or improperly installed, it could be letting water in at corners and penetrations.
Misaligned soffits can also cause issues. Water may run behind them and find its way into the stucco assembly. Inspect these areas carefully during your seasonal inspections.
Interior Symptoms and Material Impacts
The material choices in your home’s construction can affect how water damage from ice dams manifests. Understanding this can help you identify problems early.
- Ceiling/wall stains: These are often the first signs of a leak. They may start small but can grow and spread over time. Look for stains that seem to be growing or changing shape.
- Peeling paint: This could indicate trapped moisture behind the surface, which can lead to mold growth and structural damage.
- Soft sheathing: If you notice any soft spots on your walls when you press on them, it’s a sign that water has gotten in and is causing rot.
- Plaster/stucco failure: Cracks or crumbling in interior plaster or stucco could indicate hidden damage behind the surface. Check these areas closely for any signs of moisture.
- Insulation: Wet insulation loses its insulating properties and can become a breeding ground for mold. If you suspect water intrusion, check your insulation’s condition.
- Wood framing: Rot in wood framing can compromise the structural integrity of your home. Check any exposed framing for signs of rot or damage.
Long-Term Structural and Aesthetic Consequences
Ongoing moisture from ice dams can lead to serious, long-term problems in your home:
Rot can spread throughout your walls, compromising the structural integrity of your home. It can also attract pests like termites and carpenter ants.
Loss of structural capacity occurs when framing members rot or become weakened by moisture. This can lead to sagging floors, cracked walls, and other serious issues.
Accelerated freeze-thaw deterioration happens when water enters the stucco assembly, freezes, and thaws repeatedly. This cycle can cause the stucco to delaminate and fall off, leaving your home vulnerable to further damage.
Devaluation/aesthetic degradation: Water damage can significantly decrease your home’s value. It can also make your home look unkempt and poorly maintained, even if you’ve addressed the underlying issues.
Health and Indoor Air Quality Risks from Ice-Dam-Related Moisture
Ice-dam moisture can lead to mold and microbial growth that triggers allergy or irritation symptoms, with children, seniors, and immunocompromised individuals at higher risk. Symptoms may include sinus or eye irritation, coughing, or headaches after exposure. Seek medical advice if symptoms persist.
Moisture pathways raise indoor humidity and can release compounds from spoiled materials, affecting air quality. Visible mold, musty odors, and damp insulation are red flags that urgent testing may be warranted. Protect occupants during remediation with proper filtration and containment when needed.
Mold Growth Timeline and Common Species
Mold can start growing within 24 to 48 hours after water intrusion, even under winter conditions. It thrives in damp, warm environments like your home’s interior.
Common indoor mold species linked to water damage include:
- Aspergillus: Found worldwide, it can cause allergic reactions and infections.
- Penicillium: Known for its blue or green color, it can cause allergies and asthma symptoms.
- Stachybotrys chartarum: Often called ‘black mold’, it produces mycotoxins that may cause severe health effects.
Note: All molds have the potential to affect your health, so don’t wait for visible growth or symptoms to act.
Indoor Air Quality and Symptom Checklist
Use this checklist when you suspect ice-dam moisture is affecting your IAQ:
- Musty odor: Persistent damp smell indicates mold or bacterial growth.
- Increased allergies: Sneezing, itchy eyes, runny nose after exposure to damp areas.
- Respiratory symptoms: Wheezing, coughing, shortness of breath, especially in vulnerable individuals.
- Headaches: Persistent headaches, especially in previously unaffected areas of the home.
- Window condensation: Excess moisture on windows indicates poor ventilation and high humidity.
- Wet or stained materials: Inspection may reveal damp insulation, drywall, or other building materials.
- Visible mold: Any visible growth requires immediate action.
- VOC odors: Strong chemical smells from spoiled materials can indicate hidden moisture damage.
Quick rule: If you notice any of these signs, or if symptoms worsen after spending time in damp areas, contact a professional immediately.
Interim Occupant Safety Steps
While waiting for testing or repairs, take these steps to protect your health:
Ventilation: Open windows and use fans to improve air circulation. If it’s too cold, run a dehumidifier.
Isolate wet zones: Close doors and vents to damp areas to prevent spores from spreading. Keep vulnerable individuals away from affected zones.
Temporary relocation: If possible, move vulnerable occupants (children, elderly, immunocompromised) to a dry, unaffected area of the home or temporarily relocate them until repairs are complete.
Do not: Do not paint over or cover up mold. Do not use bleach or other household cleaners on mold; they’re ineffective and can cause more harm than good.
Testing and Diagnostic Methods for Moisture Behind Stucco
Begin with non-destructive signs like staining, efflorescence, cracks, and patterns around penetrations. Note any soft or elastic areas that may indicate moisture behind the surface. Exterior checks should precede interior observations.
Use pinless meters and note relative humidity readings to establish baselines. Infrared thermography can help locate pockets without intrusion, guiding targeted invasive checks only where needed. Document findings clearly for assessment if remediation is required.
Non-Destructive Tools and Visual Checkpoints
Before you start poking holes, use these non-destructive tools and visual checks to locate moisture behind your stucco. They’re quick, easy, and won’t damage your walls.
- Infrared thermography: Shows temperature differences, helping spot moisture pockets. False positives can occur with poor insulation or drafts.
- Moisture meters (pinless): Measures moisture content without puncturing walls. Less accurate on thick stucco but useful for initial scans.
- Borescope inspections: Allows visual inspection of wall cavities through small holes. Minimally invasive, but still requires drilling.
- Exterior visual checks: Look for staining, efflorescence, cracks, and soft spots. Early signs of moisture damage.
- Interior indicators: Check for peeling paint, water stains, or musty odors inside. Moisture may have penetrated the wall.
- Relative humidity readings: Measure indoor humidity levels. High RH can indicate moisture problems but isn’t conclusive.
- Establish acceptable thresholds: Know what’s normal for your stucco assembly to better spot anomalies.
Quick rule: Always start with non-destructive tests. They’re cheaper, faster, and won’t damage your home.
Targeted Destructive Testing and Lab Analysis
Sometimes you need to dig deeper. Here’s how to take targeted samples with minimal damage:
Core samples: Remove small, strategic plugs from walls to test moisture content directly. Minimal intrusion but requires repair afterward.
Probe sheathing: Use a probe to check moisture levels in the wall’s structure. Less destructive than coring but may miss hidden pockets of moisture.
Bulk/surface swabs: Collect samples for lab mold analysis. Identifies mold species and concentrations, helping pinpoint sources.
Always target suspect areas based on initial non-destructive tests. Minimize cuts to diagnose extent accurately.
Interpreting Results and Establishing Cause
Now that you’ve collected data, let’s figure out what’s causing your moisture problems:
Moisture maps: Combine readings from pinless meters to create a map of moisture levels. Look for patterns indicating roof leaks or other sources.
Thermal anomalies: Compare infrared images with normal conditions to spot temperature differences. Moisture shows up as cooler spots in winter, warmer in summer.
Sample results: Lab tests reveal mold species and concentrations, helping pinpoint sources. Compare findings across samples to establish cause.
Distinguish ice-dam roof leaks from condensation, plumbing issues, or rising damp by comparing test data. Each has unique patterns and causes.

Immediate Fixes and Temporary Mitigation During Winter
Identify active entry points and apply temporary exterior seals around penetrations. Use compatible sealants for quick, non-structural stops to limit intrusion. Do not rely on these as permanent fixes.
Contain the interior by moving valuables, protecting floors, and using dehumidification. Ensure electrical safety while managing moisture and ventilation, and avoid creating new condensation sites by poorly balancing humidity and temperature.
Emergency Exterior Actions
First, prioritize safety. Don’t attempt to work on your roof if it’s icy or snow-covered without proper equipment and training.
Carefully remove snow from eaves and roof edges using a long-handled roof rake. This helps prevent ice dams from forming.
Clear gutters of debris and ensure downspouts are free-flowing to allow water to drain away from your home’s foundation. If necessary, create temporary ice-melt channels with calcium chloride or rock salt to guide water off the roof.
Be cautious when using heat cables or ice melt products. Follow manufacturer instructions and avoid damaging stucco or landscaping.
Interior Containment and Drying Tactics
Move valuable items away from affected areas to prevent water damage. Cover floors and furniture with plastic sheeting.
Use towels or absorbent pads to catch drips and place them strategically around the room. Set up a portable dehumidifier to reduce moisture in the air and prevent mold growth.
If using space heaters, follow safety guidelines: keep them away from flammable materials, use CO detectors, and never leave them unattended. Keep doors open to improve airflow but avoid cold surfaces condensing water.
Professional help may be required if water intrusion is significant or if you suspect structural damage. Don’t hesitate to call a professional restoration service.
Documentation for Insurance and Contractors
Photograph damaged areas from various angles, including close-ups of affected spots. Note dates when damage was first noticed and weather conditions at the time.
Keep records of temporary repairs made to prevent further damage. This includes materials used and any costs incurred.
Contact your insurance company as soon as possible to report the claim. Provide them with detailed documentation, including photos and notes. They may require additional information or an inspection by a claims adjuster.
When hiring contractors for permanent repairs, share your documentation with them. This helps them understand the extent of damage and plan their work accordingly.
Permanent Repairs and Best-Practice Fixes for Stucco and Roof Systems
Plan long-term roof and gutter fixes that address material condition, flashing integrity, and downspout routing. Tie these improvements to stucco moisture protection and proper drainage around openings. Ensure work respects local codes and warranty requirements.
Consider drainage-plane upgrades and wall assembly sequencing with venting and water-resistive barriers. Decide between patching or replacing stucco based on conditions, and ensure contractor qualifications and inspections align with project goals and insurance needs.
Roofing and Eave Detail Repairs to Prevent Recurrence
To stop ice dams from recurring, focus on your roof’s defense line. Start by inspecting your roofing material. If it’s worn or damaged, replace it.
Ice-and-water shield should be added along the eaves and in valleys to prevent water intrusion. Ensure your insulation and ventilation are up to par. Proper attic ventilation keeps temperatures consistent, reducing ice dams’ likelihood.
Consider installing heated cables judiciously on problem areas, but remember they’re a band-aid, not a cure. Lastly, ensure gutters and downspouts function properly, routing water away from your home’s foundation.
Stucco Repair Techniques and Sequencing
Repairing stucco involves careful sequencing to prevent trapping moisture. First, address hairline cracks. Use a flexible patching compound that can handle movement.
For delaminated finish, remove the damaged area, apply a bonding agent, and replace with new stucco. Ensure your flashing and water-resistive barrier (WRB) layers are intact or replaced as needed.
Before reconstruction, let the wall dry out. Moisture meters can help determine when it’s safe to proceed. Always reconstruct from the bottom up, ensuring proper weep/venting details at the base.
When to Rebuild vs. Repair
The extent of damage determines whether to repair or rebuild your stucco system. If sheathing and framing are extensively damaged, consider a full removal and reinstallation.
Widespread mold growth may warrant a full rebuild. Repeated failures despite repairs might also indicate it’s time for a new system. Consult EIFS/stucco specialists. They can provide expert guidance based on your specific situation.
Remember, partial repairs can trap moisture and lead to further damage if not done correctly. Always consider the long-term implications of your repair decisions.
Preventative Strategies, Maintenance, and Low-Cost DIY Options
Develop an annual preventive maintenance calendar with simple ratings to prioritize tasks. Focus on fall prep, winter checks, and spring inspections tailored to stucco and ice-dam risk. Use clear verbage to guide what to tackle first.
Implement risk reduction like improving attic insulation and air sealing, clearing eaves and downspouts, and maintaining proper drainage away from the foundation. Include DIY steps that are safe and effective, plus a practical tools-and-materials list for common tasks.
Annual and Seasonal Maintenance Checklist
Use this checklist to keep your stucco exterior in tip-top shape, preventing ice dams and water damage. Inspect these areas each fall and after major storms.
- Inspect sealants: Check for cracks or gaps around windows, doors, and other penetrations. Seal any openings with compatible caulk to prevent water intrusion.
- Check flashings: Ensure metal flashings around chimneys, vents, and skylights are secure and in good condition. Replace or repair damaged flashings to keep water out.
- Clean gutters: Remove debris from gutters and downspouts to ensure proper water drainage away from your stucco exterior. Clogged gutters can cause ice dams and water damage.
- Inspect attic insulation/ventilation: Ensure your attic is well-insulated and properly ventilated to prevent heat loss and ice dam formation on the roof edge.
- Check exterior finishes: Inspect your stucco exterior for any cracks or damage. Reseal as needed to maintain a water-tight barrier.
- Inspect eaves and overhangs: Ensure there’s no debris buildup in eaves and overhangs that could cause ice dams during winter.
- Verify roof edge ventilation: Check for proper ventilation at the roof edges, such as continuous soffit vents or ridge vents. Adequate ventilation helps prevent ice dams.
- Ensure proper drainage: Make sure downspouts are directing water away from your stucco foundation to prevent moisture buildup and damage.
Quick rule: Regular maintenance is key to preventing ice dams and stucco water damage. Don’t skip these checks!
Low-Cost DIY Fixes for Small Homes and Budgets
Tighten your budget without compromising on ice dam prevention with these practical, safe DIY fixes.
Boost attic insulation: Add or replace old insulation in your attic to improve energy efficiency and reduce the risk of ice dams. Use a moisture meter to ensure no existing moisture issues before adding new insulation.
Install simple ridge/soffit vents: Improve attic ventilation by installing low-cost ridge vents or continuous soffit vents. Proper ventilation helps maintain a cold roof and prevents ice dams.
Reseal around penetrations: Inspect and reseal any gaps around plumbing, electrical, or other penetrations in your stucco exterior to prevent water intrusion. Use compatible sealants for your stucco type.
Use temporary gutter extenders: If downspouts are too short, use inexpensive extensions to direct water further away from your foundation and prevent moisture buildup.
Tools and Materials Checklist
Use this checklist to gather essential tools and materials for inspecting and performing simple repairs on your stucco exterior. Some tasks may require professional help.
- Caulk guns: Essential for applying sealants to fill cracks and gaps in your stucco exterior.
- Exterior sealants: Choose compatible sealants based on your stucco type (e.g., acrylic, silicone, or polyurethane).
- Gutter cleaning tools: Use a trowel or gutter scoop to remove debris from gutters and downspouts.
- Ladder safety gear: Ensure you have a stable ladder with non-slip feet for safe access to your roof and exterior walls.
- Protective eyewear: Wear safety glasses or goggles when performing tasks that generate debris or involve hazardous materials.
- Gloves: Use work gloves to protect your hands from cuts, scrapes, and chemicals during repairs.
- Moisture meter or indicators: Quickly check for moisture behind your stucco exterior with a simple, non-destructive moisture meter or wet-dry indicator.
- Basic caulking/scraping tool: Use a putty knife or similar tool to remove old caulk and prepare surfaces for resealing.
- Garden sprayer or brush (for water repellents): Apply non-toxic water-repellent coatings evenly across your stucco exterior using a garden sprayer or brush.
Quick rule: While these tools and materials can help you perform simple repairs, some tasks may require professional assistance. Know your limits!
Insurance, Liability, and When to Hire a Professional
Understand how insurance typically handles sudden versus gradual damage and what exclusions might apply to ice-dam related water intrusion. Review riders and policy language to know what could be covered. Clarify expectations with your insurer early on.
Gather documentation for claims, including photos, timelines, readings, and contractor assessments. Verify contractor credentials, including stucco experience and insurance coverage, and know when to call a professional for immediate action or a formal assessment.
How Insurance Typically Treats Ice Dam and Stucco Damage
Insurance policies often cover sudden damage from ice dams, like a roof collapse. But gradual water intrusion is trickier. Review your policy: it might exclude or limit coverage for slow leaks.
Timely mitigation is key. If you notice water damage, act fast to prevent further issues and document everything. Keep records of repairs, estimates, and correspondence with adjusters.
Ice dam-related claims require solid evidence. Take photos, measure moisture levels, and get professional assessments. This helps prove the cause and extent of damage.
Choosing Qualified Contractors and Inspectors
Hire certified professionals for repairs. Look for:
- Licensing: Check your state’s requirements.
- EIFS/Stucco experience: They should know stucco systems inside out.
- Moisture intrusion certifications (e.g., IICRC): This shows they can handle water damage.
- Insurance/GAP coverage: Protects you if something goes wrong.
Vet bidders: Ask about their process, materials, and warranties. Red flags include lowball bids or vague plans.
Cost Considerations and Planning for Repairs
Repair costs vary. Factors include:
- Scope: The extent of damage affects the price.
- Materials: Quality materials cost more but last longer.
- Access complexity: Hard-to-reach areas increase labor costs.
Plan ahead: Prioritize repairs based on urgency and potential further damage. Get multiple estimates to compare prices and approaches.
Before signing any agreement, ensure you understand the work scope, timeline, and payment terms. This helps avoid surprises down the line.
Conclusion
Winter ice dams are a real risk to stucco walls, but with practical steps you can protect safety, appearance, and long-term durability. Focus on solid diagnostics, controlled fixes, and clear priorities so moisture doesn’t take hold.
Start with a simple, practical checklist: assess safety first, shut off or isolate any damp zones, clear roof edge blockages and manage ice where you can from ground level, inspect for visible staining on stucco, test moisture behind a small area before committing, and apply temporary mitigation to limit water entry. Then plan permanent repairs in stages: fix drainage and insulation, repair damaged stucco and flashing, and schedule roof-system improvements when winter passes. Keep the area dry and monitor any changes after a thaw or a rain event.
Common mistakes to avoid are rushing quick fixes that don’t address drainage, using improper sealants or coatings behind the stucco, and pushing on with major repairs in wet, icy conditions. Remember: work from a safe, dry spot, avoid stepping on unstable or loose stucco, and wear eye and hand protection. Don’t neglect testing in a small area first and don’t ignore indoor moisture warnings or signs of mold.
If the damage is widespread, moisture behind the wall is confirmed, or mold appears, don’t push ahead alone. Call a professional to assess structure, insulation, and flashing, and to plan permanent, code-compliant repairs. With careful steps and timely help when needed, you can restore safety and keep your stucco and roof system dry—and you can sleep well knowing you’ve got a solid plan in place.
FAQ
What causes ice dams and how do they damage stucco on a winter day?
Ice damming starts when heat escapes from the attic or roof edge, melting snow that refreezes at the eave. The freeze-thaw cycle pushes water behind the stucco, leading to staining, moisture behind walls, and possibly bubbling or cracking paint. Keep heat loss low and roof edge clean to slow the process.
How can I test for moisture behind stucco without tearing into the wall?
Use a moisture meter or a dampness tester on accessible areas of the stucco. Look for higher readings near areas with staining or peeling. If you suspect hidden moisture, call out a professional for non-destructive testing methods like infrared or moisture profiling.
What health risks should I watch for with water-damaged stucco?
Excess moisture can foster mold growth and dust from degraded materials. Watch for musty smells, staining, or visible mold. If you see symptoms, address ventilation and moisture sources right away to reduce indoor air risks.
What practical steps can I take to prevent winter stucco damage?
Improve attic insulation and seal the roof-to-wall transition to limit heat escape. Clean gutters, remove ice buildup near the edge, and ensure proper ventilation above the attic and under the roof. Use manufacturer guidance for any sealants or coatings, and avoid improvised fixes that trap moisture.