

Table of Contents
- Why WRB Integrity Matters Before Stucco
- When to Use Liquid Flash vs. Tape or Full Panel Repair
- Recommended Liquid Flash Products and Compatibility Matrix
- Tools, PPE, and Materials Checklist
- Step‑by‑Step Repair Method for Small Punctures (Exact Technique)
- Curing, Environmental Limits, and Inspection Criteria
- Integration with Stucco Lath and Finish Work
- Troubleshooting, Common Mistakes, and Corrective Actions
- Code, Manufacturer Recommendations, and Warranty Considerations
- Cost, Time Estimates, and Job Planning
- Long‑Term Durability Expectations and Inspection Checklist Before Stucco
- Appendix — Quick Decision Flowchart and FAQ
Introduction
Patch small WRB punctures with liquid flash before re-stucco to restore waterproof integrity and prevent water intrusion. The guide walks you through practical steps, from prepping the puncture and applying liquid flash to smoothing, curing, and testing the seal before stucco work. You’ll learn how to choose suitable products, avoid common mistakes, and achieve a durable, weather-resistant repair. Where product-specific numeric targets are required (wet-film thickness, cure times, primers, part numbers), the text calls out the need to follow that product’s datasheet and provides actionable, repeatable verification methods you can use on site.
Why WRB Integrity Matters Before Stucco
A water-resistive barrier (WRB) sits behind the stucco to block bulk moisture while still allowing drainage, forming a continuous layer in the wall assembly that protects sheathing and framing from upstream leaks and seasonal moisture movement. Even small punctures compromise the drainage plane by enabling capillary draw and wind-driven rain intrusion, which can lead to hidden moisture, rot, mold, and eventual stucco failure if not repaired before lath is installed. Patch these punctures with Liquid Flash after proper surface prep, ensuring a clean, dry area, and integrate the patch with the surrounding WRB so the lath can be installed on a continuous, compatible surface without creating new voids.
Before patching, perform a careful check to locate all punctures, confirm WRB continuity around the area, and verify there is no concealed moisture behind the barrier that could undermine the repair. Liquid Flash is chosen because it adheres well to common WRB materials, creates a durable, weather-ready seal on clean surfaces, and negotiates compatibility with tapes and lath prep used in typical stucco assemblies. Follow proper sequencing by patching prior to lath and stucco, resealing with compatible tape if required, and rechecking moisture and drying conditions so the system remains sound after reapplication of stucco.
Common WRB types and how they behave (ZIP, Tyvek, housewrap, self-adhered)
ZIP System sheathing has an integrated water-resistive barrier that depends on taped seams. It’s low-perm compared with Tyvek, so make sure the taped joints are continuous and the tape is fully adhered before you put on lath or stucco. If you find gaps or bubbles in the tape, re-tape and seal—don’t assume the sheathing alone will stop water behind stucco.
Tyvek and similar spunbond housewrap are highly vapor-permeable and do well behind stucco for drying, but they puncture easily from fasteners, cutting, and rough handling. Inspect for holes, staple runs, and rips; every puncture is a potential leak path unless you patch it with compatible tape or a seam patch. Don’t rely on a few staples to hold the wrap—secure edges and overlaps properly so flashing can do its job.
Self-adhered membranes stick tight and resist wind-driven rain, but adhesion is the issue: cold surfaces, dust, or uneven sheathing will compromise the bond. They’re less tolerant of rough treatment at the lath stage, so avoid tearing during attachment and check adhesion around windows and corners. If in doubt, pull back a small area to verify bond and repair any loose spots before stucco goes on.
How small punctures cause big problems with stucco systems
Tiny holes in the WRB look harmless, but stucco is unforgiving. Capillary action pulls water through the smallest gaps in the wrap and mortar. Over time that moisture soaks into studs, sheathing, and the stucco backing, then rots framing or grows mold behind the finish.
Wind-driven rain forces water through punctures and around imperfect flashings. Even a small tear that bypasses a flashing or drainage layer turns that wall into a wet trap when storms hit. You don’t need a shredded housewrap to have a failure — a few pinholes in the wrong spot are enough.
What to do: walk the wall and inspect and repair any tears, nail pops, or gaps where flashing laps. Pay special attention at windows, penetrations, and the base of the wall. If the WRB type was covered earlier, use the manufacturer’s patch method for that product. Don’t skip sealing details — a quick fix now beats tearing off stucco later.
When to Use Liquid Flash vs. Tape or Full Panel Repair
Use a quick decision framework that weighs hole size, location on the wall (exterior corners, joints, or flat surfaces), and how long the exposure will be before stucco is reapplied, then choose liquid flashing, flashing tape, or a full panel replacement accordingly, while accounting for WRB type and relevant warranty or code requirements. Compare liquid flashing to flashing tape in terms of performance, curing needs, UV tolerance, and compatibility with self-adhered versus fluid-applied WRB systems, so you can match the method to the system in use. If a hole or damage surpasses defined thresholds or risks structural integrity, water intrusion, or warranty compliance, replace the damaged panel and consider how that decision aligns with code cycles and manufacturer specifications.
This matters on the jobsite because it translates into actionable checks: inspect surface cleanliness and accessibility for application, verify a suitable weather window before re-stucco, and plan around the WRB’s compatibility to avoid voided warranties or failed seals. Understanding the practical criteria helps DIYers avoid blistering or delamination from improper sealing and sets up a straightforward path for post-patch inspection or recertification. In short, the right choice minimizes future leaks, protects the WRB system, and supports long-term cladding performance within local code expectations.
Size and location thresholds (what counts as a “small puncture”)
If you can cover the hole with your fingertip and it’s under about 1/4 inch (6 mm) in diameter—think nail or small screw holes—that’s a small puncture suitable for liquid flash alone if the surrounding substrate is sound. Anything between 1/4″ and 1/2″ (6–12 mm) should get liquid flash plus a patch of approved flashing tape or fabric; anything over 1/2″ (12 mm) or any visible ragged tear, dent, or missing fastener should be considered for panel replacement or professional repair.
Location matters as much as size. A hairline or 1/4″ hole in the middle of a flat panel that doesn’t sit in a drip path is low risk. The same-size hole at a lap seam, roof edge, gutter turn, near a vent penetration, or in a high-traffic walk zone is not low risk. If the puncture is closer than a couple inches to a seam or fastener line, or if water pools there, escalate to a taped patch or full panel repair.
When in doubt, measure and test: press a clean tissue over the hole during a light spray or pour a little water on the area and watch for leaks inside. If the damage is larger than 1/4″ but under about 1/2″, or if the panel is dented or the coating is compromised, plan for a patch rather than just liquid. For anything over 1/2″, multiple fasteners missing, or if the structural edge is damaged, stop and arrange a larger repair or panel replacement—cheap fixes there will cost you later.
Compatibility and warranty implications
Different housewrap and zip systems have different rules. ZIP panels, Tyvek and other brands publish specific approved flashing tapes, liquid membranes and primers. Before you reach for a tube of generic liquid flash, check the manufacturer’s installation guide. Using unapproved products can void the warranty even if the patch looks fine.
For small punctures you may remember the size thresholds discussed earlier; that helps decide whether to liquid flash or replace a strip. Beyond that, match materials: same-brand tape or the manufacturer-approved liquid flashing, and the right primer if required. Don’t mix adhesives that aren’t approved together — incompatible solvents and sealants are a common cause of failures and denied claims.
Document what you do. Take photos, keep receipts and note product codes. If you’re unsure, call the manufacturer’s tech line before you repair. That simple step buys you coverage and avoids redoing work later because the warranty was voided.

Recommended Liquid Flash Products and Compatibility Matrix
This section lists widely used liquid flash products (brand examples) and pairs them with a compatibility matrix for common WRBs, so patching small punctures is predictable across ZIP System, Tyvek, conventional housewraps, and self-adhered WRBs. It covers surface prep needs, primer requirements, thickness targets, and cure times, plus guidance on skim coats versus full-coverage applications. A quick-reference framework helps installers choose the right product for each patch scenario.
Brands like RedGard, Sika, Henry, Prosoco, and MAPEI serve as practical patch options for small WRB punctures, with notes on where each excels and where limitations apply. The guide highlights prep steps, weather windows, and tack/curing times that influence re-stucco workflows, plus compatibility caveats with metal lath, lime plaster, or cementitious patches. Use the included quick-checks and at-a-glance recommendations to determine surface cleanliness, dry-time before stucco, and whether flashing tape or additional waterproofing is needed after patching.
Product selection by substrate and climate (recommended choices)
Pick products by matching substrate first and climate second. For concrete and masonry in cold climates choose a solvent-based elastomeric flash—it bonds when temperatures are low and stays flexible through freeze/thaw. For wood, use a water-based acrylic with a primer; it breathes and won’t trap moisture. For metal and PVC, lean to solvent-based systems formulated for plastic/metal adhesion and follow the cure times listed in the compatibility matrix above.
In hot, dry conditions an acrylic or water-based elastomeric will perform fine, but watch pot life and application thickness—heat speeds curing and can cause pinholes. In humid environments avoid solvent systems that can blush; use humidity-tolerant water-based formulations and allow longer dry times. If you must choose one all-around product for mixed jobs, a high-quality elastomeric with proven adhesion to your substrates is the safest bet.
Before you buy, do three quick checks: match product to substrate, confirm the manufacturer’s low-temp or high-humidity rating, and verify primer need against the compatibility matrix. Don’t skimp on surface prep or ignore cure time — wrong choice or rushed installation is where most failures start.
Quick compatibility chart (when not to use certain liquid flash)
Don’t pour a solvent-based liquid flash over a solvent-sensitive adhesive or fresh asphalt. You’ll dissolve the adhesive and end up with a mess. If the product matrix recommended a water‑based choice for that substrate and climate, stick with it — don’t substitute because you “want faster cure.”
Avoid water‑based liquid flash on oily, contaminated, or uncured surfaces; it won’t bond and will blister. Also skip solvent formulas on PVC and some factory-coated metals unless the manufacturer explicitly lists them as compatible. When in doubt, grab the product datasheet or use a compatible primer first — a quick adhesion test will save you hours and cash.
Check surface temperature and moisture before you apply. Cold, wet, or freshly installed membranes change what will work. If your job has mixed materials, separate the problem areas and use the product the matrix recommends for each one rather than one product for everything. If you see any doubt, pick the safer compatible option listed in the Recommended Liquid Flash Products and Compatibility Matrix or call the tech rep. Test adhesion and read the label — shortcuts here mean rework later.
Tools, PPE, and Materials Checklist
This section provides a concise checklist of the tools, PPE, and materials you need to safely patch small WRB punctures. Essential tools include cutting and trimming tools, putty knives, a stiff brush, mixing tray, brush or roller for liquid flash, a caulking gun if applicable, and a clean-up rag or sponge, plus patch fabric or WRB-compatible repair tape and patch mesh. It also highlights surface prep basics such as keeping the puncture dry and clean, removing loose debris, checking for moisture or mold, verifying product compatibility, and following a practical patching workflow from cleaning and priming to embedding the patch and curing.
Understanding the PPE specifics and consumables helps you work safely and achieve a durable seal that resists weathering and moisture intrusion. Knowing the expected workflow and surface checks reduces rework by ensuring proper prep, compatibility, and curing windows, which is crucial on a DIY or jobsite with variable conditions. Estimate quantities per puncture and plan for an extra margin, then store products upright in a cool, dry place with sealed lids and awareness of expiration to avoid waste and failed repairs.
Safety and VOC guidance
Wear the right PPE. For solvent-based products use a NIOSH‑approved organic‑vapor cartridge respirator with P100 pre-filters (example: half-mask with OV/P100 cartridges). For water‑based products or low‑VOC tasks an N95 or P100 particulate respirator is acceptable. Wear solvent‑resistant gloves (nitrile or butyl), splash goggles or sealed eye protection, and long sleeves. If sanding or abrading, use eye protection and a dust respirator rated for silica/allergen exposure.
Run real ventilation. Open windows and create a cross‑breeze. Use a box or inline fan to push fumes outdoors, not just a circulating fan. Work in short shifts if ventilation is marginal and run fans for at least 20–30 minutes after you finish to clear lingering VOCs.
Handle and discard solvents like you mean it. Store solvent‑soaked rags in a labeled metal can with a tight-fitting lid and handle as combustible waste; do not leave them balled up in open trash. Drain small leftover containers into their original labeled containers when possible and consolidate partially used solvent cans for proper disposal. Take leftover cans, contaminated rags, and primers to your municipality’s household hazardous waste (HHW) drop-off—many jurisdictions accept small contractor quantities. Do not improvise disposal—it’s illegal and dangerous.
Optional tools for cleaner results (brush types, putty knives, primers)
These extras aren’t strictly required, but they make feathering and bonding liquid flash look professional. Pick the right brush, blade, and primer and you’ll waste less product and get fewer callbacks.
- Angled sash brush — Great for cutting in edges and feathering thin coats of liquid flash. Use a 2–2.5″ synthetic angled brush for control; natural bristles will fall apart with solvent-based products. Optional and cheap (under $10); using the wrong bristles can leave hairs in the membrane and ruin adhesion.
- Nylon/polyester brush — Stiff synthetic brushes spread thicker material and help work primers into porous surfaces. Look for medium-stiffness filaments and a comfortable handle; a cheap homeowner brush is fine. Rent or buy for under $15; wrong stiffness leaves streaks or poor bond strength.
- Foam micro-roller — Smooth rollers help lay down an even skim coat without brush marks. Choose a 4–6″ closed-cell foam roller with a short nap; avoid fuzzy covers that trap air. Optional and cheap (about $8–20); fuzzy rollers can trap air bubbles and weaken the membrane.
- Flexible putty knife — Use a 3–6″ flexible blade to feather edges and press membrane into corners. Stainless or high-quality alloy with a thin flexible blade is best; a rigid knife will gouge. Buy for $5–20; using a rigid blade can tear the flash and create leaks.
- Stainless trowel — For smoothing and finishing larger feathered areas, a 10–12″ stainless trowel gives a flat, consistent finish. Look for a rounded leading edge and good balance; cheap warped trowels leave ridges. Rent or buy for $20–60; warped tools cause thin spots and premature failures.
- 3″ Foam brush — Quick, disposable option for tight spots and touch-ups where rollers can’t reach. They cost just a few dollars and are fine for solvent or water-based flash products; don’t try to reuse sloppy brushes. Cheap and disposable; reusing contaminated foam can introduce contaminants and hurt adhesion.
- Bonding primer — A compatible primer tacks down dust and improves adhesion of liquid flash to porous surfaces. Follow manufacturer spec for type (acrylic or solvent-based) and dry times; wrong primer voids the product warranty. Buy for $15–40; using the wrong primer reduces bond strength and leads to delamination.
Pro tip: Match brush and blade stiffness to the product and surface—soft brushes for thin coats, stiffer for primers and thicker flash. Rent the big metal tools if you don’t use them often, but buy good brushes and a proper primer; cheap shortcuts here will cost you in callbacks and repairs.
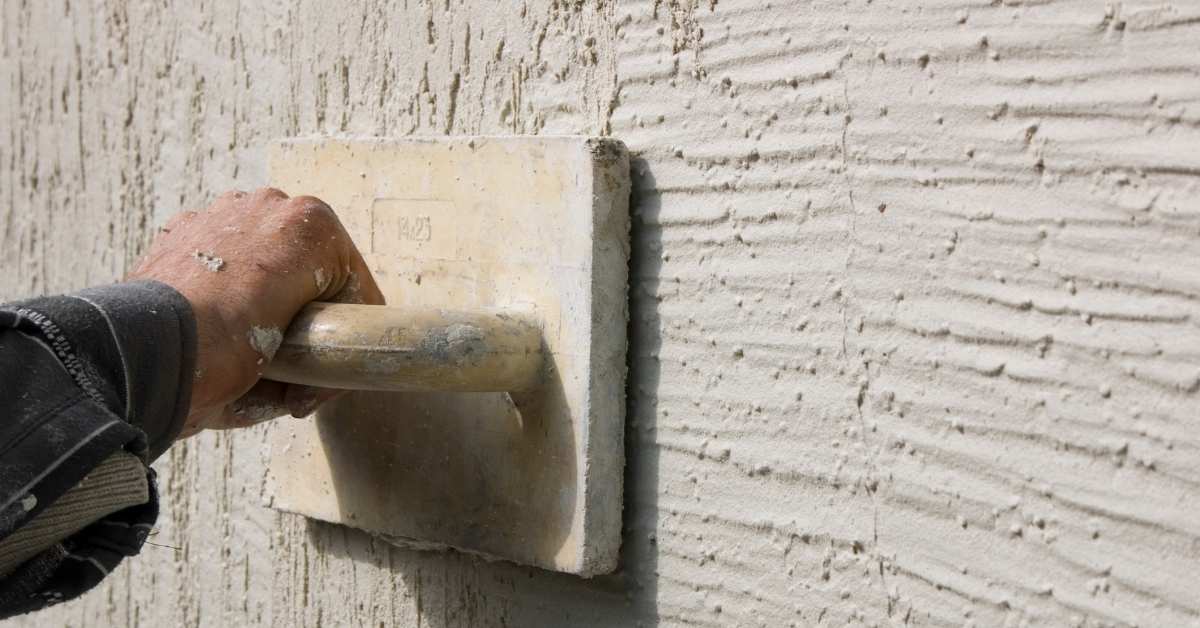
Step‑by‑Step Repair Method for Small Punctures (Exact Technique)
The original “exact technique” block has been replaced with a clear, measurable procedure. Where product datasheets specify different numbers, follow those values. Example numeric targets below are typical, repeatable ranges—confirm with the product technical data sheet (TDS) for the exact product and substrate.
Surface prep: cleaning, drying, and priming for best adhesion
1. Remove loose material and contaminants: brush away fibers and dust with a stiff brush. Wipe the area with an appropriate cleaner—use soapy water for general dirt, isopropyl alcohol for light oils, or the specific solvent recommended by the liquid flash manufacturer for grease. Do not use solvent cleaners that the WRB maker forbids.
2. Dry thoroughly: allow the area to air dry. Use warm air (hair dryer on low, held at least 6–8″ away) only if manufacturer permits. Confirm dryness with a hand or a moisture meter: wood sheathing should read under 16% moisture content before sealing; other substrates should be surface-dry with no darkening.
3. Prime when required: if the substrate is porous, chalky, or the TDS calls for a primer, apply the manufacturer-approved primer and observe the specified dry/tack time. When in doubt, prime—it’s inexpensive insurance against adhesion failure.
Application technique: measurable targets, number of coats, and feathering
1. Bond coat (first coat): use a brush to work a thin bond/slurry coat into the puncture and immediate surrounding area (extend at least 2–3 inches radially). Typical wet-film target for the bond coat: 6–10 mils WFT (0.15–0.25 mm) to key into fibers and edges—confirm on product label.
2. Build coats (bulk/finish coats): apply one or two additional coats to reach the product’s recommended total thickness. Typical total wet-film thickness (WFT) for a small puncture patch is 20–40 mils WFT (approx. 0.5–1.0 mm) depending on product. Do not attempt final thickness in a single pass—apply 2–3 lifts, allowing the specified recoat time between lifts (commonly 30 minutes to 2 hours tack-time for fast-setting products; longer for water-based systems). Always follow the product’s stated recoat and pot-life limits.
3. Feathering: feather each coat at least 2–3 inches beyond the hole to produce a tapered edge. The final feather must be thick enough to provide a tooth for the metal lath—avoid feathering to a paper-thin edge. Use a trowel or flexible putty knife to smooth the transition and remove pinholes.
4. Tool selection: use a small angled sash brush for the bond coat, a foam roller or trowel for the bulk coat, and a flexible putty knife to feather. Avoid overworking a coat once it begins to skin over—lift the next coat only when the previous coat has reached the manufacturer’s recommended recoat window.
Measurable verification and testing
1. Visual/tactile check: the cured membrane should be uniform in color and texture with no pinholes, blisters, or lifted edges. The feathered edge must be continuous and adhered.
2. Tack test: place a clean piece of polyethylene or a strip of tape on the patch and peel it after the manufacturer’s stated tack-free time. No material should transfer; if transfer occurs, continue curing or remove and reapply.
3. Adhesion test (simple field method): use a 1″ wide strip of compatible flashing tape applied to the cured flash, press firmly, then peel at 180°. A properly cured product will not delaminate from a sound substrate. For more rigorous verification, arrange a pull-off adhesion test per ASTM D4541 or follow the product TDS for acceptable pull values—document results for inspectors or warranty claims.
4. Spray leak test: after full cure, perform a light spray test (garden hose, low-flow sprayer) for 1–2 minutes over the patched area while an assistant checks the interior or behind the WRB for leaks. No water should penetrate. Repeat test after 24 hours to confirm.
5. Moisture verification: if concerned about substrate moisture, use a pin-type or pinless moisture meter. Wood sheathing should read under 16% MC before enclosing. Record readings and include them in your repair documentation.
Final notes for the exact technique
– Always follow the product TDS for wet-film thickness, recoat intervals, pot life, and low-temperature limits. The numeric ranges above are typical; your product may differ.
– Keep an on-site copy or a URL to the product datasheet. If you use a product outside the manufacturer’s recommended conditions, you risk reduced adhesion or voiding warranties.
– Photograph each step: pre-clean, bond coat, each lift, and final cure for warranty and inspection records.
Curing, Environmental Limits, and Inspection Criteria
Cure timelines vary by Liquid Flash product type used for WRB patching, with open time and full cure duration defined under typical conditions, along with clear minimum temperature and humidity thresholds that guide application and curing windows. Environmental limits such as temperature swings, rainfall exposure, and high humidity are identified as factors that can degrade patch performance and require postponing re-stucco work. Inspection criteria specify surface dryness, color change, film integrity, continuous coverage to the edges, absence of pinholes or cracks, and proper adherence to the WRB substrate prior to lath installation.
These details help you plan and verify work on the jobsite, reducing rework and improving long-term durability by focusing on practical steps like visual checks, tack tests, moisture or adhesion methods, and documentation of cure progress. Understanding compatibility with lath, plaster mix, and subsequent coatings, plus defined corrective actions if cure is inadequate, gives you a clear path to address failures or rework without guesswork. This ensures that a patched WRB interface remains sound through inspection, weather exposure, and the stresses of subsequent finishes.
How long to wait before installing metal lath and stucco scratch coat
If you’re fastening lath to wood sheathing, housewrap, or properly cured cement board, you can install the metal lath right away and usually apply the scratch coat the same day or within 24 hours if the liquid flash product indicates it’s tack-free and the feathered edge is firm. For warm, dry conditions (50–90°F, low humidity) the scratch coat will take a firm initial set in 24 hours and be ready for the brown coat in 24–72 hours. Don’t dawdle over complicated checks—just make sure flashings are in place and check base compaction and fastener spacing before you start.
New concrete or CMU walls need longer. Wait a minimum of 7 days for new concrete or block to dry and stabilize before you attach lath and apply scratch coat; 14 days is safer for high-moisture pours, and 28 days is ideal when you can afford to wait. If ambient temps are below 40–45°F or humidity is high, add extra time—curing slows a lot under those conditions.
If you must accelerate curing, use warm mixing water, temporary heated enclosures, or approved accelerators from the cement supplier—but follow limits and manufacturer instructions (too much accelerator weakens the plaster). Keep the area above freezing and ventilated for the first 48–72 hours. Bottom line: don’t rush substrates that are still wet, and avoid shortcuts that save a day but cause blowouts or delamination later.
Visual and tactile inspection checklist
Look first with your eyes. The patch should show even color and texture across the repair — no shiny spots or dark wet areas. Inspect the edges: they must be feathered into the surrounding substrate with no obvious steps or gaps. If you see cracks, lifts, or blisters, stop and re-evaluate before any metal lath or scratch coat goes on.
Then feel it. Press with a fingernail and run your hand across the surface. You should find no tackiness, a firm surface with no soft spots, and a continuous film—not flaky or powdery. Check the feathered transition too; the patch should be tied in, not sitting on top. Small bubbles or lifts under the surface are a fail.
Tap lightly with your knuckle or a small tool — a solid, dull sound means good adhesion; a hollow ping means a delamination risk. Remember the timing and environmental limits covered earlier: if the patch is still curing or conditions were outside limits, don’t rush to install lath or stucco scratch coat. When in doubt, wait longer or cut out and redo the repair; getting it right now saves a mess later.
Integration with Stucco Lath and Finish Work
Liquid flash patches must bond securely to metal lath without allowing lift, pinholes, or gaps as the lath assembly is installed, and they should maintain a continuous skin behind the metal to resist movement during framing. The patch should stay continuous behind the lath and create a through-wall drainage and air barrier that reliably directs moisture toward weep screeds while preventing capillary draw into the subsequent stucco coats. Proper interface also controls movement at fasteners and avoids bridging micro-paths that could allow moisture or contaminants to bypass the intended drainage plane.
This matters on a jobsite because a consistently bonded patch keeps water from wicking into base, scratch, or finish coats and reduces the risk of hairline cracking around openings, corners, and joints. Follow practical steps: prepare and dry the substrate, apply the patch in a uniform thickness within the specified band, and verify adhesion with a gentle test before coating, while also documenting any delaminations or minor voids. Consider fastener locations, flashing details, and future repair needs to ensure long-lasting performance without compromising drainage or the continuity of the weather seal around windows, doors, and other penetrations.
Fastening lath over patched WRB without damaging the seal
Drive the lath fasteners so they fasten into framing, not just the patched WRB. Aim to land on studs or blocking whenever possible; that gives a solid bite without stressing the repaired WRB. If the repair sits between studs, shift the lath so fasteners land on the nearest framing or add temporary blocking behind the sheathing before you nail.
Use corrosion-resistant screws or ring-shank nails long enough to pass through the lath, the WRB and the sheathing and still penetrate the framing about 3/4″ to 1″. Don’t overdrive fasteners—snug is good, crushed or torn WRB is not. Avoid stapling through delicate taped seams; staples pull and open patched overlaps.
If you had to penetrate patched WRB (no way around it), set the fastener head flush and dress the hole with a compatible self-adhesive patch or a small bead of approved sealant. Don’t glob everything—only seal actual penetrations or damaged areas. Bottom line: hit framing, don’t overdrive, and seal only where you’ve created a real breach.
Tying the patch into flashings and adjacent details
Don’t stop the repair at the visible stucco edge. Wherever the patch meets a window sill, corner, or change of plane, you have to physically tie it into the flashing and trim. Lift the flashing edge or slide a self-adhesive strip under the existing metal, then extend flashing at least 6 inches past the patch on each side. If the original flashing is rotted or loose, replace it so the patch sits on a solid continuous plane.
At corners and sills, reinforce the patch with mechanical support before you finish coat. Install metal corner bead or a galvanized angle, fasten to substrate (not just the new stucco), and embed lath so the scratch coat wraps past the bead and under the flashing overlap. Create a small back dam or sloped edge at sills so water sheds away. Don’t rely on sealant alone—sealants fail. Make the backup drainage path obvious and continuous.
Where different materials meet (trim, brick, window frame) keep a continuous drainage path and avoid tight butt joints. Feather the patch at least a few inches into sound stucco so there’s no abrupt gap for water to bypass. Check fasteners and the WRB tie-in you already handled earlier; if any seal or overlap looks marginal, redo it now. If you see rust, rot, or loose metal, fix that before finishing—the patch will fail fast if the base details aren’t honest.
Troubleshooting, Common Mistakes, and Corrective Actions
A successful patch starts with thorough pre-patch diagnostic and surface prep: ensure the puncture area is clean, dry, and free of dust, confirm ambient temperature and substrate compatibility for Liquid Flash, and establish a short, clean work window with feathered edges so the repair blends with the surrounding stucco. Avoid common DIY missteps such as insufficient cleaning, applying on damp or dirty edges, over-thinning or over-applying, skipping cure times between coats, and neglecting to mask nearby areas. Plan for proper flashing and use of thin, even coats, and always allow full drying time before testing adhesion or moving to subsequent steps.
Knowing these rules matters because it directly affects bond strength, texture, and color uniformity, reducing repeat repairs and lengthy downtime on the jobsite. Real-time signals like poor adhesion, lifted edges, visible pinholes after drying, streaks, or patches that don’t feather into the render indicate you should remove the failed patch, re-clean thoroughly, and re-apply with careful timing and technique. Following corrective actions and weather considerations—avoiding freezing, extreme heat, or high humidity, protecting from rain, and documenting cure times—helps ensure a durable repair that will integrate smoothly with the stucco finish and withstand future weather cycles.
Signs a repair failed after stucco is applied
If you see blistering, hairline cracks that spread, brown or gray staining, visible mold, or soft spots when you press the surface, the repair didn’t stick. These are early warning signs — don’t be tempted to paint over them. Do not cover it up; covering hides the problem and makes the fix much bigger later.
Grab a screwdriver or probe and poke around where you see problems. If the stucco crumbles, pulls away, or you can force a gap between the stucco and substrate, you have delamination or trapped moisture. Use a moisture meter if you’ve got one; high readings near stains mean the source is active. Follow stains back to flashing, window sills, or top edges — failures usually start at penetrations or poor flashing.
Before more work, cut back the failed area to expose the substrate. Check for rot, bad house wrap, clogged weep screeds, or poor base attachment. Fix the drainage, replace damaged sheathing or lath, let things dry, then reapply. If you find widespread mold, structural rot, or you can’t locate the leak, call a pro — small fixes are ok DIY, but don’t gamble on hidden moisture. Check flashing and substrate first, then patch correctly.
Repairing a botched liquid flash application
Start by assessing the failure: touch it, probe it, and look for lifts, wrinkles, or areas that never bonded. If the flash is soft, powdery, or peeling, don’t cover it up. You need to get down to a stable surface before doing anything else. Wear gloves and a mask if the material is dusty or crumbly.
Work in this order: re-clean the area—remove dirt, dust, and any curing compounds. Abrade or ablate all loose or poorly bonded material until you reach solid substrate. If the original primer is compromised or you see bare substrate, re-prime per the manufacturer’s instructions and allow full tack time. Then reapply liquid flash, feathering the edges into sound material and respecting the product’s wet-film thickness and cure times.
If the patch is large, repeatedly failing, or the substrate is deteriorated, stop wasting time with thin touch-ups. Switch to a tape-backed system or cut out and do a full repair so you get a proper bond and overlapping seals. Final check: after curing, probe the edges and test for continuity before stucco goes back on. Don’t guess—fix it right or it’ll come back worse.
Code, Manufacturer Recommendations, and Warranty Considerations
The section emphasizes that code expectations for WRB usage around patching and re-stucco scenarios include maintaining a continuous drainage plane behind patched areas and ensuring that penetrations or repairs do not disrupt moisture management or air barriers. It highlights how following manufacturer instructions for liquid flash products, substrate prep, cure times, and compatibility with WRB tapes/flashings can preserve warranties and ensure compliance. Keeping receipts, installation dates, and product lot numbers supports warranty coverage decisions and helps resolve any evaluation of deviations from instructions.
Documenting repairs for warranty and inspection purposes
When you make a repair, photograph the work from start to finish. Get wide shots, close-ups of problem areas, and photos that include the surrounding materials for context. Take a picture of the product label or batch number so you can prove what material was used.
Write down the application date, exact product name and batch, who did the work, and any weather conditions that mattered. Keep those notes with the receipts and photos. A neat, dated file makes claims and inspections painless.
Have the inspector or the person who signed off the repair add a signature and date to your record—either a scanned form or a photo of the signed document. That inspector sign-off plus your photos and batch info will be the evidence warranty reps or code officers want to see. If you skip this, don’t be surprised when a claim gets denied.
When to call a pro or the manufacturer
If the leak soaks more than a few square feet, or you can see bowed joists, cracked headers, or cracked masonry, stop work and call a structural pro. Small stains you can dry and monitor. Any visible movement, sagging, or cracked material is not DIY territory. A licensed structural engineer or experienced contractor can give a clear fix and a written assessment you can use for permits or warranty claims.
Call a specialist right away for repeated leaks from the same spot, leaks that return after repairs, or when the source is unclear. If plumbing, roofing, or electrical components are involved, call the trade that owns that system—not a general handyman. If the product or material could be under warranty and the language is vague, contact the manufacturer before you cut or replace parts that they might require you to preserve.
Always photograph and timestamp damage before you start repairs, and get simple scope and estimate statements in writing from any pro you call—this saves headaches with inspections and claims. Short on time? Get a professional assessment now and do the small fixes later. Don’t gamble with structures, systems, or warranty eligibility. Document and call when in doubt.
Cost, Time Estimates, and Job Planning
This section provides a concise, ballpark view of costs and timing for small wall repairs that involve punctures, focusing on per-puncture material costs, expected labor windows, and a simple way to scale for multiple holes, including wall type and patch size considerations.
The cost map items include liquid flash, small patch material (masonry patch or fiber-reinforced patch), a trowel or putty knife, a mixing cup, containment/cleanup supplies, and protective gloves, with rough DIY-friendly ranges and notes on bulk discounts when patching several punctures.
A lightweight time estimate covers the steps—surface prep, cleaning, priming, patch application, smoothing, cure time, and final inspection—with a realistic per-patch window and a buffer for learning curves, weather interruptions, and occasional tool hiccups, plus a straightforward multiplier to project total time.
Why this matters for a DIY jobsite is that you can plan a practical workflow, sequence tasks to minimize trips, stagger drying intervals, and build in environmental and cure-time considerations so you can align work with daylight, humidity, and temperature windows.
The guidance also highlights risk and containment tactics, such as anticipating hairline cracks or adhesion issues, detailing surface prep tips (degaging, dust removal, and priming), and recognizing when rework or warranty considerations might apply after patching.
Together, these elements help you estimate materials and time, avoid repeated trips, batch patches when possible, pace work across a day to fit weather and cure constraints, and maintain a short checklist of tools, safety items, and contingencies.
Sample materials list and quantities for a typical exterior wall with 10 small holes
Pick materials that match the wall makeup and weather exposure. The right mortar, primer and sealer control bond, color match and long-term durability. Buy a bit more than you think you need — small repairs eat product with waste and mixing loss.
- Polymer‑modified mortar (25 lb) Used to refill and re-point small holes and gaps in brick or block. Look for “polymer‑modified” or “mortar repair” on the bag and a Type N or M match if your wall is traditional brick; bag will usually say compressive strength and frost resistance. One 25 lb bag covers far more than 10 small holes; expect to spend $12–$25. Using plain cement or the wrong strength will crack, pull away or leave a visible mismatch.
- Pre‑mixed patch compound (1–5 lb tub) Handy for tiny voids and feathering edges where mortar would be overkill. Choose a masonry or concrete patch rated for exterior use and freeze/thaw cycles. Buy a 1–5 lb tub for ten small holes ($8–$20). Don’t use interior spackle or drywall filler — it flakes and discolors outdoors.
- Acrylic bonding agent (1 pint) Promotes adhesion between old masonry and new patch material. Pick an acrylic or latex bonding agent labeled for masonry; most state “add to mix” or “brush on” instructions. One pint is enough for small jobs ($8–$15). Skipping a bonding agent can cause poor bond and future blowouts in wet weather.
- Masonry primer/sealer (quart) Use before painting or after repairs to equalize suction and reduce staining. Look for “breathable masonry primer” or masonry sealer with low VOC and water‑vapor permeability. A quart covers the patched area and surrounding brick; expect $12–$25. Using a non‑breathable sealer traps moisture and causes spalling later.
- Mortar colorant / matching pigment For blending new mortar to the existing joint color. Buy powdered mortar dye or premixed color pack that says “mortar match” and is UV‑stable. Small packs (one pack) are $5–$15. Don’t guess color with house paint — wrong pigments fade or stain the brick.
- Tools & mixing (1 bucket, paddle, trowel) A 5‑gal bucket, margin trowel, pointing tool and a drill‑mounted mixing paddle are the tools you need. A cheap homeowner drill and a $10 paddle work fine; consider renting a mortar mixer for larger jobs. Wrong tools slow you down and cause poor compaction, which leads to premature failure.
- Brushes & rollers (masonry brush, small brush) A stiff masonry brush and a disposable trim brush for priming and cleaning joints. Look for nylon/poly bristles labeled for masonry use. Budget $6–$15. Using soft indoor brushes leaves mortar dust and poor surface prep, which ruins adhesion and appearance.
- PPE & cleanup (N95, gloves, goggles) Respirator (N95 or better for particulates; OV/P100 cartridges for solvents), nitrile gloves, and safety glasses for mixing and grinding. Buy one N95 and a pair of gloves per person; goggles are reusable. Expect $10–$30. Skipping PPE risks lung irritation from silica dust and chemical exposure.
- Water‑repellent sealer (pint) Optional for high‑exposure walls to reduce water absorption after repairs. Choose a silane/siloxane product labeled “breathable exterior” and use one pint for spot treatments. Costs $15–$30. Wrong silicone coatings can trap moisture and accelerate freeze damage.
Pro tip: Buy one full 25 lb bag and a small pre‑mixed tub instead of several tiny bags. Store cement and mortar bags off the ground, dry and on pallets; mix small batches to avoid waste. Keep leftover bonding agent and colorant for touchups — color matching is easier when you use the same batch later.
Scheduling around weather and stucco contractor timelines
Talk to your stucco crew before you order materials or start patching. Tell them when you plan to do the repairs and get their ideal start date. Then add at least one extra day for each critical cure step — don’t promise a finish date until the patch compound or bond coat has met the manufacturer’s minimum cure time under the expected temperature and humidity.
Weather beats schedules every time. If rain or freezing temps are forecast during a cure window, push the work. Protect fresh patches from rain and sun so they reach design strength. If humidity is high, cure times can double; if it’s hot and dry you may need to mist and shade. Check local forecasts daily during the week before install and have the crew confirm they’re not bringing other jobs that would force them to rush your walls.
Plan the crew’s access and scaffold time around those cure windows. Don’t let a stucco crew try to cover or finish a wall that hasn’t reached required strength — that’s how you get cracks and delamination. Put the cure deadlines in writing, verify with the product data sheet, and build in a buffer day or two so punch-list fixes don’t derail the entire job.
Sample labor/time estimates: single small puncture (prep + apply) = 15–30 minutes hands-on; allow product-specific cure windows before recoat or lath. Ten small punctures staged in one day (prep and first coats batched) = 3–6 hours labor plus cure time. Scaffold rental or erection typically adds one full day of setup cost—budget regionally ($150–$500/day) depending on scope.
Long‑Term Durability Expectations and Inspection Checklist Before Stucco
Realistic longevity after patching varies with the flash product, substrate condition, climate, and structural movement, with typical patch life spanning several years but requiring re‑inspection on a planned cadence; expect visual checks annually, moisture tests every couple of years, and resealing or re‑taping around patched areas as needed based on wear, moisture signs, and adherence. Establish maintenance intervals that trigger earlier re‑inspection if you notice any bubbling, cracking, water staining, or loosening around patches, and plan a more frequent review after severe weather or ground movement to catch issues before they propagate.
This pre‑stucco inspection matters because it combines moisture intrusion signs, WRB/tape integrity, patch adhesion, surrounding cracks, nail/fastener issues, and flashing continuity with proper air/vapor barrier sequencing to prevent hidden flaws from compromising the enclosure; verify patch and WRB coverage meet manufacturer specs, confirm patches are fully dry and clean, and ensure no standing water or moisture behind patches before stucco proceeds. Documenting patches with dated photographs, noting environmental conditions, and outlining any changes provides a record for future repairs, while contingency steps—re‑patching, removing adjacent stucco, or replacing the WRB—help you plan when a pro is needed to avoid larger failures.
Seasonal inspection tips and what to look for
Do a quick walk-around after the heavy-rain season and again after the first big freeze/thaw cycle. Focus your attention where materials meet. Check seams and joints for hairline cracks, separated caulk, or mortar gaps. Run your hand along seams; if you feel rough edges, gaps, or soft spots, mark them for repair.
Look closely at any previous patches. Press gently on patched areas and edges. If a patch is lifting, crumbling, or has a different texture, it likely failed and needs to be redone rather than re-coated. Also inspect flashing around windows, doors, roofline, and penetrations. Flashing gaps or rusted nails are common water-entry points.
Scan for bulges, staining, or mortar dust at the base and near ground level. Check grade and splash-back—standing water or mulch piled against stucco will shorten its life. If you find delamination, repeated cracks, or moisture stains, get a professional moisture check before you stucco over anything. Don’t assume cosmetic fixes will solve structural or water issues.
Recordkeeping and maintenance plan
Keep a simple file that you actually use. Date every entry, note the exact location (north wall, second bay, etc.), write what was done and by whom, and keep the contractor contact info. Take a few clear photos before and after every repair and label them with the date and location. A quick photo log beats a vague memory when a leak shows up months later.
Save product labels, material batch numbers, and the installer’s warranty paperwork. Scan or photograph the product data sheets and store them with the job photos so you can check cure times, compatible coatings, or warranty limits without digging through boxes. If a manufacturer asks for proof of maintenance, having dated records and pictures is the fastest way to get a claim approved.
Set reminders for routine checks tied to the warranty period and local seasons you already inspect for. Recommended cadence: visual inspection every 6–12 months, moisture checks every 2 years (or sooner after major storms), and re-tape or re-seal suspect joints every 5–7 years depending on exposure and product life. Keep one physical binder and one cloud copy—don’t rely on a single device. If you let records pile up or scribble them on scraps, expect headaches when you need to prove work or get paid on a claim.
Appendix — Quick Decision Flowchart and FAQ
Use this quick decision flowchart to choose between liquid flash, self-adhered tape, or a replacement panel based on puncture size, location, exposure, and weather. It guides you with simple yes/no checkpoints: is the puncture within 2–3 inches? is there active moisture? is the WRB intact around the patch? Have your tools ready: a liquid flash kit, self-adhered tape, or a replacement panel, plus basic prep steps like cleaning and drying the area.
Knowing the flow helps you select the right method fast and reduces rework on a jobsite. This matters for durability before re-stucco, since correct prep and material choice prevent adhesion failures, edge creep, and timing conflicts with stucco curing. FAQs: Can I patch in cold weather? Yes, but follow manufacturer guidance and allow longer cure times; How long before re-stucco after patch? Typically once the patch is fully cured to the specified tack and the area is dry to touch; Can I use tape on cracked or heavily textured surfaces? Use tape only on clean, dry, stable surfaces and within approved patch thickness.
Quick FAQ (cure time, paintability, paint/primer over liquid flash)
Cure time: follow the product label and local conditions. Temperature and humidity change cure substantially. If you need a rule of thumb, expect tack-free in hours but full mechanical cure in days. If you plan traffic or heavier loads, wait for the manufacturer’s stated full cure before disturbing the surface — don’t rush it.
Can you paint over liquid flash? Yes, but only after it has fully cured and been prepped. Lightly scuff or abrade the surface, clean off dust, and use a primer that the liquid-flash maker approves. If the label says “paintable,” you’re good; if not, test a small area first. Avoid painting over a tacky or only partially cured membrane — the paint won’t stick and will fail fast.
UV and bond-coat compatibility: many liquid flashes tolerate short-term UV, but prolonged exposure can cause discoloration or surface chalking — use a topcoat or paint to protect it long-term. For bond coats or primers, match chemistries: use the recommended bond coat or a compatible primer and follow the sequence in the decision flowchart earlier. If in doubt, call the tech line — a bad pairing means wasted work.

Conclusion
Patching small WRB punctures with liquid flash done right protects the weather barrier, keeps moisture out, and preserves the finish—so durability and curb appeal stay intact. If you respect the process, you avoid costly mistakes and headaches down the line. Safety first and following the exact technique matter every step of the way.
Follow a simple, practical sequence: clean and dry the area, verify product compatibility, mask surrounding surfaces, apply liquid flash exactly over the puncture per the manufacturer’s method, cure fully, inspect for complete coverage, and then re-check alignment with stucco lath and finish work before you proceed. Do the work in the right weather window, document the repair for warranty, and plan the patch so it blends with adjacent areas and remains accessible for future inspections.
Common mistakes to avoid include skipping tests or curing times, applying over damp or contaminated surfaces, using the wrong product or incompatible layers, and rushing the application. Always wear PPE, keep a clean work zone, and don’t fan the edges—tackling small patches with care beats a bigger fix later. If you’re uncertain about compatibility, or the WRB has more than tiny punctures, step back and reassess before continuing.
If the punctures are extensive, the WRB is damaged beyond a quick patch, or you’re unsure about how it ties into code, warranty, or long-term durability, it makes sense to call a professional. Stay disciplined, complete the test patch, and keep the project moving with confidence—your wall will thank you for it.
FAQ
What’s the first step before patching small WRB punctures?
Inspect the area and clean away dust, dirt, and loose material. Make sure the surface is dry and flat. Don’t patch over mold or moisture.
What tools and materials do I need?
Liquid Flash, a small brush or roller, a putty knife, and a compatible patch or mesh for the puncture. You’ll also want a utility knife and a clean rag. Don’t start without a plan or the right products.
How do I apply Liquid Flash to the puncture?
Apply a thin coat of Liquid Flash around the puncture and extend it a few inches beyond. Let it set to a tacky feel before applying any patch or re-stucco. Don’t slop on thick layers or cover wet product. Follow the product’s wet-film and recoat guidance—typically a bond coat of ~6–10 mils WFT and total patch thickness of ~20–40 mils WFT in lifts, but confirm on the datasheet.
What common mistakes should I avoid?
Don’t skip drying times or patch over wet spots. Don’t overfill or sandwich wet layers, and don’t ignore critters or damage behind the WRB. If it’s damaged beyond a small patch, fix the underlying issue first.