

Introduction
Head flashing is the primary shield against water around an opening, and caulk alone cannot provide lasting protection.
This matters because proper flashing directs water away and prevents leaks, while improper gaps can lead to rot and interior damage.
The guide walks through how to assess openings, distinguish flashing from caulk, and apply practical steps to improve sealing and drainage.
Key takeaways
- Understand that proper flashing channels water away from the opening.
- Sill pans and head flashing must be integrated with waterproof barriers.
- Caulk alone cannot shed water; use weatherproof flashings and seals.
- Install sequence: rough opening, flashing, pan, sill, window, sealant.
- DIY often underestimates drainage, UV exposure, and thermal movement.
- Long-term value comes from correct materials, proper laps, and periodic inspection.
Table of Contents
- Introduction
- Key takeaways
- What is window flashing and why it matters
- Types of flashing materials and where they belong
- Sill pan vs. integrated head flashing: roles and differences
- Proper flashing installation sequence and best practices
- Common failures when relying on “just caulk”
- DIY vs. professional installation: what to expect
- Cost, lifecycle, and long-term value comparison
- Planning a window replacement or renovation with waterproofing in mind
- Conclusion
- FAQ
What is window flashing and why it matters
Flashing is a thin barrier that directs water away from the window opening. Its core job is to shield the wood and framing from moisture intrusion. Think of it as the first line of defense in a complete water-management system around a window.
Waterproofing and weather sealing have their own roles too. Flashing channels water, while waterproofing blocks penetration and weather sealing closes joints. Together they form a continuous path that keeps the opening dry and the structure solid.
Flashing vs. Caulk—Fundamental Differences
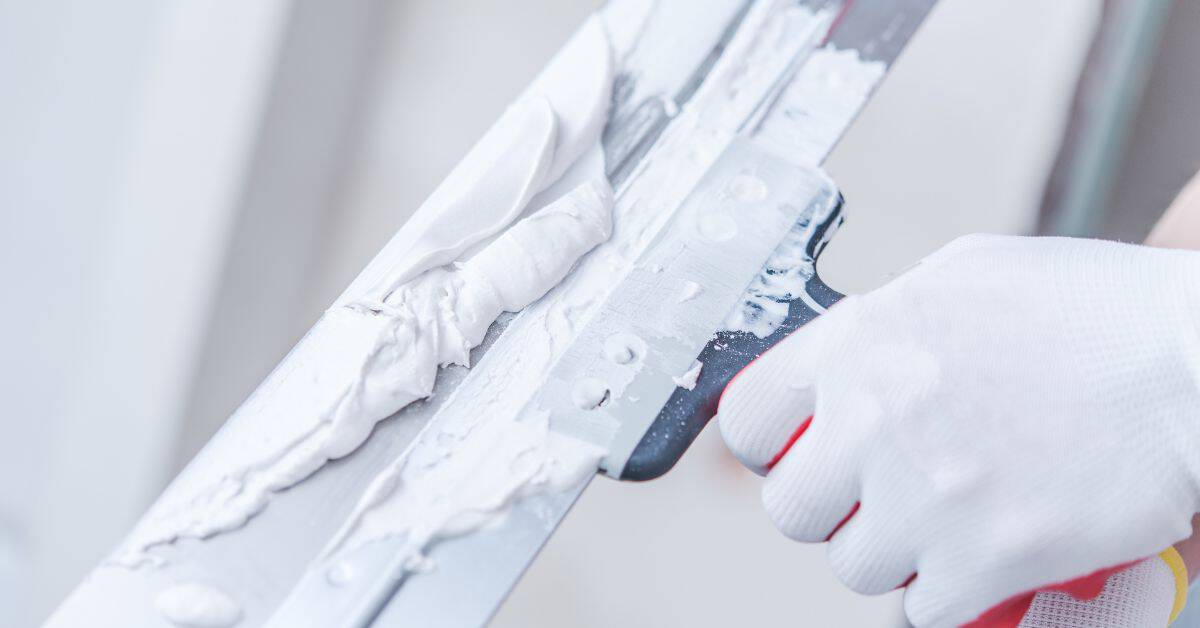
Caulk and flashing are not the same, despite what some might think. They serve different purposes in your home’s defense against water intrusion.
Flashing is a drainage layer. It’s designed to channel water away from openings like windows and doors. It’s made of materials that can handle water exposure without breaking down, like metal or high-quality plastic.
Caulk, on the other hand, is a seam sealer. It fills gaps and prevents air and water from passing through. But it’s not designed to handle standing water or direct water pressure. That’s why you’ll see caulk failing over time at window openings—it’s being asked to do a job it wasn’t built for.
Think of flashing as your home’s raincoat, diverting water away from the opening. Caulk is like the seam tape on that raincoat, keeping water out where two pieces of material meet.
Building Science Basics for Homeowners
Understanding how water moves around your windows is key to protecting them. Here’s a simple breakdown:
Water wants to get in through any opening it can find. It’ll move from high to low, and it’ll follow the path of least resistance. That’s why you see water stains above windows—it’s finding its way in.
Air and vapor also move around your home. Warm air rises, so it moves up and out through leaks at the top of your walls. Vapor can pass right through some materials, like drywall, if they get wet.
Layered protection stops these intruders. Flashing at the head of the window directs water away. Caulk at the seams keeps air and water out. A good vapor barrier behind the drywall stops moisture from passing through. It’s all working together to keep your home dry and comfortable.

Types of flashing materials and where they belong
Common flashing types include self‑adhered membranes, flexible tapes, rigid metal drip caps, and sill pans. Each type has a typical spot in the opening: sill, jambs, or head. Matching the right material to the location helps maintain a continuous water barrier.
Basics of installation matter: surface prep, substrate compatibility, overlaps, and proper fasteners to avoid leaks. Interfaces and transitions with the window flange, siding, and masonry require careful detailing to prevent gaps.
Self-adhered membranes and flashing tapes
Self-adhered membranes and flexible tapes are your go-to materials for concrete openings. They stick to themselves and the substrate, creating a seamless water barrier.
Adhesion is key here. Ensure surfaces are clean, dry, and free of contaminants for optimal adhesion. Apply these products in warm weather for best results.
Use self-adhered membranes at the head and jambs. They’re great for wrapping corners too. Flashing tapes, on the other hand, are perfect for sealing seams and gaps where different materials meet.
Rigid head flashing and drip caps
Rigid metal flashings like drip caps are ideal for the head of your concrete openings. They’re durable, won’t tear or crack over time, and can handle heavy bulk water flow.
Drip caps are L-shaped pieces that sit at the head, allowing water to drip off away from the opening. They’re typically made of aluminum or galvanized steel.
Rigid flashings should overlap each other and any flexible materials below them to maintain a continuous water barrier. Nail or screw them in place, but be careful not to puncture the flashing itself.
Sill pan vs. integrated head flashing: roles and differences
A sill pan is a dedicated component that sits at the bottom of the opening, protecting the sill edge. Head flashing sits higher, guarding the top of the opening. Integrated flashing combines elements for a more continuous system.
Each option covers different areas and has limits. A simple sill pan may not address header or side leaks, while full integration guards more surfaces but can be more involved. Installation compatibility with siding and window style matters too.
When a sill pan is essential
A sill pan is your first line of defense against water intrusion at the bottom of your window or door opening. It’s a tray-like component that sits below the frame, catching and directing water away.
You need a sill pan when you’ve got:
Heavy rainfall—it prevents concentrated leaks from pounding down on the sill edge.
Recessed installations—it catches water that might otherwise seep behind the frame.
Without a sill pan, water can wick up into the framing, leading to rot and mold. So, if your window or door sits below the finished surface, don’t skimp on the sill pan.
How head flashing complements sill protection
Head flashing is like a helmet for your window or door opening. It sits at the top, preventing water from overtopping and getting behind the frame.
Properly installed head flashing reduces reliance on caulk at the top of the opening. Here’s how:
It diverts water—head flashing directs water out and away from the opening.
It seals the gap—it bridges the space between the frame and the wall, preventing leaks.
Without head flashing, water can run down the jambs, find gaps in your caulking, and leak into your home. So, don’t forget to install head flashing when you’re protecting your openings.
Proper flashing installation sequence and best practices
Start with sill flashing, then jambs, and finish with head flashing. This order supports positive drainage and sheds water away from the opening. Proper sequencing helps prevent water from migrating into the rough opening.
The shingle-overlap principle guides how pieces overlap to direct moisture outward. Choose materials that suit the window and surrounding siding, and ensure overlaps are continuous at corners and terminations for a reliable seal.
Integration with housewrap and cladding
Flashing isn’t a standalone job. It’s part of your home’s weather barrier system. Here’s how it ties in:
Housewrap: Flashing goes over the housewrap at openings, creating a continuous drainage plane. This keeps water out and lets any that gets in escape.
Siding: Flashing should be visible where it meets siding. It’s not just under there; it’s part of your cladding system too. Make sure it’s properly integrated to keep water from getting behind the siding.
Visual checkpoints for quality control
Before you start, take a photo of your work. It helps spot issues later. Here’s what to look for:
- Flashing overlaps: Check they’re correct (head over jambs, jambs over sill). Incorrect overlaps can let water in.
- Adhesion: Make sure flashing sticks well. Poor adhesion means it could peel off.
- Taped corners: Corners should be taped for a tight seal. Missing tape lets water in.
- Open drainage paths: Water needs a way out. Check that paths are clear.
- Caulk lines: Caulk should fill gaps, not just sit on top. Incorrect caulking can trap moisture.
- Fastener spacing: Fasteners should be evenly spaced. Too few can cause flashing to lift; too many can damage it.
- Drip edge: Head flashing should have a drip edge to direct water away from the opening.
- Weather barrier termination: Flashing should end at the weather barrier. If it goes past, water can get behind it.
Quick rule: If you’re unsure, take a photo and check later with fresh eyes.

Common failures when relying on “just caulk”
“Just caulk” means a single sealant approach that often fails to protect openings long term. It leaves joints vulnerable to movement and UV exposure. The result can be hidden leaks and recurring maintenance.
Look for degradation signs like cracking, chalking, or soft spots. Caulk alone may trap water under the seam and cause rot behind siding or trim if the substrate isn’t prepared or backed properly.
Typical installation mistakes to watch for
Here are some common pitfalls when relying on ‘just caulk’ that you should avoid:
- Over-reliance on surface caulk: Caulk alone can’t handle all the water, air, and moisture barriers. It’s just a band-aid.
- Improper overlaps: Ensure each new layer of caulk overlaps the previous one by at least 1/2 inch to maintain continuity.
- Blocked drainage: Make sure water can drain away from the opening. Caulk won’t fix poor design or construction.
- Incorrect fastening through membranes: Nails and screws should go into solid wood, not through flashing or caulk. This causes leaks.
Remember, caulk is a secondary sealant. It’s there to fill gaps, not bear the brunt of water intrusion.
Signs of hidden damage and when to investigate
Sometimes, damage isn’t visible at first glance. Here’s what to look for:
Visual signs: Stains, discoloration, or paint blistering around openings can indicate water intrusion.
Tactile signs: Soft or spongy wood near caulk lines could mean rot. Probing gently with a screwdriver can help detect this.
If you suspect hidden damage, don’t wait. Open trim to inspect if possible, or call a professional. It’s better to catch problems early before they spread and become more expensive to fix.
DIY vs. professional installation: what to expect
Outline which flashing tasks you can handle and which are better left to a pro. Focus on non‑structural prep, sealant choice, and basic surface cleaning. For complex flashing, plan, safety, and sequencing before starting.
Professional work often covers continuous or multi‑plane flashing and integration with existing siding. Consider warranty implications and documentation when deciding who does the job and what materials are used.
Tools, materials checklist, and simple DIY steps
Use this list when you’re tackling minor repairs or replacing flash tape.
- Tape measure: To ensure accurate cuts and placement.
- Utility knife: For cutting flashing and sealant tubes.
- Scissors: For trimming excess tape.
- Rubber gloves: To protect hands from sealants.
- Safety glasses: To guard against debris.
- Caulk gun: For applying sealant.
- Flash tape: Choose one compatible with your substrate and upcoming siding.
- Sealant: Silicone or polyurethane, depending on your needs.
- Cleaning supplies: To prep the surface. Skip this and you might trap dirt under your flashing.
- Ladder: For reaching high openings. Safety first!
Quick rule: Always follow manufacturer instructions for application, cure times, and safety precautions.
When to hire a contractor and questions to ask
Knowing when to call in a pro can save you time, money, and headaches. Here are some red flags:
Complex angles, back-drains, or damaged framing? Pro needed. Live loads or exterior insulation finishes affecting flashing performance? Get expert help.
Before signing any contract, ask these questions:
Materials: What specific products will they use and why?
Sequence: How will they install the flashing in relation to other components like housewrap or cladding?
Warranty: Will their work be covered under warranty, and how does it interact with your manufacturer warranties?
Integration: Can they provide proof of proper integration with existing systems? Don’t hesitate to ask for photos or videos.
Cost, lifecycle, and long-term value comparison
Think in terms of total cost of ownership, not just the initial price. Upfront material and labor for proper flashing versus caulk‑only approaches influence long‑term maintenance and potential remediation. Downstream costs matter for durability and timing.
Lifecycle performance and warranty considerations help frame value. Durability, expected service life, and failure modes differ across methods and materials. Weigh maintenance needs and inspection routines as part of the decision.
Long-term savings and insurance/resale implications
Proper head flashing isn’t just about protecting your opening now. It’s about saving you money and hassle in the long run.
Fewer Repairs: Flashing reduces water intrusion, preventing rot and secondary damage. That means fewer repairs, less maintenance, and more peace of mind.
Lower Insurance Claims Risk: Water damage claims can skyrocket your premiums or even lead to policy cancellation. Proper flashing mitigates this risk, keeping your insurance costs down.
Easier Resale Disclosures: When it’s time to sell, you’ll appreciate the straightforward disclosure process. A well-flashed opening is a selling point, not a liability.
Budgeting and material-quality tradeoffs
Quality materials make all the difference in a successful flashing job. Here’s what to consider when budgeting:
- Metal Flashing: Look for galvanized steel or aluminum with a minimum 24-gauge thickness. Avoid copper unless you’re going for high-end aesthetics.
- Composite Flashing: Check for UV resistance and a Class A fire rating. Some composites outperform metal in harsh climates.
- Sealants: Opt for silicone or polyurethane caulks with low VOCs, good adhesion, and excellent flexibility.
- Sill Pans: Choose durable, corrosion-resistant materials like plastic or metal. Avoid cheap, thin pans that can crack or rust.
- Installation Steps: Ensure the quote includes proper installation sequence: housewrap integration, flashing application, and cladding alignment.
Planning a window replacement or renovation with waterproofing in mind
Define project scope by choosing full-frame replacement or insert based on opening condition and siding compatibility. Consider how framing and trim will integrate with flashing and weather barriers. Clarify what the plan means for future maintenance.
Conduct a thorough condition survey and map a waterproofing strategy. Document existing flashing, sill pans, and water-control continuity with photos and measurements for reference during the job.
Permit, Inspection, and Code Considerations
Before you start any work, it’s crucial to ensure your project aligns with local building codes and regulations.
- Check local codes: Verify if your project requires a permit. Common reasons include structural changes or updates to electrical, plumbing, or HVAC systems.
- Inspect existing conditions: Document any damage, rot, or moisture intrusion before starting work to avoid disputes later.
- Review manufacturer guidelines: Ensure chosen windows and materials comply with the manufacturer’s warranty requirements.
- Drainage plane continuity: Confirm that your chosen flashing and WRB will maintain a continuous drainage plane behind the siding.
- Flashing compatibility: Check if your chosen flashing is compatible with your siding material and installation method.
- Fire resistance: Ensure windows meet local fire-resistance codes, especially in multi-family dwellings or buildings with shared walls.
- Energy efficiency: Verify that new windows meet local energy-efficiency standards.
- Document work: Keep records of your project for future reference, warranty claims, or when selling the property.
Quick rule: Always consult local codes and document your work to protect yourself from potential issues down the line.
Visual Checkpoints for a Final Walkthrough
Once the installation is complete, perform a thorough visual inspection to ensure everything was done correctly.
- Flashing overlaps: Inspect all flashing components (head, sill, jambs) to confirm they overlap properly and direct water away from the opening.
- Weep holes/drain paths: Ensure that weep holes or drain paths are clear and unobstructed to allow water to exit.
- Head flashing intact: Verify that head flashing is securely attached and shows no signs of damage or improper installation.
- Caulk lines: Check all caulk lines around the window for proper application, continuity, and adhesion.
- Siding integration: Confirm that siding integrates seamlessly with the new window and flashing components.
- Interior seals: Inspect interior sealants to ensure they are clean, dry, and properly applied.
- Window operation: Test the window’s operation to confirm it opens, closes, and locks correctly.
Quick rule: A thorough visual inspection is your final line of defense against installation mistakes and water intrusion.
Conclusion
The core idea is simple: proper flashing protects the opening, keeps water out, and saves you costly repairs down the line. Do the job right, and you’ll see durability, better appearance, and safer structure.
Make your final checks by confirming the right flashing material for the location, verify the sill pan or head flashing is in place, follow the correct installation sequence, and test for leaks after a light load of water is applied. Start with cleaning and dry surfaces, install the sill pan or head flashing, seal joints with appropriate sealant, and finish with the outer flashing that directs water away from the opening, then recheck all transitions and fasteners before sealing the final trim.
Avoid these mistakes: relying on caulk alone for a long life, skipping a dedicated flashing layer where it’s needed, and rushing through the joints or testing before the system cures. Safety rules are simple—work dry, wear eye protection, and don’t force materials into gaps. If something doesn’t sit true or you don’t have the right flashing at every step, pause and reassess rather than forcing it.
If you’re unsure about the material choices, the full flashing sequence, or how to test for leaks without risking the surrounding structure, consider bringing in a pro before you seal it up. When you finish with solid flashing and a proven seal, you’ll have a window that lasts and a job you can stand by with confidence.
FAQ
What is head flashing and why do I need it?
Head flashing sits at the top of the window or door opening to shed water away from the wall. It’s the first line of defense against leaks. Without it, water finds the gap and follows the framing inside.
Why is caulk alone not enough for protection?
Caulk fills small gaps, but it does not direct water away. It can crack or shrink over time, letting moisture in. Relying on caulk as the sole barrier invites failures and rot.
Where should head flashing go, exactly?
Head flashing should extend beyond the opening and under the siding or cladding. It should overlap the waterproofing layer and slope away from the opening. Proper flashing details depend on your wall type and weather exposure.
What are common mistakes to avoid when installing openings?
Avoid sealing with caulk alone. Don’t skip flashing under underlying rain screen or siding. Don’t trap water behind the opening with tight or clogged gaps.