
Introduction
The cost of painting your interior house can vary greatly depending on several factors. Before you start, understanding these pricing elements will help you create a realistic budget and avoid unexpected expenses.
In this guide, we’ll break down the DIY interior paint cost, focusing on budgeting, estimates, and what affects the final price.
Understanding Interior Paint Cost: Budgeting & Pricing Factors
The total cost of painting your interior house involves more than just the paint itself. Here’s a detailed breakdown to help you create an accurate budget:
- Paint and Primer: High-quality paint and primer can significantly impact the overall cost. Expect to spend around $30-$60 per gallon for good quality paint, with primer ranging from $15-$30 per gallon.
- Supplies: Don’t forget to account for supplies like brushes, rollers, tape, drop cloths, and sandpaper. These can add an additional $50-$100 to your budget.
- Tools (if needed): If you don’t already own them, tools like ladders or scaffolding can cost around $20-$50 each to rent for a day. Paint sprayers may also be necessary for certain projects, ranging from $30-$100 per day.
- Room Size and Layout: Larger rooms and complex layouts will require more paint and time, driving up the cost.
- Surface Condition: Poorly prepared surfaces may need additional materials like caulk, spackling compound, or drywall repair, increasing your budget.
- Labor (if hiring): If you decide to hire a professional, labor costs can range from $20-$50 per hour, depending on your location and the complexity of the job. They may also charge a minimum fee for their services.
To create an accurate budget, measure your room’s dimensions, calculate the square footage, and estimate how many gallons of paint you’ll need based on coverage rates (typically 8-12 sq ft per gallon). Add in the cost of supplies, tools, and any additional materials required for surface prep. If hiring a professional, get multiple bids to compare offers.
Key takeaways
Understanding how these factors affect your DIY interior paint cost will help you allocate time and resources effectively during the planning phase, ensuring you stay within your budget.
- Plan budget by listing supplies: paint, primer, brushes, rollers, tape, caulk, drop cloths.
- Pro painting generally commands higher upfront costs but includes prep, masking, and cleanup.
- Time investment in DIY affects value; slower pace can erode savings.
- Tools matter; rent or borrow key tools to cut costs without sacrificing finish.
- Safety first: wear PPE, secure ladders, ventilate work areas, and monitor hazards.
- When hiring pros, get multiple bids and verify scope and warranty.
Table of Contents
- Introduction
- Key takeaways
- Quick Executive Comparison — When DIY Saves Money and When It Doesn’t
- How Room Size, Layout, and Surface Condition Drive Costs
- Time, Scheduling, and Labor Productivity — DIY Vs Pro Timelines
- Tools, Materials, and Product Selection (Practical Recommendations)
- Step-by-Step Workflow with Cost-Saving and Quality-Control Checkpoints
- Common Mistakes, Hidden Costs, and When DIY Ends up More Expensive
- Hiring a Pro: How to Get Accurate Bids, Compare Offers, and Verify Quality
- Conclusion
- FAQ
Quick Executive Comparison — When DIY Saves Money and When It Doesn’t
The core decision centers on total costs and disruption, not just the price tag. Consider materials, tools, paint, primers, protective gear, labor, and potential waste. Time value and home disruption can tilt the math toward hiring a pro in some cases.
Typical DIY-saves scenarios include small to moderate projects with standard walls, minor touch-ups, and when you already own supplies or can reuse tools. In contrast, large or complex jobs, high ceilings, or tight timelines often favor pros for reliability and a warranty. Look for hidden costs in prep, primer needs, edge work, and cleanup that can surprise DIY plans.
Key decision factors
The outcome of DIY vs hiring pros depends on several variables. Let’s break them down.
Room size and wall condition: Larger rooms or complex surfaces like textured walls, moisture issues, or high ceilings favor pros due to time, skill, and equipment requirements.
Skill level and time availability: If you’re a beginner with limited time, DIY might lead to subpar results. Pros bring experience and efficiency.
Safety/risk: High ladders, lead paint, or asbestos require licensed pros for safety reasons.
Short checklist to decide now
Use this quick checklist to decide DIY vs pro in under five minutes.
- Room size and scope: Can you handle the workload? More rooms or large areas favor pros.
- Wall condition: Inspect walls. Complex surfaces need pros’ expertise.
- Your skill level: Honestly assess your painting skills. Beginners might struggle with finish quality.
- Time availability: Can you dedicate enough time for prep, painting, and cleanup?
- Budget: Compare DIY material + labor hours to pro quotes.
- Disruption: Consider how long the job will take. Pros work faster.
- Long-term durability: A pro’s warranty might outweigh DIY savings if you’re concerned about longevity.
- Comfort with prep, priming, and finish quality: Are you ready to tackle edge work, caulking, and touch-ups?
Quick rule: If more than half the checklist items lean towards pros, consider hiring.
How Room Size, Layout, and Surface Condition Drive Costs
Room size and ceiling height scale material needs, labor hours, and potential waste. A clear method for measuring wall area is to calculate net paintable surface and subtract openings, then measure the ceiling separately for primer and topcoat estimates. Keep the focus on practical, observable measurements rather than assumed numbers.
Surface condition matters: existing damage, texture, and previous coats influence prep steps, primer choice, coat counts, and the project timeline. Trim complexity and architectural details add masking time and may shift tool choices, especially when deciding between spray and hand tools for finish quality.
Measuring and adjusting for ceiling height and trim work
High ceilings mean more paint, but also more ladder time. Measure from floor to ceiling at multiple points to get an average.
Trim work like baseboards, crown molding, and window/door casings add labor. Each piece needs masking, careful painting, and sometimes touch-ups. More pieces mean more time.
Tip: Consider spray painting trim for speed, but it’s messier and requires better ventilation.
Repairs, drywall, and texture considerations
Holes need filling. Small ones are quick, big ones take longer. Water damage may need professional repair.
Texture matching can be tricky. Sanding smooths old texture but creates dust. Applying new texture takes practice and time.
Each repair level adds time: patching holes is quick, replacing drywall takes longer, and texture matching can be the most time-consuming.
Time, Scheduling, and Labor Productivity — DIY Vs Pro Timelines
Build a planning-to-finish timeline that contrasts DIY and professional schedules from start to cleanup. Include planning, prep, priming, coats, drying, and final touch-up in a logical sequence. Use rough benchmarks that you can verify against your own setup without claiming exact durations.
Factor in constraints like humidity, temperature, ventilation, and weekend work windows that commonly affect DIY timelines versus full-time pro crews. Assess labor factors such as crew size, task pacing, and potential parallel work to speed or slow progress. Create a practical planning routine with buffers and a milestone checklist to track progress.
Typical workflow and where time is spent
A typical interior painting job can be broken down into several stages. Understanding where time goes helps you plan realistically.
Prep takes about 20-30% of the total time. This includes moving furniture, covering floors and surfaces, repairing holes or cracks, and cleaning the area.
Priming (if required) adds another 15-20%. Application alone takes just a few minutes, but waiting for it to dry can add hours or even days depending on the paint type.
The actual painting – cutting-in edges and rolling or spraying walls – usually consumes around 30-40% of the time. Touch-ups take another 10-15%.
How professionals gain speed and why that matters
Professional crews often complete jobs faster due to several factors. First, they have defined roles. One person preps while another primes or paints, keeping tasks moving simultaneously.
They also perform parallel tasks. While one wall dries, they can start on the next room. This is especially beneficial in larger homes with multiple rooms to paint.
Experience brings efficiency too. Pros know tricks of the trade – like how to cut-in quickly and accurately, or how to roll without leaving marks. They’ve also seen every surface type imaginable, so they can prep and prime faster.
This speed matters because it reduces labor costs. While DIYers might save on materials, pros may still be cheaper for large or complex jobs due to their efficiency.
Tools, Materials, and Product Selection (Practical Recommendations)
Define the core interior painting toolkit and how to choose sizes and nap lengths for typical walls. Include drop cloths, masking supplies, trays, and extension poles. When surfaces differ, specify appropriate tool choices to keep cleanup manageable.
Explain paint and primer attributes and how to pair primers with topcoats on concrete versus drywall. Compare brush, roller, and spray applications and note when premium brushes or rollers deliver better results. Address environmental and VOC considerations and suggest practical workflow tips for testing patches and cleaning up to protect tools and minimize waste.
Paint and primer selection guide
When it comes to paint and primer, you’ve got options. But remember, the wrong choice can lead to a shoddy finish or extra work.
Finish choices: Gloss is easy to clean but shows every imperfection. Flat hides flaws but is hard to clean. Eggshell and satin are in-between. Check what’s best for your room before you start.
Interior paint types: Latex (water-based) is the most common. It dries fast, cleans up easy with water, and has low VOCs. Oil-based takes longer to dry but has good adhesion and durability. Check product labels for specifics on your chosen brand.
Primer situations: For new drywall or drastic color changes, you’ll need a primer. Stains require a stain-blocking primer. If you’re unsure, check the manufacturer’s instructions or ask at the store. Don’t skip this step; it saves time and money in the long run.
Brushes, rollers, and sprayers — which to choose
When it comes to applying paint or primer, the tool you use makes a big difference. Here’s what you need to know:
Brushes are best for cutting in edges, small areas, and detailed work. Use them for trim, corners, and around windows. For smooth surfaces like metal or glass, opt for a natural bristle brush. For walls and woodwork, go with a synthetic brush.
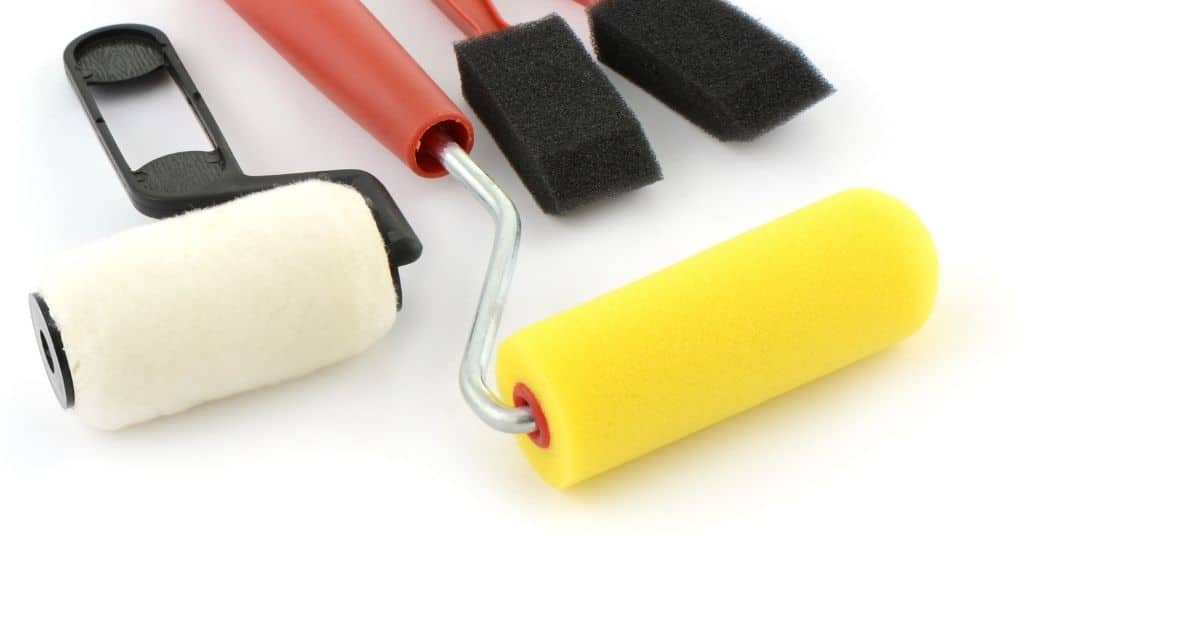
Rollers are your friend for large, flat areas like walls and ceilings. The cover varies by nap length: shorter naps (1/4″ to 3/8″) are for smooth surfaces, while longer naps (3/4″ to 1-1/2″) tackle textured or heavily sanded surfaces. Always check the manufacturer’s recommendations for your specific paint.
Sprayers give a smooth, even finish but require more setup and cleanup. They’re great for large areas with varied textures. Choose between airless sprayers (for thicker paints) or HVLP sprayers (for thinner materials). Always wear appropriate safety gear when using sprayers.
Safety, Ventilation, and Environmental Factors
First things first, safety’s your top priority. Wear a respirator with a P100 filter to protect against paint fumes and dust. Check the product label for specific recommendations.
Ventilation’s crucial. Open windows, use fans, or consider renting an air mover. Keep your workspace well-ventilated to prevent dizziness and headaches from fumes. Remember, good ventilation speeds up drying, too.
Now, climate matters. In hot, dry conditions, paint dries faster but can crack if it’s applied too thickly. In humid weather, paint takes longer to dry, and you might need to apply more coats. Always check the manufacturer’s instructions for ideal temperature and humidity ranges.
Lastly, disposal. Don’t pour solvents or paint down drains. They’re harmful to the environment. Check local rules, but often you can take them to a hazardous waste facility. And remember, never mix different types of solvents. It can cause dangerous reactions.
Step-by-Step Workflow with Cost-Saving and Quality-Control Checkpoints
Outline a pre-paint setup that emphasizes masking, containment, dust control, and floor protection. Describe how to assess surface condition and plan repairs before any material flows to the job. Keep the emphasis on prep quality as the driver of outcomes.
Provide a sequenced workflow with built-in quality checks at each stage, from sanding and patching to priming and finishing. Include moisture and adhesion tests and edge-sheen checks to catch issues early and prevent rework. Offer practical guidance for coordinating DIY efforts or overseeing contractors to protect budget and schedule.
Step-by-Step Process
Use this checklist to guide your DIY painting project from start to finish. It’s designed for practical, jobsite-real actions.
- Preparation and Safety: Check room conditions, set up containment, protect floors and fixtures, ensure proper ventilation.
- Surface Evaluation: Inspect walls for cracks, flaking paint, moisture issues. Decide if priming is needed.
- Gather Materials and Tools: Batch order supplies, select primer and finishes, choose multi-use tools to save money.
- Repair and Sanding: Address drywall repairs, sand surfaces smooth for better paint adhesion.
- Patching and Filling: Apply joint compound or spackle to fill holes and imperfections. Let it dry before sanding.
- Priming: Apply primer to seal the surface, improve paint adhesion, and reduce the number of topcoats needed.
- Cutting In: Use a brush to apply paint along edges, corners, and around trim. Maintain a ‘wet edge’ for smooth transitions.
- Rolling: Apply paint to large areas using a roller. Work in manageable sections to maintain a ‘wet edge’.
- Back-Rolling: Gently roll over previously painted areas to ensure even coverage and eliminate lap marks.
- Edge Handling: Check for any missed spots, touch up as needed. Allow paint to dry before moving furniture back in place.
- Final Checks: Inspect the entire room for any missed spots or imperfections. Make necessary touch-ups.
Quick rule: Always maintain a ‘wet edge’ to prevent visible lines between coats and ensure a professional-looking finish.
Prep and Priming Best Practices
Follow these techniques for efficient patching, sanding, cleaning, and priming to reduce the number of topcoats needed.
- Assess Surface Condition: Check walls for damage, dirt, or grease. Clean as necessary before proceeding.
- Patch Holes and Cracks: Use spackle or joint compound to fill holes and cracks. Let it dry completely before sanding.
- Sand Surfaces: Lightly sand surfaces to create a smooth base for paint adhesion. Wipe off dust with a damp cloth before priming.
- Clean Up Spills: Quickly clean up any spills or drips to prevent them from drying and becoming difficult to remove.
- Apply Primer: Use a primer suitable for your surface type. Apply it evenly, allowing it to dry according to the manufacturer’s instructions.
- Sand Primed Surfaces (if needed): Lightly sand primed surfaces to remove any raised grain or imperfections. Wipe off dust before painting.
Quick rule: Proper preparation is key to a successful paint job. Don’t rush through these steps to save time; it will pay off in the long run.
Painting Techniques and Avoiding Rework
Use these techniques to achieve a pro-looking finish without unnecessary extra coats or rework.
- Cutting In: Use a high-quality brush to apply paint along edges, maintaining a ‘wet edge’ for smooth transitions. Work in manageable sections.
- Rolling Patterns: Apply paint to large areas using a roller. Work from top to bottom, side to side, or in an ‘M’ or ‘W’ pattern to avoid lap marks.
- Maintain Wet Edge: Keep your brush and roller wet while painting to avoid visible lines between coats. Touch up any missed spots immediately.
- Avoid Overlapping: Don’t overlap previously painted areas too much as it can cause visible lines or ridges. Instead, gently roll over them to even out the paint.
- Touch-Up Strategies: Inspect your work frequently for any missed spots or imperfections. Touch up as needed before moving on to the next section.
Quick rule: Regularly inspect your work and touch up any mistakes immediately. This will save you time and effort in the long run, preventing unnecessary rework.
Common Mistakes, Hidden Costs, and When DIY Ends up More Expensive
Identify top prep and application missteps that derail projects, such as skipping surface evaluation or using incompatible products, and pair each with a mitigation tactic. Emphasize the impact of moisture, lead paint risks, and patching omissions on outcomes.
Describe hidden fees and consequences like moisture-related repairs, disposal issues, or re-coating due to poor adhesion. Provide prevention steps and a practical pre-paint inspection routine to catch issues early and protect your budget.
Examples of costly DIY pitfalls
Here are some real-life scenarios where DIYers often end up spending more than they anticipated due to avoidable mistakes.
- Using the wrong primer: A homeowner used an oil-based primer over a latex paint, causing peeling and requiring professional repainting. Avoid this by choosing the right primer for your substrate and existing paint.
- Ignoring moisture issues: DIYers painted a damp wall, leading to mold growth and needing mold remediation. Always check for and address moisture problems before painting.
- Botched trim work: A homeowner’s sloppy cutting-in led to touch-ups costing as much as hiring a pro initially. Take your time, use painter’s tape, and practice your technique on scrap materials.
- Inadequate surface prep: A DIYer skipped sanding and patching, resulting in poor paint adhesion and visible imperfections. Properly prepare surfaces by sanding, patching, and cleaning before painting.
Learning from these mistakes can save you time, money, and frustration in the long run.
When to call a pro instead of attempting it yourself
While DIY painting is great for many projects, there are times when hiring a professional painter is the better choice. Here’s when to consider calling in the pros.
Structural damage: If your walls have cracks, holes, or other signs of structural damage, it’s best to hire a pro who can assess and repair these issues before painting.
Lead paint concerns: In older homes, lead paint may be present. Professionals are trained to handle and remove lead paint safely, preventing health risks for you and your family.
Very high ceilings or complex finishes: If your project involves high ceilings, intricate trim work, or other challenging aspects, it’s often safer and more cost-effective to hire a professional with the right equipment and expertise.
Hiring a Pro: How to Get Accurate Bids, Compare Offers, and Verify Quality
Define what constitutes a comparable bid by listing scope elements such as prep, patching, coats, primer, and finish sheen, plus whether cleanup and disposal are included. Clarify the need for materials specifics and color details when comparing quotes.
Explain how to request bids with a fixed scope, site assessment, itemized costs, and a bid deadline. Emphasize evaluating bids for apples-to-apples comparisons, timelines, warranties, and the credibility of the contractor through references and proof of coverage.
What to include in your written scope
To get accurate bids, you need a clear, detailed scope of work. Here’s what to include:
Surface Prep and Patching: Specify the level of prep needed – light cleaning, heavy sanding, or patching.
Number of Coats: Clearly state how many coats you want applied. Most jobs require at least two coats.
Brand/Color: Be specific about the paint brand and color you want used. If you’re flexible, say so.
Vetting contractors and spotting red flags
Before hiring, do your homework to ensure you’re getting a reliable pro:
References: Ask for references and follow up. A good contractor will have happy customers.
Insurance and License: Verify they have liability insurance and any required licenses. This protects both of you.
Portfolio and Guarantee: Check their past work. Also, ensure they offer a written guarantee for their work.
Red Flags: Be wary of vague bids, large upfront cash requests, or contractors who pressure you to sign quickly.
Conclusion
Know when to roll up your sleeves and when to call in help. The right choice protects safety, durability, and the look you want without wasting time or money.
Before you start, verify the room’s size and surface condition, inventory the tools and paints you already own, and set a realistic schedule that fits your workload. Decide in order: prep, priming if needed, paint type and color, coverage goals, and the final finish. Do a small, hidden test patch to confirm adhesion and color in the lighting you have, then scale up only if it passes. Track costs as you go so you don’t overspend, and keep safety gear on hand and use it consistently.
Common mistakes to avoid include rushing prep, skipping surface repairs, ignoring primer needs, and choosing cheaper products without checking compatibility with your substrate. Always wear eye protection and a mask in dusty or poorly ventilated spaces, ventilate during painting, and don’t overreach or lean on ladders. If you run into stubborn repairs, if a room has extensive water damage, or if timing must align with contractors or weather, it’s wise to bring in a pro for accurate bids and quality assurance. When in doubt, test a small area, compare offers, and lean on proven, safe practices—you’ll finish strong and feel confident about the result.
FAQ
How much should I budget for DIY painting supplies versus hiring a pro?
Focus on the basics: primer, paint, brushes or rollers, tape, and drop cloths. Check the label for coverage and recommended primers. Compare total project area to gauge how many cans you’ll need, and always factor in extra for touch-ups.
What drives the cost difference between a professional painter and DIY?
Labor time, preparation work, and material waste drive the gap. Pros usually bill for setup, surface prep, and clean-up. DIY saves on labor but requires your time and proper technique to avoid rework.
How does time investment affect whether DIY saves money?
If you have a tight schedule or multiple rooms, time spent painting can dwarf material costs. Slow, careful prep and multiple coats add up. Weigh your available time against potential savings and quality goals.
What about paint quality and finish effects on total cost?
Higher-quality paint may cost more upfront but can reduce coats and improve durability. A lower-grade paint might require extra coats and more prep. Check product data sheets and labels for coverage, stain resistance, and warranty guidance.