
Introduction
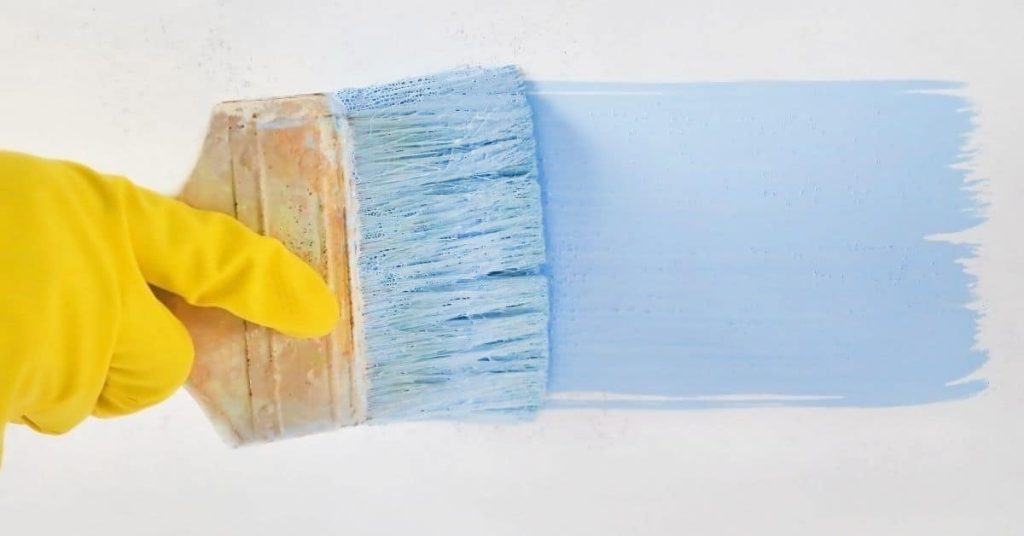
Tackling rough surfaces with a paintbrush can be challenging, but with the right approach and understanding of how long each step takes, you’ll achieve crisp lines in no time.
In this guide, we’ll break down the process into a clear timeline, helping you estimate how much time to allocate for each task and complete your project efficiently.
For the full guide, see Cutting In on Rough Surfaces: Brush Choice and Edge Tricks That Keep Lines Clean.
The Step-by-Step Timeline: How Long Each Task Takes
Before you start, gather all necessary tools and materials. This will save you time and ensure a smooth workflow.
- Preparation (15-30 minutes): Clean the surface, fill any holes or cracks, and let it dry. Tape off areas that shouldn’t be painted.
- Priming (1-2 hours): Apply a coat of primer to seal the surface and improve paint adhesion. Allow it to dry according to the manufacturer’s instructions.
- Choosing the Right Brush (5 minutes): Select a brush with stiff bristles and an appropriate size for your project. Ensure it’s compatible with your chosen paint.
- Cutting In (1-2 hours per 8-10 feet of edge): Work in manageable sections, using short strokes and steady pressure to create clean lines. Remember to keep a wet edge and maintain consistent stroke length.
- Drying Time (1-4 hours): Allow the paint to dry completely before proceeding with the next step or applying additional coats.
- Finishing Techniques (30 minutes – 1 hour): Use techniques like back-brushing and touch-ups to ensure even coverage and clean lines. Remove tape while the paint is still tacky for a crisp edge.
Key takeaways
The preparation stage significantly impacts your overall timeline, so plan accordingly to avoid delays.
- Rough textures demand stiff or high-coverage brushes for crisp edges.
- Load brush evenly and maintain steady strokes to avoid feathering on uneven surfaces.
- Apply masking tape carefully, press edges down, and remove while paint is tacky.
- Wear eye protection and use edgers or shields to guard adjacent areas.
- Prime and select compatible paint for rough textures to reduce chipping.
- Back-brush or light touch-ups after initial coat to even out texture.
Table of Contents
- Introduction
- Key takeaways
- Understanding Rough Surfaces and How They Affect Cutting in
- Choosing the Right Brush for Rough Surfaces
- Brush Loading and Stroke Technique for Clean Lines
- Tape and Sealing Strategies That Actually Work on Rough Textures
- Tools and Accessories That Help—Edgers, Shields, and Improvised Jigs
- Prep, Priming, and Paint Selection for Lasting Edges
- Finishing Techniques: Blending, Back-Brushing, and Touch-Ups
- Troubleshooting Common Problems and Maintenance
- Conclusion
- FAQ
Understanding Rough Surfaces and How They Affect Cutting in
Rough substrates—heavy texture, stucco, brick, and uneven drywall—each present their own surface profile and porosity. Those crevices and peaks create irregular edges that catch and pull paint, making a steady line harder to achieve.
Variations in adhesion and surface absorption also change how paint sits at the edge, increasing blotching or feathering if you don’t account for the texture. Check product labels or technical data sheets for substrate compatibility and surface prep recommendations before you start.
Surface profiles and what to expect
Rough surfaces come in many shapes and sizes. Heavy texture, stucco, brick, even uneven drywall – each has its own unique profile.
These textures trap paint. Deep crevices hold more product than smooth surfaces. This can lead to visible ridges or runs if not accounted for.
Shadowing is another issue. Textured surfaces cast shadows, making it tough to see your edge clearly. You’ll need to feel your way along, following the contours carefully.
Why standard cutting-in fails on rough textures
Standard cutting-in techniques often fall short on rough surfaces. Here’s why:
Paint bleed: On uneven surfaces, paint can seep into crevices and cause bleeding. This leads to a messy edge.
Bristle splaying: Textured surfaces can force brush bristles apart, causing them to splay out. This results in a wider, less defined line.
Visible ridges: Uneven application due to texture variations can lead to visible ridges along your edge, ruining the clean look you’re after.
Choosing the Right Brush for Rough Surfaces
Selecting a brush for textured cutting in is about materials and shape: natural or synthetic bristles behave differently with various paints and textures. The taper, brush width, and a well-made ferrule affect how much paint the brush holds and how precisely you can steer along an uneven edge.
Ergonomics matter on longer cuts—handle shape and balance reduce fatigue and wobble that widen lines on bumpy surfaces. If in doubt, consult the brush manufacturer’s guidance for recommended coatings and suitable substrates.
Bristle type: synthetic vs natural
When it comes to rough surfaces, choosing the right bristle type is crucial. Synthetic and blended bristles are usually your best bet.
Synthetic: These work well with both water-based and oil-based paints. They’re stiffer, which helps force paint into crevices on textured edges. Plus, they don’t absorb water so they dry out slower.
Natural (animal hair): These are great for oil-based paints but not ideal for rough surfaces. They’re softer and more flexible, making it harder to maintain a clean line on texture. Also, they can absorb water, leading to faster drying out.
Brush shape and edge control
The shape of your brush affects how it contacts rough surfaces and maintains a straight line. Here’s what you need to know:
Tapered: These have bristles that gradually get longer towards the ferrule. They’re great for getting into crevices and maintaining control on textured edges.
Angled: Angled brushes are good for cutting in at corners or along edges where you need more precision. The angle helps keep your line straight even on rough surfaces.
Flat (rounded): These have bristles that are all the same length. They’re not ideal for rough surfaces as they can’t get into crevices well and may cause the paint to spread unevenly.
Brush construction and durability
A well-constructed brush will reduce splaying (when bristles fan out) and last longer on rough materials. Here’s what to look for:
Ferrule fit: The ferrule (the metal part that holds the bristles) should be securely fitted. A loose ferrule can cause the bristles to splay, making it harder to maintain a clean line.
Bristle set: Bristles should be firmly set in the ferrule. This helps prevent splaying and ensures the brush maintains its shape even when working on rough surfaces.
The better the construction, the longer your brush will last and the easier it will be to maintain clean lines on rough edges.
Brush Loading and Stroke Technique for Clean Lines
How you load the brush and the strokes you use control film thickness and drip risk on irregular edges. Work with less paint on the tip, use short controlled strokes, and let the brush seat paint into crevices rather than slapping on a heavy film that will sag or blob.
Adjust stroke speed and pressure where texture changes so you don’t bridge peaks or miss valleys, and test technique in an inconspicuous spot first. Refer to the paint manufacturer’s application notes if you need guidance on recommended coverage and handling.
Loading methods that reduce drips and blobs
Start by dipping your brush about two-thirds into the paint can. Swirl it around to coat evenly.
Key: Don’t overload. Too much paint causes drips and blobs.
Next, tap the brush gently on the can’s lip to remove excess paint. You should hear a ‘plop’ sound as paint drops off.
Finally, wipe the brush lightly along the inside of the can or tray to ensure no globs remain. This helps prevent drips in crevices.
Stroke patterns for textured edges
For rough surfaces, use short, controlled strokes. Dip your brush, then lightly touch the surface at a 45-degree angle.
Tip: Follow the texture’s contour to maintain a crisp line.
Make light, quick passes, tipping the brush slightly as you reach the edge. This helps keep paint off the wall and on the trim.
Work in small sections, overlapping strokes slightly for even coverage.
Heel and toe control and pressure modulation
Use the heel (base) of your brush for broad, flat areas. For edges and details, switch to the toe (tip).
Vary pressure as you work:
- Press harder on raised areas to fill crevices.
- Lighten up over bumps to avoid leaving too much paint.
Modulate your stroke length and pressure to follow the surface’s contour, preventing a scalloped or ragged edge.
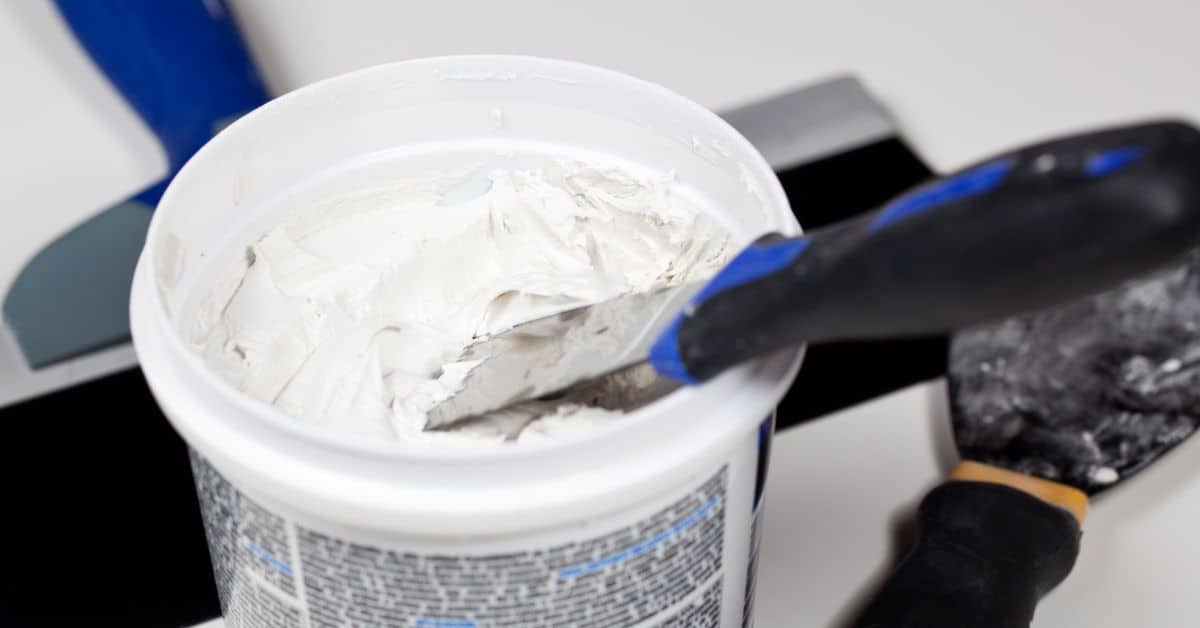
Tape and Sealing Strategies That Actually Work on Rough Textures
Tape performance varies widely on rough surfaces; some tapes conform to texture better while others simply bridge over gaps and allow bleed. Proper surface cleaning and pressing the tape into peaks can help, and some sealants or caulk-over techniques reduce seepage along the edge.
Sometimes tape causes more problems than it solves—on highly irregular substrates you may be better off using a shield or hand-cutting instead. Check the tape manufacturer’s instructions and test a small area to confirm adhesion and removability on your specific texture.
Choosing tape and prepping it for rough surfaces
When working on rough surfaces, choose a tape that’s designed to conform to texture. This could be a painter’s tape with a flexible backing or one specifically made for textured walls.
Preparation is key: Clean the surface first to remove any dirt or grease. Let it dry completely. Then, press the tape firmly onto the wall using a putty knife or your fingers. This ensures good adhesion and helps create a tight seal.
Remember, no tape can perfectly conform to every texture. So, always test a small area first to see how it performs.
Sealing the tape edge: caulk, putty knife, and back-rolling
After applying tape, seal the edges to prevent paint from seeping underneath. Use a flexible caulk or even some of your paint mixed with a bit of water.
Apply it along the tape’s edge using a putty knife. Then, use a back-rolling technique: roll the paint onto the tape and slightly over it, then roll it off again. This helps to fill any gaps and creates a smooth edge.
Always follow product instructions: Some caulks need time to dry before painting, while others can be painted immediately.
When to skip tape and rely on brush techniques
Tape isn’t always the answer. On very rough or highly irregular textures, skilled cutting-in and blending can often outperform taped edges.
For instance, if you’re working on a textured wall with deep grooves, taping might not create a tight enough seal. Instead, use a brush with stiff bristles to carefully cut in along the edge, following the texture’s lines.
Also, consider skipping tape when you need to blend colors or when the texture is so varied that taping would be difficult or ineffective.
Tools and Accessories That Help—Edgers, Shields, and Improvised Jigs
Beyond brushes, hand edgers, metal or plastic shields, and simple profile templates can steady your hand and bridge inconsistent surfaces for a straighter line. Homemade jigs—clamped straightedges or a taped-on guide—are effective when a commercial tool won’t sit flush on bumps.
Match the tool to the contour: flexible shields for gentle undulation and rigid guides where you can clamp solidly. When using any accessory, review the tool’s instructions or test-fit it against the texture to confirm it won’t gouge or smear the substrate.
Using hand edgers and shield guards properly
Hand edgers and shield guards are your best friends when cutting in on rough surfaces. They help you maintain a straight line and prevent paint from smearing.
Positioning: Place the guard against the wall, with the edge of the guard just above where you want your line to start. Hold it firmly but not too tight – you don’t want to leave any marks.
Moving: Move the guard along with your brush, keeping it in constant contact with the wall. Don’t let up pressure or you’ll get a wobbly line. And remember, never drag the guard through wet paint – that’s just asking for trouble.
DIY jigs and templates for consistent lines
When you’re dealing with irregular walls, a simple DIY template can save the day. Here’s how to make one:
- Material: Use stiff cardboard or thin wood – something that won’t bend under pressure.
- Shape: Cut it to match the profile you want. For straight lines, a simple rectangle will do. For corners, use a 90-degree angle.
- Size: Make it big enough to cover your brush and give you some room to maneuver.
- Holding: Hold the template against the wall with one hand. Use your thumb or fingers to press it firmly in place, keeping it steady as you paint.
- Checking: Before each stroke, make sure the template is still square and hasn’t shifted. A crooked template means a crooked line.
- Adjusting: If your wall isn’t perfectly straight, adjust your template to match it. It’s better to follow the wall’s line than fight it.
- Avoiding: Don’t use flimsy materials – they’ll bend and give you a wavy line. And don’t try to paint too fast; slow and steady wins the race here.
Quick rule: Always check your template before each stroke. A crooked template means a crooked line, no matter how straight your brush is.
When power tools or specialty tools help
Sometimes, rough surfaces need more than just a good brush and steady hand. Here are some times when power tools or specialty tools can lend a helping hand:
- Specialty rollers: For really textured surfaces, consider using a roller with long nap – it’ll hold more paint and give you better coverage.
- Small profile sanders: If you’re dealing with deep gouges or scratches, use a small orbital sander to smooth them out before painting. Remember to wear safety gear!
- Texturing tools: For really rough surfaces, consider using a texturing tool to create a consistent finish. Just be sure to follow the manufacturer’s instructions.
- Edge painter: This is like a tiny paint sprayer – it’s great for getting into tight corners and hard-to-reach places.
- Airless paint sprayers: For really big jobs, consider renting an airless paint sprayer. They can cover a lot of ground quickly, but they’re not cheap to rent.
Prep, Priming, and Paint Selection for Lasting Edges
Good edges start with preparation: cleaning, patching deep voids, and choosing a primer that seals porous textures to provide a uniform substrate for the finish coat. Primers and paints designed for porous or high-texture applications reduce absorption differences that cause uneven edges.
Match paint formulation to the surface and the expected wear—some finishes level differently over roughness and affect edge appearance. Check product data sheets or labels for substrate recommendations and adhesion properties before buying or applying.
Cleaning and spot-prep for textured walls
Before you start cutting in, give your walls a good clean. Textured surfaces can hide dust and debris in their crevices.
Use a soft brush or microfiber cloth with some warm water and mild detergent to remove any dirt. Rinse and let it dry.
Next, lightly sand any high spots using fine-grit sandpaper. Be gentle – you don’t want to flatten the texture. Just smooth out the rough edges.
Pro tip: Wipe off any dust with a damp cloth after sanding.
Primer choices and when they improve edge hold
On rough surfaces, using the right primer can make all the difference. Porous textures can suck up paint and cause bleed.
Bonding or sealing primers create a barrier to prevent this. They also help your topcoat adhere better and cover more evenly.
Check your paint manufacturer’s recommendations for the best primer to use with their product. Some paints come with a matching primer, others don’t.
When to prime: If you’re painting new drywall or a porous surface like brick or concrete, always use a primer.
Paint formulations and sheen considerations
The body of your paint – how thick it is – can affect how well it covers. Thicker paints often cover better, but they might not flow as smoothly into crevices.
Sheen also matters. Higher sheens reflect light more, which can make imperfections stand out. For textured walls, consider a low to mid-sheen paint (eg., eggshell or satin).
Always follow the manufacturer’s instructions for application and drying times. This ensures you get the best results from your chosen paint.
Pro tip: If you’re unsure about which paint to use, ask a professional at your local hardware store. They can guide you based on the specific surface you’re painting.
Finishing Techniques: Blending, Back-Brushing, and Touch-Ups
After cutting in, blend the edge into the rolled field while the paint is still open to avoid a ridge or lap line on textured surfaces. Back-brushing or gently feathering into crevices seats paint and creates a more consistent visual transition between the cut and the rolled area.
For touch-ups, work from the surrounding field inward and use the same brush type and loading method to match texture and sheen. If you’re unsure about timing or compatibility, check the paint manufacturer’s recoat and blending guidance.
Cut-in then roll workflow to avoid lap marks
Avoid visible seams and lap marks by following a specific sequence: cut in, then promptly blend into adjacent rolled areas while paint is still open.
- Start at the top: Begin cutting in from the ceiling downwards. This way, you can easily blend into the wall without drips or runs.
- Work in small sections: Cut in a 3-4 foot section at a time before blending it into the rolled area. This keeps paint open and workable.
- Use a ‘V’ or ‘M’ pattern: When rolling, use a ‘V’ or ‘M’ pattern to blend the cut-in edge into the surrounding wall. Start from one side of the cut-in line and roll towards it, then do the same from the other side.
- Avoid overworking paint: Be careful not to overwork the paint as you blend. This can cause lap marks or a patchy finish.
By following this workflow, you’ll minimize visible seams and create a smooth, seamless finish.
Back-brushing and tipping to fill crevices
To work paint into textured surfaces, use back-brushing and tipping techniques. These help seat the paint in crevices and create a smooth edge.
Back-brush: Hold your brush at a 45-degree angle to the surface and brush along the cut-in line. This works paint into any crevices or texture.
Tip: After back-brushing, lightly tip (or drag) your brush along the edge. This smooths out the paint film and creates a clean, seamless edge without overworking the paint.
Repeat these steps as you work down the wall, always starting from the wet edge to avoid lap marks.
Spot repairs and invisible touch-up methods
For invisible touch-ups on textured surfaces, it’s crucial to match both color and texture. Here are some methods to achieve this:
Use a small, stiff brush: For tiny touch-ups, use a small, stiff-bristled brush to apply paint directly onto the area that needs repair. This helps mimic the texture of the surrounding surface.
For larger areas or when matching texture is challenging, use a combination of drywall compound and sanding to create a smooth, feathered edge before painting. Then, lightly stipple the paint onto the repaired area using a brush with stiff bristles.
Always test your touch-up method on a small, hidden area first to ensure it matches both color and texture seamlessly.
Troubleshooting Common Problems and Maintenance
Bleeding, hairy edges, and uneven lines often trace back to technique, tool condition, or surface prep—identify which and address it before repainting. Simple fixes include resealing tape edges, flattening stray bristles with a utility knife, or reworking an edge while paint is still wet.
To maintain consistent brush performance across jobs, clean and store brushes per the manufacturer’s instructions and replace worn brushes that lose shape. When in doubt about a cleaning method or compatible solvent, consult the brush or paint maker’s care recommendations.
Fixing paint bleed and uneven edges
If you’re seeing paint bleeding or uneven edges, don’t panic. Here’s how to fix it.
Bleeding: This happens when paint seeps into the wall surface. Remove any loose paint with a scraper. Apply a suitable filler or caulk, let it dry, then sand smooth. Repaint the area using a controlled approach, following your initial cut-in technique.
Uneven edges: If edges are uneven, you might have missed spots or applied too much paint. Use a small brush to touch up missed areas. For excess paint, gently wipe off with a damp cloth. Let it dry, then lightly sand and repaint.
Extending brush life and storage tips
Maintaining your brush is key to keeping those clean lines job after job. Here’s how:
Water-based paints: After use, rinse thoroughly under warm water until the water runs clear. Gently shape bristles with your hands, then store vertically in a brush holder or wrap in plastic.
Solvent-based paints: Clean with appropriate solvent (like mineral spirits). Wipe excess on newspaper, reshape bristles, then store as above. Always allow brushes to dry completely before storing.
Visual checkpoints and quality control
Before stepping back and admiring your work, run through this quick checklist to ensure a successful cut-in.
- Consistent edge: Check from multiple angles. Ensure edges are straight and even.
- No runs: Look for any drips or runs that may have occurred during cutting in.
- Uniform sheen: Inspect the sheen. It should be consistent across the entire cut-in area.
- Check corners: Ensure paint has fully adhered to all corners and edges.
- Inspect texture: If painting textured walls, ensure paint has filled crevices evenly.
- Blending check: Verify that the cut-in blends seamlessly with the rolled-on paint.
- Dry time: Allow paint to dry fully before inspecting. Some issues may not be apparent when wet.
- Final touch-ups: After inspection, perform any necessary touch-ups.
Quick rule: Always inspect your work from multiple angles and distances to catch any imperfections you might miss at first glance.
Conclusion
Finish with clean, durable lines by matching your brush, technique, and masking to the rough texture. Take it seriously now to prevent peeling, feathering, or jagged edges later.
Align your plan: test a small patch, choose the right brush, load and stroke in smooth, consistent passes, apply seal or tape correctly, and prep and prime before color. Check that edging tools fit your setup, shields stay in place, and any improvised jig sits solid. Keep your work area visible, and confirm paint and primer are suitable for the surface and texture you’re tackling.
Common mistakes to avoid are rushing through loading or skipping a test spot, blaming the rough surface instead of adjusting your technique, and ignoring proper masking or sealing. Safety rules: wear eye protection, keep ladders stable, and clean spills promptly. Do not push through bad seams or cracks without proper filler; if you’re unsure about a tricky edge or large area, pause and reassess instead of forcing a poor result.
If the texture or edges feel beyond what you’re comfortable handling after a couple of passes, it makes sense to bring in a pro. A quick consult can prevent costly mistakes and save time. Stay steady, follow the checks, and you’ll finish with crisp edges and solid durability—you’ve got this.
FAQ
How do I keep clean lines when cutting in on very rough surfaces?
Use a brush with a stiffer, tighter bristle pattern and load it evenly. Work in short, straight strokes and keep a steady, light pressure so you don’t gouge the texture. If you see ragged edges, back off and rework the line while the paint is still workable.
Should I still tape rough surfaces, and if so, how do I tape without peeling?
Tape can help, but rough textures make edge bleed common. Use a good painter’s tape and press the edge down firmly, then seal the edge with a light brush stroke along the line to minimize bleed. Remove or re-tape once the edge is dry to prevent pulling texture off.
What tools or improvised jigs help create straight edges on rough walls?
Edgers, corner brushes, and shield setups help. You can improvise with a straightedge and a small, flat shield or card to guide the brush along the line. Keep the brush tip against the guide and rotate your wrist to stay on the line.
What’s the best way to fix streaks or uneven edges after cutting in?
Back-brush lightly with the same brush to blend the edge into the field. If streaks persist, do a soft touch-up while the paint is still wet, feathering outward from the line. Let the edge set before applying a second coat or additional touch-ups.