
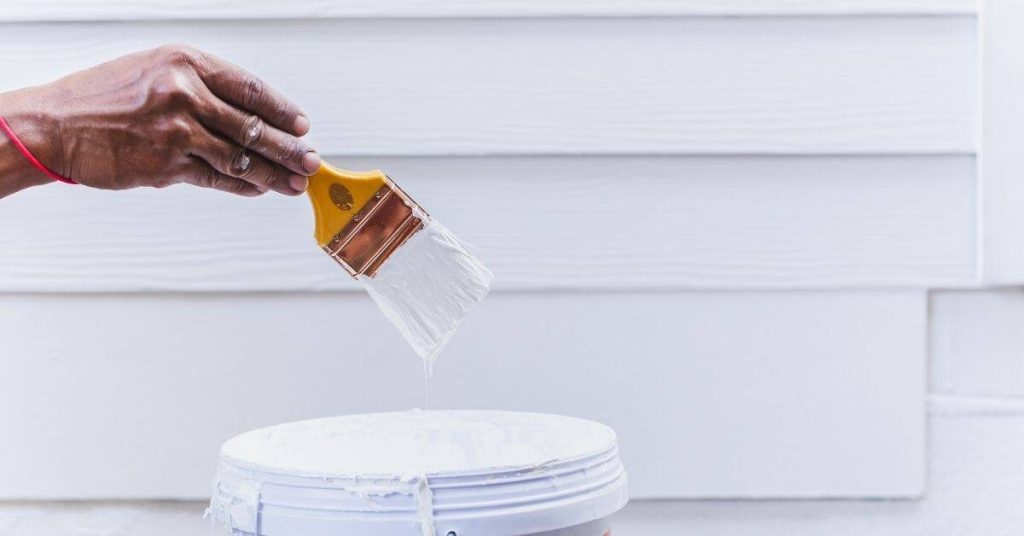
Introduction
Cutting in on rough surfaces means using the right brush and a few edge tricks so your paint lines stay sharp even when the substrate is irregular. In practice that means choosing a brush filament and size that match the material and paint—check the product label and manufacturer instructions for compatibility—and using steady pressure and short strokes to seat the brush into dips without overloading it. Think like a tradesperson: work small areas and keep a wet edge so the roughness doesn’t grab excess paint and cause drips.
Simple edge tricks—taping sparingly, back-brushing, and feathering the start of the stroke—save cleanup time and give cleaner lines on uneven surfaces. If you’re unsure which brush or technique to use for your paint type or surface, test on a scrap piece and follow the paint and brush makers’ guidance to avoid surprises.
Key takeaways
- Test rough areas with light touch and adjust brush size accordingly.
- Choose brush with stiff bristles for heavy texture and control.
- Keep paint viscosity medium; too thick causes drips on rough surfaces.
- Cut in with short, deliberate strokes and reset grip on uneven wall.
- Use edge tricks like a light bevel and steady hand pressure.
- Wear eye protection and a mask; avoid splash and dust exposure.
Table of Contents
- Introduction
- Key takeaways
- Why Rough Surfaces Make Cutting in Different
- Choosing the Right Brush for Rough Surfaces
- Paint Selection, Viscosity and Application Properties
- Cutting-in Techniques That Work on Rough Surfaces
- Edge Tricks and Alternative Tools to Improve Results
- Prep, Visual Checkpoints and Troubleshooting
- Tools and Materials Checklist for Cutting-in Textured Walls
- Brush Care and Storage After Working on Rough Surfaces
- Conclusion
- FAQ
Why Rough Surfaces Make Cutting in Different
Textured substrates change how the brush meets the wall: peaks and valleys mean the bristles hit at varying angles and some hairs never touch the high spots. That uneven contact alters paint transfer and can leave thin gaps or heavy ridges if you use the same approach as on smooth drywall.
Rough texture also makes edge errors more visible because shadows and highlights emphasize jagged lines and missed spots. Understanding those optical and physical effects sets up choices in tools and technique to hide mistakes and get a clean-looking edge.
Common textured wall types and what they require
Rough surfaces come in many forms. Understanding them helps you choose the right tools.
Coarse plaster: Deep valleys hold paint, causing drips. Use a stiffer brush to keep control.
Orange-peel finish: Small peaks and valleys mean less paint pickup. Go slow, use a smaller brush for better control.
Popcorn-style ceilings: Deep crevices hide drips but show every stroke. Use a sash brush to minimize strokes and keep lines clean.
How texture alters paint pickup and release
Texture affects how much paint your brush holds and how it applies it.
Deep valleys: Hold excess paint, causing drips. Work slowly to control release.
Small peaks and valleys: Reduce paint pickup. Use a smaller brush for better control and less drip risk.
Crevices: Hide drips but show every stroke. Go slow, use a sash brush to minimize strokes.
Visual checkpoints to assess difficulty before you start
Before cutting in, check these points to decide if you need extra prep or a different brush.
- Deep valleys: Check for excess paint hold. Consider using a stiffer brush.
- Small peaks and valleys: See reduced pickup? Use a smaller brush for better control.
- Crevices: Notice every stroke? Go slow, use a sash brush to minimize strokes.
- Paint adhesion: Check if paint sticks. If not, prep more or change paint type.
- Dust: See any? Clean surface before painting.
- Moisture: Feel dampness? Let dry or use a primer-sealer.
- Temperature: Too hot/cold? Paint may not apply evenly. Wait for ideal temps.
- Humidity: High humidity causes poor paint adhesion. Use a primer-sealer or wait for lower humidity.
Quick rule: If in doubt, prep more or change tools. Better safe than sorry.
Choosing the Right Brush for Rough Surfaces
Match bristle material and stiffness to the paint and texture: stiffer filaments push paint into crevices but can skip on peaks, while softer filaments lay paint smoothly but may gloop in valleys. Check the brush label or product data sheet for recommended coatings and compatible solvents before purchase.
Head shape and width matter too—angled heads and tapered tips give control on corners, while wider flats move more paint along an irregular profile. Try a couple of styles on a scrap of the actual textured surface to see which reduces dragging and improves edge control.
Bristle material: synthetic vs natural explained
The material of your brush’s bristles can make a big difference on rough surfaces. Here’s why:
- Synthetic: Great for latex and water-based paints, resistant to cracking or stiffening when wet.
- Natural (China Bristle): Ideal for oil-based paints, holds more paint but can splay or lose stiffness over time.
- Blended: Offers a balance of both worlds, suitable for most jobs.
- Avoid: Natural bristles with water-based paints – they’ll absorb water and release it into your paint, causing streaks.
- Tip: For rough plaster, synthetic or blended brushes are usually the best bet due to their durability and resistance to splaying.
Head shape and trim profile to match the job
The shape of your brush’s head affects how it handles edges and corners. Here’s what you need to know:
Angled heads are great for getting into crevices and cutting in along trim. They’re particularly useful on textured surfaces where you need to follow the contours.
For wider trim, a tapered head can help you maintain a consistent line without overloading the brush or leaving gaps.
Flat heads are best for large, smooth areas. On rough surfaces, they can be used to fill in larger crevices but may struggle with fine details.
Stiffness, taper and filament construction matters
The stiffness of your brush’s bristles affects control and how well it holds paint. Stiffer bristles are better for rough surfaces as they can hold their shape and get into crevices without bending too much.
Tapered bristles, where the filaments get thinner towards the tip, help with paint release and getting into tight spaces. They’re particularly useful on textured surfaces where you need to fill in small gaps.
Flagged ends, where the bristles are split or frayed at the end, can help hold more paint and provide better coverage. However, they may also cause more splatter if not used carefully.
Paint Selection, Viscosity and Application Properties
Paint formulation and thickness affect how well it fills texture and how it behaves at the cut line: thicker paint can bridge small gaps but may sag or pool in crevices, while thinner paint levels easier but might not hide texture. Consult the paint container or manufacturer instructions for thinning guidance and compatibility with additives.
When thinning or using flow improvers, test on a scrap to confirm coverage and drying characteristics on the texture before working the main wall. Those trials show whether the adjustment improves cutting-in or creates new issues like running or poor hide.
Best paint types and sheen choices for textured walls
When dealing with rough surfaces, choose a paint that can bridge the gaps and hide texture. Latex paints are usually your best bet as they’re designed to level well on uneven surfaces.
High-quality acrylic latex is often recommended due to its excellent hiding ability and durability. It’s also easy to clean up, which is a plus for DIYers.
As for sheen, flat or eggshell works well on textured walls. They reflect less light, making imperfections less noticeable. Semi-gloss can be used on surfaces with fine texture but avoid high-gloss as it will accentuate every bump and dent.
When and how to adjust viscosity safely
Sometimes, you might need to thin your paint to improve flow and make cutting in easier. But be careful not to over-thin it as this can lead to poor coverage and multiple coats.
Use water for latex paints or mineral spirits for oil-based paints, adding a small amount at a time until you reach the desired consistency. Stir well after each addition.
As a rule of thumb, don’t thin your paint by more than 10-15%. If you find yourself needing to thin it that much, consider using an additive designed for your specific paint type. These can help improve flow without sacrificing coverage.
Never thin your paint too much. It’s better to apply two light coats than one thick, poorly covered one.
Cutting-in Techniques That Work on Rough Surfaces
Adjust angle, pressure and stroke length to match the texture: hold the brush so more filaments contact peaks and use controlled pressure to push paint into valleys without overloading the tip. Work in short, deliberate strokes and reload the brush often to maintain a consistent bead at the edge.
Sequence your work to maintain a wet edge—cut a manageable length, back-brush into the face, then feather out the join to the roll area. Practice the hand motions on a test patch to develop a rhythm that minimizes jagged lines and voids.
Brush angle, pressure and stroke rhythm
Hold your brush at a 45° angle to the wall. This helps you see where you’re painting and keeps lines clean.
Lighten up on the pressure when cutting in. Too much force can cause the bristles to splay, leaving streaks.
Use short, controlled strokes. Start at the top of your cut-in area and work downwards. This helps maintain a consistent edge.
Sectioning, feathering and blending into the field coat
Work in small sections to avoid lap marks. About 2-3 feet wide is a good size.
When you reach the edge of your section, feather the paint into the wet roll or spray coat. This blends the edges and prevents harsh lines.
Time it right. Wait until the field coat is slightly tacky before cutting in. This helps prevent lap marks and ensures good adhesion.
Filling and working deep crevices without splatter
For textured walls, use a brush with stiffer bristles. This helps push paint into the crevices.
Dab gently into the crevice, then pull out slowly. This fills the texture without overloading the brush or creating blobs.
Avoid flicking your wrist as you paint. This can cause splatter and uneven coverage.
Edge Tricks and Alternative Tools to Improve Results
Tape and masking are options, but there are also non-brush tools—edging pads, mini rollers, and flexible foam trim tools—that can give straighter results on extreme textures. Review product instructions or labels for substrate recommendations and how they perform on coarse profiles.
Accessories like corner shields, thin plastic ledges, or a controlled-squeeze syringe for tight voids can speed work and reduce touch-ups. Try combinations (for example, a short-nap pad plus a feathering brush) on a scrap to see what balances speed and consistency for your surface.
Edging pads, shields and flexible guides
When dealing with rough surfaces, protecting adjacent areas is crucial. Edging pads, shields, and curved guides are your friends here.
Pads and shields absorb pressure from your hand, preventing paint transfer onto walls or ceilings. They’re especially useful when you’re working near corners or edges.
Flexible guides, like those made of rubber or silicone, can adapt to uneven profiles. They help maintain a consistent line even on textured surfaces. Just press them against the wall and run your brush along the edge.
Masking strategies for textured surfaces
Masking is a must when cutting in, but not all tapes are created equal. Choose wisely based on your surface.
For light to medium texture, painter’s tape works fine. It’s cheap and easy to apply. But for deep textures, you’ll need something more robust.
Specialty tapes, like ‘frog’ tape or caulk-bead lined tape, can handle deeper textures. They’re designed to seal better against rough surfaces. For really tough jobs, consider tape-free methods like using a brush and guide together.
Using sealants, caulk and backer prep for razor-sharp lines
Filling gaps and using flexible sealants at trim lines can make cutting in a breeze. Here’s how:
First, fill any gaps or holes with spackling compound or caulk. Let it dry, then sand smooth.
Next, apply a flexible paintable sealant along the trim line. This creates a flat plane for your brush to glide across. It also helps prevent paint from seeping into gaps.
Now, when you cut in, your brush will slide smoothly along the edge, giving you razor-sharp lines every time.
Prep, Visual Checkpoints and Troubleshooting
Proper prep and inspection prevent most cutting-in problems: clean loose debris, check adhesion at the edge, and remove glossy residue that repels paint. Use a quick visual checklist before you start to spot areas where texture changes will need special attention.
While cutting in, inspect the bead for thin spots, drips in crevices, or ragged breaks; correct problems immediately by reworking the wet edge or back-brushing. If you see repeated issues, stop and adjust brush, paint viscosity, or technique rather than continuing and compounding the flaw.
Prepping rough surfaces: cleaning, priming and patching
Before you start cutting in on rough surfaces, follow this checklist to ensure a clean edge.
- Remove dust: Use a damp cloth or vacuum to get rid of any loose texture. Dust can cause an uneven line.
- Check for loose texture: Gently run your hand over the surface. If it feels rough, use a scraper or putty knife to remove it.
- Prime porous areas: Apply a primer to any bare spots to seal them and prevent paint from soaking in.
- Fill chips: Use spackling compound to fill any chips or holes. This reduces edge irregularities.
- Sand filled areas: Lightly sand filled areas with fine-grit sandpaper until smooth. Wipe off dust.
- Check for grease: Use a degreaser on any oily spots to ensure paint adhesion.
- Tape edges: Apply painter’s tape along the edge you’ll be cutting in. This gives you a clean line.
- Mask off areas: Cover nearby surfaces with drop cloths or plastic sheeting to protect them from paint.
Quick rule: Prepping rough surfaces might take time, but it’s worth it. A good prep job ensures a clean line and better paint adhesion.
Common mistakes and how to fix them on the fly
Even with experience, mistakes happen. Here’s how to correct them quickly while cutting in.
- Overloaded brush: If paint is dripping, wipe excess off your brush. Work in smaller sections.
- Wrong pressure: If lines are uneven, adjust your pressure. Too much can cause drips; too little won’t cover well.
- Dry edges: If edges are dry, dip your brush back into the paint and lightly touch up the line.
- Paint pools: If paint is pooling, use a fan brush to gently spread it out. Work quickly before it dries.
- Ragged lines: If lines are ragged, switch to a smaller brush or use an edging tool for a cleaner line.
- Missed spots: If you’ve missed spots, lightly touch up with your brush. Don’t overload it with paint.
- Caulk gaps: If caulk is showing through, use a damp cloth to wipe away excess. Touch up with paint if needed.
Quick rule: The key to fixing mistakes on the fly is to act quickly. Don’t let problems dry before you address them.
How to evaluate success: visual checkpoints for a clean line
Once you’ve finished cutting in, use these visual checkpoints to ensure a clean line.
- Check from different angles: View your work from various angles to spot any missed spots or uneven lines.
- Use lighting to your advantage: Shine a light along the edge to highlight any imperfections.
- Touch test: Gently run your finger along the line. If it feels smooth, you’re good. If not, touch up as needed.
- Check for drips: Look closely for any drips or runs. Touch them up if necessary.
- Compare to tape edge: Before removing the painter’s tape, compare your line to it. Make sure they match up.
- Wait until dry: Let paint dry completely before doing final checks. Wet paint can be deceiving.
Quick rule: Don’t rely on just one method for checking your work. Use a combination of visual and touch tests to ensure a clean line.
Tools and Materials Checklist for Cutting-in Textured Walls
Your bare essentials should include at least one angled brush suited to your paint, a backup brush, and a small roller or pad for blending into the field. Add consumables like rags, a container for wetting or thinning paint, and masking options appropriate to the texture.
Optional gadgets—edging shields, corner tools, small putty knives for cleaning out crevices—help on very rough surfaces or tight schedules. Read product information where applicable so you bring tools compatible with your paint and substrate.
Essential brushes and backup tools to have on hand
Before you start cutting in, make sure these brushes and tools are within reach. They’ll help you tackle rough surfaces with ease.
- Angled sash brush (1.5-2″): Perfect for getting into crevices and corners.
- Stiff bristle brush: Great for filling deep grooves before painting.
- Fine detail brush (1/4″ or 3/8″): For touch-ups and tight spots.
- Putty knife (2-3″): To fill gaps and remove excess paint from crevices.
- Scraper: Helps clean up textured surfaces before painting.
- Screwdriver or awl: Useful for poking out dried paint blobs in textured walls.
- Stepladder: Essential for reaching high spots and maintaining a consistent line.
- Work light: Illuminates crevices, helping you see where to cut in.
Quick rule: Always have these tools nearby. They’ll save you time and keep your lines clean.
Consumables, masking choices and optional time-savers
These consumables, tapes, and gadgets will make cutting in on rough surfaces a breeze.
- Frog tape: For sharp lines. Press firmly to seal.
- Blue painter’s tape: Good for general use, but not as strong as Frog tape.
- Plastic drop cloths: Protect floors and furniture from drips.
- Edge shield: Keeps paint off adjacent surfaces. Use with a steady hand.
- Sealant or caulk (paintable): Fill gaps before painting for smooth lines.
- Primer (stain-blocking): Prevents tannins from bleeding through and ruining your paint job.
- Backer rod: Fills wide gaps before caulking or sealing.
- Paintable wallpaper seams: For filling large gaps between textured surfaces.
Quick rule: Use these consumables and gadgets to protect your work area, fill gaps, and achieve sharp lines.
Brush Care and Storage After Working on Rough Surfaces
Clean brushes promptly after use following the paint manufacturer’s cleaning directions to avoid bristle splaying from dried material. For stubborn textured-surface buildup, use the recommended solvent or mechanical agitation as advised on the product label.
Store brushes in a way that preserves the tip shape—hanging or flat with the bristles supported—and check them before the next job for any permanent deformation. If performance has declined, consider a replacement or reshaping following manufacturer instructions rather than guessing a fix.
Cleaning methods by paint type
After cutting-in on rough surfaces, proper cleaning is crucial to extend your brush’s life. The method depends on the paint type:
Latex/Water-based: Rinse under warm water until the water runs clear. Use mild soap if needed. Avoid harsh chemicals.
Oil-based: Clean with mineral spirits or paint thinner. Wipe excess paint off first, then soak and swirl the bristles in a container of solvent. Rinse with warm water after.
Gel/Texture paints: These are tougher to clean. Use a wire brush to remove excess, then soak in appropriate solvent (mineral spirits for oil-based, water for latex). Scrub bristles gently with an old toothbrush if needed.
Reshaping, drying and storing to extend brush life
Proper care after cleaning ensures your brush maintains its shape and performance:
Reshaping: After washing, reshape the bristles by running them through a wire comb or an old toothbrush. This helps maintain the brush’s tip shape.
Drying: Stand the brush upright in a jar or can to dry. This allows air to circulate and prevents bacterial growth. Never leave a wet brush lying flat.
Storing: Store brushes in a cool, dry place away from direct sunlight. Keep them off the ground to prevent moisture absorption. If you must store for extended periods, wrap the handle with plastic or tape to keep out dust and debris.
Conclusion
Cutting in on rough surfaces is about control. When you choose the right brush, watch your paint’s thickness, and test a small patch first, you protect the walls, your time, and your finish from chipping or ragged edges.
Check in this order as you finish: prep the area, pick the brush and paint suited for the texture, adjust viscosity and application so the line stays steady, practice a quick sweep on a hidden spot, then cut in slowly along the edge with steady wrist motion, keeping a consistent angle and working from dry to wet to prevent feathering, and finally wipe any smears while the paint is still workable. If you see snagging or pulling, pause, reload with a light load, and recheck your edge proximity before continuing.
Common mistakes to avoid are using a brush that’s too wide for the edge, overloading paint that pools on a rough surface, and rushing the line with jagged strokes. Safety rules: keep a stable ladder or step stool, wear eye protection if sanding or scraping nearby, test in a small area before committing, and clean up spills promptly to avoid tracking paint onto adjacent surfaces.
If the texture is severe, or you keep fighting a wavering line despite careful technique and the proper brush, consider bringing in a pro for the tricky patches. Stay patient, follow these steps, and you’ll get a clean edge and durable results that last. You’ve got this—steady hands and good prep win the day.
FAQ
How do I keep edges clean when cutting in on a very rough surface?
Use a brush with a stiff, short bristle and keep the corner as tight as possible to the edge. Work with light, consistent pressure and unload excess paint often to avoid drips. If you see ragged edges, touch them up with a smaller brush after the first pass.
What should I do if the brush leaves chatter or skips on rough texture?
Check the brush quality and make sure the bristles aren’t bent. Clean or replace brushes that shed bristles. Go slow and rework problem spots with smooth, deliberate strokes to even out the line.
How do I choose between a brush and an edge tool for rough walls?
For long, straight edges, a brush with a straight edge or a small angled sash brush usually works best. For tight corners or irregular textures, use a narrow brush or a corner brush to reach the edge cleanly. Always test on a small section first.
What safety checks should I do before starting to cut in on rough surfaces?
Inspect the surface for loose material that could contaminate the edge. Wear eye protection and gloves, and keep a damp rag handy to wipe excess paint off the edge. Follow the manufacturer’s instructions on the product label and your local rules for cleanup and disposal.