
Introduction
Sorptivity is a measure of how quickly a porous material absorbs water through capillary action. In this DIY intro, we’ll keep the test simple and describe what you can observe on a small patch of concrete or plaster. The goal is to get a practical sense of absorption behavior without high-tech gear.
Results help you gauge how materials or finishes handle moisture over time, which relates to surface wettability and absorption dynamics. Think of it as a quick read on how the material will respond to wet conditions in real life. Check the product labels and instructions for any test steps, and consider local guidelines if you’re planning to rely on the results for a project decision.
Key takeaways
- Sorptivity basics: how absorption rate reveals moisture movement in cementitious blends.
- DIY test setup: simplify ASTM C1585 steps without compromising surface prep.
- Interpretation: track uptake over time to gauge sealing, porosity, and actions.
- Sample prep matters: roughness, cleanliness, coatings influence absorption; follow PPE.
- Cameras and computer vision: track water uptake with simple, home-friendly tools.
- Related content and datasets: similar content viewed; SorpVision dataset; data, code, author info.
Table of Contents
- Introduction
- Key takeaways
- What Is Sorptivity and Why It Matters
- The Simple DIY Absorption Test (ASTM C1585 — Simplified for Home/Garage)
- How to Interpret Your Results — Simple Analysis and What Actions to Take
- Sample Preparation, Surface Roughness and Why They Matter
- Using Cameras and Simple Computer Vision to Track Water Uptake
- Similar Content Being Viewed by Others
- Sorpvision: a Comprehensive Dataset for Cementitious Sorptivity Analysis Powered by Computer Vision
- Results and Discussion
- Conclusion
- FAQ
What Is Sorptivity and Why It Matters
Sorptivity is a simple way to describe how fast a porous concrete sample grabs water through capillary action when it first meets moisture. It focuses on the pathways inside the concrete rather than steady flow through it. In practice, higher sorptivity signals more moisture movement that can affect durability and moisture related issues over time.
Think of sorptivity as a window into the pore structure and connectivity that dictate capillary uptake. It helps explain why certain finishes, curing histories, or surface textures can change how quickly water enters. Use it as one piece of the durability puzzle and compare similar samples rather than chasing absolute numbers.
Sorptivity definition and physics
Sorptivity is how fast concrete absorbs water due to capillary action. It’s like a sponge soaking up liquid, but in concrete, it’s the tiny pores drawing in water.
Think of it as two stages: initial sorptivity (first few minutes) and secondary sorptivity (long-term). Initial is quick, driven by big pores. Secondary is slower, due to smaller pores and diffusion.
Sorptivity usually increases with the square root of time. That means it starts fast but slows down over hours or days.
Practical implications for materials and structures
Material choices greatly impact sorptivity, affecting durability and performance. Here’s what to consider:
- Concrete mix design: Lower water-cement ratio means less water, so lower sorptivity.
- Cement type: Portland cement has moderate sorptivity. Blended cements can be lower.
- Aggregates: Coarse aggregates with low absorption reduce sorptivity.
- Admixtures: Air-entraining agents increase sorptivity slightly, but improve freeze-thaw resistance.
- Surface finish: Smooth surfaces have lower sorptivity than rough ones.
The Simple DIY Absorption Test (ASTM C1585 — Simplified for Home/Garage)
This homeowner friendly approach approximates an ASTM C1585 style test with an emphasis on repeatability and simple interpretation. It is about measuring how fast absorption happens, not about exact lab protocol. Use it to gain a practical read on sorptivity without specialized equipment.
Gather a capillary surface, plastic sheeting, a shallow tray, a measured water source, a ruler or caliper, a timer, and a notebook or digital log for results. The steps cover surface prep, sizing a uniform area, charging with water, blotting, time-based measurements, and a drying cycle. Keep trials consistent by controlling ambient conditions and sample finish.
Materials, tools and safety checklist
Before you start your DIY absorption test, ensure you have all the necessary materials and follow safety guidelines.
- Sealed specimen: Ensure it’s properly sealed on all sides except the one being tested to prevent water from escaping.
- Small water reservoir: Use a flat tray or disposable cups filled with water. Keep it consistent throughout the test.
- Digital scale (optional): For measuring mass changes, ensure it’s accurate and calibrated.
- Camera or ruler: To measure water front advancement, use a camera for before-and-after shots or a ruler for precise measurements.
- Personal Protective Equipment (PPE): Wear gloves, safety glasses, and a dust mask when handling cement and testing.
- Dust control: Keep the area clean to avoid contamination of test results. Use damp cloths if necessary.
- Ventilation: Ensure proper ventilation in your work area to prevent the buildup of harmful dust particles.
- Disposal: Dispose of used materials responsibly, following local regulations for cement waste.
Quick rule: Always prioritize safety and accuracy by checking your equipment and workspace before starting the test.
Step-by-step test procedure
Follow this sequence to accurately perform your DIY absorption test, ensuring repeatable results.
- Prepare the specimen: Ensure the surface is clean and free of any contaminants. Use a light grit sandpaper if necessary, then wipe it down with a damp cloth.
- Condition the specimen: Allow the specimen to air-dry for at least 24 hours before testing to ensure consistent moisture content.
- Expose one face to water: Place the specimen on a flat surface and pour water onto the test area, ensuring it’s fully saturated. Use a tray or disposable cups to maintain a steady water level.
- Record initial measurements: Measure and record the initial mass (if using a scale) or water front advancement (using a camera or ruler).
- Time intervals: At regular intervals, typically every 5 minutes for the first hour, then every 15-30 minutes thereafter, measure and record the mass or water front advancement.
- Drying/curing considerations: After testing, allow the specimen to dry naturally. Do not use heat sources to speed up drying, as this can affect results.
Planning checklist and common mistakes
Use this checklist to plan your test and avoid common pitfalls that can compromise your results.
- Conditioning: Ensure the specimen is properly conditioned before testing, allowing it to air-dry for at least 24 hours.
- Seal sides: Seal all sides of the specimen except the one being tested to prevent water from escaping and affecting results.
- Steady water level: Maintain a consistent water level throughout the test to ensure accurate absorption rate measurements.
- Timing frequency: Measure mass or water front advancement at regular intervals, typically every 5 minutes for the first hour, then every 15-30 minutes thereafter.
- Avoid tilting: Ensure the specimen is level throughout the test to prevent water from flowing towards one side and skewing results.
- Variable water level: Maintain a consistent water level in your reservoir to avoid fluctuations that can affect absorption rates.
- Poor sealing: Ensure all sides are properly sealed to prevent water from escaping and affecting test results.
- Inconsistent specimen size: Use specimens of uniform size and shape for accurate, repeatable results.
Quick rule: Regularly review your setup and procedure to catch any potential issues early and maintain the integrity of your test.
How to Interpret Your Results — Simple Analysis and What Actions to Take
Turn your raw measurements into a simple curve by plotting absorption against time. Normalize if needed and use a basic notebook workflow to sketch the DIY absorption curve. This helps you see the early uptake and the slower later behavior clearly.
The initial slope reflects the rapid uptake, while later behavior reveals saturation effects and porosity. Use plain cues from the curve to judge whether a surface may need sealing, better curing, or adjustments to finishing. Translate what you see into practical steps for your project.
Step-by-Step Process
Follow these practical steps to interpret your sorptivity test results and take necessary actions.
- Ensure safety: Wear gloves, eye protection, and a dust mask. Keep the work area clean and well-ventilated.
- Prepare data: Gather raw measurements (mass or height change over time). Check for any missing or incomplete data.
- Main analysis: Convert raw measurements into an absorbance-versus-time plot using a spreadsheet or notebook. Normalize by exposed area if needed.
- Identify regimes: Distinguish the early vs. later slope regions to understand sorption rate and saturation behavior.
- Calculate metrics: Estimate sorptivity (S) from the initial linear portion, following ASTM C1585 guidelines.
- Interpret results: Translate findings into actionable insights, considering surface roughness, capillarity, and porosity.
- Quality checks: Address measurement noise, outliers, sample thickness consistency, and ambient conditions. Handle non-linearities or delayed uptake as needed.
- Cleanup: Store data securely, clean the work area, and dispose of materials responsibly.
From measurements to sorptivity (simple plotting method)
Transform raw measurements into an absorption curve to estimate sorptivity:
1. Normalize by exposed area: Divide cumulative absorption by the sample’s surface area.
2. Plot cumulative absorption versus square root of time on a graph or spreadsheet.
3. Use the early-time slope as the initial sorptivity, following ASTM C1585 for precise formulas.
Practical interpretation and next steps
Low sorptivity (<0.1 mm/min1/2) indicates good concrete performance, requiring minimal changes to mix or curing.
Medium sorptivity (0.1-0.5 mm/min1/2) suggests room for improvement. Consider altering mix design, improving curing, or applying surface sealing.
High sorptivity (>0.5 mm/min1/2) indicates poor performance. Consult a professional to consider lab testing, corrective coatings, or moisture barriers.
Sample Preparation, Surface Roughness and Why They Matter
Surface roughness and whether faces are sealed can shift how moisture enters and leaves a sample. A rough texture creates more capillary pathways and boundary effects, while sealed faces reduce boundary moisture exchange. Both factors change the measured sorptivity in a practical test.
Outline a straightforward workflow: cast a representative sample, demold at a consistent age, and apply a controlled surface finish. Document curing conditions and keep the surface consistent to support repeatable results.
Impact of roughness on wettability and absorption
Rough surfaces can alter the way water interacts with concrete. Roughness affects wetting, which is how well water spreads across the surface.
Think of it like this: a smooth surface (low roughness) lets water spread out easily. But a rough one (high roughness) makes it harder for water to cover the whole area quickly.
This difference in wetting affects capillary action, which is how water gets pulled into the concrete’s pores. A rougher surface might slow down initial absorption, but over time, it could actually increase total absorption due to more complex pathways.
Simple ways to standardize or measure surface roughness at home
To keep results consistent, you need a standardized surface. Here’s how:
1. Use consistent mold faces: Make sure the sides of your molds are smooth and even. You can lightly sand them if needed.
2. DIY texture checks: Feel the surface with your fingertips to get an idea of roughness. Or, compare it visually to a reference sample or photo.
3. Photographic texture checks: Take photos of the surface under consistent lighting. Compare these images to check for variations in roughness.
For more precise measurements, consider using profilometry. But that’s usually for labs. If you need it, consult a professional or use a DIY profilometer design from online resources.

Using Cameras and Simple Computer Vision to Track Water Uptake
Automated tracking helps measure wetted area and water front more consistently than manual eyes alone. It can improve repeatability when setup is stable and lighting is controlled. Consider automation when you have a reliable test routine and basic software access.
Choose affordable cameras, plan lighting, and define a region of interest to capture the rising front over time. Explore simple methods like thresholding or contour detection for basic tracking, and note when you need more robust tools.
How water-level detection via computer vision works (overview)
The basic idea here is simple. We’re using a camera to snap pictures over time, then we use some smart software to find where the water meets the air in each shot. That’s our liquid/air boundary or wetted area. From there, we just extract the position or size of that wet patch as it grows, and voila! We’ve got ourselves a water uptake timeline.
Think of it like watching a time-lapse video of a puddle growing, but instead of just looking at it, we’re measuring how big it gets frame by frame. That’s what computer vision does here – it turns visual data into measurable data.
Key point: We’re not just taking pretty pictures; we’re turning those images into useful, quantifiable info about water absorption.
Low-cost hardware and what to check in code
Before you dive into the computer vision stuff, make sure your hardware is set up right. This checklist helps you do that.
- Camera: Use a simple, affordable webcam or IP camera. They work just fine for this job.
- Lighting: Keep it consistent. Too much light or too many shadows mess with our software’s eyes.
- Mounting angle: Get it right the first time. You want to see that water line clearly as it rises.
- Frame rate: Start with 1 frame per second. It’s enough for this test, and it keeps file sizes manageable.
- Region of Interest (ROI): Define a specific area in your image where the water will rise. This helps our software focus on what matters.
- Resolution: 640×480 or higher works well. It gives us enough detail to see that water line clearly.
- Open-source scripts: Check repositories like GitHub for ready-made scripts. They can save you time and effort.
- Verify ROI robustness: Make sure your software can find the water line even when it’s not perfectly centered or shaped.
Quick rule: Always double-check your hardware setup before relying on automated outputs. A few minutes now saves hours later.
Similar Content Being Viewed by Others
This section digs deeper than common guides by focusing on practical, actionable differences in DIY sorptivity methods. You will see how to tighten tolerances and troubleshoot in real workshop conditions. It aims to help you compare options with clear, jobsite-focused guidance.
Look for gaps in typical content and plan precise additions such as step-by-step tolerances, safety notes, and straightforward data interpretation. The goal is to help readers make informed choices that fit a home setup and time constraints.
Interpreting sorptivity results for your project: how to compare numbers and what they mean for moisture risk
The sorptivity result you get is a measure of how quickly water moves into your concrete. It’s expressed in meters per square root of time (m/s^0.5).
To understand it, first know the unit: lower numbers mean slower absorption, better moisture control.
Compare to typical values: A good sorptivity number is around 0.1 m/s^0.5 or less for most residential projects. If your result is significantly higher, you might have issues with cracking, freezing damage, or efflorescence.
Step-by-step guide to performing a simple home sorptivity test: materials, setup, procedure, and safety
Choosing the right materials is crucial for accurate results. Here’s what you’ll need:
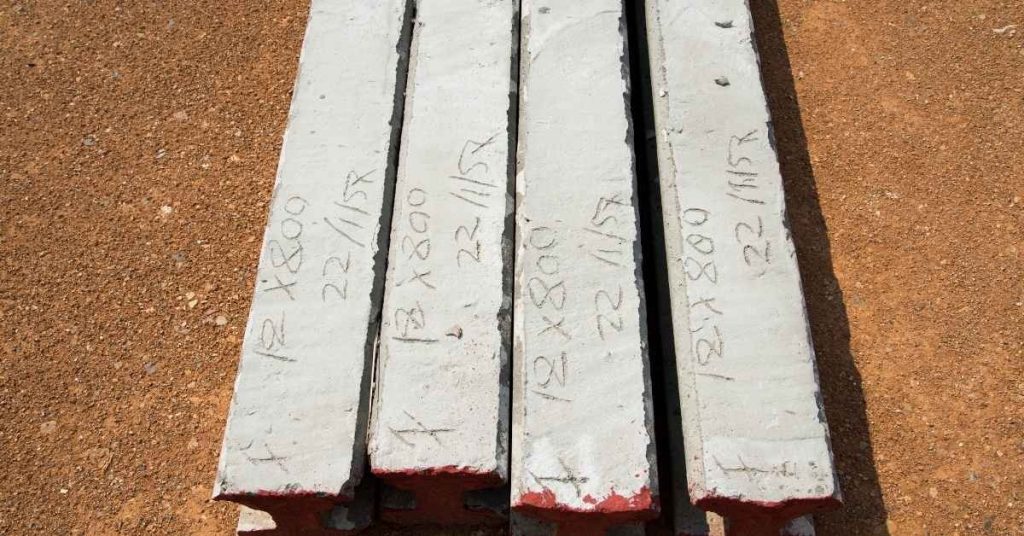
- Concrete coupons or slabs (150mm x 150mm x 60mm): Ensure they’re uniform, cured properly, and have a smooth surface.
- Distilled water: Tap water can leave residue. Use distilled to avoid contamination.
- Timer or stopwatch: To record measurement intervals precisely.
- Scale (accurate to 0.1g): For weighing coupons before and after testing.
- Safety glasses and gloves: Always protect your eyes and hands when handling materials.
Sorpvision: a Comprehensive Dataset for Cementitious Sorptivity Analysis Powered by Computer Vision
Define the scope of a practical dataset that aligns with DIY workflows, including test types, cementitious materials, cure conditions, and sorptivity measurements. Map the data to the article’s home test steps for easier use. This helps readers connect theory with hands-on practice.
Outline metadata and a simple computer vision workflow that keeps steps clear and reproducible. Explain how to store data, share results, and apply CV analyses without complex setups in a home workshop.
Setting up the Sorption Test with SorpVision in the Field or Workshop
To get accurate, repeatable sorptivity readings using SorpVision, you’ll need to set up your test just right. Here’s what you’ll need and how to do it.
Safety first: Wear gloves, safety glasses, and a dust mask when handling cementitious materials.
Gather these tools and materials: a stopwatch, ruler, camera (as specified in the SorpVision dataset), waterproof tape, and your concrete sample. Make sure your sample is prepared as outlined earlier – smooth surface, consistent size, and cured under controlled conditions.
Set up your test area with adequate lighting and minimal drafts to mimic the lab conditions of the SorpVision dataset. Tape your ruler onto a flat surface next to your sample for reference in photos.
Step-by-Step Wetting Protocol and Image Capture for Accurate Sorptivity Readings
This step-by-step wetting protocol ensures consistent water application and image capture, crucial for accurate sorptivity readings using SorpVision’s computer vision analysis.
- Prepare your sample: Ensure the surface is clean and dry. Mark a starting line on your ruler with tape.
- Wet the sample: Using a spray bottle or small container, apply water evenly across the entire surface of your sample. Start your stopwatch as you begin wetting.
- Control drainage: Tilt your sample slightly to prevent water from pooling at the bottom. This ensures consistent water absorption.
- Capture images: Place your camera on a stable tripod, framing both the sample and the ruler. Take photos every 5 minutes for the first hour, then every 10-15 minutes until no further water uptake is observed.
- End the test: Once water uptake has stopped, mark the final water level on your ruler and take a final photo. Stop the stopwatch and record the total time taken.
Results and Discussion
Interpret measured sorptivity in practical terms for DIY projects, linking it to moisture ingress and durability considerations. Discuss how different curing or finishing choices may influence the results shown by your test. Keep the discussion grounded in home workshop realities.
Present the data in a plain visual summary and explain how to read the trends without specialized training. Include common error sources and simple steps to minimize them so readers can repeat tests with confidence.
Interpreting Sorptivity Results: Quick Checks and Practical Thresholds
The sorptivity value tells you how quickly water is absorbed into your concrete. Lower numbers mean slower absorption, which is what you want for durability.
High values (over 0.1 mm/min^0.5) suggest that moisture could ingress rapidly, potentially leading to issues like efflorescence or freeze-thaw damage. This might indicate a porous mix, like one with high water-to-cement ratio or insufficient curing.
Low values (under 0.05 mm/min^0.5) suggest good moisture resistance. This is typical of well-designed mixes with proper curing and sealers. But beware of outliers: if your result seems unusually high or low, double-check your test setup or consider retesting.
How to Replicate the Test Safely: Step-by-Step Protocol, Tools, and Pitfalls
To get reliable results, follow this step-by-step protocol:
- Materials: Concrete sample (6″ x 6″ x 12″), water, timer, ruler, camera, optional: SorpVision app ($5/month).
- Safety: Wear safety glasses and gloves. Work in a well-ventilated area.
- Setup: Ensure the sample is dry, flat, and has a smooth surface. Place it on a level surface.
- Measurement: Pour water onto the sample until it’s fully submerged. Start the timer when water first touches the surface. Take photos every 30 seconds for 10 minutes.
- Avoid pitfalls: Ensure consistent lighting and distance for photos. Avoid touching the sample during testing to prevent moisture loss.
Conclusion
This test gives you a clear read on how well moisture moves into concrete or mortar and why that matters for safety, durability, and looks. Do the test right, and you can spot trouble early and keep your project from costly fixes.
Proceed with a simple, repeatable check: choose a small, clean area, prepare the surface as you did for the test, apply water the same way each time, monitor uptake with your eye or a camera, note timing and amounts, compare to a baseline, and decide on actions based on the results. Start small, document what you see, and use the results to guide curing, sealing, or additional tests in nearby spots.
Common mistakes to avoid: rushing the surface prep or using uneven water, skipping a consistent starting point or timing, and ignoring safety gear or the potential for water damage to finishes. Safety first means protect nearby surfaces, work in a dry area when possible, and keep water away from electrical outlets. Keep tests simple and stop if you see unexpected cracks, spalling, or paint failure.
If you notice persistent high sorptivity after a couple of tests, or if the area is critical (structural concrete, foundations, or moisture-sensitive finishes), call a professional rather than pushing ahead. When you stay methodical, you stay safe, and you keep the project on track with confidence and momentum.
FAQ
What are practical methods to compare sorptivity across different mixes or surfaces?
Keep testing conditions consistent: same surface prep, same amount of water, and the same timing for measurements. Use simple, repeatable steps and note any differences in surface texture or coating. Check product labels or manufacturer instructions if you’re comparing specific materials.
How do absorption dynamics differ between cementitious materials, and what should I observe?
Different mixes absorb water at different speeds. Watch how quickly the surface wets and how the damp area grows over time. If you’re unsure, compare pictures or simple timing observations and look for trends rather than exact numbers.
How do I set up a simple hardware configuration for a DIY sorptivity test?
Use a stable surface, a ruler or tape for scale, and a small, repeatable water source to apply a consistent amount of water. A basic camera or phone can help you track wetting over time. If you use any sensors or software, follow the manufacturer instructions and local rules.
Can surface wettability affect results, and how should I test for it?
Yes. Wettability changes how fast water spreads. Roughness and coatings matter. Clean the surface, avoid slapping on coatings you don’t intend to test, and document any surface treatment before starting. If unsure, consult the material label or instructions.