
Introduction
Learn how to safely and effectively repaint a popcorn ceiling without damaging it.
The guide walks through practical steps, common pitfalls, and tips to choose finishes and prep work so you can do it with confidence.
You’ll know what to expect, what tools to use, and how to achieve a durable, even finish.
Key takeaways
- Assess popcorn texture and underlying drywall before painting to plan repairs.
- Test ceiling for asbestos; if positive, hire licensed abatement before painting.
- Use low-VOC acrylic matte paints for non-gloss finish to hide texture flaws.
- Protect furniture and walls with plastic sheeting and seal edges with painter’s tape.
- Apply thin, even coats with roller designed for ceilings; avoid heavy loads.
- Allow adequate drying time between coats; inspect and repair imperfections promptly.
Table of Contents
- Introduction
- Key takeaways
- Why Paint a Popcorn Ceiling? Benefits and when to choose painting over removal
- Safety First: Testing, asbestos, and protective measures
- Tools, materials, and eco-friendly paint options
- Prep work: Inspecting, cleaning, repairing, and protecting the room
- Step-by-step painting process for a professional-looking finish
- Common DIY mistakes and how to avoid them
- Costs, time estimate, and deciding DIY vs. hiring a pro
- Aftercare, maintenance, and choosing ceiling colors for best results
- Conclusion
- FAQ
Why Paint a Popcorn Ceiling? Benefits and when to choose painting over removal
Painting a popcorn ceiling can save money, time, and a big mess compared with removal. It delivers a brighter, more uniform look and is a reversible, temporary refresh rather than a demolition project. Use painting as a sensible first step when the texture is minor or cosmetic and you’re on a tight schedule; removal is worth it if the ceiling has severe damage, you want a completely smooth surface, or asbestos is present or suspected.
Before you start, inspect texture quality, moisture or structural issues, and your budget and tolerance for disruption, and decide whether to test for asbestos or hire a pro. Plan for surface cleaning, sealing with primer, patching, sealing off the room, and choosing the right paint and finish to minimize moisture exposure. Expect a brighter ceiling with a more uniform look, but treat it as a temporary fix that may need future maintenance and reassessment.
Advantages of painting vs. removal
Painting a popcorn ceiling is often the smarter choice when you’re looking to save money and time. Unlike removal, which can be a major undertaking with lots of dust and mess, painting keeps things neat and tidy. Plus, it’s quicker—no need for weeks of cleanup or structural repairs.
Painting also offers flexibility. If you ever decide you want a smooth ceiling down the road, removing the texture is still an option. But if you go with removal now, you’re locked into that decision until another renovation comes along. And let’s not forget about maintenance—painting makes it easier to touch up scuffs or stains without redoing the whole ceiling.
Another key advantage is cost savings. Removing popcorn texture can be pricey due to labor costs and potential repairs needed afterward. Painting, on the other hand, requires fewer materials and less time, making it a budget-friendly fix that brightens up your space instantly.
When you should consider removal or professional help
If your popcorn ceiling has severe water damage or is heavily painted over, it might be time to think about removal. These issues can compromise the integrity of the texture and make painting less effective. Similarly, if you’re dealing with asbestos concerns, hiring a pro is crucial for safety.
Signs that removal may be necessary include large sections of crumbling texture or extensive water damage that has weakened the ceiling’s structure. In these cases, attempting to paint could lead to further problems down the line.
Before you start any work, it’s important to check for asbestos. If there is a chance your home contains this material, professional testing and removal are mandatory to avoid health risks. DIY projects can be rewarding, but when dealing with potentially hazardous materials like asbestos, leaving it to experts ensures everyone stays safe.

Safety First: Testing, asbestos, and protective measures
Before you paint, test for asbestos and lead, and set protective measures. If tests show hazards, pause work and hire licensed abatement or remediation as advised. Use proper PPE and scene containment during any testing or prep.
Tests matter because popcorn ceilings and old paint can hide risks. Knowing when to escalate helps protect your family and avoid costly mistakes, and it keeps you on the right side of safety. Always check product labels and manufacturer guidance, and follow local disposal rules for hazardous waste.
How to test for asbestos and lead (and what results mean)
To ensure your safety when dealing with popcorn ceilings, testing for asbestos and lead is crucial. Start by considering DIY kits or professional lab tests. For asbestos, a certified lab can provide accurate results without disturbing the material, which could release harmful fibers.
If you opt for DIY kits, be cautious as they may not offer the same level of accuracy. If your home was built before 1980, it’s highly recommended to hire professionals due to the higher likelihood of asbestos and lead presence. A positive test means you need a licensed abatement professional to handle removal safely.
For lead paint, testing kits can help identify its presence but may not be as reliable for quantifying levels. If high lead concentrations are detected, specialized remediation is necessary before proceeding with any painting or renovation work.
Personal protective equipment and containment
When working on popcorn ceilings, proper PPE and containment measures are essential to protect your health and the environment. Here’s what you need:
- Respirator: Choose a respirator rated for particulates to filter out dust and fibers. Ensure it fits snugly with no gaps around the nose or mouth.
- Eye protection: Wear safety goggles to prevent dust from entering your eyes during scraping or sanding.
- Disposable coveralls: Use full-body disposable suits to avoid contaminating clothing and skin. These can be rented for a day at around $20-$30.
- Gloves: Wear nitrile gloves to protect your hands from chemicals and dust. Opt for thicker ones if you’re handling rough materials.
Contain the work area by setting up plastic sheeting on floors, walls, and doorways to prevent dust spread. Use duct tape to seal edges tightly. Proper containment not only keeps the mess contained but also ensures a safer working environment.
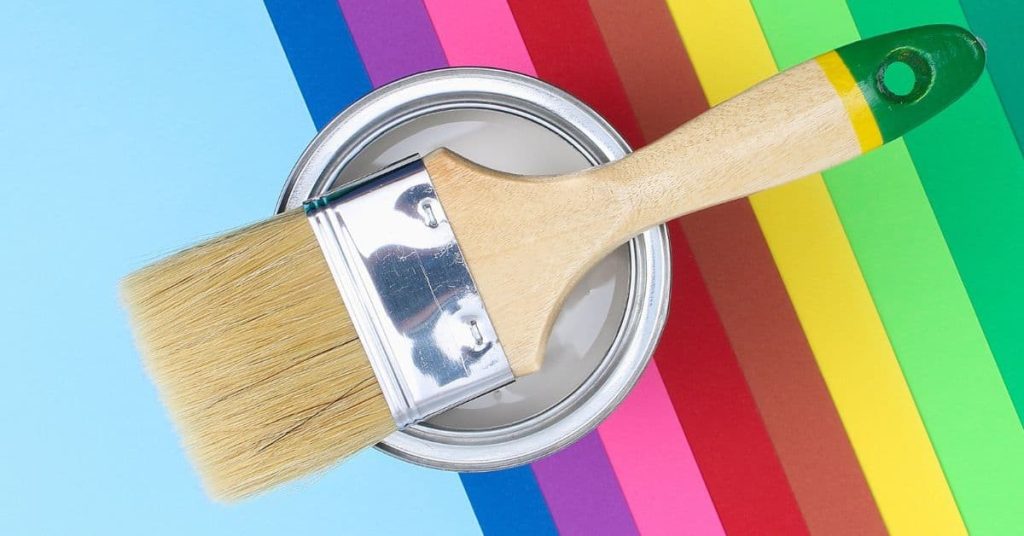
Tools, materials, and eco-friendly paint options
The core point here is a concise, practical checklist that covers the exact tools and materials you’ll need for popcorn ceiling painting, plus safe, eco-friendly options and a quick pre-paint inspection to ensure a stable surface. Include roller covers and nap length considerations, an extension pole to cut down ladder use, an angled sash brush for edges around fixtures, plus drop cloths and a sturdy ladder; add safety gear like a dust mask and eye protection, and specify primers, stain-blocking if needed, and caulk for any repairs. For the eco-friendly path, list low- to zero-VOC acrylics or latex paints, low-odor primers, and options for sustainable containers, while reminding readers to check product labels for VOC content and disposal guidance.
This matters because popcorn texture reacts to roller pressure and edge work differently, so choosing the right tools and paints saves time and minimizes texture damage while keeping odors and emissions low. The guidance helps you forecast coverage, drying times between coats, and when a stain-blocking primer or sealant is warranted for problem spots, without promising exact numbers you’ll have to verify on the label or datasheet. In practice, you’ll benefit from nib-free, gentle edge work with a sash brush, a modest nap length matched to the texture, and a finish such as matte or eggshell that hides texture without glare, while following local disposal rules for painters’ supplies and checking for signs a product has degraded before use.
Tools and consumables checklist
Before you start painting, run through this checklist to ensure you have everything needed for a smooth job.
- Paint roller: Choose a 9-inch roller with a medium nap (about 1/2 inch) for best coverage on popcorn texture. Avoid short naps that won’t reach into the peaks and valleys.
- Extension pole: Get an adjustable extension pole to minimize ladder use and reduce risk of falls. Check it extends at least 6 feet longer than your ceiling height.
- Sash brush: Use a small angled sash brush for edges, corners, and around light fixtures where the roller can’t reach.
- Drop cloths: Lay down large drop cloths to protect furniture and floors from paint splatters. Make sure they cover all areas under your work zone.
- Ladder: Use a sturdy ladder that reaches high enough for you to comfortably paint the ceiling without overreaching. Check it’s stable on level ground.
- Dust mask: Wear a dust mask to protect against airborne particles during prep and painting. Ensure it fits snugly around your nose and mouth.
- Eye protection: Use safety glasses or goggles to shield eyes from paint splatters and debris. Make sure they fit securely over prescription glasses if needed.
- Vacuum with brush attachment: Clean up loose popcorn texture before painting using a vacuum with a soft-bristle brush attachment. This prevents dust from settling on the ceiling during prep work.
Quick rule: Always double-check your tools and materials to avoid mid-project delays or safety issues.
Paint, primer, and finish choices — including low-VOC options
Selecting the right paint is crucial for a smooth popcorn ceiling. Opt for flat or matte latex finishes as they hide texture well without excessive shine.
A good primer is essential to seal porous surfaces and ensure even coverage of the topcoat. Look for stain-blocking primers if there are any marks or stains on your ceiling that need covering up.
For eco-conscious choices, choose low-VOC or zero-VOC paints and primers from reputable brands like Benjamin Moore Aura or Sherwin-Williams Emerald Urethane Sheen. These products minimize harmful emissions while still providing excellent coverage and durability.
Prep work: Inspecting, cleaning, repairing, and protecting the room
Prep work means clearing the room and protecting what stays: move furniture, wall décor, and electronics out of the way and map a simple sequence from prep to protection to repair. Cover floors with drop cloths, seal furniture and fixtures with plastic, and seal off vents and outlets so dust and debris don’t chase you back into other rooms. Don’t rush the plan— assess flaking texture, plan a gentle patch, and set aside time for drying and light feathering without flattening the popcorn.
Safety first: check for asbestos if the popcorn ceiling dates from an earlier era, ventilate well, and wear proper PPE like a dust mask and eye protection. Clean with a microfiber cloth or a vacuum with a HEPA filter, avoiding oversaturation that could loosen texture, and spot-clean grease with a mild detergent after testing a small area. For repairs, stabilize and repair damaged texture with an appropriate patching compound, feather the edges, let it dry fully, and lightly sand to blend without destroying the popcorn—this slow, thorough prep is what yields a durable finish.
How to clean and lightly repair popcorn texture without scraping
To prep your popcorn ceiling for painting, start by dusting it down. Use a microfiber cloth or a vacuum with a HEPA filter attachment to gently remove loose dust. Avoid saturating the texture; you just want to lift off surface dirt.
For any grease stains or marks, spot-clean them with a mild detergent solution. Test this on an inconspicuous area first to make sure it doesn’t damage the texture. Once cleaned, look for flaking areas that need repair. Use a small patching compound specifically designed for popcorn ceilings and feather out the edges carefully.
Let each repair dry thoroughly before lightly sanding to blend in with the rest of the ceiling. The goal is to stabilize any loose bits without flattening or scraping away the texture. Take your time; rushing through this step can lead to uneven patches that stand out after painting.
Protecting walls, floors, and fixtures
Cover all surfaces with drop cloths or plastic sheeting. Start by laying down a large tarp on the floor to catch any debris that falls during prep work and painting. Use painter’s tape around edges where the ceiling meets the wall to prevent paint from bleeding.
Seal off light fixtures, ceiling fans, and HVAC vents with plastic wrap and masking tape. This keeps them free of dust and paint splatters. If you have any furniture or decor that can’t be moved, cover it thoroughly with plastic sheeting and secure it tightly.
Turn off ceiling fans before covering them to avoid damaging the blades when securing the plastic. Make sure all electrical outlets are taped up as well to prevent paint from getting inside. Proper protection is key to keeping your room clean and ensuring a smooth painting process.

Step-by-step painting process for a professional-looking finish
A professional-looking finish starts with smart prep, a stain-blocking or bonding primer, and a disciplined painting sequence from repair through the final coat. Use a short-nap roller and a W or M pattern, work in small sections, keep a consistent wet edge, and apply two light coats rather than one heavy one. Repair loose texture, feather edges, and seal against dust; decide if a light knockdown is needed to reduce shedding.
Doing this right minimizes texture issues, lap marks, and the need for heavy touch-ups. Always follow the product instructions for drying times and conditions, and plan touch-ups by misting lightly to blend texture without overworking. Check local disposal rules and look at the label or datasheet for guidance on primers, coatings, and clean-up; when in doubt, ask the store or manufacturer.
Step-by-Step Process
This sequence ensures a smooth, professional finish on your popcorn ceiling.
- Inspect and prep the room. Cover floors, walls, and fixtures to protect them from paint splatters.
- Repair any cracks or holes in the texture with spackle or joint compound. Feather edges for a seamless look.
- Apply primer using a roller designed for textured surfaces. This seals the porous popcorn ceiling and improves adhesion.
- Start painting by working in small 4×4 ft sections to avoid lap marks. Use a W or M pattern with consistent pressure.
- Allow each section to dry completely before moving on to the next one, typically 2-4 hours depending on humidity.
- Inspect your work under natural light for missed spots and touch up as needed without overworking the texture.
Priming and why it matters on textured surfaces
Primer is crucial because it seals the porous popcorn ceiling, improving paint adhesion and blocking stains. Use a stain-blocking primer to cover up any discolorations.
Apply the primer evenly but avoid over-saturating the texture. A light coat will do just fine; too much can cause the texture to sag or become uneven.
Note: If you notice the primer is pooling in low spots, thin it slightly with water and apply a second light coat.
Rolling technique, section size, and how to apply coats
Use a roller with a short nap designed for textured surfaces. A 1/4-inch or 3/8-inch nap is ideal.
Work in overlapping sections of about 4×4 feet at a time. This helps avoid lap marks and ensures even coverage.
Maintain a wet edge as you paint, moving the roller in a W or M pattern to cover all areas evenly without overworking the texture.
Inspecting, touch-ups, and recommended drying/coat timing
After your first coat dries completely, inspect the ceiling under natural light. Look for any missed spots or uneven areas.
If you find spots that need touch-up, lightly mist them with water to blend in better before applying a second thin coat of paint.
Wait at least 2-4 hours between coats, longer if humidity is high. This ensures the first coat dries properly and prevents lap marks.
Common DIY mistakes and how to avoid them
Common DIY mistakes include skipping primer, over-wetting textures, using the wrong roller or sheen, and poor prep. Fixes are practical: clean and patch, sand rough spots, and apply a bonding/alkali-resistant primer suited for popcorn textures. Use the right roller nap, test spritz-wetting to avoid drips, and mask walls, vents, and floors to keep the job clean.
This approach helps you finish smooth, durable texture without frequent peeling or patchy spots. Plan each step—surface prep, moisture control, tool choice, and containment—so you know what to do when problems show up and you can keep the work surface steady. Always check product labels for specifics and local rules for disposal.
Mistake: Over-saturating the texture or using too much paint
Avoid these common mistakes to keep your popcorn ceiling looking its best.
- Too wet roller: Excess moisture can loosen the texture. Use a dry-roller technique and apply light coats.
- Overloading brush: Too much paint clumps and sags. Load only half of your roller’s capacity.
- Inconsistent pressure: Uneven application leads to drips and runs. Maintain steady, even strokes across the texture.
- No test area: Always check on a small section first for proper coverage and drying time.
Maintain control over paint load and application to ensure your ceiling stays intact and looks great.
Mistake: Skipping primer or using wrong sheen
Avoid these common mistakes for a flawless finish on your popcorn ceiling.
- No primer: Primer seals the surface and prevents peeling. Always apply an alkali-resistant primer first.
- High gloss paint: Shiny finishes highlight imperfections. Use low-lustre or matte sheens for a smooth look.
- Incompatible paints: Ensure your paint is suitable for textured surfaces and adheres well to the ceiling.
Selecting the right primer and finish ensures durability and hides imperfections, giving you a professional result.
Mistake: Poor prep and cleanup leading to uneven results
Avoid these common mistakes for an even and clean finish on your popcorn ceiling.
- Inadequate masking: Protect walls, vents, and floors from overspray. Use painter’s tape and drop cloths.
- Dirt left behind: Clean the surface thoroughly before painting to avoid embedded dirt. Dust with a damp cloth first.
- Rushed touch-ups: Take time for proper drying between coats. Touch up only when fully dry.
Adequate preparation and cleanup ensure your ceiling looks uniform and professional upon completion.
Costs, time estimate, and deciding DIY vs. hiring a pro
This section helps you build a practical framework to estimate DIY time and material costs for popcorn ceiling projects and compare that to hiring a pro. Break down the ceiling area, coats, prep work, and finishes; use rough per-square-foot guidance and note the cost drivers like texture removal and abatement needs. It also introduces a simple decision rubric to decide when a pro saves time or reduces risk.
In practice, expect to consider room size, ceiling condition, asbestos/lead testing, disposal, and any containment needs. The payoff is you know when your time, tools, and safety risks outweigh the warranty, insurance, and efficiency a pro brings. A quick worked example helps you sanity-check your plan, and a risk/benefit checklist guides the call to action.
How to estimate materials, time, and labor for a DIY job
The right choice of materials can make or break your project. Use high-quality paint and primer designed for textured surfaces.
- Square footage: Measure the ceiling area accurately. Multiply length by width for simple rooms; add up irregular shapes for complex ones.
- Number of coats: Two to three coats are usually needed, depending on the color contrast and texture coverage. Test a small patch first.
- Patching and sanding: Assess cracks and holes. Use lightweight spackling compound; sand smooth after drying.
- Priming: Apply primer to seal the surface and ensure paint adheres properly. Choose an oil-based primer for better coverage.
- Paint selection: Opt for a durable, matte or eggshell finish that hides imperfections well. Avoid glossy finishes as they highlight texture flaws.
When to hire a professional and what to expect from a quote
Hiring pros is wise if you encounter asbestos, large or high ceilings, complex repairs, or lack the time.
Containment: Ensure professionals plan containment measures for dust control. This includes drop cloths, plastic sheeting, and air filtration systems.
Testing: Professionals should test for asbestos before starting work. If found, they must follow strict abatement procedures to ensure safety.
Aftercare, maintenance, and choosing ceiling colors for best results
After you paint a popcorn ceiling, establish a gentle cleaning routine and protect the surface from moisture. Use mild cleaners and a soft cloth or sponge, avoid soaking, and watch for signs that touch‑ups are needed—fading, staining, wear of the texture, or water spots.
Color choices can make a room feel brighter, deeper, or warmer, especially when you pair them with the right lighting. Expect to adjust palettes by room and lighting—natural light vs. artificial light changes perception—so plan accent tones and consider ventilation and drying during upkeep to prevent problems.
Cleaning and long-term maintenance tips
To keep your painted popcorn ceiling looking fresh, aim to clean it every six months with a soft-bristled brush or microfiber cloth. Use mild soap diluted in water for tough spots; avoid harsh chemicals that can strip the paint.
For small chips or stains, dab on a touch-up coat of matching paint using a fine brush. Let it dry thoroughly before applying another thin layer if needed. Always test any cleaning solution on an inconspicuous area first to ensure no damage occurs.
Maintaining proper ventilation during cleaning is crucial to prevent moisture buildup and potential mold growth. If you notice water spots or signs of leaks, address them immediately by repairing the source before repainting affected areas.
Best colors and finishes for popcorn ceilings
Choosing the right color can dramatically change how your room feels. Opt for whites or off-whites to brighten up a space, especially in rooms with limited natural light.
If you prefer warmer tones, go for soft neutrals like beige or light gray. These colors add depth and coziness without overwhelming the texture of the ceiling. A flat or matte finish is usually best as it hides imperfections better than glossy finishes.
Consider how lighting affects color perception. Natural light tends to bring out cooler undertones, while artificial lights can make warmer tones pop more. Test different palettes in your space before committing to paint.

Conclusion
With the right prep and a careful approach, a freshly painted popcorn ceiling can look clean, even, and durable for years. The key is to protect yourself, test materials, and follow a steady process so you don’t risk peeling, staining, or unseen damage.
Finish by confirming your plan in plain terms: inspect for cracks and water damage, clean the surface, repair what you can, set up drop cloths and ventilation, prime if needed, apply thin coats with even strokes, and let each coat dry before moving on. Work in clear steps, avoid rushing, and check the room for dust, drips, or missed spots as you go. Do a final inspection in good light, touch up only where required, and allow the room to vent fully after you’re done.
Common mistakes to avoid include skipping a small-area test, using the wrong paint or too thick a coat, and neglecting safety gear or proper ventilation. Test in a hidden corner first, choose a low-odor, breathable option if possible, and keep edges protected to prevent damage to adjacent walls. Always wear a mask and eye protection, keep the area well ventilated, and stop if you see any signs of loosened texture or moisture behind the ceiling.
If you encounter significant asbestos concerns, extensive damage, or a ceiling that requires major repairs, calling a pro is the wise choice. Otherwise, stay disciplined, follow the plan, and you’ll finish confidently, with a result that lasts and looks professional.
FAQ
Do I need to remove popcorn texture before painting?
No. You can paint over it to save time. If the texture is loose or crumbling, fix those spots first before painting.
What kind of paint should I use on a popcorn ceiling?
Use 100 percent acrylic latex paint. Flat or matte finishes hide imperfections best. Avoid glossy finishes that show flaws and drips.
How do I prevent the paint from peeling or cracking?
Clean the ceiling lightly, fix any damaged areas, and use a proper primer first. Apply thin, even coats and let each coat dry fully before the next.
Is it safe to paint popcorn ceilings now?
Yes, but check for asbestos if the house is old. If you suspect asbestos, hire a pro to test and handle it safely before you start painting.