
Introduction
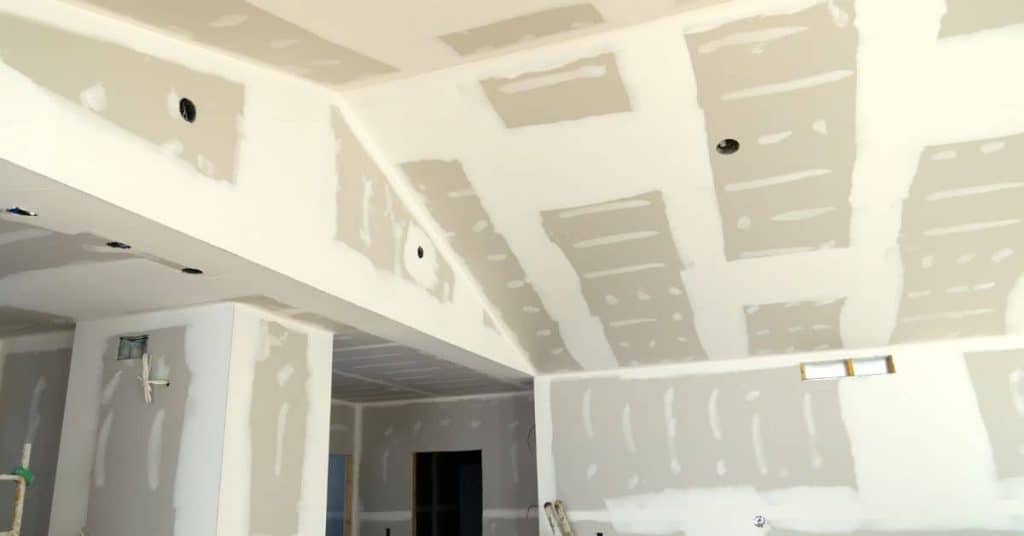
Rounded drywall corners are created by smoothing the joint with compound to form a curved edge instead of a sharp corner.
That profile helps hide minor misalignments and reduces impact dings during daily use. You’ll want to diagnose why the corner isn’t staying round before you fix it, so you don’t chase symptoms.
This article covers common causes, quick tests you can do on the job, and practical fixes you can try with basic tools. It speaks in plain, hands-on terms, with steps that a DIY homeowner can follow without special equipment. If a spec or instruction from a product or local rule applies, check the label or your local guidelines before proceeding.
Key takeaways
- Inspect existing bead and drywall; identify rounded areas and moisture damage.
- Wear goggles, mask, and gloves when cutting, sanding, or embedding mud.
- Remove damaged bead carefully to avoid widening the rounded corner.
- Patch small areas with compatible joint compound and corner patch if needed.
- When replacing, use bullnose or rounded corner bead and embed properly.
- Sand smooth, prime, and seal before painting to prevent chips.
Table of Contents
- Introduction
- Key takeaways
- Understanding Why Drywall Corners Become Rounded
- Diagnosing the Problem — Tests and Visual Checkpoints
- Tools and Materials Checklist
- Preparing the Work Area and Removing Damaged Bead
- Quick Patch Methods for Small Rounded Corners
- Full Replacement — Installing Bullnose or Rounded Corner Bead
- Sanding, Priming and Painting Rounded Corners
- Preventing Recurrence and When to Call a Pro
- Conclusion
- FAQ
Understanding Why Drywall Corners Become Rounded
Corners go round for several common reasons. Material choices and bead profiles influence how edges hold their shape after finishing. Impact damage and improper installation can also push corners toward a curved profile over time.
Some causes are DIY repair friendly, while others point to structural issues. Look for evidence of poor bead selection or misaligned edges as repairable tasks. If the problem stems from framing or movement in the wall, it may require different fixes or professional input.
Material-related causes
The materials used for drywall, compound, and corner beads play a significant role in the durability of your corners.
- Drywall Paper: Thin paper can tear easily. Thicker, more durable paper holds up better over time.
- Compound Type: Lightweight compounds are cheaper but weaker. Multi-purpose or all-purpose compounds offer a good balance between cost and durability.
- Corner Bead Material: Plastic beads are inexpensive but can crack under stress. Metal beads are stronger but more expensive.
- Compound Rating: Higher ratings (e.g., 90, 120) indicate better bond strength and durability.
- Avoid Low-Quality Materials: They may save you money initially but will likely lead to repairs down the road.
Installation and workmanship causes
Proper taping, mud application, and corner bead installation are crucial for strong corners. Poor techniques can lead to rounding.
Taping: Inadequate tape coverage or insufficient compound can cause weak bonds, leading to rounded corners.
Mud Application: Applying too little or too much compound can result in weak or brittle corners that round over time. Ensure even application and proper drying.
Bead Choice: Using the wrong bead for your needs (e.g., using a thin bead where a thick one is needed) can lead to rounding. Always choose the right bead for the job.
Environmental and usage factors
Humidity, thermal movement, and frequent impacts can all contribute to corner rounding over time.
Humidity: High humidity can cause drywall to swell and corners to round. Maintain proper indoor humidity levels to prevent this.
Thermal Movement: Drywall expands and contracts with temperature changes. This movement can cause corners to crack or round if not accounted for during installation.
Frequent Impacts: Furniture, foot traffic, and other impacts can weaken corners over time. Protect your corners from excessive wear and tear where possible.
Diagnosing the Problem — Tests and Visual Checkpoints
Start with a visual inspection of the corner profile from several angles. Check for consistency along the entire length and note any hidden damage that is not visible on the surface. Examine whether the bead sits true to the plane or if there is bowing or cracking behind it.
Decide if a patch will restore the look or if a full replacement is needed. Signs of deeper substrate failure or loose framing point to more extensive work. When in doubt, verify with product instructions or local rules before proceeding.
Visual inspection checklist
Use this checklist before starting any repairs to document problem areas and plan your work.
- Cracking: Look for hairline cracks or gaps in the drywall tape. These could indicate a weak bond or damaged substrate.
- Separation: Check if the corner bead is pulling away from the wall. This might mean the bead needs replacing.
- Inconsistent radius: Measure the corner’s curve to ensure it’s consistent throughout. Inconsistencies may suggest previous repairs or installation issues.
- Paint lines: Inspect for visible seams under paint. These could indicate a poor tape job or damaged substrate.
- Water damage: Look for discoloration, warping, or soft spots, which may suggest hidden water damage.
- Nail pops: Check for nail heads popping through the drywall. This can cause rounding and needs to be addressed.
- Sagging tape: Inspect if the tape is sagging or wrinkled. This indicates a problem with the mudding process.
- Dents or holes: Look for any damage that might have occurred during installation or use.
Quick rule: A thorough visual inspection helps you understand the extent of the problem and plan your repair strategy.
Simple physical tests
Before making any repairs, perform these non-destructive checks to assess bond integrity and locate weak spots.
- Light tapping: Gently tap the corner with a closed fist. A hollow sound may indicate a void behind the drywall.
- Flex test: Gently flex the corner by pushing and pulling on it. Excessive movement could suggest weak mudding or damaged substrate.
- Probing: Use a flathead screwdriver to gently probe the corner for any soft spots, which may indicate hidden damage.
- Bead check: Inspect the corner bead for any bends, kinks, or gaps. These could cause rounding and need to be addressed.
- Tape check: Gently lift a small section of the tape to check its adhesion. Poor adhesion may indicate a need for full replacement.
Quick rule: These simple tests help you understand if the problem lies with the substrate, bead, or mudding process.
Measuring and matching radii
Before purchasing new corner beads, measure your existing corners to ensure a consistent finish.
- Radius measurement: Use a tape measure or a flexible ruler to determine the radius of your current corner. This will help you match it when buying new beads.
- Bead options: Check with your local hardware store for available bullnose/bead options that match your measured radius.
- Consistency check: Ensure the radius is consistent throughout the entire corner. Inconsistencies may suggest previous repairs or installation issues.
- Bead condition: Inspect the existing bead for any damage, corrosion, or wear that might require replacement.
Quick rule: Accurate measurement and matching of radii ensure a consistent finish and help you purchase the right beads for your repair.
Tools and Materials Checklist
Assemble a basic set of hand tools, a drywall knife, and a utility knife. Include a few sanding sponges, a straight edge, and a sanding block for feathering edges. Have optional items like a corner bead tool and a flexible bead on hand for rounded corners.
Always verify product instructions before use and choose items that suit your project scale. Keep safety gear close at hand, and have a container for waste and a bag for dust control. Use manufacturer data sheets to confirm compatibility with your substrate and finish products.
Essential tools
Before starting any rounded-corner repair, ensure you have all the essential tools and safety equipment. This checklist will help you verify what you need.
- Tape Measure: Check it against the longest corner to be repaired to ensure accuracy.
- Pencil: Mark dimensions directly onto the surface for precise cutting.
- Utility Knife: Test blade sharpness by trying to cut a piece of paper. Replace if dull.
- Straight Edge: Use it to ensure clean, straight cuts along marked lines.
- Trowel (6-inch): Check for flexibility and no cracks or bends before use.
- Corner Trowel: Ensure it’s the right size for your corners by checking against the repair area.
- Bead Snips: Test cut a piece of metal to ensure they’re sharp and functional.
- Safety Glasses: Check for any cracks or scratches before wearing. Safety first!
- Work Gloves: Ensure they fit well and provide adequate protection.
Quick rule: Always check your tools before starting work to avoid costly mistakes and rework.
Material options and profiles
Before you start mixing concrete or installing corner beads, use this checklist to ensure you’ve got the right materials for your project. This will save you time, money, and rework.
- Metal Corner Bead: Check if walls are straight with no major cracks. Confirm by measuring wall plumbness and inspecting visually.
- PVC Corner Bead: Ideal for interior, non-load bearing walls. Ensure walls are clean and dry before installation to prevent mold growth.
- Flexible Corner Bead: Suitable for curved or irregular walls. Verify wall radius is within bead’s flexibility range (check product label).
- Bullnose Corner Bead: For rounded corners, typically used in bathrooms and kitchens. Confirm corner radius matches bead’s profile.
- Bead Width: Match bead width to wall thickness. Measure wall thickness and choose a bead that fits snugly.
- Bead Length: Calculate total length needed, adding 10-15% extra for cuts and waste. Measure wall perimeters and check product label for coverage.
- Fasteners: Check if screws or nails are included with bead. If not, purchase separately (check local hardware store).
- Joint Compound: For metal beads, ensure you have joint compound to fill screw/nail holes and create a smooth finish.
Quick rule: Always check product labels and manufacturer instructions for specific installation details. This ensures you’re using the right materials correctly, preventing costly mistakes.
Material specs and standards explained
Before you head to the store or start mixing, use this checklist. It’ll help you understand what those numbers and words on product labels mean, so you get the right materials for your job.
- Cement Type: Check it matches your project needs (e.g., Type I for general use, Type II for sulfate resistance).
- Concrete Strength (psi): Ensure it meets your local building codes and project requirements. Common strengths are 3000, 4000, or 5000 psi.
- Water-Cement Ratio: Look for a range like 0.45 to 0.60. Lower is stronger. Check manufacturer’s recommendations.
- Air Entrainment (%): For freeze-thaw areas, ensure it has air entrainment (usually 5-8%).
- Fire Resistance Rating: If needed for fire safety, check the rating matches your local codes.
- Manufacturer’s Installation Guidelines: Read and follow these to ensure proper mixing, placing, and finishing.
- Packaging Label: Check it’s intact, with no signs of tampering or contamination. Verify the product inside matches what’s on the label.
- Expiration Date: Ensure materials are fresh to maintain their strength and workability.
Quick rule: Always double-check your local building codes and manufacturer recommendations. They’re there for a reason – to keep you safe and your project sound.
Preparing the Work Area and Removing Damaged Bead
Clear the area and protect nearby surfaces with drop cloths and painter tape. Contain dust with plastic sheeting if possible and seal off the work zone. Remove loose paint and damaged bead without breaking the drywall layers underneath.
Dispose of damaged materials properly and follow local guidelines for debris. Contain the dust and debris during removal to minimize cleaning later. After removal, inspect the edge for any signs of exposed taping or studs behind the bead.
Surface protection and safety
Before you start, protect your work area. Lay down drop cloths or floor coverings to catch any dust or debris. Make sure they’re big enough to cover the entire area where you’ll be working.
Mask off areas you don’t want concrete splashing onto. Use painter’s tape and plastic sheets for this. It might seem like overkill, but trust me, it’s worth the extra time.
Ventilation is key. Concrete dust can be harmful if inhaled. If possible, open windows or use fans to keep the area well-ventilated. Consider wearing a respirator for added protection.
Safety gear is non-negotiable. Wear safety glasses and gloves at all times. If you’re using power tools, make sure they’re in good working order and follow the manufacturer’s safety guidelines. Always keep your work area clean and free of tripping hazards.
Removing old bead and prepping drywall edges
First off, don’t go at it like a madman with a sledgehammer. You want to preserve the drywall as much as possible.
Start by scoring the bead with a utility knife along its length. This helps break the adhesive seal and makes removal easier. Be careful not to cut into the drywall itself.
Gently pry the old bead off using a flathead screwdriver or a similar tool. Work from one end, using the tool to lift the bead away from the wall in small sections. If it’s stuck, use some warm water and a sponge to soften the adhesive before trying again.
Once the bead is off, check the edges of your drywall. If there are any tears or damaged areas, you’ll need to patch them before installing new bead. Use joint compound and mesh tape for this, following the manufacturer’s instructions.
Repair planning and materials staging
The right materials ensure a strong, durable repair that looks good. Here’s what you need:
- Drywall Bead: Use paper-faced or vinyl bead for best results. Look for standard width (1/2″ to 5/8″) and length (80′ to 100′). Avoid cheap, thin beads that can tear easily.
- Joint Compound: Choose a setting-type compound for strength and durability. Look for a rating of at least 4 on the USG joint compound scale. Avoid quick-setting compounds which are harder to work with.
- Mortar: For embedding screws or reinforcing corners, use Type N mortar. It’s strong, flexible, and affordable. Check the bag for a strength class of at least M4.
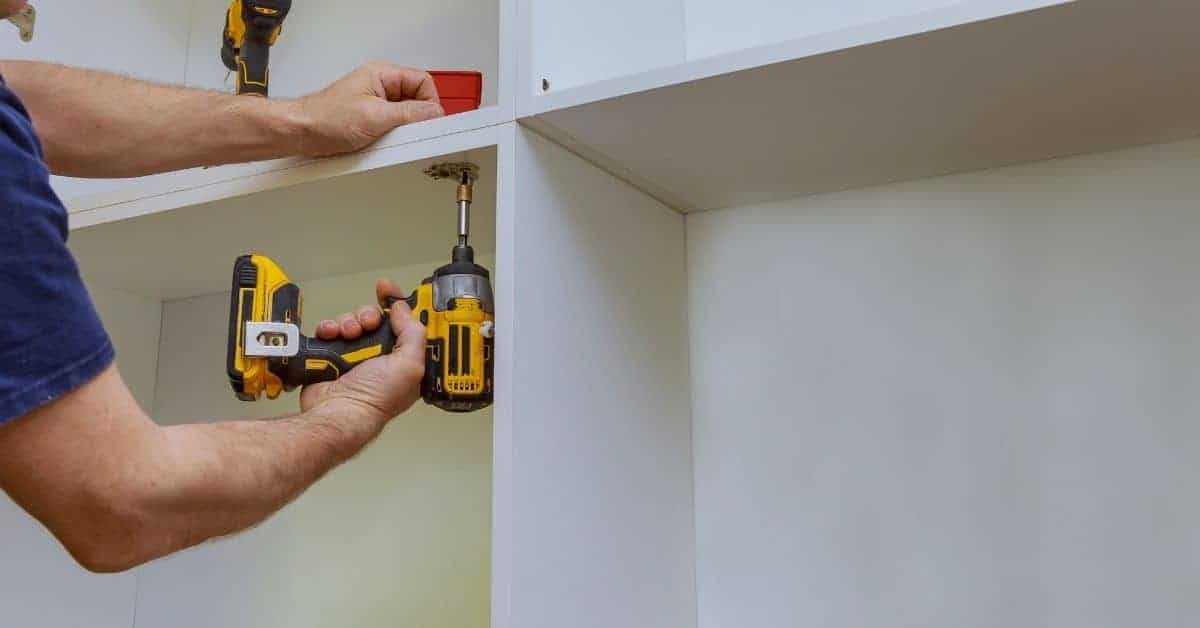
- Screw Driver: A cheap homeowner drill with a screwdriver bit is fine. Hire or rent if you don’t already own one.
- Tape Measure: A basic 25′ tape measure will do the job. Ensure it’s accurate to avoid measurement errors.
- Utility Knife: Use a sharp utility knife for cutting drywall and bead. Avoid dull knives that can tear the material.
- Safety Glasses: Protect your eyes from debris. Cheap, basic safety glasses are fine.
- Dust Mask: Wear a dust mask to protect against drywall dust. A simple disposable mask is sufficient.
- Work Gloves: Use gloves with good grip for handling materials and tools. Avoid thin, slippery gloves that can cause drops or cuts.
Pro tip: Buy materials in small quantities to avoid waste. Store them properly to maintain quality. When mixing compounds, follow the manufacturer’s instructions for a workable consistency. Always mock-fit the bead before final installation to ensure it fits perfectly.
Quick Patch Methods for Small Rounded Corners
For minor rounding, apply a thin skim coat to reestablish a true edge. Use feathering techniques to blend the edge into the surrounding surface. A flexible corner bead can help preserve shape during finishing.
Decide if a patch will suffice by evaluating the extent of rounding and edge continuity. If the profile remains reasonably consistent, a patch and skim may be all you need. If the rounding is pronounced, prepare for a larger repair or replacement.
Skim-coating to rebuild profile
Start by applying a thin layer of joint compound, using a 6-inch taping knife. Work it into the rounded area, building up the profile gradually.
Key: Keep each layer thin to avoid cracking and ensure proper adhesion. Let it dry completely before sanding lightly with fine-grit sandpaper.
Apply additional layers as needed, feathering the edges to blend into the surrounding wall. Allow each layer to dry fully between applications.
Using flexible corner beads and trims
For shallow radii, use flexible corner beads or trims designed for such applications. They conform better to the curve compared to standard beads.
Tip: Before installing, score the back of the bead with a utility knife to help it bend more easily.
Apply joint compound along the wall edge, then press the bead into place, using your fingers or a taping knife to work it into the curve. Hold it in place until the compound grabs.
Feathering and blending into surrounding wall
Once your repair is complete, use a taping knife to feather the edges of the patched area. This helps blend it into the surrounding wall, making the repair less visible.
Technique: Hold the knife at a 45-degree angle and pull it lightly across the edge, gradually reducing pressure as you move away from the patch.
When painting, start at the patched area and blend outwards to match existing paint lines. Use a small roller or brush for better control.
Full Replacement — Installing Bullnose or Rounded Corner Bead
Plan a full removal and install of new bullnose or rounded corner bead. Align the bead carefully to maintain a true rounded profile along the full height of the corner. Fasten according to the bead type and ensure the edge sits firm against the drywall.
Apply joint compound in steps, keeping the profile rounded as you mud. Follow the manufacturer instructions for fastening and mud application to avoid pulling or flattening the corner. Let the finish cure as directed before sanding or priming.
Cutting, fitting and securing the bead
Start by measuring and cutting your bullnose or rounded corner bead to length. Use a hacksaw or tin snips for this task.
Dry-fit the bead onto the wall to ensure it’s the right size and fits properly. Make any necessary adjustments before securing it in place.
Follow manufacturer instructions for fastening. Some beads use mechanical fasteners like nails or screws, while others may recommend an adhesive. Use the correct fasteners and drive them into the drywall at an angle to avoid damaging the bead.
Taping, mudding and building the radius
Start by applying a thin layer of joint compound onto the drywall using your taping knife. This is called ‘bedding’ the bead.
Embed the corner bead into this compound, ensuring it’s centered and follows the wall’s edge perfectly. Use your fingers or a trowel to press it firmly in place.
Apply a second layer of compound over the bead, building up the radius. Be careful not to over-bulk the corner as this can lead to shrinkage issues later on. Let each coat dry completely before applying the next.
Common issues during installation and how to avoid them
Here are some common mistakes to avoid when installing bullnose or rounded corner bead:
- Misalignment: Ensure the bead is centered on the wall’s edge before securing it. Use a level or straightedge to check alignment.
- Gaps: Avoid leaving gaps between the bead and the drywall. If you do, fill them with joint compound before embedding the bead.
- Fastener show-through: Be careful not to drive fasteners too deep into the bead. If they’re too long, they’ll show through the final finish.
- Inadequate drying time: Allow each layer of joint compound to dry completely before applying the next coat. Rushing this process can lead to cracks and other issues.
By avoiding these common pitfalls, you’ll ensure your new corner is true, durable, and looks great.
Sanding, Priming and Painting Rounded Corners
Begin with a light sanding to smooth ridges while preserving the curve. Use a fine grit and steady strokes to avoid flattening the corner. Dust off the area before applying primer.
Choose a primer compatible with your finish and designed for drywall. Apply a thin, even coat that enhances adhesion without altering the profile. Topcoat with the desired finish, keeping the edges crisp and true.
Sanding and surface prep without losing radius
Start with a low grit sandpaper, like 120 or 150, to smooth out any rough spots on your patched corners. This helps maintain the rounded profile.
Tip: Use a flexible sanding sponge for better contact with the curve.
Gradually move up to higher grits (220 and 320) for a smoother finish, but be careful not to sand too much into the flat wall areas. This could flatten your rounded corners.
Primer, paint selection and application tips
Use a high-quality drywall primer to seal the patched area and improve paint adhesion. Choose one that’s suitable for your paint type (latex or oil).
Tip: Consider using a stain-blocking primer if you’re painting over repairs.
For application, use a 3/8″ nap roller for the main surface and a smaller, angled brush for edges. This helps maintain a consistent sheen and hides repair lines.
If you’re using spray paint, make sure to follow the manufacturer’s instructions and apply in thin, even coats to avoid drips or uneven coverage.
Visual checkpoints for a finished look
Before you call your project complete, use this checklist to ensure a professional finish.
- Seamless transitions: Check that the patched area blends smoothly with the surrounding wall. No visible lines should be present.
- Consistent radius: Ensure the rounded corners maintain their shape and size throughout the entire length.
- No seam shadows: Inspect for any visible shadows or signs of unevenness that could indicate a missed spot during sanding or painting.
- Sheen consistency: Check that the sheen is consistent across both the patched area and the surrounding wall.
- Edge definition: Ensure the edges of your rounded corners are well-defined and not blurred or smudged.
- No drips or runs: Inspect for any paint drips or runs, especially around the corners.
- Color match: Check that the patched area matches the surrounding wall color as closely as possible.
- Drywall tape lines: Ensure there are no visible lines from the drywall tape used during repairs.
Quick rule: If it looks good from a distance, but you notice issues up close, it’s time to touch up or redo those areas.
Preventing Recurrence and When to Call a Pro
Use the right bead profile for the environment and avoid impact-prone locations when possible. Reinforce corners with proper taping and ensure the studs and framing are stable. Add protection or guards in high-traffic areas to extend life.
Decide if the repair falls within DIY capabilities or if a professional is warranted. If there is significant structural movement, cracking along multiple corners, or repeated failures, consult a pro. Maintain a routine inspection and address small issues before they grow.
Best practices to avoid rounded corners in new work
To prevent rounded drywall corners from the start, avoid these common mistakes during framing and finishing.
- Inconsistent stud spacing: Keep studs 16″ or 24″ on center for even support. Inconsistency causes walls to shift, leading to rounding.
- Improper bead selection: Use flexible corner beads for rounded corners and rigid ones for square corners. Using the wrong bead type leads to rounding over time.
- Sloppy taping: Apply tape carefully, ensuring it’s fully adhered to both walls and the bead. Sloppy taping allows movement, causing rounding.
- Inadequate mudding: Apply joint compound generously but evenly, filling any gaps between the tape and the wall. Insufficient mudding leaves corners weak and prone to rounding.
By following these best practices during installation, you’ll create stronger, longer-lasting drywall corners.
Protective measures and maintenance
Preventing rounded corners involves protecting them from impact and regular wear. Here’s how:
Install corner guards: In high-traffic areas, install plastic or metal corner guards to protect against scuffs and impacts.
Control traffic patterns: Keep heavy furniture and foot traffic away from corners to minimize stress and prevent rounding.
Regularly inspect your drywall corners for signs of wear. Catching issues early allows you to address them before they become major problems.
Signs you should hire a professional
While many rounded corner fixes are DIY-friendly, some situations require professional help. Here are red flags to watch for:
Structural movement: If your walls or corners show signs of significant movement, it could indicate structural issues that need immediate attention from a pro.
Extensive hidden damage: If you suspect extensive damage behind the drywall, hire a professional to assess and repair the issue before proceeding with corner fixes.
Recurring failures: If you’ve attempted multiple DIY repairs without success, it might be time to call in an expert. They can identify underlying issues and provide lasting solutions.
Lack of confidence/tools: If you’re unsure about any aspect of the repair process or lack necessary tools, don’t hesitate to hire a professional. It’s better to pay for quality work than risk further damage or injury.
Conclusion
Take action now with calm focus: fix the rounded corner so it looks right, stays strong, and won’t weaken the wall over time. The right steps protect safety, keep dust down, and prevent costly rework.
Begin by inspecting the damage, choosing the method that matches the corner, remove damaged bead if needed, install the chosen bead or patch, then sand, prime, and paint in that order, testing a small area first and stopping if anything looks unsafe or off. Finally, monitor the corner after painting and follow the preventative steps to reduce recurrence, and keep your work area clean and dry throughout.
Common mistakes to avoid are rushing the bead replacement or patching without a proper bond surface, skipping sanding or primer, and applying paint over a poorly prepared patch. Safety rules to follow: wear eye protection and a dust mask, shut off adjacent room power if you’re near outlets, work in a ventilated area, and don’t force wire or fasteners into damp or unsupported edges. If you’re unsure about the substrate, test a small section first, and don’t overwork the patch or sand too aggressively, which can round or gouge the corner further.
If the corner is severely warped, the framing or drywall edge is damaged, or you’re unsure about the structural integrity, call a professional rather than pushing ahead. With clear steps and steady work, you’ll restore a sharp, durable rounded corner and feel confident tackling the next project.
FAQ
What should I check first if my rounded corner comes back after patching?
Inspect the patch edges and the surrounding drywall for gaps or cracks. Make sure the existing corner bead is removed cleanly and that there is solid backing behind the patch before reworking.
Can I reuse the old rounded bead or do I need new bullnose bead?
Reuse is not recommended if the edge is dented or out of shape. Use a new bullnose or rounded corner bead that matches the wall thickness and the curve you want, and follow the manufacturer’s installation steps.
How do I confirm the patch will bond well to the drywall compound?
Use a good quality setting or drying compound and apply it in thin coats. Let each coat dry fully as per the product label before adding the next, and finish with a light skim to blend the edge.
What are safe finishing steps to avoid new dents or dimples after painting?
Sand lightly and evenly, wipe off dust, and prime the repaired area before painting. Use a lightweight paintable caulk around the edge if there are small gaps, then apply two thin coats of paint to match the wall. Check the manufacturer instructions for drying times.