
Introduction
Freeze-thaw cycles cause concrete repairs to fail in low-temperature zones.
The guide explains how repeated freezing and thawing weakens repair bonds and highlights practical steps—such as material choices, protective measures, and maintenance routines—you can apply in cold climates to improve durability.
Key takeaways
- Choose cold‑climate mixes with low water-cement ratio and air entrainment for durability.
- Use proper surface prep: clean, dry, and etched before patching to ensure adhesion.
- Avoid neat cement patch tests; rely on polymer-modified or polyurethane mortars in freeze zones.
- Implement continuous drainage and slope away from repairs to minimize water pooling.
- Apply sealed joints with compatible sealants to handle repeated cycles.
- Schedule inspections after freeze-thaw seasons to address cracking and moisture ingress.
Table of Contents
- Introduction
- Key takeaways
- What freeze‑thaw cycles are and why they matter
- How concrete’s microstructure controls vulnerability
- Common freeze‑thaw damage patterns to recognize
- Environmental drivers that accelerate freeze‑thaw deterioration
- Why many common and DIY repairs fail in cold regions
- Why temporary patches look good but don’t last — common failure mechanisms
- Best repair approaches for freeze‑thaw zones
- Design and material specs for cold‑climate mixes
- Preventive measures: drainage, grading, and maintenance
- Sealers, coatings, and de‑icer guidance for longevity
- Safety, liability, and triage for failed concrete
- Cost analysis and lifecycle considerations: repair vs. replace vs. lift
- Timing and seasonal planning: when to inspect and schedule repairs
- Common DIY mistakes and a step‑by‑step DIY checklist for small repairs
- When to call a professional and how to choose one
- Conclusion
- FAQ
What freeze‑thaw cycles are and why they matter
Freeze‑thaw cycles are simply repeated freezing and thawing of water trapped in concrete pores. When water freezes, it expands and creates tiny pressures that push against the surrounding material, which over time forms microcracks, surface spalling, and progressive deterioration—especially in cold climates where cycles happen often. These cycles matter because they magnify existing damage and accelerate the decline of concrete, setting the stage for repairs to fail if the underlying moisture and climate dynamics aren’t addressed.
For a DIY or jobsite reader, the key takeaway is that repetition matters: each cycle adds stress from saturated or damp conditions, amplifying bond failures or lift when repairs are made on or near joints, and increasing the risk of exposure or reinforcement corrosion. Environmental factors like soil moisture, drainage, temperature swings, and when freezing starts all drive how severe and how fast damage progresses, so choosing repair materials and methods that resist moisture movement and not relying on a single quick fix becomes essential for lasting performance.
The physical process (water → ice expansion)
Water in concrete sits in pores and tiny cracks. When temperature drops below freezing, that water turns to ice and expands by about 9%. The ice pushes on the surrounding cement paste and aggregate.
That pressure creates internal stresses. If the concrete is saturated or poorly drained, the pressure is higher and cracks form or widen. One freeze may not show much, but the next one attacks the same weak spots.
Over time the microcracks link up and turn into visible damage like spalling or joint failure. In repairs, the new-to-old bond is often the weakest path for these stresses, so the expansion drives delamination and lift.
Frequency vs. severity: why many small cycles are dangerous
It’s tempting to think only deep freezes matter. In reality, frequent freeze-thaw swings wear concrete out faster. Each cycle opens and re-closes microcracks. Repetition means damage accumulates.
Dozens of mild freezes can equal the harm from a few hard ones. Moisture repeatedly moves in and out. That pumps salt and water into weak spots and stresses the repair bond. Repeated cycling also prevents the material from recovering between events.
So in cold zones focus on reducing cycle count as well as peak cold. Improve drainage and limit saturation to cut the number of damaging swings a repair sees.

How concrete’s microstructure controls vulnerability
Concrete’s vulnerability in cold conditions is governed by its microstructure, where porosity, the capillary network, and air voids control how water moves, freezes, and builds pressure; the size, connectivity, and distribution of these pores determine moisture pathways and the susceptibility to frost damage. Aggregate types, interfacial transition zones, and cement paste quality also set where damage initiates and how it propagates, because grading, bonding, and paste coverage shape a continuous matrix that resists or yields to freeze-thaw stresses.
Understanding these traits helps explain why visible cracks, spalling, and dusting often trace back to underlying pore structure and void distribution, and why simply surface repairs may fail if porosity and paste quality are not addressed. For a DIY or jobsite reader, this means focusing on the practical measures that calm moisture migration and microcracking: optimize paste-to-aggregate ratios, improve paste bonding, and manage curing and drying so capillary suction remains in check; consider air-entraining admixtures to create stable microair voids that relieve pressure during freezing, and control moisture exposure to minimize repeated wetting and drying cycles that worsen interfacial zones.
Air‑entrainment: what percent matters and why
Entrained air gives water a place to expand when it freezes. Small, well‑distributed voids break the suction and lower internal pressure. In practical terms, you’re not guessing on the job — you target an air content based on exposure and aggregate size.
A good rule: for severe freeze‑thaw exposure aim for 4–8% air; for moderate exposure 3–5% air. Fine‑grained mixes and pavements need the higher end of the range because spacing between voids must be tight to protect paste and fines.
Don’t overdo it. Too much air cuts compressive strength and makes the surface more friable. Proper air entrainment plus correct spacing, not simply more percent, is what prevents internal pressure and extends repair life.
Aggregate quality and thermal compatibility
Aggregates act like the skeleton of concrete. Porous, soft, or crushed stone soaks up water and weakens the matrix. When ice forms, those weak particles let cracks start and run. Use dense, hard aggregates where freeze‑thaw is a risk.
Thermal mismatch between aggregate and cement paste creates stresses each cycle. Aggregates with very different coefficients of thermal expansion pry at the interfacial transition zone and open microcracks. Well‑graded, compatible aggregate reduces differential movement and improves bond.
On repairs, avoid lightweight or high‑absorption rock unless you precondition it. Good aggregate selection and a strong paste bond keep tiny cracks from growing into the failures you see on the surface.
Common freeze‑thaw damage patterns to recognize
Common freeze‑thaw damage reveals itself through several observable failure modes that signal cycles of moisture entering pores, freezing, and expanding. Look for surface scaling, flaking, or powdery residues that can be distinguished from wear or chemical attack; hairline and map cracks that form in random micro‑cracks, spiderweb patterns, or directional lines; and spalling, chipping, or pop‑outs near edges, joints, and penetrations caused by air voids, improper compaction, or salt exposure. Delamination or lifting under loads indicates repeated freeze‑thaw stress beneath coatings, overlays, or repairs, while joint and surface disintegration in paver or concrete systems shows cracking aligned with joints and deterioration of mortar and exposed aggregates.
Recognizing these patterns helps you plan targeted repairs and timing, increasing durability and reducing recurrence. The discussion also emphasizes moisture indicators—retained moisture, efflorescence, frost heave evidence, and seasonal timing—that reinforce the freeze‑thaw origin. For a DIY audience, understanding how moisture moves and where it tends to accumulate clarifies where to prioritize sealing, proper compaction, and timely repairs to extend service life and improve long‑term performance on driveways, sidewalks, and exterior slabs.
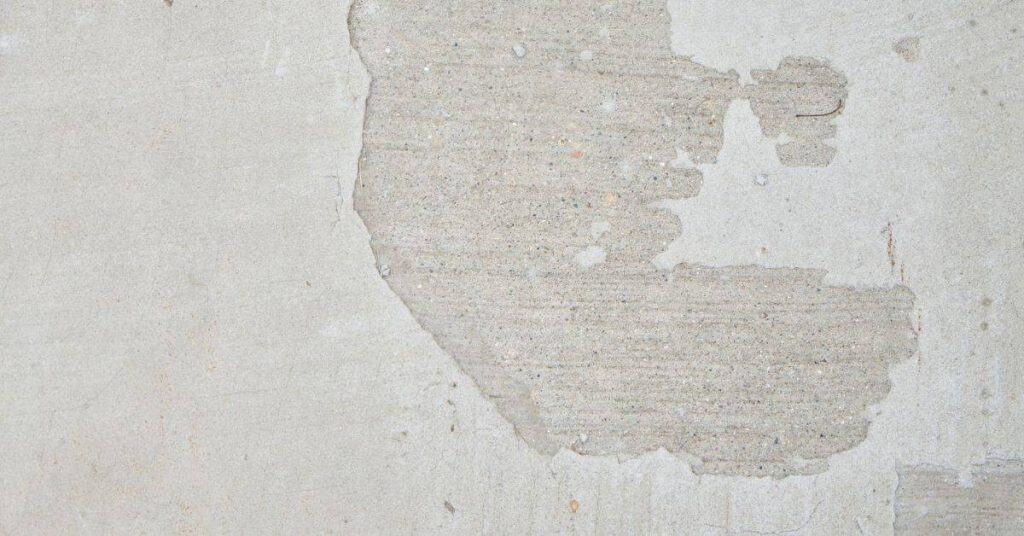
Surface scaling and dusting
Surface scaling shows up as thin flakes or a powdery layer coming off the top paste. It’s usually shallow — you can scrape it with a screwdriver or broom. Unlike abrasion from traffic, scaling peels in sheets or leaves a gritty residue rather than smooth wear patterns.
Check for seasonal timing and nearby salts. If the damage appears after freeze periods or where de-icers are used, that points to freeze‑thaw action rather than chemical etching. Tap the slab — a hollow sound under intact concrete suggests lost paste and early surface failure.
- Remediation steps at a minimum: clean and dry the surface, remove loose material with a stiff brush, and apply a compatible surface sealer or penetrating densifier after confirming the area is dry and free of active ice or moisture.
- Assess repair urgency: surface scaling over high-traffic areas or near joints should be addressed before winter to reduce moisture ingress; deeper or widespread scaling may require topping or overlay restoration by a professional.
- Safety/cost note: wear eye protection and a dust mask when brushing or grinding; costs vary but plan for at least surface prep materials plus a penetrating sealer or patching compound if needed.
Map cracking, spalling, and delamination
Map or hairline cracking begins as a web of random micro‑cracks across the surface. Those tiny cracks let freeze water enter deeper with each cycle. Over time the cracks link and widen into larger spalls — chunks of concrete that break away, often exposing coarse aggregate.
Delamination happens when a weak plane forms between the surface layer and the substrate. Patches or overlays that ‘‘lift’’ under a hammer hit are a telltale sign. Document width, depth and whether rebar or aggregate is exposed to gauge progression from micro‑cracks to full delamination.
- Remediation steps: perform a moisture test, remove loose material, and apply a patching mortar or overlay that matches the substrate; for delaminated areas, remove and relevel the affected surface and ensure proper bonding with a bonding agent or primer as needed.
- If rebar or aggregate is exposed, assess structural implications and consider consulting a structural or concrete repair professional before proceeding with a full-depth patch.
- Safety/cost note: use proper PPE when cutting or grinding; expect higher material costs for patching materials and potential downtime for repairs before winter.
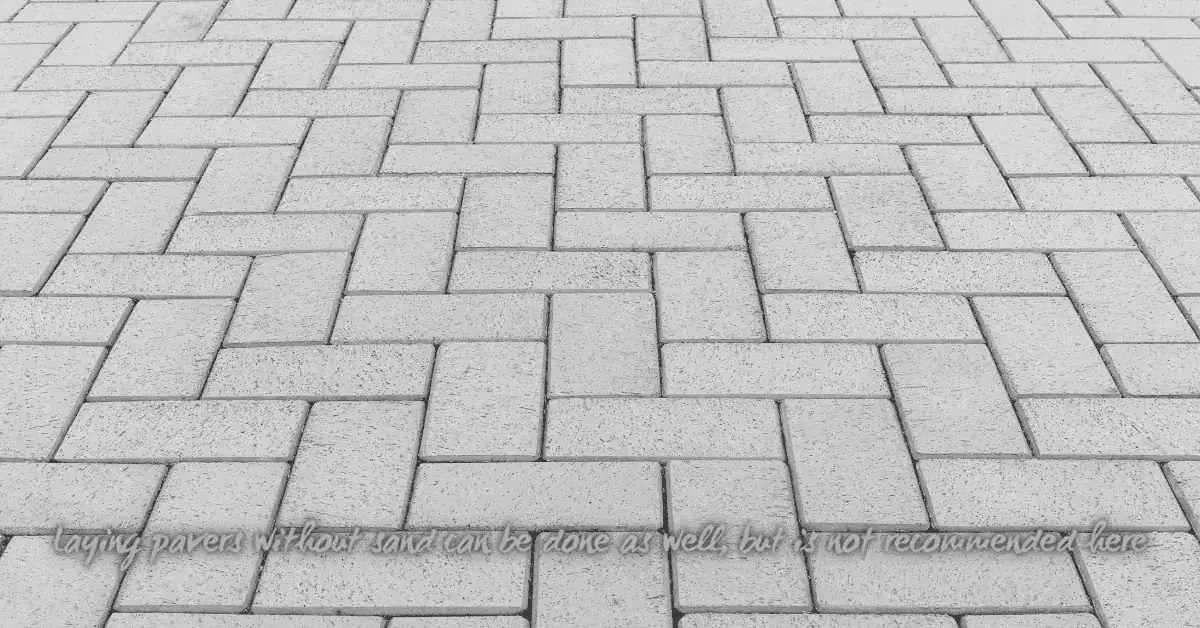
Joint and edge failure, differential settlement
Joints and slab edges take the worst of cyclic frost action. Look for stepped cracks, uneven edges, or panels that sit higher or lower than neighbors. That asymmetric movement often means frost heave or loss of support under one side.
Edges, joint sealant loss, and crumbling mortar around pavers are classic signs. Measure offsets and note whether deterioration aligns with joints or runs across slabs — alignment along joints usually indicates repeated freeze‑thaw cycles and moisture migration rather than simple settlement.
- Remediation steps: clean out failed joint material, insert backer rod at proper depth, and reseal with a compatible, flexible joint sealant; investigate and address base compaction, drainage, and edge support to minimize future movement.
- Repair sequence: stabilize any misaligned panels, patch high- and low spots, then re-seal joints after allowing adequate cure time; ensure the surrounding surface is dry before sealing.
- Safety/cost note: joint sealing is typically a mid-range repair; ensure adequate access for proper tool use and ventilation if epoxy-based products are used.
Environmental drivers that accelerate freeze‑thaw deterioration
Environmental drivers such as temperature fluctuations, moisture sources, freeze frequency, and de-icing chemicals accelerate freeze‑thaw deterioration by driving water through phase changes, causing ice expansion, microcracking, and spalling that gradually loosen surface layers and create networks for further damage. Saturated pores from precipitation, snowmelt, groundwater, and condensation amplify this process by increasing moisture available for freezing and by promoting osmotic and chemical interactions that weaken the cementitious matrix. Frequent cycles in cold zones—combined with longer durations of freezing and thawing—compound fracture networks, surface scaling, and potential debonding at patches, especially where de-icers are used regularly.
For DIY and jobsite readers, this means visible signs like damp surfaces after rain, history of repeated freeze events, efflorescence, or general scaling can indicate elevated risk and guide timely maintenance planning. Understanding the moisture pathways and chemical accelerants helps prioritize interventions, such as sealing porous surfaces, improving drainage, and selecting appropriate, less aggressive de-icers, to slow deterioration and protect any loaded elements. Practical checks—moisture meter readings, surface dampness after storms, and consistent monitoring of crack and patch behavior—provide actionable indicators to justify targeted repairs before structural performance declines.
Role of moisture — capillary suction and standing water
Water is the fuel for freeze‑thaw damage. Fine pores and hairline cracks draw moisture in by capillary suction; even small amounts trapped inside the matrix freeze and expand. Wet concrete at the surface or just below it is far more vulnerable than dry material.
Standing water on slabs, poor slope, or ponding against edges keeps pores saturated and raises the number of damaging cycles. Check for persistent damp spots and high moisture meter readings after rain — those are red flags. Control moisture first if you want repairs to last.
De‑icers and salt: chemical exacerbation
Salt lowers the freezing point of pore water, which changes ice formation patterns and can drive repeated partial freezes and thaws. Chloride salts also attack cement paste chemically, weakening the binder and making the surface more prone to scaling and pop‑outs.
Salts create osmotic pressure that draws more water into cracks. Visible white deposits (efflorescence) or rapid surface dusting after winter are signs salt is at work. Use less aggressive products and rinse treated areas when possible to reduce long‑term damage.
Soil and drainage interactions
Poor subgrade drainage and saturated soils change how a slab moves when temperatures drop. Wet subsoil freezes, heaves, and then settles; that repeated movement stresses joints and patches and opens new pathways for moisture.
Clays and fine silts hold water and prolong freeze conditions. Simple checks—look for puddles near edges, soft spots, or frost heave in winter—tell you whether subgrade work or improved drainage should come before surface repairs. Fix the drainage, then fix the concrete.
Why many common and DIY repairs fail in cold regions
In cold regions, the main reason many common and DIY repairs fail is that they repeat the same mistakes: using patch materials that don’t bond well or expand at the same rate as surrounding concrete, applying patches at depths or with textures that trap moisture, and ignoring how freeze‑thaw cycles will repeatedly stress weak interfaces. These errors—wrong materials, mismatched patch depths, poor bonding prep, and neglected subgrade or drainage—set up traps for water, create poor adhesion, and invite new cracks as moisture freezes and expands.
Repair success hinges on proper timing, surface preparation, and drainage, plus design choices that suit cold climates, such as appropriate curing temperatures, air-entraining mixes, and correct joint management rather than relying on quick-set caulks that crack. Understanding the why behind these failures helps a DIYer plan maintenance, schedule temporary heat or coverings when needed, improve compaction and drainage, and adopt preventive steps that extend service life beyond a single winter.
Using non‑air‑entrained mixes and improper mortar
Most bagged DIY patch mortars and fast‑set mixes are designed for speed, not freeze‑thaw durability. They often lack the tiny, stable air voids that relieve hydraulic pressure when water in the paste freezes and expands.
Using a non‑air‑entrained or overly dense mortar creates a brittle interface with the existing concrete. That interface cracks quickly under repeated cycles and lets water re‑enter the repair.
Tip: Choose materials specified for freeze‑thaw exposure, or add professional‑grade air‑entraining admixture and follow manufacturer cure instructions to get a resilient repair.
Patching over wet or poorly drained bases
Putting a patch over saturated soil, standing water, or a soggy slab seals moisture inside. That trapped water freezes, heaves, and breaks the repair from below.
Poor compaction and blocked drainage are common culprits. Even a well‑made patch will fail fast if the subgrade keeps feeding moisture upward.
Foreman rule: Dry and fix the drainage first — regrade, add gravel, or install a drain. Only place patch material on a firm, dry base and give it a clear path to shed water.
Repair timing errors (winter vs. spring)
Timing repairs wrong is a top reason they fail. Avoid work during active freeze‑thaw swings or when the slab and subgrade are wet from thaw.
- Starting too cold — mixes don’t cure properly; use temporary heat or wait for stable above‑freezing temps.
- Repairing during thaw — trapped meltwater undermines bond; wait until surfaces are dry and temperatures steady.
- Rushing spring fixes — early spring looks dry but subgrade may be saturated; confirm drainage and firmness before patching.
- Ignoring cure window — fluctuating temps break freshly placed material; protect cures with insulated blankets or heaters as needed.
Plan repairs for a stable warm window, or prepare to control temperature and moisture until the repair fully cures.
Why temporary patches look good but don’t last — common failure mechanisms
Temporary patches may look convincing because they hide cracks and damp spots, but they rarely address the real culprits: moisture intrusion, substrate movement, and freeze‑thaw stress that drive deeper damage. Cosmetic fixes tend to seal only the surface or bridge small gaps, while permanent repairs must stop moisture pathways, secure bonding to a properly prepared substrate, and accommodate movement without re‑exposing the underlying problems. When patches rely on weak bond lines or low‑quality patch mortars, they often fail under cold cycles, spalling, delamination, or moisture tracking that reopens the repair area from below.
For a DIY or jobsite reader, understanding the failure modes and diagnostic signs helps prevent wasted effort and escalating costs, guiding you toward the right next steps instead of chasing quick fixes. A practical approach emphasizes a clear diagnostic checklist—assessing substrate condition, moisture content, crack patterns, salt exposure, patch history, and signs of soil or slab movement—before deciding between patching, lifting and grading, reinforcement, or full resurfacing. Prioritizing drainage, crack control, compatible materials, and proper curing windows reduces recurrence and supports longer service life, while documentation of patch size, crack width, and moisture signs informs professional evaluation and future maintenance planning.
Bond failure and delamination
Temporary patches often stick at the surface but never bond deep into the concrete. If the substrate is dusty, scaled, or saturated the new mortar rides on top instead of locking in. Cold cycles only make that weak interface worse.
Thermal cycling and moisture movement set up shear forces at the junction. The patch peels away in sheets or flakes — delamination. Younger DIY mortars without proper primers or mechanical keys are the usual culprit.
Quick check: tap the patched area with a hammer. A hollow sound is a sure sign the patch never adhered. Proper repair needs clean, dry or treated substrate, a bonding agent or saw-cut key, and materials rated for freeze–thaw service.
Incompatible thermal expansion and stiffness
Concrete slabs and patches move differently with temperature and load. A very stiff, high-modulus patch bonded to a flexible, cracked base concentrates stress at the edges. That mismatch opens cracks every freeze cycle.
Likewise, soft or low-strength DIY mixes compress and creep while adjacent concrete expands. The result is edge breakup, map cracking, or the patch popping out. Matching stiffness and allowing movement is essential.
Field fix: use a compatible repair mortar or add reinforcement and proper jointing. If you can see step movement or recurring edge cracks, a spot patch won’t hold — the whole zone needs a repair that accommodates differential movement.
Best repair approaches for freeze‑thaw zones
Best repair approaches for freeze‑thaw zones focus on controlling moisture ingress, managing capillary rise, and aligning repairs with ongoing thermal cycles to protect structural support. Key strategies include moisture management and substrate prep, repair modalities that withstand repeated freezing, and timely reinforcement when load transfer or footing stability is at risk. Materials choices emphasize low‑permeability, air‑entrained mixes, compatible sealants, and repair systems such as concrete patching, polymer‑modified mortars, injections, crack stitching, and controlled lifting, all documented for cold conditions and long‑term durability.
This matters for DIYers because correctly sequencing work, choosing the right materials, and protecting cures in cold weather determine adhesion, durability, and recurrence risk. You gain practical context on when to seal, how to slope surfaces for drainage, and how to balance rigidity with movement in a way that preserves underlying structures. A quick‑start checklist and decision tree can help homeowners assess moisture sources, select repair modalities, plan timing, and know when to call a professional to avoid costly mistakes and unsafe conditions.
Polyurethane and polymer injection lifting vs. mudjacking
Polyurethane/polymer injection uses small drilled ports to pump expanding resin under a slab. It sets quickly, gains load capacity in hours, and works well at marginally low temperatures if you follow manufacturer cold‑weather limits. Expect minimal excavation and very little added weight to frozen subgrades.
Mudjacking pumps a sand/cement slurry and relies on heavier fills and slower cure. It can be cheaper, but the slurry holds water and freezes or segregates on cold sites, so it’s riskier where freeze‑thaw cycles are active. Mudjacking also disturbs drainage more and can reintroduce capillary moisture.
Choose injection when you need fast return to service, limited disturbance, and lower permeability. Consider mudjacking only on well‑drained, unfrozen bases and where cost constraints outweigh long‑term freeze‑thaw durability concerns.
Full replacement with air‑entrained, properly designed concrete
Replace when damage is widespread, reinforcement is compromised, or substrate drainage can be corrected. Full removal lets you rebuild proper slopes, compact base material, and install a mix tailored for freeze‑thaw exposure.
Specify air‑entrainment, low water‑cement ratio, well‑graded aggregates, and a durable admixture package. Aim for low permeability and a design slump that limits bleeding. Curing matters: protect from freezing and rapid moisture loss until target strength is reached.
Plan for drainage and joints up front so the new slab isn’t undermined later. Replacement costs more up front but yields the best long‑term resistance to cyclic freeze‑thaw when done to spec.
Proper joint repair and routing/re‑sealing
Joints are the first line of defense. Rout out failed caulk and clean to sound concrete; don’t just cover old material. Create a proper bond‑breaker depth and backer rod so sealant can flex without tearing out.
Use a compatible, low‑modulus sealant rated for freeze‑thaw and compatible with de‑icers. In cold seasons, follow warm‑temperature application guidance or heat the substrate to ensure adhesion. Allow sealant to cure to its recommended hardness before exposing to traffic.
Maintain joints on a schedule: inspect after winter, reseal where adhesion or shape changes appear, and keep adjacent drainage clear so water can’t pond into the joint.
Design and material specs for cold‑climate mixes
Design and material specs for cold‑climate mixes emphasize durable performance in freeze‑thaw conditions, targeting a controlled air content of 4–7% with verified air‑entraining agents and compatible aggregate grading to optimize the void structure. Use Type I/II cement or compatible equivalents, and limit fly ash or slag substitutions to maintain workability and long‑term durability in cold weather. Implement a concrete mix blueprint with explicit, project‑level targets: cement type Type I/II or CEM II; fly ash limited to 10–20% of cementitious materials and slag limited to 10–20%; silica fume limited to 3–5% of cementitious materials; aggregate grading well‑graded to minimize large voids, with 35–50% passing the 0.3 mm sieve and a maximum aggregate size of 19 mm for typical exterior work. Maintain a target water‑cement ratio (w/c) of 0.40–0.45 and a slump range of 75–100 mm (3–4 inches) to ensure placement workability in cold conditions. Include core admixtures such as air‑entraining agents, water reducers, and set retarders or accelerators configured for low‑temperature placement, with careful dosing to avoid deactivation by moisture or aggregates. Plan 28‑day strength goals in the 25–40 MPa range and treat the mix design as part of a broader curing and protection strategy that supports early strength gain.
The practical takeaway for a DIY or jobsite reader is that a well‑designed cold‑weather mix reduces cracking and cost overruns by resisting freeze‑thaw damage and premature drying. Following standards such as ASTM C666 for freeze‑thaw durability and C595 for mix design helps ensure compatibility between cement types, admixtures, and aggregates. A clear curing plan—minimum curing temperatures (hold above 10°C for the first 3–5 days), duration, and protective methods like insulation blankets or enclosure—keeps moisture in and minimizes early drying, so the concrete reaches target strength without surface cracking or delayed strength gain. Include field verification steps such as initial consistency checks, temperature logs, and post‑pour curing temperature maintenance to document adherence to the spec.
Recommended air‑entrainment ranges and how to test
For exterior concrete in freeze‑thaw zones aim for 4–7% entrained air for flatwork and 5–8% for lightweight or highly stressed repairs. Keep the target tight: ±1% on the job mix reduces scaling and internal cracking while preserving strength.
Specify an air‑entraining agent and require verification. Field checks use the pressure meter (ASTM C173/C231) on fresh concrete. For hardened verification, use volumetric desktop tests on hardened cores if doubts arise. Record readings with each pour and adjust admixture dose rather than aggregate or water to correct air content. Include a planned re‑check schedule after significant temperature shifts or extended laydown periods.
Admixtures, supplementary cementitious materials, and water‑cement ratio
Choose materials that lower permeability and control set in cold weather. The right combo reduces capillary paths, improves freeze‑thaw resistance, and avoids late strength loss.
- Water‑reducing admixture Use mid‑ to high‑range plasticizers. Look for ASTM C494 Type A/E. Tip: cut water, keep slump, reduce permeability.
- Set accelerators Use non‑chloride accelerators for winter. They speed early strength and reduce curing time. Avoid calcium chloride to prevent corrosion.
- Set retarders Limited use in cold jobs. Use when transport or placement delays occur. Overuse delays strength gain and increases freeze risk.
- Fly ash/slag Limit to 10–20% for early strength in cold climates. They improve durability but too much delays early curing and can cause bond issues.
- Silica fume Small doses (3–5%) reduce permeability. Use with a water reducer. Too much makes mixes sticky and hard to finish.
- Low w/c ratio Target 0.40–0.45 depending on required strength. Lower w/c cuts permeability; avoid adding extra water onsite or you lose durability.
- Compatibility checks Trial mixes before the job. Wrong combos cause air loss, set failure, or unexpected bleeding.
Preventive measures: drainage, grading, and maintenance
Preventive measures center on keeping water away from surfaces that crack or spall when exposed to freeze–thaw cycles, by evaluating site grading, directing runoff through gutters, downspouts, splash blocks, swales, and proper slopes, and by choosing appropriate soil base compaction and sub-base thickness to minimize infiltration and settlement; this also includes ensuring that drainage paths remove water away from foundations and slabs before it can pool. This approach incorporates concrete jointing, sealants, timely crack monitoring, and a routine of regular debris removal, along with sealing or impregnating sealers and careful handling of de-icing salts to reduce water ingress and extend durability.
Implementing these steps seasonally and with practical guidance helps you decide what you can DIY versus when to call a pro, while weighing costs against long‑term resistance to water damage and costly freeze–thaw repair; it also emphasizes planning for proper maintenance frequency and window timing to keep surfaces performing well. Understanding how grading, drainage, maintenance scheduling, and material choices interact provides a clear, actionable plan to keep foundations and slabs dry, improve performance, and minimize maintenance cycles over the life of the concrete.
Surface grading and subsurface drainage fixes
Grade soil so finished surfaces slope away from slabs and foundations. Aim for at least 2% slope (1/4″ per foot) for the first 5–10 feet. Where site constraints prevent surface grading, install a perimeter French drain or trench drain to intercept runoff before it pools next to concrete.
For slabs already failing from a wet base, check sub-base composition and compaction. Replace soft, organic fill with a well‑graded granular sub‑base and compact to spec. Consider a geotextile beneath the sub-base and a perforated pipe in a gravel trench to carry water to a daylight or sump. A small drop inlet or splash block at downspouts tied into this system keeps concentrated flows off the slab.
Fix the source, not just the symptom: moving water away is cheaper and more permanent than repeated surface patches.
- Prioritized workflow for cold regions (environmental sequencing):
- Assess subgrade drainage and soil frost susceptibility first. If the soil holds water or demonstrates frost heave risks, install or repair perimeter drainage, under-slab drainage, and ensure water is conveyed away from the slab footprint before any surface patches are attempted.
- Address surface grading and site drainage second. Provide a continuous 2% slope away from foundations and slabs for the first 5–10 feet; add perimeter or trench drains as needed to prevent ponding near the concrete.
- Stabilize the base third. Replace soft fill with a well‑graded granular sub-base, compact to spec, and lay a geotextile if required. Include a perforated drainage pipe to daylight or sump if groundwater or persistent seepage exists.
- Proceed with concrete repairs fourth. When moisture is controlled, perform patches with appropriate flexible repair mortars, ensure joints are properly reviewed, and keep patches dry during cure. Use crack-isolating products where possible to accommodate movement.
- Seal and protect fifth. Apply breathable, UV-stable sealers after patches have cured, selecting products compatible with the base and traffic level; avoid sealing too early in wet conditions.
- Maintenance planning sixth. Establish an ongoing schedule for inspections, seasonal resealing, and prompt attention to new cracks or drainage changes; budget for periodic sub-base refreshment if the site experiences repeated wet cycles.
Seasonal maintenance checklist
Spring: walk the site after thaw. Clear gutters, downspouts, and splash blocks. Sweep joints and remove debris that traps moisture. Reseal routed joints and hairline cracks with an appropriate flexible sealant before the first heavy rains.
Summer: inspect grade, repair low spots with compacted granular fill, and check that French drains and inlets remain clear. Reapply a penetrating silane/siloxane sealer on porous slabs in a dry spell if previous sealer is worn.
Fall/Winter prep: clear leaves and mulch from grades near slabs, extend downspouts, and top up slope where washout occurred. Use non‑chloride de‑icers or sand near fresh repairs. Do small repairs early; catching cracks and clogged drains before freeze events prevents repeat freeze–thaw cycles.
Sealers, coatings, and de‑icer guidance for longevity
Choose penetrating, breathable sealers for freeze‑thaw resistance when the goal is moisture management in low‑temperature cycles, and pair them with film‑forming or breathable coatings as appropriate for underlying repair materials; explain how each type affects moisture vapor transmission and adhesion to patch mortars or epoxy overlays, plus UV and chemical resistance considerations. Emphasize timing and prep: apply after curing in a dry weather window, with surface cleaning, moisture checks, and proper curing requirements to maximize long‑term adhesion and durability, and outline how to coordinate resealing with repairMaterial compatibility and warranty considerations.
This guidance helps DIY and jobsite readers plan a practical maintenance cycle, including recoat intervals and visual cues for sealant failure across seasons, while also outlining safer de‑icer options such as sodium‑ or potassium acetate, and traction aids like sand or grit to minimize damage when de‑icing is necessary. It covers practical implementation tips to avoid sealing in freezing temperatures or on wet surfaces, plus considerations for large or irregular areas, temperature bands, airflow, and curing time to ensure reliable performance. A simple decision‑matrix or checklist focuses on surface condition, climate, traffic, and repair type to guide sealer/coating selection and de‑icer strategy, while noting ventilation, contractor guidelines, and how coatings may influence warranty on repairs.
Which sealers work in freeze‑thaw zones (and when to apply)
Choose a sealer based on breathability and water repellency. Penetrating silane/siloxane products soak in and repel water without trapping vapor — great for freeze‑thaw because they reduce pore saturation while letting moisture escape. Penetrating silicates or silanes suit driveways and sidewalks where you want low film and long service life.
Acrylic and film‑forming coatings block water but can trap vapor if not compatible with the repair mortar. Use breathable acrylics only over substrates designed for films, and avoid thick non‑breathable membranes on air‑entrained concrete. For epoxy overlays, pick coatings the manufacturer lists as compatible to prevent delamination.
Apply after full cure and dry weather: typically 28 days for new concrete or as the product label states for patch mortars. Seal only on frost‑free, dry days with surface temps above the product minimum. Clean, dry, and salt‑free surfaces ensure adhesion and maximize longevity.
Smart winter de‑icing: what to use and what to avoid
Wrong chemicals and heavy use speed freeze‑thaw damage. These rules stop common mistakes and protect repairs.
- Calcium magnesium acetate (CMA) — gentler on concrete; less chloride penetration. Use where concrete is recently repaired.
- Sand or grit for traction — no chemical action. Sweep up after thaw to avoid abrasion and clogging joints.
- Potassium acetate — lower corrosion and freeze‑thaw impact; good for sensitive areas.
- Avoid rock salt (NaCl) — high chloride content draws water and accelerates scaling. Limit use near fresh repairs and flush surfaces in spring.
- Use minimal application — apply only where needed and follow label rates; more product equals more damage over cycles.
Pick non‑chloride options when possible, use traction materials, and clean treated surfaces after the thaw to reduce cumulative damage.
Safety, liability, and triage for failed concrete
Unsafe concrete conditions create immediate trip and fall hazards, exposed rebar or edges, and risks from loading or vehicle traffic that demand swift recognition. This section explains how to identify these hazards, perform a rapid damage triage for cracks, spalling, settlement, and heave, classify urgency (do-now versus monitor), and establish temporary boundaries and access control until a full assessment can be completed. It also covers practical interim safety fixes such as barriers, cones, and warning signs, as well as temporary shoring or bracing for severely misaligned slabs and water-control measures to limit additional damage while awaiting permanent repair.
Documentation and liability considerations clarify owner versus property-management responsibilities, applicable local codes or covenants, and when professional evaluation is legally required or prudent. A photo log with measurements of levelness and displacement, weather notes, dates, and the decisions made provides a defensible record for insurance claims and contractor references and supports a clear escalation plan. By outlining interim repair guidance and next steps—including non-invasive crack sealing for water exclusion to clearly defined criteria for lifting, underpinning, or permanent repairs—DIYers gain a safe, organized path for monitoring and knowing when to engage licensed concrete specialists.
Short‑term hazard mitigation (ramps, tags, temporary coverings)
Stop the obvious hazards first. Put cones or bright tape around the damaged area and attach a clear warning tag. If a change in elevation is a trip risk, install a temporary ramp or a beveled plywood plate to smooth the edge for pedestrians and light-wheeled traffic.
Cover jagged spalls and exposed rebar with plywood or a rubber mat and secure with sandbags or weights so covers cannot shift. For outdoor slabs, route runoff away from the damaged zone with temporary berms or downspout extensions to limit further freeze‑thaw action.
Do not allow vehicle traffic over unsupported or visibly moving slabs. Keep records: take photos before and after you place barriers and note time, temperature, and actions taken so contractors or insurers see the interim fixes.
When damage becomes a structural or legal concern
Escalate immediately if you see active movement, a sudden drop or heave, exposed reinforcement, or a slab that carries structural loads (steps, lintels, garage floors). Also treat public walkways and ADA routes as higher priority—local code or municipal rules often require prompt repair.
If gaps or offsets become wide (visible trip hazards, separations exceeding finger‑widths, or cracks that continue to grow), document measurements, photos, and weather. Notify property managers or insurers and post restricted‑access signage.
For anything affecting load capacity or safety around utilities, call a licensed professional—a structural engineer or qualified concrete contractor. Keep a dated log of decisions and temporary measures; that record protects occupants and helps establish liability and repair scope later.
Cost analysis and lifecycle considerations: repair vs. replace vs. lift
Cost analysis for concrete issues centers on three pathways—targeted repair, full replacement, and concrete lifting—each with price bands that reflect regional labor costs and low-temperature adjustments. Targeted repair may range from hundreds to a few thousand dollars, replacement from tens of thousands, and lifting from several thousand to over ten thousand, with a lifecycle ROI framework weighing upfront investments against long-term savings and payback horizons of 20–30 years.
Decision criteria hinge on crack width and pattern, slab movement or settlement, moisture issues, load demands, and safety or permitting considerations that determine whether repair, lift, or replace is warranted. Planning should align interventions with freeze-thaw windows and anticipated downtime, while accounting for hidden costs such as subgrade stabilization, surface refinishing, warranty terms, and ongoing maintenance like sealing and re-levelling checks. For a DIY or jobsite reader, this means forecasting total value, scheduling preventive measures, choosing durable materials that resist freeze‑thaw cycles, and maintaining a clear record of decisions to maximize lifecycle performance.
Typical price ranges and expected service life
Small targeted repairs like crack filling and localized patching usually run $3–$12 per square foot, or $150–$1,200 for single-area jobs. Expect 3–7 years in active freeze‑thaw zones unless surface drainage and sealing are addressed. Polyurethane slab lifting commonly costs $8–$20 per square foot (or $300–$1,500+ per low spot) and restores levelness fast; properly done it typically lasts 7–15 years depending on subgrade stability. Traditional mudjacking is cheaper upfront—$4–$12 per square foot—but often performs worse in freeze cycles and can need repeating every 3–8 years.
Full replacement varies widely: $10–$40+ per square foot for a basic slab, $50–$120+ where demolition, subgrade work, and cold‑climate mixes are required. A well‑executed replacement with proper drainage and air‑entrained concrete can last 25–40 years. Use higher upfront spend when repeated repairs, downtime, or safety risk make the lifetime cost of patching exceed the one‑time replacement or a quality lift.
Decision flow: liftable slab vs. replaceable slab
Start with symptoms: isolated settlement, trip hazards, or ponding over a few panels point to lifting as an option. Wide, branching cracks, multiple adjacent failed panels, or full slab heave suggest replacement. Check subgrade: dry, granular fill with localized voids is a good candidate for lifting; organic, saturated, or extensively frost‑disturbed soils usually require replacement and stabilization.
Assess crack pattern and load demand. Hairline cracks and single‑edge settlement under light loads often respond well to polyurethane lifting. Structural cracks through reinforcement, irregular joint separation, or slabs supporting heavy machinery need replacement. Factor safety and legal exposure: if failure risks injury or code compliance, favor replacement or engineered repair. When in doubt, a simple site probe and moisture check will steer you toward the most durable choice rather than the cheapest quick fix.
Timing and seasonal planning: when to inspect and schedule repairs
A year-round plan with seasonal inspection windows guides when to inspect and schedule repairs, highlighting fall for pre-winter readiness, late winter to early spring thaw periods, and late spring through summer for durable work. It emphasizes the best months for high-quality repairs, while avoiding peak freeze-thaw risk and aligning timing with curing requirements. You’ll check cracks, spalling, scaling, pop-outs, moisture intrusion, drainage, soil movement signs, and repair integrity, tying findings to expected freeze-thaw stress.
With a clear, season-by-season checklist, you gain practical guidance on sequencing repairs, prioritizing high-risk areas, and choosing surface patches, full-depth repairs, or lifting based on curing and ambient temperatures. The plan also covers target curing temperatures (roughly above 50–60°F where possible), humidity control, and protective coverings to minimize early freezes during cure. Documenting conditions, materials used, and follow-up inspection dates helps you stay on track and coordinate with professionals when structural concerns arise or specialized lifting/drying is required, reducing surprises and extending durability.
Best months for diagnostics, lifting, and replacement in cold climates
Plan major work for reliable weather windows. I aim for late September–October to get surfaces ready for the winter and April–May for cleanup and full repairs after thaw. Those months minimize freeze‑thaw cycles during cure and let me use standard materials without heavy heating.
Summer (June–August) is great for full‑depth pours and slab replacements because warm, steady temperatures speed curing and bond. Avoid scheduling new concrete in mid‑winter; thawed pockets and refreezing ruin fresh cures and undermine lifts. For lifting or slab replacement, pick a 3–6 week window inside the best months and lock it in.
If you must work in colder months, use heated enclosures, accelerators rated for structural use, and extend protection times — but treat winter work as contingency, not ideal timing.
Curing and moisture‑control windows to avoid re‑damage
Skipping proper cure or letting slabs see a freeze before strength gain are common mistakes. Control temperature and moisture for the whole critical cure period.
- Keep temps above 50°F — concrete gains strength slowly under cold. Use heaters or schedule when daily highs stay near this range.
- Maintain surface moisture — rapid drying causes shrinkage cracks. Cure with wet burlap, curing compound, or misting until initial set is complete.
- Delay first freeze — a freeze within the first 3–7 days can pop out fresh concrete. Protect with insulated blankets or a heated enclosure during early cure.
- Control subsurface water — saturated subgrade freezes and heaves. Improve drainage before repairs or use drying/heat to lower moisture.
- Allow full strength before traffic — light foot traffic at 24–48 hours, vehicle loads only after manufacturer‑listed strength milestones.
Follow those windows and your repair will resist the next thaw better. Log temps and protection measures so you can prove conditions if problems reappear.
Common DIY mistakes and a step‑by‑step DIY checklist for small repairs
Common DIY mistakes in freeze-prone zones—like using the wrong patch material, skipping thorough surface prep, neglecting proper sealing, or ignoring expansion and contraction stresses—quickly accelerate cracking, spalling, and moisture intrusion. This paragraph provides a concise, safe, step-by-step checklist for small repairs, covering preparation, material selection, application, curing, and post-repair protection, with emphasis on staying within temperature limits and avoiding work in extreme cold. It also highlights practical considerations such as weather constraints, personal protective gear, and pacing the work to align with typical concrete cure times.
Choosing the right system matters: use polymer-modified or epoxy patch compounds when adhesion and resilience are critical, or cementitious repairs for simpler fills, ensuring the patch system matches the existing concrete for expansion and freeze-thaw performance. The guidance helps you recognize red flags—signs of structural movement, major spalling, or moisture intrusion—and know when to escalate to professional services, saving time, protecting your investment, and reducing safety risks.
Tools and materials checklist
Pack what you need before you start. Use materials rated for freeze‑thaw cycles and simple, rugged tools you can clean on site.
- PPE Gloves, eye protection, and a dust mask protect you from silica and dust. Wear thermal layers when working in cold weather and replace disposable masks after heavy sanding.
- Chisel and hammer Remove loose concrete and undercut edges for a better mechanical bond. A cold‑chisel and masonry hammer cost under $40; rent demolition tools for larger jobs.
- Wire brush/ grinder Clean and profile the surface to remove salts and laitance. Use a cup brush or small angle grinder at low speed; expect $30–$60 to buy, $20–$40/day to rent.
- Polymer or epoxy Use polymer‑modified or epoxy patch for thin repairs where freeze‑thaw resistance matters. Choose products labeled for exterior freeze cycles and follow temperature limits on the bag.
- Cementitious patch Air‑entrained, repair mortar for deeper fills and wider cracks. Look for 0.5–1.0% air entrainment and a compatible shrinkage spec.
- Trowels and floats Apply and finish patches cleanly. Use stainless or carbon steel tools and keep edges feathered to match existing surface.
- Curing blankets Protect patches from rapid cooling and frost. Borrow or buy blankets; they save cures in marginal temperatures and prevent rework.
Visual checkpoints and quality tests before finishing
Start with a dry, clean substrate. Look for residual moisture, salt staining, efflorescence, or loose particles; any of these reduce bond and invite early failure.
Perform a simple bond pull: press a 2–3 inch square of patch material or tape into the prepared area, let it set briefly, then try to pull it off. If it peels easily the surface needs more cleaning or a bonding primer. Also check for complete seating of the patch—no voids or honeycombing visible at edges.
Cold‑weather check: confirm ambient and substrate temperatures are above the product minimum and won’t dip below the cure threshold overnight. If temps are marginal, delay work or use heated blankets. Final visual should show full contact, no cracks forming, and consistent color—any gaps or shrinkage are red flags that need rework or professional review.
When to call a professional and how to choose one
Know when a repair clearly requires a licensed professional: signs like large cracks with active movement, salt damage, spalling, settlement and soil instability, or moisture intrusion that affects interior framing or foundations. Vet contractors by confirming required licenses and insurance (GL and workers’ comp), bonds, and a proven track record with freeze-thaw repairs in similar climates, plus a written estimate and scope. Look for certifications (ICC, ACI, or concrete repair designations), a solid project portfolio with before/after photos, and performance warranties or guarantees to back up claims.
Beyond the basics, ask about method selection (lifting, patching, or replacement), chosen materials (low-permeability concrete, air-entraining admixtures), drainage improvements, and long-term freeze-thaw resistance, along with expected downtime. Verify credibility with references, site visits, and long-term maintenance plans, and request independent third-party performance data or test results (durability tests, compressive strength, salt resistance) where possible. Ensure the contract clearly states warranty terms, milestone-based payments, liability coverage, a site safety plan, cleanup, and any required permits if structural work is involved, so you know exactly what quality and protection you’re buying.
Diagnostic services and reports to request
Ask the contractor for a site drainage assessment first. Poor surface or subsurface drainage is the most common repeat offender in freeze‑thaw cycles. A simple plan showing flow, downspouts, and soil grading tells you if repairs will last.
Request core sampling and a written lift‑feasibility report when slabs are cracked or uneven. Cores confirm concrete thickness, reinforcement, and freeze‑thaw damage below the surface. The feasibility report should state whether mudjacking, polyjacking, patching, or full replacement is recommended and why.
Get data, not just opinions. Ask for moisture readings, compressive strength results from lab tests, and any salt‑intrusion or chloride tests. Insist on a clear scope and a timeline tied to those findings so the remedy addresses the root cause, not just the cosmetics.
Warranty, insurance, and references checklist
Confirm general liability and workers’ comp insurance up front and a performance bond for larger jobs. Match policy limits to the project size. Have the contractor provide certificates you can verify with the insurer.
Ask for a written warranty that names what is covered (materials, workmanship, freeze‑thaw failure) and its duration. Check payment milestones tied to inspections or milestones, and get a cleanup and site‑safety clause. Don’t accept vague verbal promises.
Verify at least three local references for similar freeze‑thaw work. Visit one completed site if possible. Request before/after photos, contact info, and any long‑term performance data or third‑party test results. A reliable pro will supply these without delay.
Conclusion
Dealing with freeze‑thaw damage is about durability, safety, and staying out of costly trouble. If you plan and test properly, your repairs can hold up through hard winters—and your surfaces look better too.
Check the scene in plain language: inspect the worst patches for cracking and spalling, verify drainage and grading are directing water away, confirm you’re using a cold‑climate mix and appropriate sealers, pace your work for dry, mild days, wear eye and skin protection, and start with a small test area before full repair. If you’re unsure, your best move is to schedule tasks in stages, document moisture and temperature conditions, and confirm you’ve got the right materials before you mix or pour.
Common mistakes to avoid include jumping to a quick patch without addressing drainage or underlying moisture, using the wrong repair products for freeze‑thaw zones, and skipping small tests that would reveal poor adhesion or premature failure. Safety rules are simple: never work on wet or frozen concrete, never remove more than you can properly repair, and always wear eye protection and gloves; keep children and pets away from active work zones, and never mix or apply chemicals in enclosed spaces without ventilation.
When to call a professional is clear: if the damage spans large areas, penetrates deeply, or you’re unsure about drainage or frozen substrates, get a pro who understands cold‑climate specifications and liability considerations. Stay disciplined, follow the plan, and you’ll finish with a repair that lasts through the season and beyond.
FAQ
What causes the freeze-thaw pattern to fail in low-temperature zones?
Water in cracks freezes and expands. Repeated cycles push cracks wider and weaken the concrete. Salt and moisture make the damage spread faster.
How can I tell if my concrete repairs will fail in cold weather?
If you see existing cracks or flaky patches, be worried. Weather turning freezing soon after a pour is a red flag. Wet surfaces and poor curing mean trouble ahead.
What should I do to prepare repairs for cold temps?
Use the right mix and follow a proper curing method. Keep the area warm and dry, and protect it with a breathable cover if needed. Don’t skip joints or proper finishing.
Are environmental controls worth it for DIY projects?
Yes. Keep temps above about 40–50°F for curing. Avoid pouring if a hard freeze is expected within 24 hours. You’ll save time and money by not rushing a bad repair.