
Introduction
Terracotta tile floor trends in 2026 are practical, clay-based floors that highlight warm, earthy tones and a handcrafted look. This introduction explains common problems, their causes, and simple tests and fixes you can try at home. You’ll also learn what terracotta tiles are like to install and maintain, without fancy equipment.
Terracotta tiles are porous and natural, so moisture, staining, and cracking are common concerns you should watch for. Check product labels and manufacturer guidance for sealing, cleaning, and compatible grouts, and be prepared to address issues with practical, hands-on steps. We’ll cover the pros and cons and offer plain, actionable tips to keep a terracotta floor looking good.
Key takeaways
- Understand terracotta tiles are porous; seal before grouting to prevent staining.
- Verify 2026 trends emphasize warm, earthy tones and matte finishes in homes.
- Check installer or manufacturer guidance for curing times and sealer compatibility.
- Terracotta’s natural properties require regular maintenance to avoid cracking and efflorescence.
- Plan for proper ventilation and safety gear when grinding or cutting tiles.
- Inspect for moisture issues and repoint/repair grout promptly to prevent damage.
Table of Contents
- Introduction
- Key takeaways
- What Is Terracotta Tile Flooring?
- 2026 Design and Style Trends for Terracotta Floors
- Advantages and Disadvantages of Terracotta Floors
- Common Problems with Terracotta Tile Floors (2026 Focus)
- Testing and Inspection: How to Diagnose Issues
- Fixes and Repairs: Step-by-Step Solutions
- Installation, Safety, and Best Practices for DIY Projects
- Maintenance Plan and Long-Term Care
- Conclusion
- FAQ
What Is Terracotta Tile Flooring?
Terracotta tile is clay fired to a rustic, warm look, usually in natural earthy tones that suit floors. It’s clay‑based and porous, with handmade tiles showing artisanal textures and extruded tiles offering more uniform shapes; this mix affects durability and how the surface feels underfoot. Choose it knowing it can be uno glazed or glazed, with the finish influencing color and maintenance.
It differs from ceramic and porcelain in clay content and firing style, which changes absorption and hardness and makes terracotta a bit more delicate for high‑traffic floors. Traditionally used in Mediterranean and Tuscan settings, it shines indoors in living spaces and in climates where moisture is managed, but it also needs proper substrate and sealing. Understanding its characteristics helps you plan sealing, slip resistance, cleaning, and long‑term durability for a DIY floor project.
Types and finishes of terracotta
Terracotta tiles come in various types and finishes, each affecting performance and appearance. Let’s dive into the most common options:
Unglazed Terracotta: These tiles showcase the natural beauty of the clay, offering a warm, rustic look. They’re porous, so sealing is crucial to prevent moisture absorption.
Glazed Terracotta: A glaze layer protects these tiles from moisture and stains, making them easier to maintain. Glazing also comes in various colors and patterns, offering design flexibility.
Encaustic-Look Terracotta: These tiles mimic the intricate patterns of traditional encaustic cement tiles but with the durability of terracotta. They’re usually glazed for easy maintenance.
Reclaimed Terracotta: Salvaged from old buildings, these tiles offer a unique, aged look. They may require more care to ensure consistency in size and quality.
Key material properties
Understanding terracotta’s material properties helps you make informed decisions for your floor:
- Porosity: Terracotta is porous, which means it can absorb moisture. This isn’t a problem if properly sealed and used in suitable applications.
- Water Absorption: Look for tiles with low water absorption rates (<20%) to minimize expansion and contraction issues.
- Hardness (MOHS): Terracotta is relatively soft (around 6-7), so it’s prone to scratching. Avoid in high-traffic areas without proper protection.
- Thermal Behavior: Terracotta tiles are great heat conductors, making them suitable for underfloor heating systems.
- Expected Lifespan: With proper care and sealing, terracotta floors can last 50+ years. Regular maintenance is key to longevity.

2026 Design and Style Trends for Terracotta Floors
2026 design trends for terracotta floors lean into earthy colors, matte or satin finishes, and glaze directions, with formats like large planks, hex, brick, and encaustic-inspired patterns. These tones and textures pair naturally with modern rustic, Mediterranean revival, and minimalist spaces, guiding how you choose wood, metal, stone, and plaster accents. The message for DIY homeowners is to plan for mood, movement, and durable, maintenance-friendly surfaces in busy rooms.
Knowing this helps you set room-by-room palettes (kitchens, living rooms, baths, entryways) that feel cohesive and practical. It also highlights what to check before laying tile—installation hints, sealing needs, and long-term upkeep to protect color and surface in moisture or high-traffic areas. Always read the product label and manufacturer instructions and adapt to your local conditions; when in doubt, use a qualitative rule of thumb and test a small area first.
Popular formats, patterns, and colors
In 2026, terracotta tiles are all about embracing natural textures and earthy hues. Large plank formats are trending, giving the illusion of wider spaces. Hexagonal and brick-like layouts are also popular, adding a unique touch to your floors.
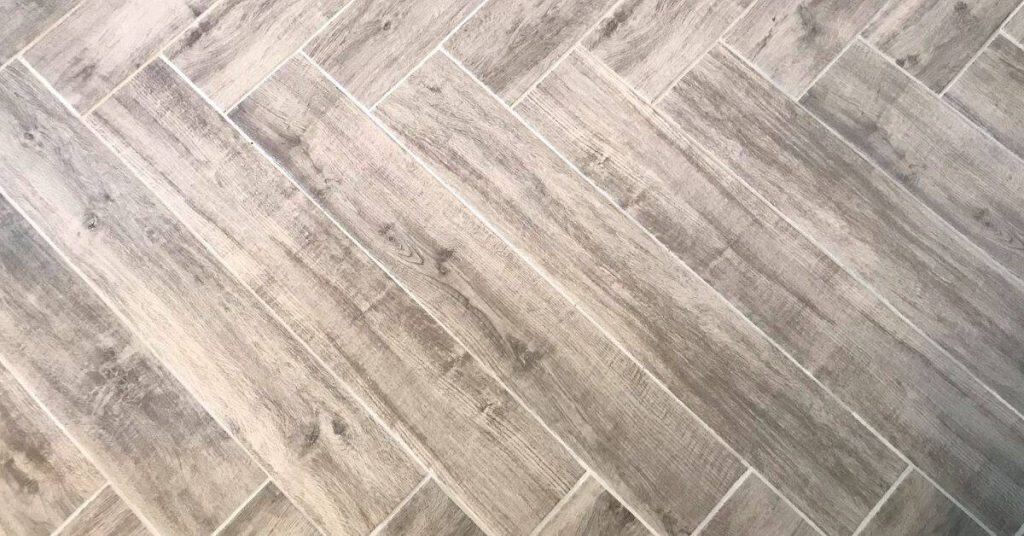
Herringbone and modular patterns are favored this year, creating dynamic visual interest. For colors, expect to see warm, earthy tones like terracotta reds, oranges, and browns. Matte finishes are in demand for their natural, rustic look, while satin sheens add a touch of elegance.
Encaustic-inspired motifs are making a comeback, offering intricate patterns without the high cost of traditional encaustic tiles.
Styling tips and room-by-room uses
In kitchens, pair terracotta with natural wood cabinets for a modern rustic look. Use a dark grout to emphasize the tile’s texture. In bathrooms, opt for hexagonal tiles in warm hues, paired with black metal fixtures for a Mediterranean revival feel.
For entryways, consider large format planks in a herringbone pattern. This creates a welcoming, spacious entrance. Outdoors, terracotta pairs beautifully with natural stone and plaster, creating a cohesive look between indoor and outdoor spaces.
Don’t forget about trim. Use it to frame your tiles and add another layer of design interest. Consider using the same material as your tile for a seamless look, or contrast it with a different color or texture.
Advantages and Disadvantages of Terracotta Floors
Terracotta floors bring earthy warmth and rustic charm, but they live or die by sealing and maintenance. They’re porous by nature, so durability depends on proper sealing to resist scratches and spills over time.
For DIYers, think about climate, room use, and sealing schedule when choosing terracotta. It works with radiant heat and can feel comfortable in many settings, but high-moisture areas or extreme humidity demand extra caution. Check the label or manufacturer instructions for sealing products and re-sealing intervals.
Benefits for homeowners and DIYers
Terracotta offers warmth underfoot, a sustainable option with natural materials. It’s easy to shape on-site, outmatching alternatives in this aspect.
Warmth: Terracotta retains heat, providing thermal comfort. It works well with radiant heating systems.
Sustainability: Being a natural product, terracotta is eco-friendly. Plus, it’s long-lasting, reducing waste over time.
On-site shaping: Terracotta can be cut and shaped easily on-site, making it great for DIYers tackling complex layouts or curves.
Limitations and when to avoid it
While terracotta has many benefits, there are certain situations where it’s not the best choice. Here are some mistakes to avoid.
- Staining: Terracotta is porous. Unsealed tiles can stain easily from spills or moisture. Always seal your terracotta floors.
- High porosity: This makes terracotta susceptible to water damage and freeze-thaw cycles. Avoid using in areas with high humidity or extreme cold.
- Exterior use in cold climates: Terracotta can crack in freezing temperatures if not properly protected. Consider alternatives for exterior use in very cold regions.
- High-traffic areas without proper maintenance: Without regular sealing and care, terracotta can show wear and tear faster in high-traffic zones like entryways or kitchens.
Understanding these limitations helps you make informed decisions. Terracotta is a wonderful choice for many spaces, but it’s not one-size-fits-all.
Common Problems with Terracotta Tile Floors (2026 Focus)
Terracotta tile floors today face several common issues: staining from minerals, iron, or rust; efflorescence from rising moisture; cracking from substrate movement; lippage from uneven surfaces; loose tiles from adhesive failure; and color fading from UV and wear. These problems often show up together as conditions change with time and use, especially in busy homes. Understanding the likely causes helps you spot early signs and pick practical fixes without overhauling the whole floor.
Knowing why it matters saves you time and money: early detection lets you test moisture and adhesion, choose compatible mortars and sealers, and set realistic re-sealing or maintenance intervals. It also helps you plan prevention steps—proper vapor barriers, acclimation, prompt spill cleanup, and appropriate cleaners—so you don’t chase symptoms instead of addressing the root causes. When in doubt, check product labels, manufacturer instructions, and local guidance for your specific terracotta and subfloor setup.
Problem causes explained
Terracotta tile floors face issues due to several reasons. Understanding these can help you diagnose problems accurately.
Substrate movement: This is a common cause of cracking and loose tiles. It occurs when the subfloor or slab beneath your terracotta tiles moves, deflects, or cracks. Improperly prepared substrates can also lead to issues.
Improper curing: Terracotta tiles need time to cure after installation. Rushing this process can cause adhesive failure and loose tiles. Similarly, using incompatible mortars or adhesives can lead to poor bonding.
Moisture intrusion: Moisture is a silent killer of terracotta floors. It can cause efflorescence, staining, and even structural damage if left unchecked. Sealer failure can also exacerbate moisture-related issues.
Visual checkpoints for diagnosis
Before you start any repair work, use this checklist to identify the problem and its extent.
- Cracking: Look for hairline cracks or gaps between tiles. Tap them with a hammer; hollow sounds indicate loose tiles.
- Efflorescence: White, powdery deposits on tile surfaces signal soluble salts migrating from within the terracotta or substrate.
- Staining: Check for discoloration. Scratch the surface lightly to confirm if it’s water-based (easily removed) or oil-based (persistent).
- Lippage: Use a straight edge or feeler gauge to check for uneven tile surfaces.
- Loose tiles: Gently wiggle tiles. Any movement indicates adhesive failure.
- Color fading: Inspect for dullness or discoloration, especially in areas exposed to sunlight.
- Moisture: Use a moisture probe to test suspect areas. High readings indicate potential efflorescence and staining issues.
- Substrate movement: Check for cracks or gaps in the subfloor or slab. Tap it; hollow sounds signal movement.
Quick rule: Regular inspections can help catch problems early, preventing costly repairs down the line.

Testing and Inspection: How to Diagnose Issues
Start>Note: The H2 focuses on a practical, low-risk diagnostic approach for terracotta tile floors, starting with safety steps, then simple in-situ tests and a clear sequence to follow. Shut off utilities where needed, wear PPE, and document ambient conditions before you touch anything. Use moisture meters at multiple substrate depths, gently test tile stability, run surface water tests, and monitor grout lines over a short period to establish baseline readings.
Start>
DIY tests and tools checklist
Before you start testing, gather these essential tools. Use this checklist to ensure you have everything needed for common diagnostics.
- Moisture meter: To check substrate moisture levels at different depths.
- Straightedge and mallet: For tile stability tests and detecting cracks or gaps.
- pH strips: To test for acidic conditions that could cause efflorescence.
- Infrared thermometer: To detect heat loss or gain, indicating possible substrate movement.
- Tape measure: For measuring tile and grout cracks or gaps.
- Flashlight: To inspect hard-to-reach areas for signs of damage.
- Chalk line: To mark test areas or problem zones.
- Gloves and safety glasses: For protection during testing.
Quick rule: Always double-check your tools before starting. Calibrate moisture meters regularly for accurate readings.
When to hire a professional and what to ask
Knowing when to call in the pros can save you time, money, and potential damage. Here’s a checklist of signs and questions to help guide your decision.
- Visible substrate movement: If tiles are lifting or cracking due to underlying movement, it’s time to call a pro.
- Persistent moisture: If moisture readings remain high despite attempts at mitigation, consult an expert.
- Significant cracking: Widespread cracks may indicate structural issues that require professional assessment.
- Mold growth: Visible mold indicates a moisture problem that needs immediate attention from a pro.
- Efflorescence that returns: If cleaning doesn’t resolve efflorescence, it’s time to call in an expert.
- Delamination of tiles or grout: Widespread delamination may require professional intervention to prevent further damage.
- Ask for certifications: Ensure your installer or inspector is certified by relevant organizations (e.g., NTCA, CTI).
- Request references: Ask for past clients’ contact information to verify quality of work.
Quick rule: If in doubt, err on the side of caution and consult a professional. It’s better to be safe than sorry when it comes to your home’s structural integrity.
Fixes and Repairs: Step-by-Step Solutions
This section walks you through fixes from quick surface remedies to full tile replacement, with practical materials lists and rough project timelines suitable for DIYers. It covers safety steps, moisture checks, and how to tell when a fix is temporary rather than permanent.
Starting with quick fixes can limit further damage and buy you time to plan a larger repair. You’ll learn how to assess the problem, choose the right repair approach, and what tools and steps to follow for a solid, durable result. If you see persistent moisture or signs of structural trouble, stop and consider bringing in a licensed contractor for a permanent solution.
Step-by-Step Repair Process
Follow these practical steps to fix your terracotta tile floor issues safely and effectively.
- Assess the damage: Identify unstable tiles, water damage signs, and check for loose or sticky tiles. Wear gloves and safety glasses.
- Test for moisture: Use a moisture meter or perform a simple DIY test to confirm water intrusion. Keep ventilation on high if working with chemicals.
- Prepare the area: Clear the room of furniture, lay down drop cloths, and ensure power tools are unplugged before starting work.
- Perform repairs: Based on your diagnosis, reseal, regrout, or replace tiles as needed. Follow manufacturer’s instructions for adhesives and grouts.
- Final checks: Inspect your work, clean up the area, and test repaired sections under light traffic to ensure they’re secure.
Quick fixes and maintenance interventions
Tackle minor issues with these simple DIY methods to keep your terracotta tile floor looking its best.
To remove stains, use a mixture of equal parts white vinegar and water. Apply, let it sit, then scrub and rinse. For grout refresh, clean the area first, then apply fresh grout mix using a rubber float, smoothing it into gaps. Let it set, then wipe off excess with a damp sponge.
For localized crack repair, use an epoxy-based filler. Apply with a putty knife, let it cure, then sand smooth and touch up with matching paint or stain.
Major repairs and replacement guidance
When faced with extensive damage, follow these steps to remove, repair, and replace terracotta tiles safely and effectively.
Remove affected tiles using a chisel and hammer or an oscillating tool. Prepare the substrate by cleaning it, repairing any damage, and leveling if necessary. Ensure the surface is dry before applying new adhesive.
Select matching reclaimed or new tiles, ensuring they match in size, color, and style. Apply adhesive according to manufacturer’s instructions, then set the tiles in place using spacers for even gaps. Allow the adhesive to cure as directed before grouting.
If waterproofing is required, apply a suitable membrane before installing new tiles. If structural issues persist or you’re unsure about any step, consult a licensed contractor.
Installation, Safety, and Best Practices for DIY Projects
We cover planning, substrate prep, mortar selection, and expansion joint placement to keep terracotta tiles from cracking, loosening, or showing excessive lippage, so your DIY job holds up to daily use and seasonal movement. Assess and prepare the subfloor—concrete slab, plywood, or terrazzo—by performing moisture checks, cleaning thoroughly, filling hollows, and bringing high spots down, then choose a terrace or latex-modified mortar that suits the surface and expected loads. Lay out the pattern to minimize waste and achieve clean grout lines, plan where joints go in long rooms or changes of plane, and account for edge treatments and rotation to hinge on proper movement tolerance.
Safety comes first: wear eye protection, gloves, a respirator if dust or fumes are present, non-slip footwear, and keep ventilation steady when mixing and applying adhesives to protect your lungs and eyes. Understand mortar choice, trowel notch guidance, and tile porosity, and check labels for mix ratios, working time, and pot life so you don’t guess and end up with poor adhesion or premature drying. Follow a clear workflow from dry- fitting and bed prep through setting, jointing, curing, and maintenance, so you avoid cracks, staining, and weak grout lines while maximizing your layout efficiency.
Tools, materials, and cost checklist for DIYers
Before you start your terracotta tile project, use this checklist to ensure you have everything needed. It’ll save you time and trips to the store.
- Tape measure: To accurately measure your space and tiles.
- Level: For checking and ensuring a flat surface before installation.
- Chalk line: Helps mark out layout lines for straight tile placement.
- Tile nippers/cutters: To cut tiles to size where needed. Skipping this can lead to improper fitting and gaps.
- Grout float: For spreading mortar and applying grout evenly.
- Notched trowel (3/16″ or 1/4″): Ensures even mortar coverage. Wrong size can lead to weak adhesion or waste.
- Sponge: For cleaning excess mortar and grout from tiles.
- Terracotta-specific adhesive (thinset or latex-modified): Essential for proper tile adhesion. Using the wrong one can cause tiles to lift or crack.
- Flexible terrace/flex mortar: For leveling and filling hollows or high spots on your subfloor. Skipping this can result in a wavy, uneven surface.
- Expansion joint material: Crucial for accommodating seasonal movement to prevent cracking.
- Safety gear (PPE): Includes eye protection, gloves, non-slip footwear, and a respirator if dust is an issue. Skipping PPE can lead to injuries or health issues.
- Grout: Match color and type (sanded/unsanded) to your tile size and grout line width.
Quick rule: Always check the manufacturer’s recommendations for specific products to ensure you’re using the right ones for your tiles.
Common installation mistakes to avoid
Here are some frequent DIY errors and how to prevent them, ensuring a successful terracotta tile installation.
- Insufficient substrate prep: Skipping proper subfloor preparation can lead to uneven surfaces, hollow spots, or tiles lifting. Always ensure your subfloor is clean, level, and stable before tiling.
- Wrong mortar selection: Using the wrong type of mortar (e.g., regular mortar instead of flexible terrace/flex) can result in cracking due to movement. Always choose a mortar suitable for terracotta tiles and your subfloor type.
- Inadequate adhesive open time: Not allowing enough time for the adhesive to set before applying pressure or walking on it can cause tiles to lift. Follow manufacturer’s guidelines for open time and curing.
- Poor sealing: Skipping sealant application can lead to grout staining, moisture damage, or tile lifting. Always apply a suitable sealer after installation.
- Improper layout: Not planning your layout properly can result in excessive waste and lippage (uneven tile heights). Take time to plan your layout before starting to install tiles.
By avoiding these common mistakes, you’ll achieve a long-lasting, beautiful terracotta tile floor.
Maintenance Plan and Long-Term Care
Plan a year-round maintenance calendar for terracotta tile finishes, whether sealed or unsealed, and tailor tasks to interior vs. exterior use and local climate. Sealing guidance should be based on finish type and environment, with signs that resealing is due and a check-the-label rule if you’re unsure. Clean with pH-neutral cleaners using a soft mop, avoid abrasive tools and harsh chemicals, and keep stain prevention in mind to protect the finish.
Add prevention checks for efflorescence, water infiltration, grout wear, and freeze damage, with practical remedies and when to call a pro. Climate affects how you maintain grout and sealers, so adjust tasks for cold climates, humid/coastal areas, or dry interiors, and keep a simple maintenance log with sealer type and dates. A quick troubleshooting flow helps you spot problems early and decide if you repair, reseal, or involve a pro.
Daily/weekly cleaning and seasonal care
Keep your terracotta tiles looking their best with regular, gentle cleaning. Use a pH-neutral cleaner to avoid damaging the finish.
Mop softly in a figure-eight motion, working from one side of the room to the other. Avoid harsh scrubbing or using abrasive tools that can scratch the surface.
Inspect your tiles seasonally, especially after winter or heavy rains. Check for any signs of water damage, efflorescence, or other issues. Catching problems early prevents bigger headaches down the road.
Re-sealing and periodic deep maintenance
Sealer performance fades over time. Test it by sprinkling water on the tiles; if it beads up, your sealer is still good. If it soaks in, it’s time to reapply.
Choose a sealer suitable for your tile finish and environment. Follow manufacturer instructions for application. Most sealers need 24-48 hours to cure before you can walk on them or replace furniture.
Deep maintenance might include replacing worn-out grout or hiring a professional for restoration services. Do this every few years, depending on usage and climate.
Conclusion
Terracotta tile floors can stay durable and looking great if you approach the next steps with safety and a clear plan. The core idea is to test, verify, and fix carefully so you protect both the floor and the people using it.
Begin with a quick visual sweep of the area, then verify moisture and substrate stability, test a small area for adhesion, check tile condition and grout, assess for cracks, and map a repair or replacement plan before you touch anything. If you follow that simple checklist in order, you’ll pinpoint what actually needs work and avoid wasted effort.
Common mistakes to avoid include skipping moisture testing, using incompatible cleaners or sealers, and rushing repairs without a clear method or dry time. Safety rules to follow are plain: wear eye protection and gloves, ventilate the space when using cleaners or sealers, and never mix chemicals. Stay disciplined about testing first and only proceed on a small, controlled area to see the result before expanding.
If you’re unsure about substrate damage, large cracks, or consistent water intrusion, call a professional instead of pushing ahead. A well-timed expert check can save money and prevent costly mistakes. Stay practical, stay deliberate, and you’ll keep the floor looking sharp and standing up to daily use.
FAQ
What defines Terracotta Tile Floor Trends for 2026?
In 2026, trends focus on warm, earthy tones and matte finishes. Expect mixed sizes and rustic edges to stay popular. Check current design guides for color palettes and application ideas, and confirm with product labels for finish options.
What are the key material properties to know before install?
Terracotta tiles are porous and breathe, so they soak up moisture easily. They are relatively soft and can stain if not sealed. Always read the tile datasheet and the sealer instructions before starting.
How should I approach installation and maintenance to keep the trends looking good?
Seal the tiles properly after installation to protect against stains. Use a breathable sealant compatible with terracotta, and re-seal as recommended by the manufacturer. For maintenance, wipe spills quickly and clean with products labeled safe for terracotta.
Is terracotta a good value compared to other floor types?
Terracotta can be affordable upfront, but costs rise with professional sealing and more frequent maintenance. Compare total cost of materials, sealers, and potential repairs with other options, using manufacturer guidance and local pricing as references.