
Introduction
Roof tile problems are issues that affect tiles, including leaks, cracks, corrosion, and wear. This article breaks down common causes and how to test and fix them in plain, hands-on terms. You’ll learn to spot oil canning, loose tiles, and scratched surfaces before they sink your roof.
Common problems like oil canning, leaks, corrosion, and installation errors have practical signs you can verify on your own. Test ideas and fixes rely on what the tile type and underlayment require, so check the product label and manufacturer instructions and follow local rules. If in doubt, use careful, non-destructive checks and safe repair options.
Key takeaways
- Inspect tiles regularly for cracks, chips, and signs of oil canning or leaks.
- Verify proper tile orientation and underlayment to prevent leaks and installation errors.
- Look for corrosion at metal flashing and fasteners; replace corroded parts promptly.
- Use correct sealant and flashing details to reduce scuffing and surface damage during installs.
- Schedule preventive inspections after severe weather to catch hidden tile damage early.
- Safety: work from stable ladders and wear fall protection when inspecting roofs.
Table of Contents
- Introduction
- Key takeaways
- Common Roof Tile Problems by Material
- Root Causes: Why Tile Problems Develop
- Diagnostic Testing and Inspection Protocols
- Fixes and Repair Strategies by Problem
- Safety, Tools, and Materials Checklist
- Preventive Maintenance and Long-Term Care
- Choosing Materials and Contractors: Planning Before You Buy
- Conclusion
- FAQ
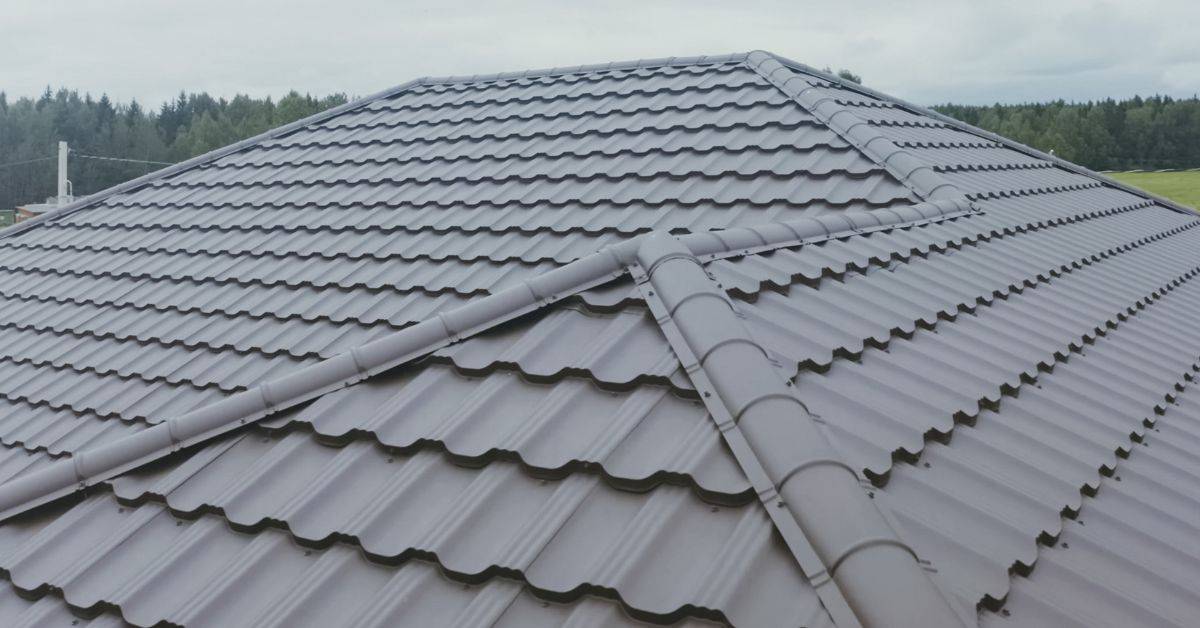
Common Roof Tile Problems by Material
Clay, concrete, slate, metal, composite, and solar tiles each show distinct trouble patterns. Homeowners commonly notice cracking, spalling, or chips on clay tiles, while concrete tends to suffer frost-related damage and spalling over time. Slate may become brittle and broken, and metal tiles can show rust, corrosion, or loose fasteners from wind and thermal cycling. Composite tiles often exhibit delamination or discoloration, and solar tiles focus leaks around module flashing and penetrations. Map the symptoms to the material type to narrow potential causes quickly and plan safer checks from ground level to ridge line.
Think through which problems tend to cascade. Freeze–thaw cycles and UV exposure stress clay and concrete differently, while wind uplift frequently loosens metal and thinner composite tiles. Climate exposure and prior installation methods influence how fast issues appear. Use a symptom-to-diagnosis approach to guide whether aging, impact, or installation flaws are the primary driver. When in doubt, verify with the product label or manufacturer instructions and consider local weather patterns and code expectations before taking further steps.
Cracking, Breakage, and Granule Loss
Roof tiles can crack, break, or lose granules due to several reasons. Impact from falling branches, hail, or foot traffic is a common cause. Freeze-thaw cycles in colder climates can also lead to cracking as water expands in the tile’s pores.
Thermal expansion and contraction with temperature changes can stress tiles over time, causing hairline cracks that may not be visible from below but can allow water intrusion. Manufacturing defects or improper installation might also result in early breakage.
Homeowners should look for:
Visible cracks, even tiny ones, missing granules (in asphalt shingles), and broken tiles. Inspect your roof regularly to catch these issues early.
Corrosion, Staining, and Chemical Reactions
Metal roofs can suffer from corrosion, staining, and chemical reactions accelerated by environmental factors. Galvanic corrosion occurs when two different metals are in contact with each other and an electrolyte (like water), leading to rapid deterioration of the less noble metal.
Staining may occur due to chemical reactions between roof materials and pollutants or other substances in the atmosphere. For instance, acidic rain can cause staining on certain metals like copper.
Homeowners should watch for:
Rust (orange or red flakes), stains on the roof or walls below, and loose fasteners. If you notice any of these signs, act promptly to prevent further damage.
Weathering, Fading, and Coating Failure
Over time, all roof materials are subject to weathering, fading, and coating failure. Ultraviolet (UV) rays from the sun can degrade roofing materials, causing them to fade, crack, or become brittle. This process is accelerated in areas with high UV index.
Chalking occurs when a powdery substance forms on the surface of some tiles due to exposure to sunlight and moisture. Paint failure can also happen as a result of weathering, leading to peeling, flaking, or discoloration.
Different coatings and climates affect longevity differently. For example, darker colors absorb more heat, which can speed up degradation in hotter regions. Regular inspections can help homeowners monitor these changes and address any issues early.
Root Causes: Why Tile Problems Develop
Identify the broad categories that drive tile problems: installation errors, material incompatibility, environmental exposure, and structural or decking issues. Each category points to different fixes and considerations for safety and longevity. Start by noting whether symptoms align with improper fasteners, misaligned overlays, or mismatched tile weights on the deck framing. From there, you can layer in climate effects such as sun exposure, freeze–thaw cycles, and proximity to salt spray or tree debris. Use the categories as a framework rather than a final diagnosis.
Develop a practical diagnostic framework you can apply on-site. Look for cracks, slips, voids, and signs of flashing or underlayment failure. Assess deck and substrate integrity, roofing pitch compatibility, and drainage performance with the chosen tile type. Document findings with photos and measurements to track progression and clarify escalation steps to a professional when necessary.
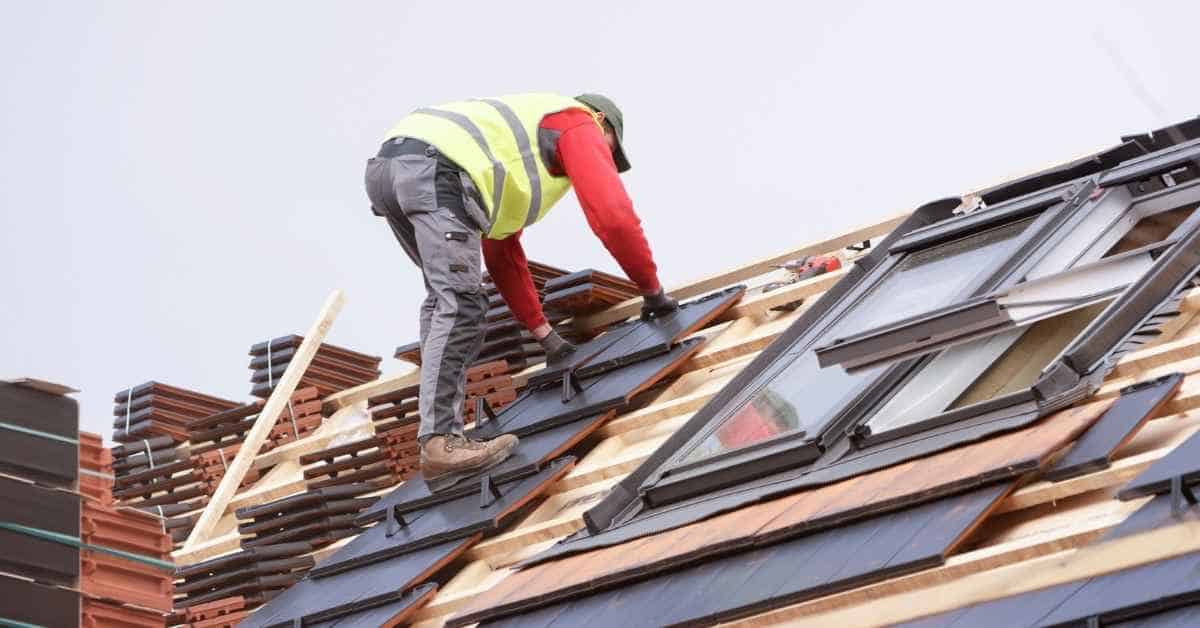
Installation and Workmanship Errors
Proper installation is crucial to prevent leaks and premature failure. Here are common mistakes to avoid:
- Improper flashing: Inadequate or incorrectly installed flashing leads to water intrusion at valleys, hips, and ridges.
- Wrong fasteners: Using nails that are too long or not designed for tile can cause damage and leaks.
- Poor underlayment: Insufficient or improper underlayment allows moisture to penetrate the decking, leading to rot and leaks.
- Inadequate mortar/adhesive: Missing or improperly applied mortar/adhesive can cause tiles to slip, crack, or dislodge.
Regular inspections during installation can help catch these issues early.
Material Interaction and Compatibility Issues
Choosing compatible materials is vital for a long-lasting, problem-free roof. Here are common pitfalls to avoid:
- Dissimilar metals: Mixing different metals can cause galvanic corrosion, leading to leaks and staining.
- Incompatible mortars/underlayments: Using materials not rated for tile roofs can result in weak bonds, cracking, or delamination.
- Substrate problems: Inadequate decking or underlayment can cause tiles to crack, slip, or leak.
- Incorrect tile material: Using tiles that are too heavy for the structure can lead to sagging and leaks.
- Glaze/porosity issues: Tiles with high porosity or improper glaze can absorb moisture, leading to staining or mold growth.
Design and Roof System Factors
The roof’s design and system components play a significant role in preventing problems. Consider the following:
Slope and drainage: A steep enough pitch and adequate drainage help prevent water pooling, ice dams, and leaks.
Ventilation: Proper attic ventilation reduces heat buildup, preventing shingle curling and moisture-related issues.
Load considerations: The roof structure must be strong enough to support the tile’s weight and wind loads. Regular inspections can help ensure the roof remains structurally sound.
Diagnostic Testing and Inspection Protocols
Establish a visual inspection routine that covers exterior tile condition, cracks, delamination, staining, and any uneven wear. Inside the attic or ceiling, watch for moisture patterns and signs of unseen leaks. Use a methodical approach so you can repeat checks over time without losing track of details. Keep notes organized so you can correlate surface issues with hidden causes. This protocol is designed for homeowners and helps guide professional input when needed.
Incorporate tested steps for water intrusion and fastener health. Perform controlled water intrusion tests or dye tests to trace leak paths without causing damage. Check fasteners, clips, nails, underlayment exposure, and seam integrity. Include flashing around penetrations and drainage assessment as part of the standard routine, and document thresholds for samples or lab testing if moisture or substrate concerns arise.
Visual and Non-invasive Inspections
Before you grab your ladder, understand that a thorough visual inspection is crucial. It’s the first line of defense in identifying roof tile problems.
- Exterior Roof Surface: Walk the roof, looking for cracks, missing tiles, or damaged ones. Binoculars can help from ground level.
- Tile Condition: Check for delamination (layers separating), staining, or irregular wear. These could indicate underlying issues.
- Interior Signs of Leaks: Inspect the attic and ceilings for water stains, mold, or mildew. These are telltale signs of leaks.
- Ventilation: Ensure all vents are clear and functioning properly. Blockages can lead to moisture buildup.
- Gutters and Downspouts: Check for debris, corrosion, or gaps that could cause water backup.
- Roof Penetrations: Inspect around chimneys, vents, and skylights. These are common leak points.
- Document Findings: Take photos of any issues. Include measurements to help with repairs.
- Safety First: Always wear appropriate safety gear when walking the roof.
Quick rule: Never skip a visual inspection. It’s your best bet for early detection and prevention of costly repairs.
Water Infiltration and Leak Testing
When visual inspections aren’t enough, it’s time to test for leaks. Here’s how to do it safely.
- Controlled Water Flooding: Use a garden hose with a spray nozzle to simulate rain. Start at the lowest point and work your way up.
- Dye Testing: Apply waterproof dye around suspected leak areas. If there’s a leak, it’ll show up on the interior.
- Rapid Rain Simulation: Use a rain simulator or hire a professional to mimic heavy rainfall conditions.
- Tracing Techniques: Once you’ve found a leak, trace it back to its entry point. This might involve inspecting the roof from inside the attic.
- Avoid Damage: Never test during actual rain or when the roof is wet. This can cause further damage.
- Safety First: Always have someone spotting you while on the roof, and use safety gear.
- Document Findings: Note down where leaks were found and how they were traced.
Quick rule: Never test for leaks in wet conditions. It can cause more harm than good.
Material Sampling and Laboratory Tests
Sometimes, you need expert help to diagnose the problem. Here’s when and how to collect samples for lab testing.
- Tile Samples: Collect a few tiles, especially if they’re damaged or show signs of deterioration.
- Underlayment Samples: If you suspect underlayment failure, take samples from affected areas.
- Decking and Substrate Samples: If there’s evidence of rot or damage to the underlying structure, collect samples.
- Coating Adhesion Tests: Check for peeling or flaking paint. Labs can test adhesion strength.
- Salt Contamination Tests: If you live in a coastal area, salt contamination could be an issue. Labs can test for this.
- Corrosion Analysis: If fasteners or metal components are corroded, send samples for analysis.
- Choose the Right Lab: Select a lab with experience in roof tile testing and relevant certifications.
- Document Findings: Keep records of where samples were taken and any observations made.
Quick rule: Always wear gloves when handling suspect materials. Some can be harmful to your health.
Fixes and Repair Strategies by Problem
Approach repairs by severity to prioritize safety and budget. Start with temporary fixes for active leaks, then move to patches and component replacements as appropriate. If there is structural concern or widespread deterioration, plan for more substantial work and likely replacement. Use a sequence that protects the roof and interior while you determine the best long-term solution. These decisions hinge on observed condition and the specific tile type you are dealing with.
Outline concrete steps for common scenarios. Temporary fixes may involve containment and drainage diversion; patching can address local flashing or underlayment issues; and component-level repairs should target valleys, ridges, and flashing with matching materials. When a full replacement is warranted, consider life expectancy, contractor qualifications, permitting, and inspection requirements to stay on the right side of local rules and warranties.
Leak Repairs and Flashing Replacement
First, locate the leak. It might not be directly below where you see water inside. Use a garden hose to simulate rain.
Safety first: Wear non-slip shoes and use secure ladders. Don’t work in wet conditions.
If it’s flashing (metal strips around chimneys, vents), replace it. Remove old nails, scrape off old sealant, then install new flashing with proper overlap. Use roofing cement under nail heads to prevent leaks.
For underlayment (waterproof barrier), patch small holes with underlayment repair tape. For larger areas, replace the entire sheet.
Handling Corrosion, Stains, and Dissimilar Metal Issues
Galvanic corrosion happens when different metals are in contact with each other. Stop it by isolating metals or using protective coatings.
Clean the affected area first. Use a wire brush for metal and a soft-bristle brush for painted surfaces. Apply a coat of rust inhibitor primer.
Apply a protective coating like paint, sealant, or a sacrificial anode (a piece of metal that corrodes instead of your roof tile).
If the problem persists, consider replacing the affected component with one made from compatible materials.
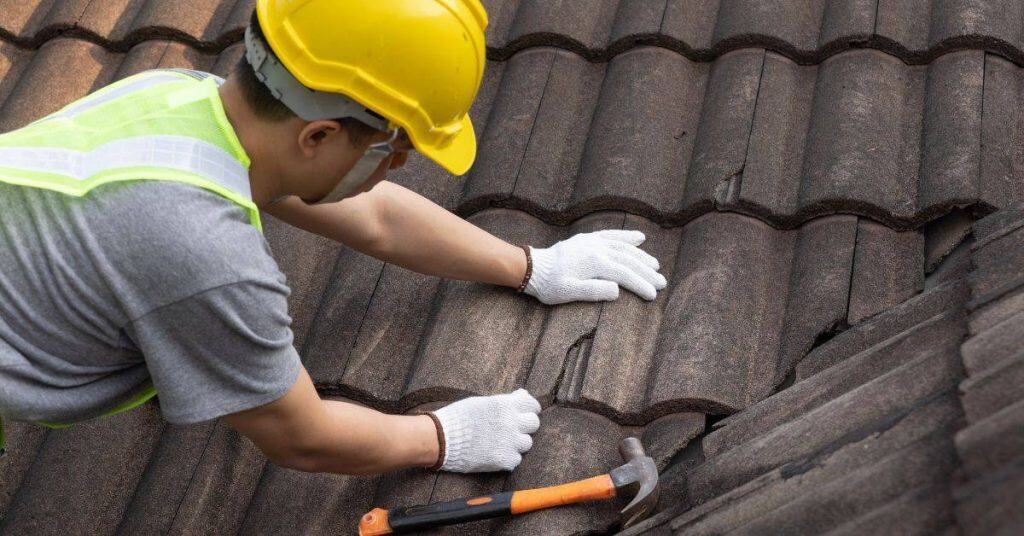
Repairing Cracked or Displaced Tiles
Safety first: Wear gloves and safety glasses. Use a flat pry bar to gently lift tiles.
For small cracks, use roofing cement. Apply it with a putty knife, pushing it into the crack. Let it dry, then paint over it with matching tile paint.
For larger cracks or displaced tiles, replace them. Remove the damaged tile, clean the area, and apply new roofing felt. Use new nails that match the originals in size and material. Place the new tile and seal it with roofing cement.
If you can’t find a matching tile, consider replacing a whole section to maintain consistency.
Safety, Tools, and Materials Checklist
Safety comes first for roof work. Define the scope, assess fall hazards, and monitor weather conditions. Have a fall protection plan and ensure electrical lines are cleared before starting. Keep a communication plan if you work with a partner so you can coordinate movements and support. This baseline helps prevent common on-site accidents and keeps the job moving smoothly. Always tailor precautions to your roof height and slope.
Prepare the PPE and tools you’ll need for inspections and minor fixes. Use a hard hat, safety glasses, gloves, non-slip boots, and knee pads, plus any specialty gear like a harness and roof anchors if required. A practical toolkit includes measuring tape, chalk line, pry bar, hammer, utility knife, level, trowel, caulking gun, sealants, roof cement, flashing tape, and replacement tiles. Store items to prevent weather exposure and organize for quick access during the day.
Personal Safety and Fall Prevention
Before you start any work on your roof, safety should be your top priority. Use this checklist to ensure you’re protected from falls and other hazards.
- Hard Hat: Protect your head from falling debris or impact with a hard hat.
- Safety Glasses: Shield your eyes from dust, debris, and harmful UV rays.
- Gloves: Wear work gloves to protect your hands from cuts, scrapes, and burns.
- Non-Slip Boots: Ensure you have secure footing with non-slip boots designed for roof work.
- Knee Pads: Protect your knees from the rough surface of the roof and make working more comfortable.
- Harness and Lanyard: Use a full-body harness with a lanyard to prevent falls. Always tie off at a secure anchor point.
- Fall Protection Planning: Assess fall hazards, plan your route, and use safety measures like guardrails or warning lines.
- Electrical Line Clearance: Ensure all electrical lines are clearly marked and at least 10 feet away from your work area.
- Ladder Safety: Use a ladder with a 4:1 angle, secure it at the eaves, and use stabilizers or toe boards to prevent slipping.
- Avoid Working in Poor Weather: Do not work on your roof during rain, snow, ice, or high winds. Wait for clear, dry conditions.
- Professional Help: If you’re unsure about any aspect of safety or the job is too complex, hire a professional roofer.
Quick rule: Always prioritize safety over speed. Take your time and follow these guidelines to protect yourself from serious injury.
Tools and Replacement Materials
Having the right tools and materials on hand will make your inspection and repair job much easier. Use this checklist to ensure you’re prepared.
- Measuring Tape: Accurately measure tiles, gaps, and areas for replacement to ensure a proper fit.
- Chalk Line: Snap chalk lines to mark cut lines or areas that need repair.
- Pry Bar: Gently remove damaged tiles without causing further damage to the roof structure.
- Hammer: Tap down nails, secure flashing, or break up old mortar.
- Utility Knife: Carefully cut backings, underlayments, or sealants as needed.
- Level: Ensure tiles are properly aligned and sloped for water runoff.
- Trowel: Apply mortar or sealants evenly and smoothly.
- Caulking Gun: Seal gaps, cracks, or joints with roofing caulk.
- Roof Cement: Repair small holes, cracks, or leaks using roof cement designed for your tile type.
- Flashing Tape: Sealing around vents, chimneys, and other penetrations to prevent water intrusion.
- Replacement Tiles: Match the size, shape, and material of your existing tiles to maintain a uniform appearance.
- Underlayments: Choose underlayments compatible with your tile type and local climate conditions.
Quick rule: Always select tools and materials designed for roofing work. Using the wrong tools can cause damage or injury.
Environmental and Local Code Considerations
Before you begin any work, it’s important to consider environmental factors and local codes to ensure your project is safe, legal, and environmentally friendly.
- Permits: Check with your local building department to see if you need a permit for your repair work.
- Wind/Snow Loads: Ensure your tiles and underlayments can withstand local wind and snow loads.
- Hazardous Materials Disposal: Follow local guidelines for disposing of old tiles, sealants, or other hazardous materials safely.
- Asbestos Containment: If your home was built before 1980, test for asbestos in older roofing materials. If present, hire a professional to handle and dispose of it safely.
- Lead Paint Safety: If your home has lead paint, take precautions to prevent lead exposure during repair work.
- Wildlife Protection: Avoid disturbing nesting birds or other wildlife during breeding season. Check local regulations for protected species.
- Noise Restrictions: Be aware of noise restrictions in your neighborhood, especially if you live in an apartment building or have close neighbors.
- Waste Management: Plan how you’ll dispose of old tiles, underlayments, and other waste materials generated during the repair process.
Quick rule: Always follow local codes and environmental guidelines to protect both yourself and the environment from harm.
Preventive Maintenance and Long-Term Care
Adopt a seasonal preventive maintenance calendar that breaks tasks into spring, summer, fall, and winter checks. Prioritize cleaning, debris removal, and rapid identification of new or expanding issues. Use simple checklists to stay consistent so you can compare condition from year to year. This approach helps catch problems early before they become leaks or costly repairs. Keep weather considerations in mind to avoid working under unsafe conditions.
Focus on visual inspection, drainage, and moisture control as core habits. Regularly check for cracked or displaced tiles, loose fasteners, and signs of moisture intrusion. Clean gutters, inspect ventilation, and manage moss or algae growth with safe methods that won’t harm tile surfaces. Document maintenance with notes and photos to support warranty needs and future replacements.
Routine Inspection and Cleaning Plan
Regularly inspect your roof to catch potential issues early. Use this checklist quarterly, or after severe weather.
- Spring: Check for winter damage; remove debris from valleys and gutters.
- Summer: Inspect tiles for cracks or loose ones; trim back trees to prevent future damage.
- Fall: Clean gutters before leaf drop; inspect flashing around chimneys and vents.
- Winter: Remove snow and ice dams; check for moisture intrusion signs.
- After storms: Inspect for displaced tiles or ridges; clear debris from roof surface.
Quick rule: Always inspect your roof after heavy winds, hail, or snowstorms to prevent minor issues from becoming major ones.
Ventilation, Insulation, and Moisture Control
Balanced attic ventilation prevents heat buildup in summer and moisture buildup in winter. Ensure you have adequate intake vents at the eaves and exhaust vents at the ridge or gable ends.
Insulate your attic floor to maintain a cold roof in winter, preventing ice dams and moisture intrusion. Use baffles to ensure proper airflow under insulation.
Control moisture by sealing air leaks from the living space into the attic. Install a vapor barrier on the warm side of your insulation to prevent moisture migration.
When to Replace vs. Repair (Cost Considerations)
Repairing is often cheaper than replacing, but consider the long-term risks and remaining lifespan of your tiles.
Replace if more than 30% of your roof is damaged or if tiles are over 20 years old. Replacement may be covered by warranty; check before proceeding.
Repair if damage is minor, and tiles are relatively new. Consider the cost of repairs versus replacement, factoring in expected remaining life and long-term risks like leaks and structural compromise.
Choosing Materials and Contractors: Planning Before You Buy
Select tile materials with climate in mind, noting how temperature, humidity, and freeze–thaw cycles affect performance. Consider ceramic, concrete, and clay options for durability and color/thermal properties, then compare how each handles wind and sun exposure. Always verify that the chosen tile suits your roof deck in terms of weight and support requirements. Use climate and load considerations to set realistic expectations for lifespan and maintenance.
Vet manufacturer specs and warranties carefully. Check product datasheets, performance ratings, installation requirements, and whether warranties are transferable. When evaluating contractors, prioritize licensing, insurance, and a solid project portfolio. Ask about substrate prep, underlayment compatibility, and lead times to avoid install problems and warranty issues. Include pre-purchase planning steps and budgeting considerations to protect your investment.
Material Specs, Standards, and Warranty Checks
The right materials ensure your roof’s longevity. Here’s what to check:
- Freeze-Thaw Resistance: In cold climates, look for ASTM C126 standards. Avoid materials with low resistance to prevent cracking.
- Coating Standards: Check if the coating meets ASTM D4308 standards. This ensures it won’t peel or fade prematurely.
- Wind Uplift Ratings: Look for high wind uplift ratings (e.g., Class F, H) to resist strong winds and prevent tile blow-off.
- UV Resistance: Check the UV resistance rating. High ratings protect against sun damage and discoloration.
- Warranty Terms: Read warranties carefully. Look for coverage duration, what’s included (labor, materials), and transferability.
Selecting and Vetting Contractors
Choosing the right contractor is crucial. Here’s how to vet them:
First, ensure they’re licensed (licensing number) and insured (liability and workers’ comp). Ask for their insurance certificates. Next, check their project portfolio and references. Lastly, insist on a written scope of work and clear warranty commitments.
On-site assessments help too. Check if they’re familiar with your specific roof type and local conditions.
Design Decisions That Prevent Problems
A well-designed roof minimizes future issues. Consider these aspects:
Roof Pitch: Steeper pitches shed water and snow better, reducing moisture-related problems.
Flashing Details: Proper flashing around chimneys, vents, and skylights prevents leaks. Ensure contractors use high-quality materials and follow best practices.
Underlayment Choice: Select underlayment suitable for your climate. In cold regions, consider ice and water shield to prevent ice dams. For hot climates, opt for reflective underlayment to reduce heat gain.
Integration with Other Systems: If you have solar panels or gutters, ensure they’re compatible with your chosen roof tile and won’t cause issues down the line.

Conclusion
Protecting your roof means acting on what you know now: address problems before they spread, choose durable fixes, and keep the work safe and repeatable so the roof stays reliable year after year. A solid approach reduces leaks, slows wear, and preserves curb appeal without breaking the bank.
Start with a simple, practical checklist: begin with a safety check and only proceed if the roof is stable, survey from ground level or using a steady ladder, look for cracked, slipped, or chipped tiles, loose fasteners, and damaged flashing, then lightly tap tiles to spot hollow or suspect spots, inspect underlayment and gutters for debris or signs of moisture, replace damaged tiles one by one or re-bed where needed, reseal or repair flashing as indicated, and finish by documenting what you fixed and what to monitor during the next maintenance window.
Common mistakes to avoid are walking on fragile, damaged tiles, using the wrong fasteners or sealants, and guessing at the cause without proper testing. Always keep safety first: wear non-slip footwear, use a partner or stabilizing setup, and test small areas first before committing full capacity repairs. Do not push repairs beyond your skill level, and never seal or cement tiles without confirming the issue and the surface underneath.
When in doubt about material compatibility, flashing, or underlayment, or if multiple areas show damage, call a professional. If you see widespread cracking, sagging, or persistent leaks after a small repair, stop and consult an expert. The right move keeps your roof durable, protects your home, and lets you sleep easy knowing you did it the right way.
FAQ
What causes oil canning in roof tiles and how can I tell it’s happening?
Oil canning shows up as wavy, flexible distortion in flat or lightly ribbed tiles. It’s often a result of manufacturing tolerances or improper support. Look for visible waviness, especially on large surfaces, and compare with neighboring tiles for consistency.
How do I spot corrosion on metal roof tiles, and what should I do about it?
Corrosion may appear as rust spots, staining, or pitting on exposed metal edges. Check for coating wear near fasteners, penetrations, and joints. If you see corrosion, follow the manufacturer’s touch-up or replacement guidance and consider replacing severely damaged panels.
What installation mistakes commonly cause leaks or tile damage?
Common culprits are improper underlayment, misaligned or loose fasteners, and wrong flashing details. Check that tiles are seated correctly, fasteners aren’t over-tightened, and flashing around chimneys, vents, and edges is intact. When in doubt, refer to the tile’s installation guide and local practice for flashing methods.
What should I know about chalking, fading, scuffing, or dissimilar metal interactions on roof tiles?
Chalking or fading can come from weathering or coating wear on painted tiles. Scratches and scuffs can expose underlying metal or primer. For dissimilar metals, ensure there’s proper isolation and compatible sealants to prevent galvanic corrosion; consult the manufacturer instructions if you see unusual staining or corrosion near joints.