

Introduction
A termite inspection gap on stucco can be created without compromising the wall’s appearance.
This article explains practical steps, materials, and rules of thumb to keep the gap functional while remaining visually unobtrusive.
You’ll learn how to locate, size, and finish the gap so inspections are thorough and the exterior stays clean.
Key takeaways
- Create a visible termite inspection gap along stucco joints without removing siding.
- Maintain at least 6 to 12 inches height clearance for accessibility.
- Use weep screed channels or slim trim to conceal gaps.
- Choose flexible seals compatible with stucco to avoid cracking.
- Inspect quarterly for moss, cracks, or debris blocking access points.
- Consult a pro for drilling through hard coat or foam-backed stucco.
Table of Contents
- Introduction
- Key takeaways
- Why a Termite Inspection Gap Matters on Stucco Walls
- Determining the Right Gap Size and Location
- Aesthetic approaches: Concealing the Gap Without Blocking Access
- Installation methods for different stucco types
- Tools, materials, and visual checkpoints
- Step-by-step DIY guide with time and cost estimates
- Common mistakes and how to avoid them
- Frequently Asked Questions About Termite Inspection Gaps on Stucco Walls
- Maintenance, inspection routine, and when to call a pro
- Conclusion
- FAQ
Why a Termite Inspection Gap Matters on Stucco Walls
A termite inspection gap is a clear space between the stucco and the wall or ground that lets inspectors spot termite activity. It helps reveal hidden damage and moisture problems before a full infestation takes hold. Skipping the gap hides termites and costs you more later. For actionable guidance, aim for an inspection gap of 1/4 inch to 1/2 inch where code permits, and verify measurements with a ruler or caliper during installation and maintenance checks.
In a stucco job, termites hide in the space behind the skin. Keeping that gap helps you spot damage early and hit problems with treatment before it spreads.
Termite behavior and pathways relevant to stucco
This checklist helps you spot potential termite entry points on your stucco walls before they become a problem. For added precision, perform the following testing steps during inspections: measure all gaps with a ruler or caliper, ensure clearance is maintained at 6 inches or more above grade in accordance with local codes, and use a moisture meter in suspected hidden cavities to detect elevated moisture that attracts termites.
- Check soil contact: Look for any areas where the ground touches the bottom of the wall. Ensure there’s at least 6 inches clearance to prevent termites from entering through the soil. Skip this and you risk termite infestation.
- Inspect weep holes: Check that all weep holes are clear and free of debris. Blockages can lead to moisture buildup, attracting pests like termites.
- Evaluate stucco gaps: Confirm there’s a 1/4-inch gap between the ground and the bottom of the stucco wall for proper drainage. This gap is crucial as it stops soil contact.
- Look at expansion joints: Ensure all expansion joints are properly sealed with termite-resistant material to prevent pests from entering through cracks.
- Check plumbing penetrations: Verify that any pipes or conduits penetrating the stucco wall have proper seals and flashing to avoid gaps where termites can enter.
- Inspect electrical conduit: Confirm there are no gaps around electrical conduits entering the wall. Seal any openings with caulk or foam sealant.
- Evaluate window frames: Check that all window frames have proper flashing and seals to prevent water intrusion, which can attract termites.
- Look for cracks: Inspect stucco walls for even the smallest cracks. Seal them immediately with a quality caulk or patching compound.
Quick rule: Keep your stucco wall dry and free of contact with soil to prevent termite entry points.
Building code and pest control guidance
This checklist helps you ensure your stucco walls meet building codes for termite inspection gaps. Use it before finalizing the exterior to avoid costly rework. As a reference, verify local code requirements for gap size, material, and height above grade, and cross-check with pest control standards or guidelines from reputable industry organizations.
- Check gap size: Ensure the gap is 1/4 inch wide by measuring with a ruler or caliper. Too narrow and termites can’t be inspected; too wide and water might seep in.
- Inspect continuity: Walk around your home to check if the inspection gap runs continuously without breaks. Breaks allow pests to enter undetected.
- Verify material: Confirm that the gap is filled with a non-organic, termite-resistant material like metal or plastic. Organic materials can attract termites.
- Check height: The inspection gap should be at least 1 inch above grade to prevent soil contact. Measure from ground level up to confirm.
- Inspect corners: Ensure the gap is present in all corners, especially where walls meet foundations or other structures. Missing gaps here can lead to termite infestations.
- Check for debris: Look inside the inspection gap for any debris that could block access during inspections. Clean out any dirt or wood scraps.
- Inspect around doors and windows: Make sure there are no gaps where stucco meets door frames, window sills, or other fixtures. These areas can be overlooked but are crucial.
- Verify waterproofing: Ensure the inspection gap is properly sealed to prevent water from entering behind the stucco. Look for signs of moisture damage around the gap.
Quick rule: Keep your termite inspection gaps clean, continuous, and free of organic materials to meet both building codes and pest control needs.

Determining the Right Gap Size and Location
Choose gaps that are 6-8 inches tall and 12-18 inches wide. Space them along the entire perimeter every 6-8 feet, with openings at corners and between sections. These gaps give you clear, quick access for inspectors and your own checks.
Placing gaps consistently saves you time later. It helps you spot moisture, pests, or misaligned edges before they become big problems. If you skip them or make them too small, you’ll fight later and miss issues.
Measuring for effective inspection and treatment access
This checklist helps you measure the right gaps around doors and windows to ensure easy maintenance and durability.
- Check grade level: Measure from finished grade to sill. Confirm it’s at least 6 inches below ground level to prevent water entry.
- Inspect door openings: Ensure there’s a 1-inch gap between the bottom of doors and the threshold for proper drainage. Check by placing a straight edge across the opening.
- Measure window gaps: Aim for a consistent 3/4 inch gap around windows to allow for expansion and contraction. Use a ruler or tape measure to verify.
- Verify sill slopes: Ensure sills slope away from the house at least 1/4 inch per foot. Check with a level to avoid water pooling.
- Evaluate lintel clearance: Measure and confirm there’s a minimum of 2 inches between window tops and roof overhangs for proper ventilation.
- Check weep holes: Ensure they are unobstructed and placed every 16 inches along the length of the wall. Test by blowing into them to ensure clear drainage.
- Inspect expansion joints: Measure gaps between concrete sections for proper movement, typically 3/8 inch wide. Confirm with a ruler or gap gauge.
- Evaluate flashing installation: Check that flashing is properly installed and overlaps by at least 2 inches to prevent water intrusion.
- Measure vent clearances: Ensure there’s adequate space around vents for air circulation, typically 3 inches from the wall. Use a tape measure to verify.
Quick rule: Always double-check measurements and ensure all gaps allow easy access for maintenance without compromising structural integrity.
Adjusting for sloped sites, planters, and hardscapes
When dealing with slopes, make sure your gaps are placed where water won’t pool. Slopes can change how you measure distances, so check base compaction and drainage before setting any gaps.
Near planters or raised beds, keep an eye on soil height. If the soil is higher than the concrete slab, plan your gap to be a bit wider to allow for easy inspection and maintenance without damaging plants. Don’t forget that roots can grow into small spaces, so give them room to breathe.
For hardscapes like patios or walkways next to your project, align gaps with existing joints if possible. This keeps everything neat and prevents tripping hazards by ensuring consistent spacing across different surfaces. Remember, a well-planned gap can save you from headaches later on when maintenance is needed.
Aesthetic approaches: Concealing the Gap Without Blocking Access
Conceal the gap with options that hide the opening but still allow access for inspection and maintenance. Use tight-fitting trim, removable panels, or flexible sealant that you can pull back. The goal is to blur the gap without locking out pests or making it hard to reach.
Choose methods that balance looks with function. A solid cover that snaps or hinges open makes it easy to check for pests, while weatherproofing keeps drafts out. Skip permanent closures that trap debris or block service, and avoid cheap fixes that fail after a season.
Low-profile gravel and perimeter edging
To hide the gap between your concrete slab and foundation without blocking access for termite checks, go with a low-profile approach. Use narrow bands of gravel, about 2 to 4 inches wide, around the edges. This keeps things neat while still allowing easy inspection.
For perimeter edging, stick to thin metal or plastic strips that sit just above ground level. Make sure they’re not so deep that you can’t slip your hand underneath for termite checks. The goal is to keep it simple and functional—no need for fancy landscaping here.
Check base compaction before laying down the gravel or installing edging. You want a solid, level surface to prevent any settling issues later on. This small step saves you headaches in the long run.
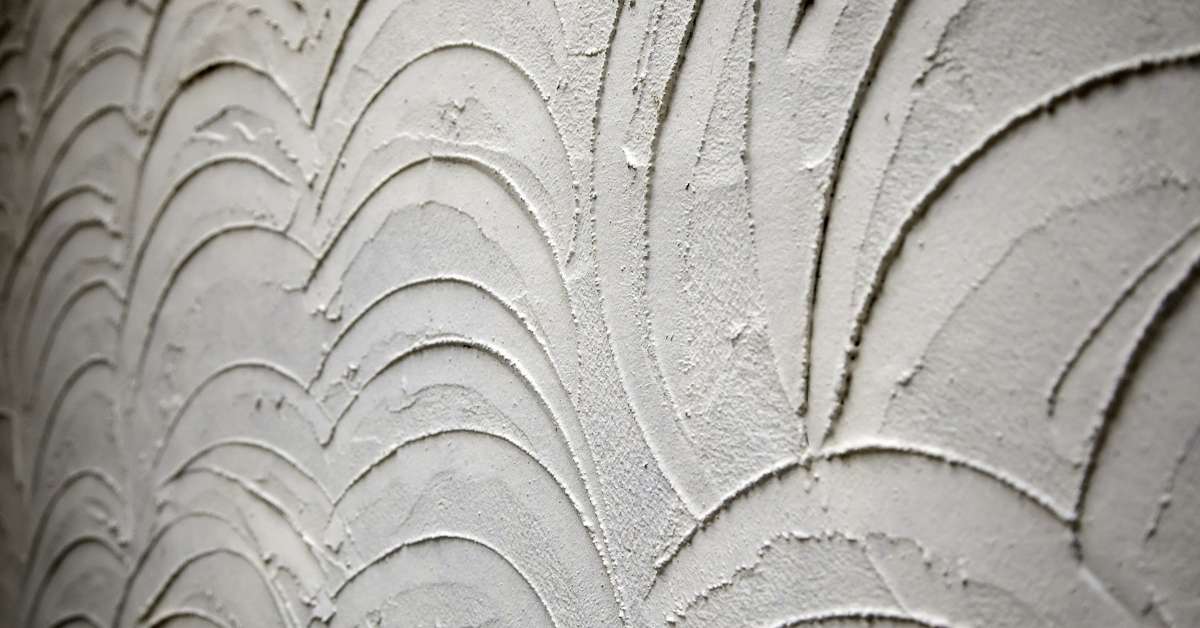
Painted trim, shadow lines, and purposeful reveals
If you want to hide the gap between your concrete slab and a wall without blocking access, consider using painted trim. This approach can make the joint look intentional and part of your design. Paint the edge of the concrete slab with a color that matches or contrasts nicely with your walls. Add a thin strip of trim along the edge to create a shadow line effect. This not only hides any small gaps but also gives the illusion of precision.
Another way is to use purposeful reveals, where you intentionally leave a small gap between the concrete and the wall. Fill this reveal with a contrasting color or material like metal strips or plastic trim. Make sure the gap is consistent in width all around for a professional look. This technique works well if your design includes architectural joints anyway.
When installing trim, always check base compaction. Loose soil can cause movement over time, leading to gaps and cracks. Ensure everything is solid before you start painting or adding trim. It’s also crucial to use high-quality materials that won’t peel or crack easily under weather conditions.
Landscaping strategies that preserve access
When it comes to landscaping around concrete slabs, you want plants and mulch to hide gaps while keeping the area accessible for inspections. Stick with low-growing groundcovers or small shrubs like creeping thyme or sedum, which won’t block your view of the slab edges. Keep these plants at least 6 inches away from the concrete so they don’t trap moisture and cause damage.
Mulch is a great way to cover gaps without blocking access. Use shredded bark or gravel chips that are small enough not to pile up against the concrete but large enough to stay visible. Spread mulch 2-3 inches thick, leaving space around the slab edges for air circulation and easy checks.
Remember, no matter how pretty your landscaping looks, it’s crucial to be able to check base compaction and inspect for cracks or settling issues. Keep pathways clear and avoid overgrown plants that can hide potential problems from view.
Installation methods for different stucco types
Different stucco types need different installation steps. This guide breaks down traditional three-coat, one-coat, and synthetic EIFS so you know what to do and what to avoid.
Substrates and flashings matter, and you must follow the right method for each system. Skip flashing or mix methods and you’ll invite leaks, cracks, and costly repairs.
Creating the gap during new stucco installation
When you’re setting up for a new stucco job, making sure there’s a clean gap between your base and the wall is crucial. Start by installing weep screeds at the bottom of your walls to create that space. Make sure they’re level and secure; this sets the stage for everything else.
Next, focus on flashing terminations. These should be placed above the weep screed but below where your stucco will start. Use a quality metal or plastic flashing material to ensure water doesn’t seep into your wall’s base. Remember, proper placement of flashing is key to preventing leaks and keeping your home dry.
For reveal profiles, use them to mark out where different sections of stucco meet, like corners or edges. These should be installed before you start applying the stucco mix. Make sure they’re straight and secure; any wobble here will show up in your finished product. Take a moment to check base compaction too—loose ground can cause all sorts of problems later on.
Retrofitting a gap on existing stucco
To retrofit a gap in existing stucco, start by carefully removing the finish layer around the area where you need to create the gap. Use a chisel and hammer or an angle grinder with a cutting disc to cut out the old stucco cleanly without damaging the underlying lath.
Next, install flashing and screed as needed to ensure proper water drainage and prevent future leaks. Make sure your base is compacted and level before attaching any new metal pieces. This step is crucial for long-term durability.
Once everything is set up correctly, apply a fresh coat of stucco over the repaired area. Blend it seamlessly with the existing surface by feathering out the edges. The goal here is to avoid visible patch marks that stand out like a sore thumb.
Working around through-wall penetrations and vents
When dealing with pipes, vents, or other through-wall penetrations in stucco work, you need to create a gap for inspection and maintenance. This means leaving a 1/4-inch reveal around these elements. Use flashing tape on the inside of the penetration to ensure water doesn’t seep into your home.
For vents, install a metal box or frame that sits flush with the stucco surface but leaves enough space for air flow and future inspections. Make sure this frame is securely attached to the wall before applying stucco around it.
Avoid sealing these areas tightly as it can lead to moisture buildup inside walls, causing serious damage over time. Remember, proper ventilation and access are key to preventing issues down the line.

Tools, materials, and visual checkpoints
You need a ready kit of tools and materials to create the gap and finish cleanly. Gather the basics: measuring tools, a saw, fasteners, adhesive, caulk, and a level. Use a visual checklist to confirm you have what you need before you start.
Having the right items and a steady checklist keeps mistakes small and the job looking right. It saves time, avoids gaps that collect dirt, and helps you spot problems early.
Tools and materials checklist
Use this checklist to ensure you have everything needed before starting stucco gap work.
- Hand tools: Check hammer, chisel, tape measure. Confirm all are in good working order.
Gotchas: Missing or dull tools waste time and money. - Flashings: Measure width and length of flashing strips. Ensure they match your project specs.
Skip at your peril: Improper flashings lead to water damage. - Sealants: Check for proper type (e.g., silicone) and color matching stucco. Test sealant flexibility by stretching a small sample.
Misstep: Using the wrong sealant can cause cracking or peeling. - Weep Screeds: Verify spacing and alignment with wall dimensions. Confirm they are securely attached to prevent leaks.
Blunder: Improper installation leads to water intrusion. - Trim Options: Select appropriate trim pieces (e.g., corner beads, edge strips). Ensure they fit snugly against stucco surface.
Mistake: Inadequate trimming results in uneven edges and gaps. - Ladders and scaffolding: Inspect for stability and safety. Check all rungs and braces are secure.
Slip-up: Unsafe equipment can lead to injury. - Safety gear: Confirm hard hats, gloves, goggles, and dust masks are available and worn properly.
Neglect: Failing to wear proper safety gear increases risk of injury. - Mixing containers: Ensure buckets or tubs are clean and large enough for mixing stucco. Check they have handles for easy transport.
Overlooked: Dirty containers can contaminate the mix, ruining your work. - Screeds and floats: Confirm tools are in good condition with sharp edges and smooth surfaces.
Omission: Dull or damaged tools affect stucco finish quality. - Water supply: Ensure a steady water source is available for mixing and cleaning. Check hoses are long enough to reach all areas.
Neglected: Running out of water can delay your project.
Quick rule: Always double-check tools and materials before starting work to avoid costly mistakes.
Visual checkpoints for a discreet, code-compliant gap
This checklist helps you verify that the gap between your concrete and other building elements is both functional and attractive.
- Consistent reveal depth: Check all sides of the gap are even. Use a straight edge to ensure uniformity. Skimping here leads to an uneven look.
- Continuous flashing: Ensure there’s no break in the flashing material around the perimeter. A quick visual check suffices. Missing flashing can cause water damage.
- Neat finish transitions: Look for smooth, clean edges where concrete meets other materials. Use a ruler to measure any irregularities. Rough or uneven transitions look unprofessional and may leak.
- No debris inside gap: Inspect the interior of the gap for dirt, gravel, or other debris. A flashlight helps here. Debris can cause water infiltration issues.
- Gap width uniformity: Measure several points along the gap to ensure it’s consistent. Use a tape measure. Inconsistent widths lead to poor aesthetics and potential leaks.
- No cracks at edges: Inspect all corners for any signs of cracking. A magnifying glass can help spot tiny cracks. Cracks allow water entry, causing structural issues.
- Proper sealant application: Ensure the gap is sealed with a bead of sealant that’s neither too thick nor too thin. Feel it to check consistency. Poor sealing allows moisture in and causes damage.
- No visible gaps under flashing: Check for any spaces where water could seep through. A quick visual inspection works here. Water can enter these gaps, leading to costly repairs.
Quick rule: If it looks clean and uniform, it’s likely right.
Step-by-step DIY guide with time and cost estimates
This guide breaks the project into clear stages, with estimated time, skill level, and supply costs for each step. You’ll see how long each part should take and what you’ll spend so you can plan DIY or hire a contractor. Know what to do first, what can wait, and when to call for help.
Breaking the work into stages helps you avoid surprise costs and rushed, unsafe jobs on the jobsite. It lets you compare DIY versus contractor work, set a realistic schedule, and track progress. Don’t cut corners or skimp on safety—bad shortcuts cost more in the end.
Step-by-Step Process
This sequence will guide you through pouring a concrete slab, ensuring quality and safety at each stage.
- Action: Lay out formwork for the edges of your slab.
Reason: To contain the wet concrete and ensure it pours to the correct height and shape.
Check: Formwork should be level, straight, and securely braced against shifting or sinking.
Professional Alert: If formwork is not stable, call in a pro before pouring begins. - Action: Mix concrete according to the bag instructions for your slab size.
Reason: Proper mix ratio ensures strength and workability of the pour.
Check: Concrete should be wet but not soupy, with no dry patches visible in the mix. - Action: Pour concrete into forms, starting from one corner and moving outward evenly.
Reason: Ensures even distribution and helps prevent air pockets or weak spots.
Check: Surface should be smooth with no large voids or puddles of water. - Action: Use a screed board to level the concrete surface, pulling off excess material.
Reason: Screeding removes high spots and ensures uniform thickness across the slab.
Check: Surface should be even with no dips or ridges visible. - Action: Float the concrete using a bull float to smooth out any rough areas.
Reason: Floating helps close up small holes and creates an initial smooth surface for finishing.
Check: Surface should feel smooth when touched, with no sharp edges or cracks. - Action: Wait at least 48 hours before applying a concrete sealer to protect the slab from moisture damage.
Reason: Sealing too early can trap moisture inside and weaken the slab’s integrity.
Check: Surface should be dry, free of standing water or wet spots. - Action: Clean up tools and equipment immediately after use to prevent concrete from hardening on them.
Reason: Proper cleanup ensures your tools are ready for the next project without damage.
Check: Tools should be free of hardened concrete, with all parts moving smoothly.
Pro tip: Always wear safety gear like gloves and goggles when handling wet concrete to protect yourself from irritation or injury.
Prep and safety steps
Before you start pouring concrete, make sure your site is ready. Clear the area of all debris and level the ground. Check base compaction to ensure a solid foundation for your slab. If you’re not sure about soil conditions or need deeper excavation work, call in a pro.
Wear protective gear: safety glasses, gloves, and steel-toed boots are non-negotiable. Concrete can be rough on the skin and eyes, so protect yourself properly. Also, shut off utilities like gas lines if your project is near them to avoid any accidents.
Review structural concerns before you start. If pouring concrete over an existing slab or dealing with load-bearing walls, consult a professional first. DIY mistakes here can be costly and dangerous.
Installation steps with photos suggested
Start by cutting your forms to size and setting them up around the area where you’ll pour concrete. Make sure everything is level and square, and don’t forget to install proper flashing at any joints or transitions to prevent water damage later on. Check base compaction before pouring; it’s crucial for a solid foundation.
Seal all edges with caulk or another sealant to keep moisture out and ensure your concrete lasts longer. Once the pour is complete, finish it off by troweling smooth or adding texture as needed. Take photos at each stage—before you start pouring and after everything sets up—to document your work and catch any issues early.
Common mistakes and how to avoid them
“`html
Frequently Asked Questions About Termite Inspection Gaps on Stucco Walls
Creating a termite inspection gap on stucco walls can raise several questions for homeowners. Understanding the purpose, placement, and maintenance of these gaps ensures your home stays protected from termite damage. Here are some common questions and practical answers to guide you through the process.
- What is the ideal size for a termite inspection gap? Aim for a gap between 1/4 inch and 1/2 inch, depending on local building codes. This size allows for effective inspection without compromising the wall’s integrity.
- How often should I inspect the gap? Perform a visual check every three months and after severe weather. Look for signs of blockage, moisture, or damage.
- Can I conceal the gap without affecting its function? Yes, use removable panels or slim trim to hide the gap while keeping it accessible for inspections.
- What materials should I avoid near the gap? Steer clear of organic materials like wood mulch, which can attract termites. Instead, use gravel or non-organic mulch.
- How do I maintain the gap? Regularly clear debris and check for signs of wear or damage. Reseal with compatible materials if needed to ensure the gap remains functional.
- When should I call a professional? If you notice persistent moisture, significant cracking, or suspect termite activity, contact a pest control expert or stucco contractor immediately.
- Is it necessary to have a gap on all stucco walls? Yes, especially on walls that are close to soil or vegetation. This gap is crucial for early detection of termite activity.
“`
The big point: don’t overpatch, skip proper flashing, or block access. These mistakes ruin the look and fail inspections.
Patch only where it fits, and finish with the same texture as the wall. Use proper flashing at joints and edges to shed water instead of trapping it. Keep access clear so you or the inspector can check for moisture and defects without chasing it through a world of patches.
Over-patching and mismatched finishes
Avoid over-patching concrete by sticking to small, necessary repairs. Large patches stand out like a sore thumb and can ruin the look of your whole slab. If you need to patch, keep it under 2 square feet. Anything bigger should be redone in its entirety.
To blend patched areas with the rest of the concrete, make sure both surfaces match in texture and color. Use a float that matches what was originally used on your slab for a seamless look. For coloring, test samples to find a perfect match before applying it widely. A mismatched finish is like wearing two different colored socks—everyone notices.
Before you start patching, check base compaction. If the ground isn’t stable, any repairs will just crack again. Spend time getting this right from the start to save yourself headaches later on.
Improper flashing and drainage issues
Poorly installed flashing can lead to big headaches down the road. When moisture gets trapped, it can rot out your foundation walls and cause major structural damage. Make sure you have a proper gap between the concrete slab and any adjacent structures or walkways so water can drain away easily.
Check base compaction before pouring to ensure solid support for flashing. Use flexible materials like rubber or plastic for flashing, as they bend without breaking over time. Also, make sure there’s a slight slope in the concrete towards drains or edges to keep water moving away from your home.
Avoid using mortar or other rigid materials that can crack and trap moisture. If you’re unsure about any part of this process, consult with a professional before proceeding. Proper flashing is not just about aesthetics; it’s crucial for long-term durability and preventing costly repairs later on.
Maintenance, inspection routine, and when to call a pro
Keep up with a regular maintenance and inspection routine. Check your home for termites and water issues at set intervals and seasonal checkpoints. If you see signs like mud tubes, frass, cracking, or water stains, call a pro right away. For long-term upkeep, follow a proactive schedule: perform quick checks every 3 months, with a thorough inspection twice a year, and schedule a professional inspection every 1–2 years or after major storms or renovations.
Sticking to a schedule helps you catch trouble before it spreads. You can handle basic checks, but professional eyes are needed for termite activity or water intrusion. That quick call can save you big repair costs.
DIY inspection checklist and reporting
Use this checklist during your regular maintenance rounds to catch issues early before they become costly repairs. Document findings with photos and notes to share with a pro if needed.
- Concrete cracks: Look for hairline fractures. Measure length and width. Note any progression over time and seal small cracks to deter water entry.
- Foundation settlement: Check door frames for gaps. Use a level to see if floors are uneven. Record any new gaps or shifts and monitor for expansion.
- Drainage issues: Ensure gutters slope away from house. Test downspouts with water. Clear debris to maintain proper drainage and prevent water damage.
- Cracking mortar joints: Inspect brickwork for cracks. Feel joints for looseness. Mark areas of movement and consider sealing or repointing as needed to stop water intrusion.
- Water stains on walls: Look for discoloration near windows and doors. Check ceilings for dampness. Investigate the source of moisture and address leaks promptly.
- Rust spots on metal: Inspect exposed steel beams and railings. Touch to see if rust is flaking off. Treat and repaint or replace severely corroded elements to maintain structural integrity.
- Termite damage signs: Look for mud tubes near foundation walls. Check wood for hollow sounds when tapped. Report any signs of activity to a termite specialist promptly.
- Rotting wood: Inspect deck supports and roof edges. Feel for soft spots or splinters. Plan repairs or replacement to prevent collapse and future water intrusion.
- Leaking faucets: Turn on taps to check water flow. Look for drips under sinks. Repair leaks to reduce water waste and mold risk.
- Drywall cracks: Inspect walls near windows and doors. Check ceilings for stress lines. Note progression and consider underlying moisture or structural issues.
- Loose window frames: Test windows to see if they rattle or move easily. Feel for gaps around edges. Address gaps to reduce drafts and pest entry.
Quick rule: If it looks off, measure it; if it feels wrong, document it.
When to hire a pest control or stucco contractor
This checklist helps you spot the signs that it’s time to call in the pros for either pest issues or stucco repairs. The goal is to intervene before small problems become expensive and disruptive.
- Mud tubes present: Look around your foundation and walls. If you see active mud tubes, pests are likely nesting inside your home’s structure. Schedule a professional evaluation promptly to confirm activity and treatment options.
- Visible termite droppings: Check for small piles of sawdust-like material near wood structures or in cracks. This is a clear sign termites are active nearby—contact a pro quickly for assessment and treatment plan.
- Widespread stucco cracking: Inspect your exterior walls for multiple cracks, especially those that run vertically and horizontally across large areas. Address underlying moisture or movement issues with a professional before patching.
- Bubbling or peeling paint: This often indicates moisture issues beneath the stucco layer. Check if water is pooling in certain spots after rain and have a pro diagnose moisture sources and remediation needs.
- Foundation damage: Look for cracks wider than 1/8 inch, especially those that run diagonally across concrete blocks or slabs. This can indicate shifting soil and needs professional attention to prevent further movement.
- Wood rot near stucco: Check around windows, doors, and other wood elements where water might collect. Soft spots or darkened areas suggest rot has set in and should be treated or replaced by a contractor.
- Water stains inside walls: If you see discoloration on your interior walls, especially near the baseboards, it likely means there’s a leak behind the stucco. Have a professional locate and fix the leak and assess stucco integrity.
- Structural wood damage: Tap wooden beams and supports around your home. Hollow or soft spots indicate termite infestation or water damage and require expert evaluation and remediation.
Quick rule: If you spot any of these issues, it’s time to call a professional before the problem gets bigger—and more expensive.
Conclusion
First, check that you’re in the right place and the gap size matches your plan, then verify the surface condition before cutting or drilling. Measure, mark, and test a small patch to confirm it won’t crack or show through after finish work. Confirm you have the right tools and materials for your stucco type, and pace your work so you don’t rush or miss a visual checkpoint. If any step feels uncertain, pause and test in a small area before continuing, and keep access clear so you can inspect behind the gap without damaging the wall.
Common mistakes to avoid are rushing the cut, using the wrong fasteners for your stucco, or blocking the access path needed for inspection. Always wear eye protection and use slow, controlled motions; don’t force materials through openings and don’t leave exposed edges that can snag paint or sealant. A simple safety rule: test in a small area first, then proceed in stages, and revisit the wall after a weather change to confirm everything still looks and works as intended.
If you run into uncertain substrate, unusual flashing, or suspect extensive damage, don’t push on alone. A pro can ensure the gap is effective without compromising the stucco or voiding warranties. With careful steps and disciplined checks, you’ll have a clean, functional gap that lasts and keeps termites out while your wall still looks right—and you’ll sleep better at night.
FAQ
Creating a termite inspection gap in stucco raises many questions for homeowners. It’s crucial to address these concerns to ensure the gap is both effective and aesthetically pleasing. Here are some common questions and practical advice to guide you through the process.
- How wide should the inspection gap be? Aim for a gap width of 1/4 inch to 1/2 inch, allowing inspectors to see potential termite activity without compromising the wall’s appearance.
- What materials are best for sealing the gap? Use flexible sealants compatible with stucco, such as silicone or polyurethane, to prevent cracking and maintain a clean finish.
- How often should I inspect the gap? Perform quarterly inspections to check for debris, moss, or cracks that could block access or indicate moisture issues.
- Can I install the gap myself? Yes, but ensure you have the right tools and follow proper steps. If unsure, consult a professional to avoid costly mistakes.
- How can I conceal the gap without blocking access? Use weep screed channels or slim trim that can be easily removed or adjusted for inspections.
- What should I do if I find termites? Contact a pest control professional immediately to assess the situation and recommend treatment options.
- Is a permit required to create an inspection gap? Check local building codes as requirements vary. Some areas may require permits for modifications to exterior walls.
Keep the termite gap on stucco practical and durable by prioritizing safety, preserving the wall’s appearance, and staying within the installation steps you already planned. A solid gap done right protects the structure and makes routine inspections easier.