
Introduction
Creating a paint sample wall without ruining drywall means putting paint on removable boards or using a temporary film so the wall itself stays clean. This is a hands-on DIY approach that keeps samples tidy and lets you move or change test spots without patching. Check product labels and manufacturer instructions for attachment methods and surface compatibility before you start.
In practice you’ll prepare the removable surface, secure it to the wall without damaging the drywall, and then apply your sample paints. Keep things simple: use painter’s tape or non-marring fasteners and follow paint drying and cleanup guidance from the paint manufacturer. If you’re unsure about adhesives or mounting, test a small hidden area or consult local advice.
Key takeaways
- Use removable boards and clear film to keep drywall clean during testing.
- Pre-cut boards slightly larger than sample area; mount with removable fasteners.
- Film protects edges; tape seams to avoid paint bleed and edge pull-off.
- Label samples by color and lighting condition for fair comparison.
- Use consistent lighting and adjacent control area to judge true color.
- Removal and cleanup: wear eye protection; peel film, remove boards, inspect drywall.
Table of Contents
- Introduction
- Key takeaways
- Why a Paint Sample Wall Matters and When to Use Removable Methods
- Tools and Materials Checklist
- Preparing Boards and Film for Accurate Samples
- Mounting and Installation Methods That Protect Drywall
- Painting Techniques for Reliable, Comparable Samples
- Viewing, Lighting, and Comparison Strategies
- Removal, Cleanup, and Minimizing Drywall Repair
- Cost, Timeline, and Decision Checklist
- Conclusion
- FAQ
Why a Paint Sample Wall Matters and When to Use Removable Methods
Testing paint at scale lets you judge color, sheen, and how light changes the look across real wall areas instead of small swatches. Seeing multiple large samples side-by-side helps avoid surprises when the whole room is painted.
Removable boards or film are preferable when you want full-size comparisons without committing to painting drywall or risking repairs. Use removable methods on rented spaces, freshly finished drywall, or whenever you want to avoid patching and sanding later.
Objectives of a sample wall
A paint sample wall is your chance to see how colors, finishes, and textures will really look in your space. Here’s what you should learn from it:
True Color: Paint swatches can’t capture the true color or how it’ll interact with other hues in the room.
Texture Appearance: You’ll see how the paint’s finish (gloss, matte, etc.) looks under your lighting conditions.
Lighting Effects: Observe how the color changes throughout the day and night to ensure it works with your space’s natural light and artificial lighting.
When to choose boards vs. film vs. painting on drywall
Each method has its pros and cons. Here’s when to pick one over the others:
Removable Boards: Ideal for rentals where you can’t paint walls, or if you want a semi-permanent solution that won’t damage drywall.
Paint Film: Great for quick, easy application and removal. Perfect for testing colors in multiple rooms without the hassle of painting and repainting.
Painting on Drywall: This is best when you’re ready to commit to a color and don’t mind the potential mess or damage during removal (if necessary). It’s also suitable if you plan to paint the entire room later.
Tools and Materials Checklist
Gather rigid boards, sample film, compatible adhesives or low-residue fasteners, brushes or rollers, primer, and the paint samples you plan to test. Include basic tools: a utility knife, sandpaper, measuring tape, level, and labeling supplies so each panel is identifiable.
Before buying, check product labels and manufacturer instructions for adhesion, paintability, and removability details, and confirm the film or board surface accepts paint type you intend to use. If in doubt about adhesive residue or surface compatibility, consult the product data sheet or retailer guidance to choose safer options.
Boards and panels (types and considerations)
Use this checklist when selecting boards or panels for your paint sample wall to ensure they’re suitable and easy to work with.
- Foam-core: Lightweight, smooth surface. Check for edge finish; rough edges can be tricky to handle.
- Plywood: Durable, versatile. Inspect for surface smoothness; sand if needed. Weight may require extra support.
- MDF (Medium Density Fiberboard): Smooth, consistent surface. Check for warping or bending; avoid if present.
- Panelboard: Lightweight, easy to cut. Ensure it’s smooth and flat; some may have a textured finish.
Quick rule: Always check the weight and edge finish of boards before purchasing to ensure easy handling and a clean look.
Removable films and adhesive sheets
Use this checklist when choosing removable films or adhesive sheets for your paint sample wall to ensure they stick well and come off cleanly.
- Peel-and-stick paint films: Check tack level; too low won’t stick, too high may damage drywall on removal.
- Low-tack vinyl: Evaluate finish compatibility; ensure it matches your desired paint texture.
- Protective films: Inspect for UV protection if using outdoors; some offer limited protection.
Quick rule: Always test a small piece first to confirm the film’s tack level and finish compatibility before committing to a large area.
Mounting supplies and application tools
Use this checklist when gathering supplies for your paint sample wall to minimize damage and ensure easy removal.
- Damage-free hangers: Check they’re suitable for your board/film weight; some may require additional support.
- Low-residue adhesives: Verify they leave minimal residue on removal. Read manufacturer instructions carefully.
- Painters tape: Choose a low-tack, wide tape to minimize damage and provide ample coverage for edges.
- Labeling supplies: Use labels or tags to keep track of paint colors and samples.
Quick rule: Always verify the manufacturer’s removal instructions before using any mounting supply or adhesive.
Preparing Boards and Film for Accurate Samples
Cut boards and film to consistent sizes and sand any rough edges so each sample has the same surface texture. Wipe surfaces clean, prime if the material requires it, and let any primer follow the manufacturer’s directions before applying paint.
Label each panel clearly on an unpainted edge with paint name, sheen, and application date so comparisons stay reliable over time. If you’re unsure about priming or surface prep specifics, check the primer and board product instructions to match the system correctly.
Cutting and Sizing Boards Safely
First, decide on your sample size. A common dimension is 12″ x 12″. It’s large enough to see color and finish, but small enough to handle easily.
Use a circular saw or a jigsaw for cutting. Always wear safety glasses and gloves. Secure the board in a vise or have someone help you hold it steady.
Measure twice, cut once. Mark your line with a pencil, then use a straight edge to guide your saw. Keep the blade well-lubricated with cutting oil to prevent binding.
Surface Prep: Sanding, Priming, and Sealing
Start by giving your boards a light sanding. Use 120-grit sandpaper to remove any mill glaze or rough spots. Wipe off dust with a damp cloth.
Next, apply a coat of primer. This seals the wood and provides a consistent surface for painting. Use a good-quality primer designed for your paint type.
Let it dry according to the manufacturer’s instructions. Then, give it a light sanding with 220-grit paper to remove any raised grain. Wipe off dust again.
Labeling and Organizing Samples
Before you start painting, label each board clearly. Include the paint name, sheen, any special mix instructions, and the date. This helps keep your samples consistent and easy to compare.
Use a permanent marker or print out labels on sticker paper. Place them in the same spot on each board, so you can easily find what you’re looking for.
Organize your boards as they dry. Keep similar colors together and lay them flat to prevent warping. This also makes it easier to see how they look side by side once they’re dry.
Mounting and Installation Methods That Protect Drywall
Choose mounting methods that avoid penetrating the drywall, such as removable adhesive strips rated for painted walls, picture-hanging hooks that use existing studs, or freestanding supports that lean without contact. Position panels with a level to ensure samples sit flat and consistent with the wall plane.
Follow adhesive maker guidance for weight limits and surface prep; test one small area first to confirm removability. If you need to use temporary screws or anchors, verify drywall repair steps and local recommendations beforehand to minimize permanent damage.
Adhesive and hanging methods to avoid damage
Avoid these common mistakes when using adhesives and hanging methods. They can damage your drywall.
- High-tack adhesives: These are too strong, leaving residue or pulling off paint when removed.
- Non-removable strips and hooks: Check weight limits and manufacturer removal guidance to avoid damaging the wall.
- Using nails or screws: These leave holes and can compromise drywall integrity.
- Applying adhesive directly to drywall: This makes removal difficult, potentially causing damage.
Stick to low-tack adhesives, removable strips, and hooks designed for easy removal. Always test a small area first.
Temporary freestanding and leaning setups
For renters or delicate walls, consider these no-adhesive alternatives. They allow you to create a sample wall without damaging the drywall.
Easels: These provide a simple, free-standing solution for displaying your samples. Just make sure they’re stable and won’t tip over.
Sawhorses: With a few boards across them, sawhorses can serve as a sturdy base for your sample wall. They’re great for larger samples or panels.
Leaning panels: For smaller samples, you can lean them against the wall. Just ensure they’re secure and won’t slide or fall over.
Applying removable film to drywall without residue
Follow these best practices for applying removable film to your drywall. This ensures easy removal later, with no residue left behind.
Align carefully: Start from the top and work your way down, ensuring each strip is straight and aligned with the one above it.
Smooth as you go: Use a squeegee or smooth edge to press out any air bubbles and ensure full contact with the wall. Work from the middle outwards.
Before applying film to your entire wall, test a small area first: This helps confirm that the film will remove easily and without residue from your specific drywall type.

Painting Techniques for Reliable, Comparable Samples
Apply paint the same way across every panel: use the same tool, stroke pattern, and target coverage per coat so differences show true color and sheen, not application variance. Keep coat counts consistent and allow drying under the conditions recommended by the paint manufacturer before judging results.
Record application details (tool type, nap size, number of coats) on the label so you can replicate the finish when you proceed to the full project. If you’re uncertain about drying or recoat windows, refer to the paint can instructions or technical data for guidance.
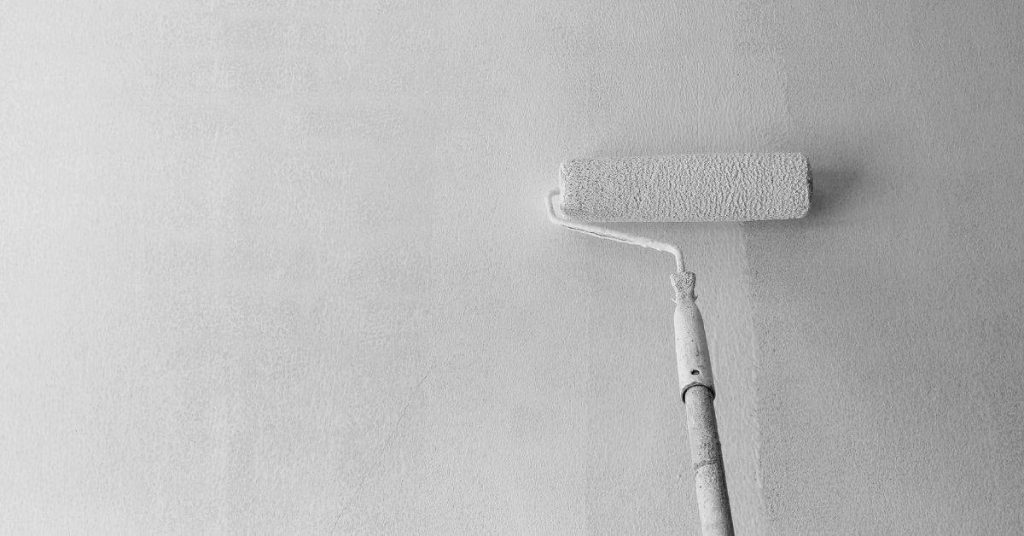
Recommended application methods (roller, brush, spray)
Each paint application method – roller, brush, or spray – leaves a unique texture and coverage. Choose wisely for sample accuracy.
Roller: Best for large areas, provides even coverage. Use it when you want your sample to mimic the final wall’s smooth, uniform look.
Brush: Ideal for edges, details, and small areas. It offers more control but can leave visible strokes in certain paints. Use it sparingly on samples to avoid misrepresentation.
Spray: Offers the most consistent coverage but requires proper ventilation and protection of surrounding areas. Reserve it for when you need a truly uniform sample, like with textured or dark colors.
Number of coats and wet vs. dry appearance
The number of coats affects the final color’s vibrancy and sheen. Follow manufacturer guidelines for best results.
Most paints require two coats for full coverage and color depth. Apply a second coat after the first dries to see your paint’s true hue and finish.
Remember, wet paint appears darker and richer than when dry. Let each coat dry completely before deciding if you need another. Check the manufacturer’s recommendations for drying times.
If unsure, test on a scrap board or use a paint tester pot to see how your chosen color behaves with multiple coats.
Edge finishing and transition treatments
Proper edge finishing ensures accurate side-by-side comparisons. Here’s how:
Use blue painter’s tape to create clean edges on your sample boards or film. Apply it firmly along the edges, then paint over it. When dry, gently remove the tape for a crisp line.
For samples side by side, ensure they overlap slightly. This helps manage transitions and prevents any abrupt color shifts when comparing samples.
If using removable films on walls, apply them in full sheets where possible to avoid edge issues. If trimming is necessary, use the tape method mentioned above.
Viewing, Lighting, and Comparison Strategies
Evaluate samples at multiple times of day and under the room’s actual lighting to see how color shifts with natural and artificial light. Photograph panels from the same angle and distance under consistent lighting to compare options later without memory bias.
Stand back and view from typical sightlines and furniture positions so you judge how the color will read in real use. If precise color matching matters, check light temperature and fixture types against manufacturer guidance or consult a lighting professional for controlled comparisons.
Natural vs. Artificial Light and Time-of-Day Checks
Lighting plays a big role in how colors appear. Check your samples under both natural and artificial light.
Morning light brings out cool undertones, while afternoon sun can make colors look warmer. Evening light from lamps gives the most consistent view throughout the day.
Rotate your samples at different times of day to see how they change. This helps you pick a color that looks good all day long.
Side-by-Side Layout and Neutral Background Use
Arrange your samples side by side to compare them easily. This helps you spot subtle differences between colors.
Use a neutral-colored wall or lean the boards against a neutral surface. This prevents other colors in the room from influencing your decision.
You can also use white foam board or poster paper as a background for a clean, unbiased view of your samples.
Photographic and In-Room Comparison Tips
Take photos of your samples to keep track of them and compare later. Use natural light for the most accurate results.
Place the boards in the actual room where you’ll be painting. This gives you a sense of how the color will look in context, with other colors and lighting in the space.
Take photos again in the room to see how the color looks under different lighting conditions. This helps you make an informed decision about which color works best for your space.
Removal, Cleanup, and Minimizing Drywall Repair
Remove panels or film gently following the adhesive maker’s removal instructions to reduce the chance of paint lifting or paper tearing. Peel slowly at a low angle and use a plastic scraper and mild solvent recommended by the adhesive manufacturer for residue cleanup if needed.
If the drywall has minor nicks or paper tears, perform basic repairs: reattach loose paper, apply joint compound, sand, prime, and touch up as needed; call a pro if damage is beyond simple patching. When unsure about repair technique or compound compatibility, check product directions or seek professional advice.
Removing boards and adhesive strips safely
Start by gently pulling the board away from the wall. If it’s stuck, use a utility knife to cut along the edges to release any adhesive.
Be careful not to pull too hard or you might damage the paint or drywall paper.
For adhesive strips, use a hair dryer on low heat to soften the adhesive. Then, slowly peel off the strip. If it’s still stuck, use a razor blade to scrape off any remaining residue.
Cleaning residue and surface touch-ups
Use a damp cloth with mild soap to wipe away any adhesive residue. For tougher spots, try using rubbing alcohol or white spirit.
To touch up small scuffs, use a paint that matches your wall color. First, sand the area lightly, then apply a thin layer of paint. Let it dry, and apply another coat if needed.
Always check the compatibility of cleaning products with your paint to avoid damaging it.
When and how to repair drywall if needed
For small nicks, use a drywall patch kit. Cut the patch to size, apply joint compound, let it dry, then sand and paint.
If there are larger holes or cracks, you might need to replace a section of drywall. This is a bigger job that requires cutting out the damaged area and installing a new piece.
If the damage is extensive, it’s best to call a professional. They have the tools and experience to do the job right.
Cost, Timeline, and Decision Checklist
Plan time for prep, multiple coat applications with full drying between coats, mounting, viewing across different lighting conditions, and careful removal—build a realistic schedule based on manufacturer drying guidance. Crunching exact costs depends on materials you choose; list board and adhesive options and check labels for coverage so you can estimate spend.
Use a checklist to capture criteria: color acceptance in morning and evening light, how sheen reads at arm’s length, and any installation or removal impacts on the wall. If you need help picking materials or estimating labor, consult product literature or a local pro to refine your plan.
Budgeting and cost-saving tips
Before you start, consider these factors to keep your sample wall project budget-friendly.
- Choose sample size wisely: Larger samples mean more paint, but smaller ones might not show the true color. Aim for a balance – around 2′ x 2′.
- Reuse materials: If you’ve got leftover paint from previous projects, use it for your samples.
- Rent tools: Instead of buying, rent the tools you need. It’s cheaper and you won’t have to store them.
- Buy in bulk: If you’re sure about your color choice, buy larger quantities of paint to save on cost per unit.
- Avoid premium paints: For samples, stick with mid-range or economy brands. They’re good enough for testing.
- DIY vs. hiring: If you’re unsure about your painting skills, consider hiring a professional to avoid costly mistakes.
- Calculate paint needed: Use a paint calculator to ensure you buy the right amount. Too little means extra trips to the store; too much is wasted money.
- Shop sales and discounts: Keep an eye out for paint sales, coupons, or discount codes online.
Quick rule: Remember, it’s a sample – don’t overspend!
Sample wall project timeline
Here’s how to break down your project into manageable phases.
- Prep (1-2 days): Measure, cut boards, let them dry if needed. Apply primer or adhesive strips.
- Painting (1 day per coat): Allow 24 hours drying time between coats for best results.
- Viewing (3-7 days): Let your samples sit under different lighting conditions at various times of day.
- Removal (1 day): After you’ve made your decision, carefully remove the boards or strips.
Quick rule: Plan for flexibility – painting and drying times can vary based on weather and humidity.
Final decision checklist and next steps
Before you commit to painting your walls, use this checklist to confirm your choice.
- Check color consistency: Ensure the sample matches the paint can’s label and looks consistent under different lighting.
- Test finish: Make sure the sheen level (gloss, satin, flat) suits your needs.
- Consider room layout: Check if the color works with your furniture, flooring, and other elements in the space.
- Review samples side-by-side: Compare your top choices to be sure of your decision.
- Check paint quality: Ensure you’re using a good-quality paint for long-lasting results.
- Gather supplies: Before painting, make sure you have all necessary tools and materials ready.
- Plan painting schedule: Set aside dedicated time for prep, painting, drying, and touch-ups.
- Hire professionals if needed: If you’re unsure about doing it yourself, hire a pro to avoid costly mistakes.
Quick rule: Take your time – rushing through this process can lead to regrets later!
Conclusion
You now have a practical, low-risk path to test color at full scale without redoing drywall. By using removable boards and film, you protect the surface, get accurate comparisons, and keep the project moving safely.
Before you start, confirm your plan with a quick, step-by-step check: gather the removable boards and film, prepare the surfaces and edges, mount the samples with clean, sealable fasteners, apply your paints in light, even coats, compare under consistent lighting, and document results before removing everything and cleaning up. Do the work in a logical sequence, test a small area first, and keep the room ventilated while you work.
Avoid these common missteps: sticking materials directly to bare drywall without protection, skipping edge sealing or masking, and rushing coats that trap moisture or streak unevenly. Follow the safety rules: wear eye protection and a dust mask when handling film and tools, work in a well-ventilated space, and test any method on a small test patch first to ensure you didn’t miss a potential issue.
If you’re unsure about mounting, long-term adhesion, or matching colors across lighting, it’s wise to bring in a pro rather than pushing on. When in doubt, pause, evaluate the sample under the room’s usual lighting, and choose a plan you can repeat confidently. You’ve got the skills to make the right call and finish strong.
FAQ
Can I reuse boards and film for multiple colors or samples, and how to store them properly?
You can reuse clean boards and film if you inspect them for any residue or damage that could taint the next sample. Rinse or wipe boards after each use and store in a dry, flat place to prevent warping. If you notice staining or creases, replace the material to keep samples honest.
What should I do if tape pulls paint off the surface when removing a sample?
Stop and inspect the edge. Use fresh tape on clean, dry skin of the board surface for a test patch before pulling more. If paint lifts, switch to a gentler removal method or use new film and lighter adhesion to prevent drywall damage.
How can I tell if a drywall surface is at risk during removal or when applying/removing film?
Look for rough patches, gouges, or loose finish beneath the sample area. If you see any, stop and patch that area before continuing. Always follow manufacturer instructions for any adhesive or mounting method you use.
What are best practices for storing and labeling samples so I can compare colors accurately later?
Label each board with the color name, brand, and the room or time you tested it. Keep samples flat and protected from direct sun and moisture. When you’re done, store away from high-traffic areas to prevent accidental damage.