
Introduction
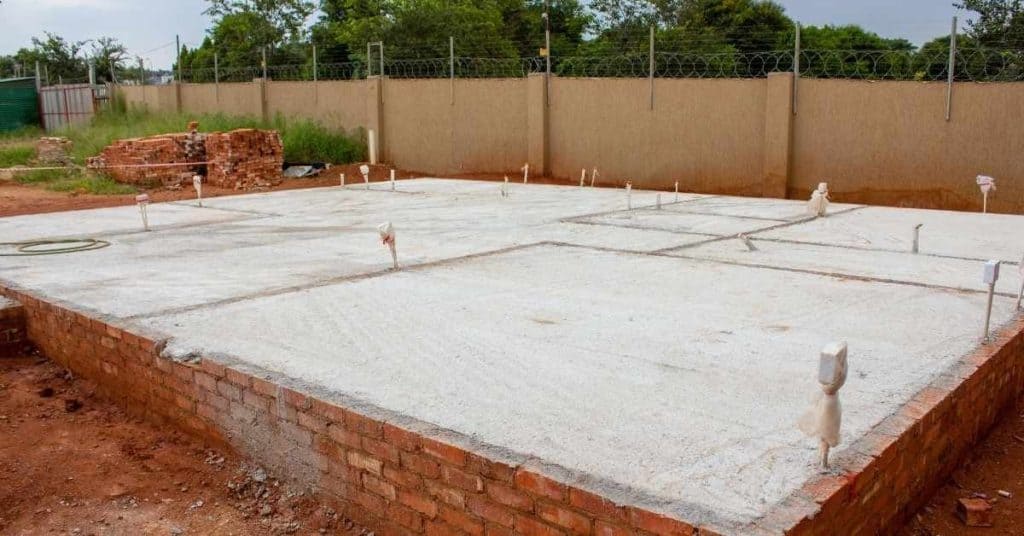
Prevent wicking and spalling at the garage slab edge by properly detailing stucco at the base.
The guide explains why edge detailing matters for moisture control and durability, and walks through practical steps, tips, and general rules of thumb you can apply to common garage slab conditions.
Key takeaways
- Identify moisture sources at slab edge: improper slope, clogged gutters, and drainage faults.
- Seal cracks and control wicking with proper flashing and stucco detailing at base.
- Ensure grading slopes away from the slab by at least three percent.
- Coordinate permits, safety gear, and budget estimates before starting exterior repairs.
- Choose exterior waterproofing and coatings that bond to stucco and concrete.
- Implement maintenance checks for cracks, drains, and paint integrity annually.
Table of Contents
- Introduction
- Key takeaways
- Why wicking and spalling occur at slab edges
- Assessing the problem: diagnosis and visual checkpoints
- Planning fixes: sequence, permits, safety, and costs
- Site-level solutions: grading, gutters, and exterior drainage
- Slab-edge and stucco-detail repairs to stop wicking
- Waterproofing and coatings: interior vs exterior approaches
- DIY techniques and common mistakes to avoid
- Long-term maintenance and monitoring
- Conclusion
- FAQ
Why wicking and spalling occur at slab edges
Moisture moves by capillary suction at the concrete-stucco interface, and edges tend to wick more than interior walls, so homeowners often notice damp patches, efflorescence, and damp-stained mortar near the perimeter. The edge presentation can look different from the rest of the wall as moisture travels along the joint and evaporates. Observing these moisture patterns helps you spot the underlying causes before they spread.
Freeze-thaw cycles compound the problem by stressing microcracks and encouraging spalling where water remains near the base. Salt or efflorescence shows up as white crusts that trace moisture paths along the edge. Mechanical stresses from settlement, wind-driven rain, and door-area movement create cracks and flaky edges that worsen over time and invite further moisture intrusion.
Capillary suction (wicking) explained
Concrete and mortar are porous. They suck moisture like a sponge. This is capillary action, or wicking.
Edges wick more than interior walls because they’re exposed on all sides. Homeowners see damp patches, efflorescence – that white crusty stuff – and stained mortar.
Moisture climbs up into the stucco. It weakens it, causing deterioration over time.
Freeze-thaw and salt damage
Water trapped in pores freezes and expands. This stresses the stucco, leading to microcracking and spalling – that flaking you see.
Salt from the concrete moves with water. It concentrates at the edge as it evaporates, leaving white crusts. These salts further damage the stucco when they freeze and thaw.
The lead-lag effect happens when one side freezes before the other. This causes more stress and accelerates deterioration.
Interaction of construction details and moisture
Cold joints, improper control joints, poor flashing – they all let water in at the slab-stucco interface. Water finds the path of least resistance.
Missing barriers mean nothing’s stopping that water from climbing up into the stucco. It wicks, it freezes, it thaws, and it damages.
Proper construction details are key to keeping moisture out. They’re your first line of defense against wicking and spalling at slab edges.
Assessing the problem: diagnosis and visual checkpoints
Distinguish wicking from active leaks by noting whether moisture is seasonal or constant, and use quick field checks to confirm the source. Document the timing and pattern of dampness to separate capillary movement from rain-driven infiltration. Keep track of changes as you test and observe.
Visual checkpoints at the slab edge include the span of spalling, paint or stucco loss, cracks, efflorescence, staining, and any signs of corrosion on fasteners. Hollow or delaminated areas indicate deeper issues that may require more than cosmetic fixes. Combine moisture readings with tactile tests and a controlled water run-off check to map problem areas accurately.
Visual and tactile inspection points
Before you start any repairs or improvements, use this checklist to assess your concrete surfaces. It’s best to do this on a dry day, after the surface has had time to cool down.
- Damp rings: Look for dark, often circular stains around walls and floors. These could indicate water leaks or condensation. Use a moisture meter to confirm (check manufacturer instructions).
- Efflorescence: Check for white, powdery deposits on the surface. This is usually harmless salt from within the concrete, but it can hide other issues. Brush gently with a stiff brush and water to remove.
- Hairline cracks: Inspect for thin, often web-like cracks. These are common but need checking as they can widen over time. Use a magnifying glass if needed.
- Powdery concrete: Tap the surface with a hammer (lightly!). If it sounds hollow and crumbles, you’ve got spalling – delaminating concrete that needs immediate attention.
- Loose stucco or topping: Gently push or tap on any toppings or finishes. If they feel loose or crumble, there’s a problem beneath that needs fixing before proceeding.
- Uneven surfaces: Use a straight edge and level to check for dips or high spots. These could indicate settlement issues or poor initial construction.
- Crack width: Measure any cracks with a crack gauge. Narrower than 0.2mm can often be sealed; wider may need repair (check local codes).
- Concrete delamination: Tap the surface with a hammer. If it sounds ‘dull’ or hollow, there might be delamination – check further with a screwdriver or pick.
Quick rule: Always address any underlying issues before applying sealers, toppings, or paint. Skipping this can lead to expensive rework and shortened lifespan of your repairs.
Tests to determine moisture source
Before you start any repairs or improvements, use this checklist to identify the source of moisture in your home. This will help you fix the problem right the first time and avoid costly mistakes.
- Check for condensation: Place a large plastic sheet against an interior wall where you suspect moisture is coming from. Leave it there for a few days. If water droplets form on the side facing the room, condensation is the culprit.
- Test for dampness with a probe: Use a moisture meter or a simple screwdriver and continuity tester to check for dampness in walls, floors, and ceilings. A reading of 17% or higher indicates excess moisture.
- Inspect plumbing: Check under sinks, around toilets, and behind appliances for any leaks. Look for water stains, mold, or mildew.
- Examine roof and gutters: Inspect your roof for damaged or missing shingles, and ensure gutters are directing water away from the house.
- Check exterior walls: Look for cracks, gaps, or other openings that could allow water to enter. Pay special attention to areas around windows and doors.
- Inspect foundation and basement: Check for cracks in the foundation, water stains on walls or floors, and any signs of water intrusion from below.
- Evaluate grading and drainage: Ensure your property slopes away from the house to direct water away. If it’s flat or sloped towards the house, water may pool and seep in.
- Consider exterior cladding: Some types of siding can trap moisture against the wall if not installed correctly. Check for any signs of warping, buckling, or excessive moisture behind the cladding.
Quick rule: Always address the source of moisture first before making repairs. Fixing symptoms without understanding the cause can lead to recurring problems and costly rework.
When spalling means structural repair
Before you grab your trowel and mix up some concrete patch, use this checklist to determine if the damage is just cosmetic or if it’s a sign of deeper structural issues that need professional attention.
- Check delamination size: Measure any flaking or peeling areas. If they’re larger than 1-2 inches, it might be structural.
- Inspect rebar exposure: Look for exposed reinforcing bars. Even a small amount could indicate corrosion and structural compromise.
- Feel for hollow spots: Tap the concrete with a hammer. A dull thud instead of a solid sound may indicate delamination.
- Check for cracks: Look for wide or numerous cracks, especially those that are diagonal or zigzag. These can be signs of structural issues.
- Inspect corners and edges: Damage here is often more serious than in flat surfaces due to stress concentrations.
- Check for rust stains: Brown, orange, or red stains could indicate rebar corrosion, which can weaken the structure.
- Look for leaning or settling: Any signs of movement or misalignment may suggest structural problems.
- Consider age and history: Older concrete with a history of damage or repairs is at higher risk for serious issues.
Quick rule: If you find any of these signs, it’s better to be safe. Consult a structural engineer or professional concrete contractor before proceeding with repairs.
Planning fixes: sequence, permits, safety, and costs
Outline the operation sequence with clear dependencies: source control and drainage come first, followed by slab/edge repairs and then stucco detailing. Establish milestones and typical timeframes that help you coordinate materials and access without trapping moisture. Proper sequencing reduces the chance of re-wicking and new structural stress.
Consider permit needs and what inspections to expect, then compare quotes that reflect the same scope. Emphasize safety and PPE for silica dust, with containment plans during cutting and grinding. When estimating costs, use no-nonsense ranges and plan for contingencies tied to access and cleanup rather than exact prices.
Step-by-step project plan
The following sequence ensures you address the moisture issue at its source, repair the concrete, and apply a durable stucco finish.
- Diagnose: Inspect for cracks, gaps, or other signs of moisture ingress. Use a moisture meter to confirm.
- Stop moisture source: Fix drainage issues, redirect downspouts, and ensure proper slope away from the garage. This prevents further wicking.
- Repair concrete: Grind out spalled areas, clean, and apply a concrete repair mix. Let it cure properly.
- Install flashing and barrier: Apply a self-adhesive flashing membrane at the slab edge to prevent water entry. Install a drainage plane behind the stucco.
- Apply stucco and finish: Mix and apply stucco, ensuring it’s thick enough to cover the mesh and provide a durable surface. Let it cure according to manufacturer’s instructions.
Safety and regulatory considerations
Safety first: When cutting or grinding concrete, wear a respirator rated for silica dust (P100), safety glasses, and gloves. Wet the surface to minimize dust.
For structural repairs or tied-in flashing, permits may be required. Check local building codes. Expect inspections at various stages of work, including final inspection before stucco application.
Document your work with photos and keep records of material receipts for permit inspections.
Ballpark cost drivers and budgeting tips
Major cost factors: Extent of spalling, drainage work, flashing materials, labor, and scaffolding (if needed).
Prioritize source-control work first. Fixing drainage issues may prevent costly repairs later.
Get multiple quotes from reputable contractors. Ask for itemized bids to compare costs accurately. Don’t forget to factor in hidden costs like scaffolding, temporary drainage, and disposal.
Site-level solutions: grading, gutters, and exterior drainage
Begin with a practical site check for slope away from the slab and identify low spots that trap water. A simple regrading plan and small fill adjustments can redirect runoff before it reaches the edge. These low-cost steps often deliver visible improvements quickly.
Regular gutter maintenance and extensions keep roof water away from the slab edge, and downspout extensions or splash blocks should place water several feet from the wall. Address window wells and adjacent hardscapes by draining or redirecting water and grading the ground to promote evaporation and flow away from the edge.
Grading and Landscaping Fixes
Start by checking the ground around your garage slab. It should slope away from the edge at a consistent grade of about 5-10%. If you find low spots where water collects, mark them for regrading or adding compacted clean fill.
Use a shovel to move soil and create a positive slope over at least 3-4 feet. Compact the fill with a plate compactor to prevent settling. Avoid planting moisture-trapping vegetation near the slab, like ivy or ferns, as they can hold water against the wall.
After grading, spread a layer of mulch or gravel over the area to help absorb and direct water away from the slab edge. This simple fix can save you from costly repairs down the line.
Gutters, Downspouts, and Splash Blocks
Inspect your gutters for leaks or clogs. Clean them out if needed, and repair any damage. Ensure they’re securely fastened to the fascia board with proper pitch to carry water away from the garage.
Check downspouts. They should extend at least 6-8 feet away from the slab edge. If not, install extensions or splash blocks to redirect roof water. Misaligned outlets can cause water to cascade toward the slab, so ensure they’re properly positioned and functioning.
Consider installing larger gutters if your current ones frequently overflow during heavy rain. This simple upgrade can help prevent water from reaching the garage perimeter.
Subsurface Drainage Options
Before digging trenches for drain tile, try less invasive methods first. Ensure your surface grading and gutters are in good working order. If water is still pooling near the slab, consider simple trenching and drain tile installation.
Dig a shallow trench (about 12 inches deep) around the garage perimeter, sloping it away from the wall at a consistent grade. Fill the trench with gravel, then lay perforated drain pipe on top. Cover with more gravel before backfilling with soil. This DIY fix can help alleviate water pressure against the slab.
If you’re dealing with persistent water issues or live in an area prone to flooding, consider hiring a professional for exterior drainage systems like French drains or sump pumps. These options are more invasive and costly but may be necessary to protect your garage from severe moisture damage.

Slab-edge and stucco-detail repairs to stop wicking
Assess the edge area for loose or spalling concrete and check for signs of moisture intrusion. Define the repair boundary, determine whether rebar exposure exists, and decide whether to remove all compromised material or just the loose portions. Plan the sequence and safety steps to minimize dust and debris spreading to the stucco during work.
Prep the surface by removing loose material, cleaning, and preparing the substrate; apply bonding agent as needed and patch with a breathable concrete repair mix. Inspect rebar and treat corrosion risks, then finish with proper flashing, termination beads, and joints to minimize capillary rise and provide a clean, stable edge.
Repairing and protecting the concrete edge
Start by chipping out damaged concrete with a hammer and chisel. Remove all loose material, but be careful not to damage the rebar.
Inspect the rebar. If it’s rusted or pitted, clean it with a wire brush, apply a rust inhibitor, and coat it with a corrosion-inhibiting paint. Ensure proper cover depth before patching.
Use a polymer-modified, breathable concrete repair mix to patch the area. Feather the edges to blend with the existing slab. Follow manufacturer’s curing instructions.
Stucco termination, control joints, and flashing details
Terminate stucco above a capillary break using termination beads. These create a physical barrier to prevent moisture from wicking up into the stucco.
Install weep screeds or vented termination beads at the base of the stucco. This allows any trapped moisture to escape, preventing pressure buildup that could cause spalling.
Flashing is crucial. Install metal flashing or backer rod along the edge of the slab to create a continuous drainage plane. This directs water away from the stucco and prevents it from entering behind the finish.
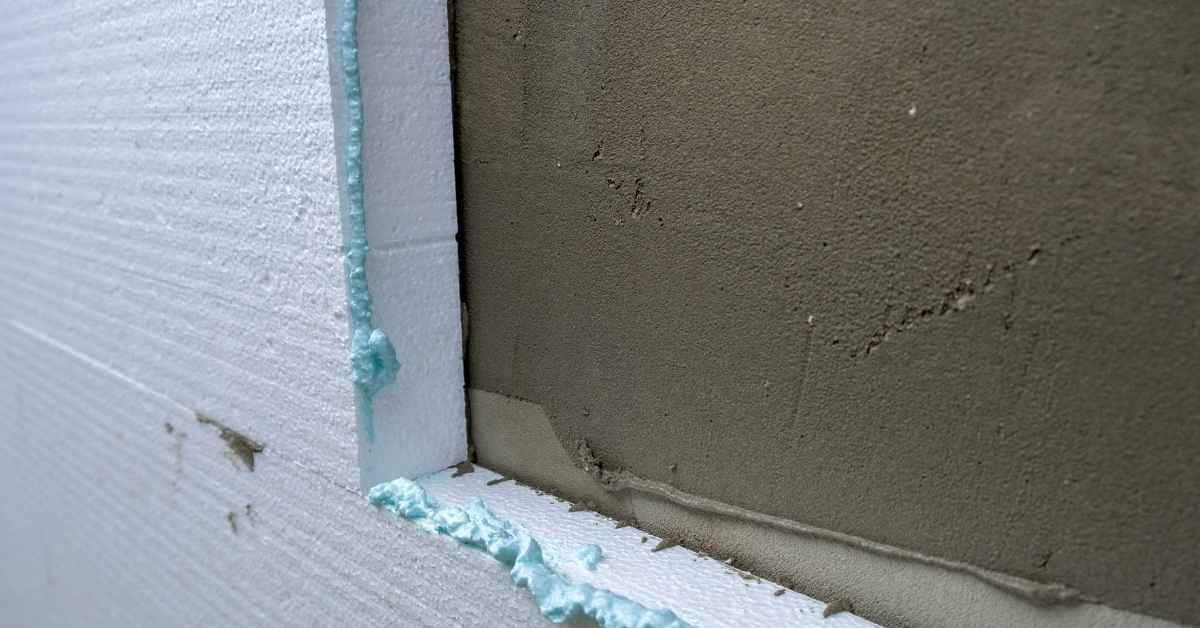
Capillary break and vapor-barrier strategies
Install air gap strips or compressible backer at the base of the stucco. These create a physical capillary break, preventing moisture from migrating up into the stucco.
Use an appropriate vapor retarder between the slab and the stucco. This controls moisture movement but still allows any trapped water to escape, preventing pressure buildup.
Regular inspection is key. Check your capillary breaks and flashing annually for signs of damage or deterioration. Repair as needed to maintain their effectiveness.
Waterproofing and coatings: interior vs exterior approaches
Explain the fundamental difference: exterior waterproofing measures—coatings, membranes, flashing, and proper drainage—address the moisture source at the slab edge, while interior coatings and dehumidification are supplementary. Exterior solutions should be the primary defense against wicking from the edge.
Compare exterior options like cementitious and elastomeric coatings, sheet membranes, and flashing details, noting how prep and cure requirements affect performance at the base. Interior options include coatings and moisture control strategies, but they do not replace the need to control moisture at its source. Always consider compatibility with cementitious stucco and ensure appropriate primers and adhesion.
Exterior membranes and surface sealers
For exterior waterproofing, consider these options:
Liquid-applied Membranes: These are flexible, rubberized coatings that stretch with the substrate. They’re great for sealing cracks and preventing moisture intrusion at the slab edge. Apply them after proper surface preparation and let them cure before applying stucco.
Sheet Membranes: These come in rolls and are ideal for large areas. They create a barrier against water, but they need to be properly sealed at joints and edges. Flashing should be installed along with these membranes to ensure complete protection.
Cementitious Waterproofers: These are thick, cement-based coatings that form a hard, impermeable surface once cured. They’re great for protecting against water intrusion but may not be as flexible as other options. Ensure the substrate is clean and dry before application, and follow manufacturer’s cure requirements.
Interior coatings and dehumidifiers — pros and cons
While interior coatings can provide temporary relief, they don’t address the root cause of moisture issues. Dehumidifiers help control symptoms but aren’t a cure either.
Pros
- Temporarily hide signs of moisture damage.
- Can be applied quickly and easily.
- Help maintain indoor air quality by controlling humidity.
- Available in various types (epoxy, acrylic, elastomeric) to suit different needs.
Cons
- Don’t address the source of moisture intrusion.
- May peel or blister over time due to trapped moisture.
- Require regular maintenance and reapplication.
- Can be expensive, especially for large areas.
Use interior coatings and dehumidifiers as a last resort or while addressing exterior issues. They’re not a replacement for proper exterior waterproofing.
Material compatibility and safety notes
Choosing compatible materials is crucial to ensure your waterproofing system works effectively and safely. Here are some key points:
- Cementitious Stucco: Compatible with most exterior coatings, but ensure the coating can bond well to cement-based surfaces.
- Liquid-applied Membranes: Check for compatibility with your chosen primer and stucco. Avoid solvent-based products that can degrade stucco.
- Sheet Membranes: Ensure they’re compatible with your flashing material. Use a compatible adhesive or sealant at joints.
- Cementitious Waterproofers: These are typically compatible with cementitious stucco, but check for any specific recommendations from the manufacturer.
- Interior Coatings: Ensure they’re compatible with your substrate and won’t be affected by any residual moisture.
- Dehumidifiers: Safety first – ensure proper ventilation during installation. Follow manufacturer’s guidelines for safe operation.
DIY techniques and common mistakes to avoid
Define a practical DIY scope that covers small repairs and edge detailing while recognizing limits and when to call a professional. Focus on work that prevents wicking without compromising structure or drainage. Set clear boundaries for what you will attempt yourself.
Proceed with practical steps that emphasize substrate prep, crack repair, proper lath, base coat, and moisture barrier considerations, finishing with a drip edge to direct water away. Follow with flashing and edge detailing to minimize intrusion, and incorporate proper curing to avoid future cracks.
Tools and materials checklist
Before you start, ensure you have the right tools and materials for a successful repair. Here’s a quick checklist.
- Chisel: For removing damaged stucco and preparing the surface. Skip this and you’ll struggle to bond new material.
- Grinder with dust shroud: To smooth edges and remove high spots. Without it, you risk leaving rough surfaces that trap water.
- Cement patch: For filling cracks and holes. Don’t skip this or moisture will wick right back in.
- Flashing: Essential for directing water away from the wall. Neglect this and you’ll have ongoing issues.
- Stainless screws: To secure lath/mesh. Galvanized can rust, leading to more problems down the line.
- Termination beads: These create a clean edge for your new stucco work. Without them, you’ll have an uneven finish.
- Sealant: To seal around termination beads and at lath/mesh edges. Miss this and water will find its way in.
- Tape measure: For accurate measurements when cutting flashing and installing termination beads. Inaccurate cuts lead to improper fitting and leaks.
Quick rule: Always check your tools and materials before starting any repair work.
Step-by-step small-repair workflow
Follow this safe, practical sequence to minor concrete patching and re-terminating stucco at the slab edge.
- Prepare the surface: Remove damaged stucco using a chisel. Vacuum or brush off dust.
- Repair cracks: Apply cement patch to fill any cracks. Allow it to cure according to manufacturer’s instructions.
- Install lath/mesh: Secure stainless steel lath/mesh with screws, following the existing pattern. If unsure, call a pro.
- Apply base coat: Mix Portland cement stucco with appropriate sand and water ratio. Apply over lath/mesh, ensuring it’s well-bonded.
- Install termination beads: Cut and install these along the slab edge to create a clean finish and protect against wicking.
- Seal edges: Apply sealant around termination beads and at lath/mesh edges to prevent water intrusion.
- Apply final coat: Mix and apply your topcoat stucco, ensuring it’s sloped away from the wall. Let it cure according to manufacturer’s instructions.
- Inspect and test: After curing, check for any signs of moisture or wicking. If unsure, consult a pro.
Top 10 mistakes and how to avoid them
Learn from these common pitfalls to ensure your stucco repair lasts.
- Sealing over trapped moisture: Why: Trapped moisture leads to wicking. How to avoid: Address drainage issues first, then seal.
- Improper flashing: Why: Without proper flashing, water can intrude behind stucco. How to avoid: Install flashing correctly and ensure it’s well-secured.
- Poor grading: Why: Incorrect grading leads to water pooling near the slab edge. How to avoid: Ensure your grading directs water away from the house.
- Inadequate curing: Why: Improper curing can cause cracking and spalling. How to avoid: Follow manufacturer’s instructions for proper curing.
- Improper material choices: Why: Using the wrong stucco mix or improper ratio can lead to poor performance. How to avoid: Always use the recommended mix and ratios.
By avoiding these common mistakes, you’ll ensure your stucco repairs last and protect against wicking and spalling at the base.
Long-term maintenance and monitoring
Establish an annual inspection cadence, with a post-wet-season check to catch moisture intrusion early. Decide who performs the inspection (you or a contractor) and keep records of findings and actions taken. Use this documentation to guide future repairs and maintenance.
During checks, look for cracks, efflorescence, damp patches, and signs of trapped moisture behind stucco. Verify flashing and moisture barriers remain intact, and test for hidden moisture as needed. Plan for sealing, re-coating, or patching at appropriate intervals and keep gutters, grading, and vegetation in good condition to support ongoing protection.
Visual checkpoints and when to reapply treatments
Use this checklist annually, especially after the wet season. Catch issues early to prevent costly repairs.
- Efflorescence: White powdery deposits indicate moisture. Reapply sealers every 2-5 years if present.
- Cracks: Hairline or wider, they let water in. Seal and reapply caulk every 1-3 years as needed.
- Paint blistering: Bubbles mean moisture beneath. Recoat within a year if spotted.
- Damp patches: Persistent dampness signals water intrusion. Reseal and recoat every 1-2 years if found.
- Flashing and barriers: Check they’re intact. Replace or repair as needed, every 3-5 years.
- Stucco surface: Inspect for spalling (flaking). Reapply or repair within a year if seen.
- Concrete edge: Examine for cracks and moisture. Reseal and recoat every 2-5 years as required.
- Moisture meter test: Check behind stucco. If readings are high, reapply sealers or coatings within a year.
Quick rule: If you spot any of these issues, don’t wait. Address them promptly to keep your garage in tip-top shape.
Record-keeping and when to call a pro
Keep a photo log and notes of repairs. This helps track conditions over time and makes future maintenance easier.
Warning signs: Spreading spall, structural movement, or persistent leaks may indicate serious issues. Don’t hesitate to call a professional if you notice these.
Regular inspections help catch problems early. But if something seems amiss between checks, trust your instincts and get an expert opinion.
When in doubt: It’s always better to err on the side of caution. A pro can assess the situation and provide peace of mind.
Conclusion
Getting the base of the stucco finish dry and solid is all about controlling water at the edge and moving it away. If you do the checks, plan the fixes, and follow a safe, orderly sequence, you’ll prevent wicking, reduce spalling, and keep the look intact for years.
Run this check like a simple plan: verify grade and drainage are directing water away from the slab edge, confirm the framing and flashing are sound, map out the repair steps in the right order (site fixes first, then slab-edge detail work, then interior or exterior coatings), pick an external or internal waterproofing approach that matches your climate and exposure, and test any repair or coating on a small area before full commitment. Check materials, tools, and permits if needed, and never skip safety gear or testing in a hidden area before scaling up.
Common mistakes to avoid are trying to skim over drainage or flashing, skipping the small-area test, and applying coating systems that aren’t compatible with your substrate. Use basic safety rules: work from dry, protect yourself from dust and sharp edges, and don’t mix products in ways that void warranties or trap water behind the stucco. If you feel unsure about grading, flashing details, or a full exterior waterproofing approach, pause and recheck the plan or a pro’s input before proceeding.
When the problem crosses into structural concerns, complex drainage layouts, or you’re facing permits or code issues, it makes sense to call a professional rather than push ahead alone. Stay steady, follow the plan, and you’ll finish with a durable, clean edge that resists future wicking and spalling.
FAQ
What causes stucco at the garage slab edge to wick water?
Water climbs the wall where the stucco meets the slab if the edge isn’t sealed or sloped away. Cracks, poor flashing, or a too-thick finish let moisture travel upward. Keep the joint clean and protected to stop it at the source.
How can I prevent wicking and spalling at the base?
Grade the slab so water runs away from the wall. Install proper flashing and a moisture barrier where stucco meets concrete. Use a cap or 1/4 inch gap to allow drainage and air flow.
What mistakes should I avoid when finishing the edge?
Avoid sealing directly to the concrete or burying the stucco edge in concrete. Don’t skimp on flashing or skip a proper expansion joint. Bad flashing or no gap is a recipe for moisture damage.
What maintenance steps help long-term durability?
Check the edge yearly for cracks and cracks widen. Repoint or seal as needed, and keep vegetation away from the wall. Repaint or recoat if you notice peeling or moisture stains.