
Introduction
The process of sealing fasteners through stucco can seem daunting, but with a clear understanding of the timeline and steps involved, you can ensure a watertight finish that lasts. This guide walks you through the entire process, from site assessment to final inspection, with an emphasis on how long each step takes.
Whether you’re a seasoned DIYer or tackling your first stucco project, following this timeline will help you avoid common mistakes and create a durable seal that prevents water intrusion.
The Step-by-Step Timeline for Sealing Fasteners Through Stucco
Properly sealing fasteners through stucco involves several steps, each with its own duration. By following this timeline, you can ensure a thorough and efficient process that minimizes water traps and maximizes durability.
- Site Assessment and Materials Selection (30-60 minutes): Begin by assessing the site for moisture risk and selecting appropriate fasteners, sealants, and backing materials. This step is crucial in determining the success of your sealing project.
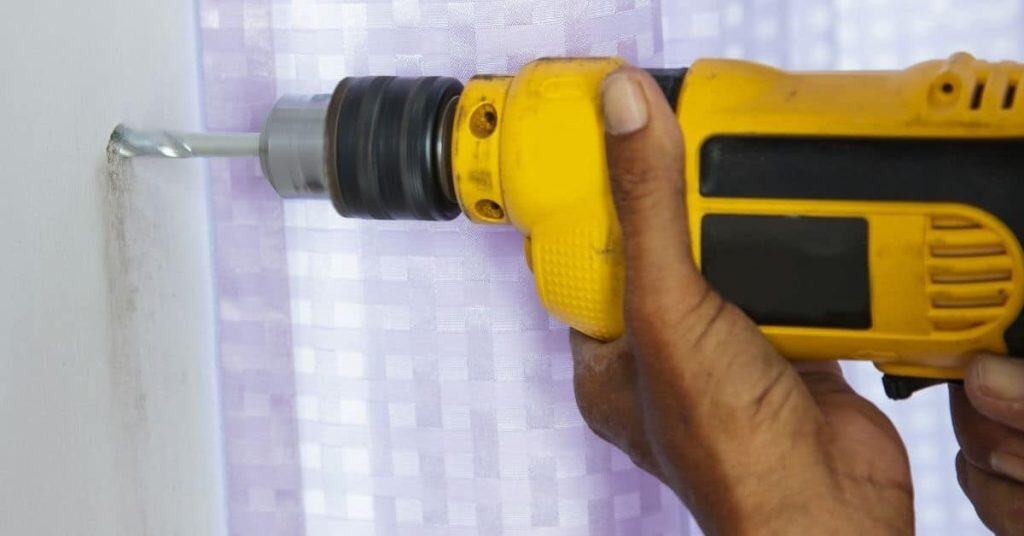
- Pre-drilling (15-30 minutes per hole): Pre-drill holes using a pilot bit that matches the diameter of your chosen fastener. This helps minimize cracking and ensures a cleaner hole.
- Surface Preparation (15-30 minutes): Clean the stucco surface, remove any loose material, and ensure it’s dry before applying sealant. This step is essential for achieving a strong bond between the sealant and the stucco.
- Sealant Application (5-10 minutes per hole): Apply a continuous bead of sealant around each fastener, ensuring there are no gaps or voids. Use a backing material to support the sealant and prevent it from sagging.
- Flashing Installation (10-20 minutes per linear foot): Install flashing or weather barriers according to local code requirements to further protect against water intrusion.
- Inspection and Testing (15-30 minutes): Inspect the sealed fasteners for any voids, cracks, or repairs. Perform a simple test by spraying the area with water to ensure it repels moisture effectively.
The total duration of this process can vary depending on the size of your project and the specific materials you’re using. However, by following this timeline and dedicating sufficient time for each step, you can expect to complete the sealing process in a few hours to a full day.
Key takeaways
Properly preparing the stucco surface before applying sealant is crucial as it affects the overall duration of the project. Taking the time to clean and dry the area ensures better adhesion and prevents potential delays caused by improper curing.
- Choose corrosion-resistant fasteners appropriate for stucco and backing material type.
- Pre-drill holes with proper pilot size and clearance to minimize cracks.
- Use sealants compatible with stucco and exterior conditions; verify cure times.
- Seal around fasteners with a continuous bead and backing material to avoid gaps.
- Install flashing or weather barriers per local code to prevent water intrusion.
- Wear eye protection and gloves; inspect after sealing for voids, cracks, repairs.
Table of Contents
- Introduction
- Key takeaways
- Why Proper Sealing Matters
- Planning Before You Drill: Site Assessment and Materials Selection
- Sealant Types and Material Specs Explained
- Installation Procedures That Avoid Water Traps
- Avoiding Common Errors and Water-Trapping Details
- Inspection, Testing, and Maintenance After Sealing
- Safety, Environmental Factors, and Jobsite Best Practices
- Tools and Materials Checklist with Visual Checkpoints
- Conclusion
- FAQ
Why Proper Sealing Matters
Water intrusion through fasteners and stucco openings can travel behind the veneer if sealing isn’t done correctly. Poor sealing often begins a slow march of moisture that the wall can’t drain or shed. This leads to a cascade of issues that impact the wall’s life and the interior environment.
When sealant, flashing, and gaskets aren’t coordinated with stucco behavior, water traps form and wear accelerates. Wood rot, mold growth, interior staining, and stucco cracking can follow over time, sometimes weakening structural components. Upfront labor to do it right now often reduces future repairs and preserves warranties while keeping overall costs in check.
Consequences of Water Traps
Improperly sealed fasteners through stucco can create water traps, leading to serious issues hidden behind the veneer.
Water trapped in these areas can cause hidden leaks, leading to framing rot and damage to insulation. This moisture can also travel upwards, causing interior finish problems like peeling paint or wallpaper, and even mold growth on ceilings.
Over time, this constant moisture exposure can lead to stucco cracking as the material expands and contracts with temperature changes. Severe cases may result in structural degradation, compromising the integrity of your walls.
How Stucco Systems Drain and Breathe
Understanding how stucco systems handle water and vapor is crucial for proper sealing strategy. There are two common types of stucco assemblies:
Direct-applied stucco is applied directly to the substrate, relying on a water-resistive barrier to prevent moisture intrusion. In this case, fasteners should be sealed with compatible sealants and backer materials to ensure no water can bypass the barrier.
Drainage/EIFS systems have a drainage plane behind the stucco, allowing any water that gets behind the veneer to escape. Here, proper flashing around penetrations is crucial to direct water out and away from the wall cavity. Fasteners should be sealed with compatible materials that won’t trap water.

Planning Before You Drill: Site Assessment and Materials Selection
Start by inspecting the existing stucco and identifying what lies behind it. Look for cracks, delamination, moisture stains, and suspect patches that hint at the substrate type. Knowing whether you’re dealing with masonry, framed walls, or gypsum helps pick the right fasteners and seals.
Pinpoint anchor opportunities and plan layouts to minimize penetrations while aligning with structural members when possible. Consider environmental factors such as sun, rain, wind, and temperature shifts that affect sealant choice. Check for any local rules or manufacturer instructions that may apply to exterior penetrations.
Assessing Stucco Type and Condition
Before you start drilling, figure out what kind of stucco you’re dealing with. It’s either one-coat, three-coat, or EIFS ( Exterior Insulation and Finish System).
One-coat: Thin layer, painted. Easy to drill.
Three-coat: Thicker, textured. Drilling needs extra care.
EIFS: Looks like stucco but has foam insulation behind. Don’t drill without knowing what’s there first!
Choosing Anchors and Fasteners
Picking the right anchors and fasteners is crucial. They’ve got to work with your stucco and substrate.
Stainless screws: Good for thin, one-coat stucco over wood or metal studs.
Through-bolt with backing plate: Solid choice for thick, three-coat stucco over masonry. Needs a good drill bit and pilot hole.
Masonry anchors: For solid brick or block walls. Use with an appropriate drill bit and hammer drill.
Sealant Types and Material Specs Explained
Sealant chemistries like silicone, polyurethane, hybrid MS polymers, butyl, and elastomeric acrylics each behave differently on exterior stucco. Some stick well and stay flexible, while others excel in UV resistance or ease of application. Note potential drawbacks such as staining or special cure requirements when selecting a product.
When reading datasheets, look for adhesion to masonry, elongation, hardness, vapor permeability, and temperature range. Check for primers, surface prep needs, and whether the formula suits the joint movement you expect. Use this to build a practical match for the project at hand.
Best Sealants for Stucco Fasteners
Choosing the right sealant is crucial to prevent water traps around fasteners in your stucco. Here’s what to look for:
First, check if the sealant is paintable. This lets you match it with your stucco finish. Next, ensure it has good adhesion to masonry, sticking well to both concrete and stucco.
Look for a joint movement rating of at least 25% for normal service temperature ranges (-10°F to 130°F). This ensures the sealant can accommodate any minor movements without cracking. Always verify these specs on the label before buying.
Backing Materials, Primers, and Compatibility
Using the right backing materials, primers, and ensuring compatibility is key to a successful seal. Here’s what you need:
- Foam backer rod: Use it for wide gaps (1/4″ or more). It helps control bead size and prevents over-application.
- Appropriate primer: Some sealants require a primer to improve adhesion. Always follow the manufacturer’s recommendations.
- Chemical compatibility: Check if your chosen sealant is compatible with your stucco finish. Incompatibility can cause staining, weak bonding, or cracking.
- Sealant and substrate compatibility: Ensure the sealant is suitable for both concrete and stucco substrates to avoid bond failures.
- Avoid incompatible materials: Never use silicone-based sealants with oil-based paints. This can cause staining and weak bonds.
Installation Procedures That Avoid Water Traps
Before drilling, identify stucco type, the substrate behind it, and any existing moisture barriers. Plan drill bit sizes, anchor types, and the expected load path to prevent creating a water trap. Keep clear of edges and joints to minimize cracking risks.
Outline a logical sequence from surface prep to final sealing, paying attention to weather windows and keeping the moisture barrier intact. Use corrosion-resistant anchors and consider sleeves or undercut options to maintain proper seal geometry. Verify alignment with structural members to avoid compromised seals.
Drilling and Hole Preparation
Start by selecting the right drill bit. It should be slightly smaller than your anchor’s diameter to ensure a snug fit.
Drill at low speed to prevent heat buildup and cracking. Keep the drill perpendicular to the surface for a clean hole.
Drill to the correct depth, leaving room for the anchor and sealant. Clean out any debris from the hole with a brush or compressed air.
Create a slight outward bevel at the bottom of the hole using a countersink bit. This helps seat the sealant properly.
Fastener Insertion and Sealant Application Technique
Insert your anchor into the hole, tapping it gently with a hammer if needed. Ensure it’s flush or slightly below the surface to create a good seal.
If using a primer, apply it now according to the manufacturer’s instructions. This helps the sealant bond better.
Insert a backer rod into the hole around the anchor if needed. This supports the sealant and prevents it from sagging.
Apply your sealant in a concave or sloped bead using a caulking gun. Tool it with your finger or a damp rag to ensure it adheres to both the stucco and the anchor, creating a continuous bond. Avoid creating pockets where water can collect.

Avoiding Common Errors and Water-Trapping Details
Frequent mistakes include overfilling pockets, recessed pockets, puncturing house wrap, using incompatible or aged sealants, and painting over failed seals. Each of these can create hidden water traps behind the stucco. Addressing them early prevents costly remediation later.
Focus on correct pocket depth, flush surfaces, and compatible backer rods with sealants. Avoid fillers that obscure failures and maintain a continuous drainage plane with proper flashing. Regularly verify the integrity of seals during maintenance checks.
Problem Patterns and How to Spot Them
Over time, failing sealants around fasteners through stucco show clear signs. Keep an eye out for these patterns:
Capillary gaps: Small spaces between the stucco and the sealant mean water can wick in.
Blistered stucco: Pockets of trapped moisture cause the stucco to bubble or peel. Act fast – this is a sign of serious water intrusion.
Rust stains: Reddish-brown streaks around fasteners indicate water’s been getting in, causing corrosion and further damage.
Special Cases: Flashing Breaks, Window/Trim Fasteners, and Railings
Some areas need extra care to prevent water traps:
Flashing breaks: Ensure fasteners don’t puncture the flashing. Seal with compatible sealant and use backer rods for a tight fit.
Window/trim fasteners: These are high-risk areas. Use proper flashing, maintain a continuous drainage plane, and ensure no voids behind trim.
Railings and penetrations near horizontal surfaces: Water can pool here. Make sure sealants are compatible with the weather barrier, and maintain proper drainage.
Inspection, Testing, and Maintenance After Sealing
Set up a practical review routine that covers initial cure, first heavy rainfall, and seasonal checks. Decide who will perform the inspections and when. DIY homeowners can handle basic checks, while professional follow-up may be needed for complex issues.
Visual cues such as cracks, gaps, or moisture staining guide maintenance. Use simple water tests and document test outcomes with photos and notes. Keep a schedule and store product and batch information for reference during future sealant work.
Visual and Functional Inspection Checklist
Use this checklist after sealing fasteners through stucco, then annually or after heavy rain.
- Cracks: Look for new or widening cracks. Skipping can lead to water ingress.
- Gaps around fasteners: Check sealant adhesion. Gaps allow water entry.
- Caulk/coating deterioration: Inspect sealant condition. Deterioration may require resealing.
- Moisture staining/efflorescence/delamination: These signs indicate water problems that need addressing.
- Staining/moss growth on stucco: Check for organic growth, which can damage stucco.
- Fastener tightness: Tighten any loose fasteners to prevent sealant failure.
- Drainage and flashing integrity: Ensure water flows away from the stucco. Poor drainage causes water buildup.
- Pooling water near foundation or behind stucco: Check for water accumulation, which can cause damage.
Quick rule: Regular checks keep small issues from becoming big problems.
When to Call a Professional
Certain issues require professional assessment. Don’t hesitate to call if you notice these signs.
- Extensive stucco cracking: Multiple or large cracks may indicate structural problems.
- Suspected substrate rot: Delamination, soft spots, or musty odors could signal rot behind the stucco.
- Inaccessible cavities: Professional tools and expertise are needed to inspect hard-to-reach areas.
- Water ingress after heavy rain: If water is getting in despite your best efforts, it’s time for a pro.
- Mold or mildew growth: These indicate moisture problems that require professional remediation.
Quick rule: When in doubt, call a professional. It’s better to be safe than sorry.
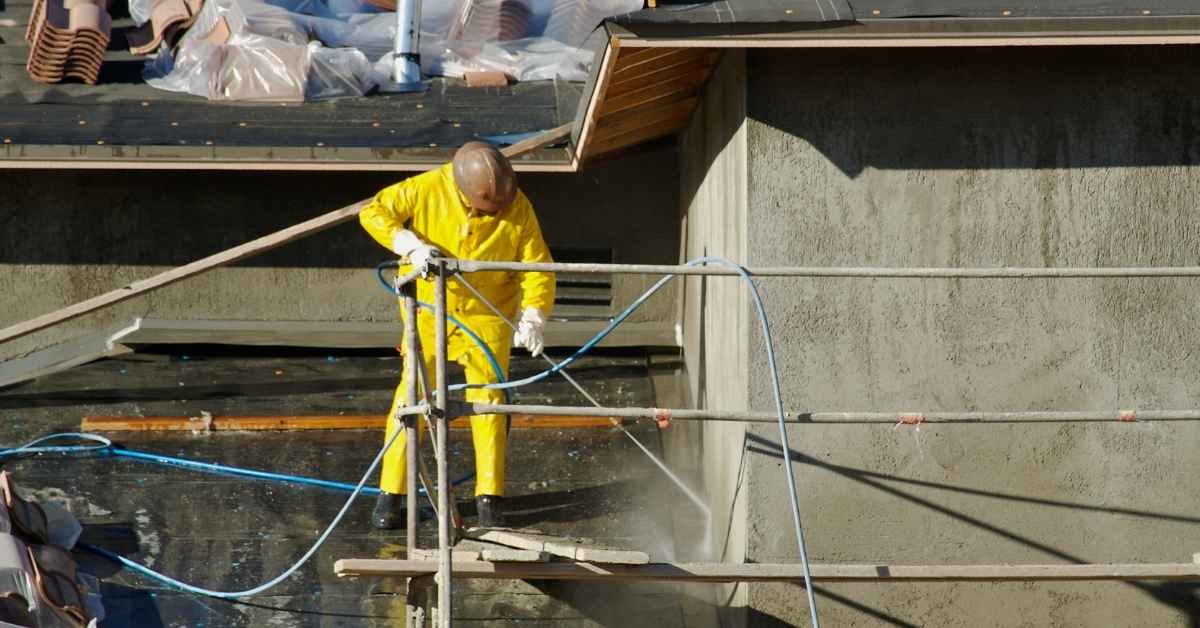
Safety, Environmental Factors, and Jobsite Best Practices
Wear proper PPE for eye, skin, and respiratory protection, plus fall protection when using ladders or scaffolds. Plan for safe access and egress during the workday. Keep the site tidy to avoid accidents and damaged finishes.
Control dust with wet-cut methods or vacuum tools, and dispose of old sealants according to local regulations. Consider UV exposure, freeze–thaw cycles, and coastal salt when choosing materials and planning maintenance; these factors influence inspection frequency and resealing schedules.
Personal Protective Equipment and Dust Control
Safety first. Here’s what you need when drilling through stucco.
- Eye/Face Protection: Safety glasses or goggles to protect from debris. Consider a face shield for full coverage.
- Respirator: A half-face respirator with P100 filters to protect against silica dust. It’s around $20-$30.
- Gloves: Heavy-duty work gloves to protect your hands from cuts and vibrations.
- Hearing Protection: Earplugs or earmuffs to reduce noise levels when drilling. Around $10-$20.
- Dust Control: Use a wet-cutting method or vacuum during drilling to minimize airborne particulates. Rent a dustless drill for around $50-$70 per day.
Environmental Durability Considerations
Climate plays a big role in how long your sealant lasts. Here’s what to consider:
Sun Exposure: UV rays break down sealants over time. Choose UV-resistant sealants, especially for south- and west-facing walls.
Freeze-Thaw Cycles: Extreme temperature changes can cause sealants to crack or peel. Opt for freeze-thaw resistant sealants in colder regions.
Coastal Salt Air: Salt air accelerates corrosion and degradation of sealants. Use salt-resistant sealants within 5 miles of the coast.
Always check manufacturer’s durability guidance for your specific climate conditions.
Tools and Materials Checklist with Visual Checkpoints
Assemble essential tools such as drills, masonry bits, caulk guns, and backer rods, and understand their roles for through-stucco work. Choose fasteners appropriate for the substrate and confirm backer rod sizing and sealant compatibility. Plan hole locations to minimize cracking and ensure clean surfaces.
Visual checkpoints help confirm correct bead size and finish, continuous seals, and proper edge details. Test the cured seal with light finger pressure and note any gaps or soft spots. Include safety gear, weather awareness, and step-by-step sequencing to minimize stucco damage.
Basic Tool Setup and Calibration Tips
Before you start, make sure your tools are in good working order and set up properly for a consistent finish.
- Drill settings: Use the right speed (600-800 RPM) and torque to prevent stripping screws or damaging stucco.
- Caulk gun technique: Squeeze steadily with even pressure, keeping the nozzle at a consistent angle for smooth bead application.
- Bead size control: Use backer rod to create a uniform space for sealant and prevent over-application or under-application.
- Drill bit selection: Choose bits that match your screw/anchor size to ensure proper grip and avoid stripping.
- Hammer drill use (if masonry): Engage the hammer action only when drilling into masonry, not stucco, to prevent damage.
- Screwdriver bit selection: Match bits to your screw heads for a secure grip and smooth driving.
- Caulk gun nozzle selection: Choose a nozzle size that matches your bead width to ensure consistent coverage.
- Drill bit depth setting: Set the drill’s clutch or use a depth gauge to prevent over-drilling and damaging stucco.
Quick rule: Regularly check and adjust your tools throughout the job to maintain consistency.
Visual Acceptance Criteria
After applying sealant, visually inspect your work to ensure a proper bond and no trapped voids.
- Bead size: Check that the bead is consistently sized along its length. Inconsistencies may indicate air pockets or under-application.
- Bead profile: Ensure the bead has a smooth, uniform profile with no peaks or valleys. Irregularities could indicate trapped moisture or improper application.
- Edge seal: Verify that the bead seals completely along edges to prevent water intrusion.
- Gap/void check: Look for any gaps or voids in the bead, which can trap water and cause damage over time.
- Slope check: Ensure the bead has a slight slope away from the wall to facilitate water runoff. A flat or inverted slope can trap water.
- Photograph/mark approved areas: Document your work by taking photos or marking approved areas for future reference and inspections.
Quick rule: If in doubt, gently press the bead with a gloved finger to check for any soft spots or voids.
Conclusion
Sealing fasteners through stucco is about keeping water out and your project looking tight. Do the planning, pick the right sealant, install correctly, and verify there’s no hidden water trap before you call it done.
Check that you have assessed the site for moisture risk, chosen compatible materials, tested a small area first, followed the proper installation steps, cleaned up edges, and scheduled a basic post‑seal inspection. Move in the order: site read, material fit, test patch, seal, inspect, maintain, then recheck after weather cycles.
Common mistakes to avoid are trying to seal over loose stucco, using the wrong sealant type for the surface, and skipping a test patch or a thorough inspection. Always wear gloves and eye protection, work from dry, clean surfaces, and lampshade your work so you don’t trap moisture. If in doubt about substrate damage, big cracks, or poor drainage, stop and call a pro rather than guess. Stay methodical, and you’ll protect the wall, your home value, and your time—steady steps now save costly fixes later.
FAQ
What types of fasteners work best with stucco for through-wall applications?
Use fasteners that are rated for masonry or stucco and are corrosion resistant. Look for screws or anchors that specify compatibility with hollow stucco or masonry materials and follow the manufacturer’s guidance.
Check labels or data sheets for pull-out strength and edge distance, and choose the smallest diameter that fits the job to reduce cracking risk.
What pre-drilling techniques help prevent stucco cracks?
Pre-drill with a bit size recommended for the fastener and use a slow, steady drill to avoid wandering. Drill perpendicular to the surface and stop before you break through to the underlying backing if that’s not needed.
Clear dust from the hole and avoid forcing the fastener in if the hole walls aren’t clean; a clean hole reduces stress concentrations that lead cracks.
What sealing methods and materials should I use to prevent water traps around fasteners?
Seal around fasteners with a compatible sealant that bonds to stucco and the fastener material. Make sure the sealant remains pliable and does not create a water-stopping saddle that traps moisture.
In some setups, a pressure-tetted or gasketed accessory can help, but always verify compatibility with the specific materials you’re using.
Which sealants or tapes are commonly used and how should I apply them?
Common choices include silicone-based sealants or tapes designed for exterior use; read the product label for surface prep and cure times. Apply evenly, tool out to a smooth finish, and avoid gaps where water could wick in.
Check that the sealant or tape remains rated for exterior exposure and adheres to both stucco and metal or plastic fasteners. If in doubt, compare options on the manufacturer’s instructions and local guidelines.