
Introduction
Deck attachments through stucco can be installed in a way that prevents water from being trapped.
You’ll learn practical steps and guidelines for planning, installing, and inspecting connections that stay watertight without compromising the stucco.
Key takeaways
- Use continuous flashing with weep screed to channel water away from stucco joints.
- Avoid embedding deck fasteners directly into stucco; secure to framing behind.
- Seal penetrations with compatible, breathable sealants and removable supports if needed.
- Plan for drainage paths that prevent water stagnation at attachment points.
- Inspect stucco for cracks before attachments and repair to minimize leaks.
- Document maintenance schedule to revisit flashing, caulk, and flashing annually.
Table of Contents
- Introduction
- Key takeaways
- Does Stucco Absorb Water — Quick Answer and Why It Matters for Deck Attachments
- Common Entry Points and Failure Mechanisms Around Deck Attachments
- Signs and Consequences of Water Damage from Attachments
- Safe Design Principles for Attaching Decks Through Stucco
- Step-by-Step Installation Plan: Secure the Deck Without Trapping Water
- Tools, Materials, and Material Specs to Use (DIY-Friendly)
- Common Mistakes and How to Avoid Them
- Cost Implications and Long-Term Value of Proper Installation
- Conclusion
- FAQ
Does Stucco Absorb Water — Quick Answer and Why It Matters for Deck Attachments
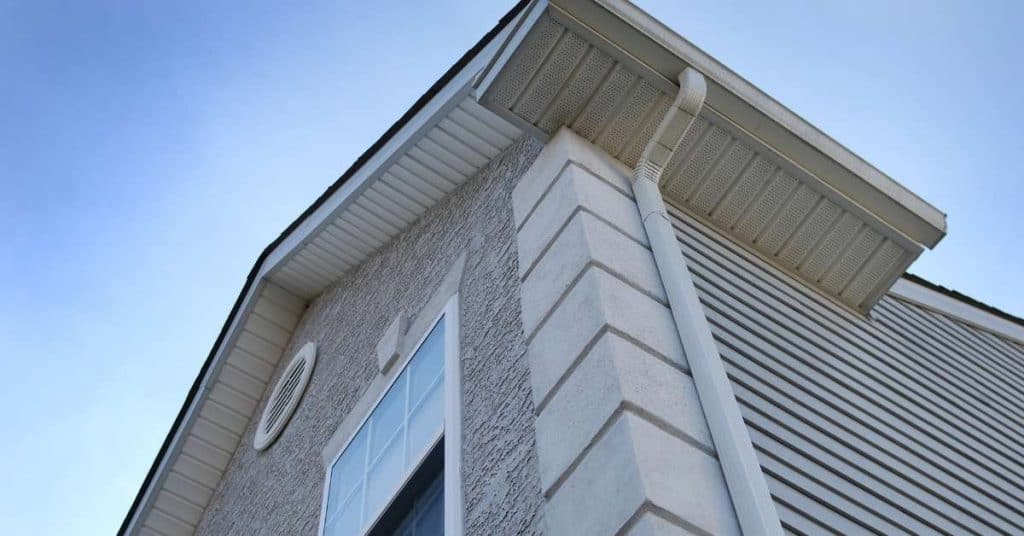
Stucco is porous by design and does not act as a waterproof barrier on its own. This porosity means water can move through the surface if proper detailing isn’t in place. Deck attachments become a moisture-risk detail when the surrounding flashing and sealants don’t redirect water away from the substrate.
Water can travel through small gaps around drill holes, anchors, and fasteners, then follow the hardware toward the deck structure if not appropriately shielded. Common vulnerabilities include unsealed penetrations, inadequate backer or cover boards, and insufficient flashing at transitions. Quick-fit best practices focus on preparation, surface conditioning, weather awareness, code-compliant flashing, and regular inspections to minimize trapping water.
How stucco’s porosity affects fasteners and penetrations
Stucco is porous by design. This means it absorbs water, unlike waterproof materials.
When you drive screws or bolts into stucco for deck attachments, those fasteners create tiny gaps. Water can migrate along these paths, following the fasteners towards your deck structure.
Penetrations, like holes drilled for anchors, also allow water to enter and hide behind the stucco surface.
This hidden moisture can cause rot, delamination, or even structural damage over time. That’s why it’s crucial to understand how stucco’s porosity affects fasteners and penetrations.
Traditional vs synthetic stucco differences relevant to attachments
There are two main types of stucco: traditional cement-based and synthetic (EIFS). Each has unique properties that affect deck attachments.
Traditional Stucco is more permeable. It absorbs water but also allows it to evaporate. This can help reduce moisture buildup around fasteners, given proper detailing.
Synthetic Stucco (EIFS), on the other hand, is less permeable and doesn’t allow water to escape as easily. It requires a different approach to flashing and detailing to prevent water from getting trapped behind it.
Both systems need careful consideration when attaching decks. Always check local codes and consult with a professional if you’re unsure about your specific stucco type.

Common Entry Points and Failure Mechanisms Around Deck Attachments
Identify and map the four frequent entry points: ledger-to-wall interface, window or door intersections, through-wall penetrations, and the deck frame where it meets ground or soil contact. Each point is susceptible to water intrusion due to flashing gaps, sealant gaps, and capillary action. Understanding these zones helps you plan better detailing.
Typical failure modes include flashing deterioration, improper integration with stucco, aging or failed sealants, corrosion of metal connectors, and cracks around penetrations. Moisture can wick through joints and mortar, while ground contact invites soil moisture and capillary rise. During planning, verify flashing configuration, backer rod use, and drainage paths to prevent trapping water around the ledger.
Cracks, gaps, and improperly sealed bolt penetrations
Installation gaps around bolts and movement of the deck can create channels for water to enter. This accelerates deterioration at these points.
Bolt penetrations are particularly vulnerable due to their small size and the pressure exerted on them by the ledger board.
Improperly sealed or missing sealant around bolts allows water to seep in, leading to corrosion of metal connectors and eventual failure. Cracks in stucco around these penetrations can also form as the deck moves, further compromising the seal.
Poor flashing integration and missing weep screeds
Improper or absent flashing at the ledger-to-wall interface and termination points can trap moisture, leading to serious issues.
Flashing should be lapped properly and integrated continuously with the stucco to prevent water intrusion. Missing or improperly installed weep screeds can also cause water to become trapped in the wall system, leading to damage over time.
Without proper flashing integration and weep screeds, water can become trapped behind the stucco, leading to deterioration of the stucco itself and any underlying materials. This can result in costly repairs and even structural issues if left unaddressed.
Signs and Consequences of Water Damage from Attachments
Exterior indicators include staining, efflorescence, cracking, spalling, and softened stucco around deck attachments, with rust on flashings or fasteners signaling moisture exposure. Interior signals to monitor are peeling finishes, damp drywall, musty odors, and visible mold near the affected areas. These signs point to ongoing intrusion that can compromise finishes and framing.
Structural risks involve warped framing, weakened connections, and deterioration of the ledger or attachment points. Prolonged moisture exposure can lead to wood rot and possible deterioration of related structural members. Practical checks include testing for moisture, inspecting for hidden leaks, and documenting findings to guide resealing or remediation steps.
Visual and tactile exterior signs to inspect
First, look for visible signs of water intrusion around your deck attachments. These can include:
Staining: Dark spots or streaks on the stucco near your deck ledger could indicate water has been absorbed.
Efflorescence: A white, powdery substance on the stucco’s surface might mean moisture is present and pushing salts to the surface.
Also, feel around the ledger area. If the stucco feels soft or crumbles easily, it could be a sign of water damage weakening the material.
Interior indicators and structural risks
Water damage isn’t always visible from the outside. Here are some interior signs to watch for:
Damp drywall: If your walls feel cold or damp, especially near the deck area, it could indicate a leak.
Musty odors: A persistent musty smell might mean mold is growing behind your walls.
Water damage can also cause structural risks. Check for:
Warped framing: Moisture-warped wood around the deck attachment could compromise its stability.
Rusted screws/bolts: Rust on fasteners near the ledger might mean they’re failing due to water exposure.
Potential wood rot: If left untreated, moisture can cause wood rot in your framing.
Safe Design Principles for Attaching Decks Through Stucco
Focus on design constraints that minimize water trapping by limiting penetrations and using independent support options when possible. Clearances and drainage paths should be planned to prevent moisture buildup behind the stucco and around the deck interface. A thoughtful layout reduces reliance on the stucco for structural support.
Detail flashing and WRB integration carefully, with continuous barriers at the top and sides of openings. Use corrosion-resistant hardware and consider proper through-wall sleeves. Regularly verify clearances and ensure flashing orientations prevent water from pooling near the substrate.
Best-practice flashing and ledger termination details
Proper flashing is crucial to prevent water intrusion. Start by installing a continuous head/jamb flashing at the top of your ledger board, extending it beyond the stucco face.
Sill pans are also essential where the deck meets the ground or another surface. They should be integrated with the WRB and extend under the ledger to collect any water that gets behind the flashing.
The WRB must be lapped over the top of the ledger board, sealed at the edges, and extended down the sides. This ensures water is directed away from the wall and doesn’t get trapped in the ledger termination area.
Strategies that avoid through-stucco ledger attachments
Drilling holes through stucco for ledger board attachment is a common mistake. It can lead to water intrusion and structural issues. Here are some alternatives:
- Avoid through-wall penetrations: Use freestanding posts or clip-on brackets that attach to the band joist above, keeping them independent of the stucco wall.
- Rim joist ledger attachment: Mount your ledger board to a rim joist behind a removable siding strip. This keeps penetrations out of the stucco and allows for easy access if repairs are needed.
- Cantilevered decks: Design your deck so it extends from the house without needing support from the wall, keeping it independent of the stucco.
These strategies minimize through-wall penetrations, reducing the risk of water intrusion and structural damage. Always consult local building codes before proceeding with any attachment method.
Step-by-Step Installation Plan: Secure the Deck Without Trapping Water
Begin with a thorough pre-installation assessment that checks code compatibility, WRB compatibility, and deck type and ledger details. Plan your wall prep and WRB repair to provide a clean, dry base for flashing and seals. Establish a flashing strategy that covers all deck penetrations and ledger connections.
Choose attachment methods that minimize water intrusion, favoring corrosion-resistant fasteners and appropriate through-wall hardware with proper clearances from stucco. Seal joints only where recommended and ensure drainage paths are in place to prevent pooling. Finish with a post-installation water test and a maintenance plan for ongoing checks.
Step-by-Step Installation Process
Follow this clear, numbered sequence to secure your deck through stucco without trapping water.
- Preparation: Gather materials, check safety gear, and ensure the work area is clean and safe.
- Wall Prep: Inspect and repair WRB, fix voids, and ensure a clean, dry surface for proper flashing and seals.
- Flashing Installation: Install continuous flashing at all deck penetrations, ledger connections, and corners. Ensure material (metal, flexible) and slope shed water away from the stucco.
- Deck Attachment: Secure the deck using selected attachment method, ensuring fasteners are corrosion-resistant and maintaining proper clearance from stucco to prevent capillary wicking.
- Sealing and Final Checks: Apply sealant only where recommended, address control joints, install weep holes or drainage paths as needed, stagger or seal joints to avoid water pooling, and perform a final inspection for alignment, slope, and flashing integrity.
Pre-install Inspection and Moisture Testing
Before starting work, use this checklist to assess existing moisture and verify WRB condition.
- Check for signs of water damage: Look for cracks, gaps, or improperly sealed bolt penetrations around the stucco.
- Inspect WRB: Ensure the Weather-Resistant Barrier is intact and there are no voids that could allow water intrusion.
- Moisture test: Use a moisture meter to check for excess moisture in the stucco. If readings are high, consult a stucco inspector or structural engineer before proceeding.
- Verify flashing integration: Ensure existing flashing is properly integrated and there are no missing weep screeds that could trap water.
- Check ledger details: Inspect the ledger board for any signs of rot, warping, or improper installation. If issues are found, consult a structural engineer before proceeding.
- Determine deck type and span: Identify the type of deck (wood, composite, etc.) and its span to ensure proper attachment methods are used.
- Assess code compliance: Verify that your installation plan complies with local building codes and standards.
- Plan flashing strategy: Determine the material and slope for continuous flashing at all deck penetrations, ledger connections, and corners to shed water away from the stucco.
Quick rule: If any issues are found during inspection, address them before proceeding with installation to prevent further damage.
Installation Sequence and Quality-Control Checkpoints
Use this checklist to guide the on-site installation process and ensure a watertight integration.
- Apply/Repair WRB: Ensure the Weather-Resistant Barrier is properly installed or repaired before proceeding with flashing installation. A damaged WRB can lead to water intrusion behind the stucco.
- Install Flashing: Verify that continuous flashing has been installed at all deck penetrations, ledger connections, and corners using the planned material (metal, flexible) and slope to shed water away from the stucco.
- Fasten with Proper Methods: Use selected attachment method, ensuring fasteners are corrosion-resistant and maintaining proper clearance from stucco to prevent capillary wicking. Tighten fasteners securely but avoid overtightening, which can cause stripping or cracking.
- Seal Penetrations: Apply sealant only where recommended to prevent water intrusion through bolt penetrations or other openings created during installation.
- Check Alignment and Slope: Verify that the deck is properly aligned with the stucco wall and that it maintains a slight slope away from the building to facilitate water drainage.
- Inspect Flashing Integrity: Ensure that all flashing is securely attached and shows no signs of damage or improper installation. Replace any damaged flashing immediately to prevent water intrusion.
Quick rule: Regularly inspect your work throughout the installation process to catch and correct any issues early, ensuring a watertight integration between the deck and stucco.
Tools, Materials, and Material Specs to Use (DIY-Friendly)
Assemble core tools such as measuring and marking tools, drill/driver, masonry bits, rubber mallet, caulk gun, trowel, level, and safety gear. Include specialized flashing installation tools if available and a reliable sealant gun for appropriate products. Have a plan for material compatibility with your stucco type.
For fasteners and anchors, choose corrosion-resistant options and verify embedment and load expectations with the manufacturer. Select sealants and flashings rated for exterior use and compatible with your stucco system. Don’t skip checks against local codes and product approvals; keep a quick compatibility reference handy during installation.
Fastener and connector recommendations
When attaching a deck through stucco, it’s crucial to use corrosion-resistant fasteners. Stainless steel or hot-dip galvanized connectors are your best bets.
Size matters: Ensure the fasteners you choose are long enough to penetrate at least 1.5 inches into the framing behind the stucco. This provides a solid anchor and helps distribute loads evenly.
Check local building codes for specific load ratings, but as a general rule, use #10 or #12 fasteners for most deck attachments. Always verify that your chosen fasteners can handle the structural loads of your specific project.
Flashing, sealants, and WRB-compatible products
Flashing is your first line of defense against water intrusion. Use flashing membranes or metals rated for exterior use. Ensure they’re compatible with your stucco type (monolithic, EIFS, traditional) and any existing weather-resistant barriers (WRBs).
Seal tight: Apply a compatible sealant around the fasteners and along the ledger board to prevent water from seeping in. Urethane or silicone sealants work well with stucco.
Before applying any product, test it on a small, hidden area of your stucco first. This ensures compatibility and prevents potential damage to your finish.
Common Mistakes and How to Avoid Them
Common mistakes include cutting or bypassing the WRB, missing or improper step flashing at ledger connections, and burying stucco below grade where it cannot shed water. Corrective practices involve restoring a continuous drainage plane and ensuring sealed joints and proper flashing layouts. Plan ahead to keep water managed behind the stucco.
Other pitfalls are flashing misalignment, penetrations flashed and sealed inconsistently, and failure to maintain deck flashings above the stucco surface. Use a proper sequence for deck connections that preserves water management and avoids damaging the stucco. If in doubt, consult a licensed pro for flashing, drainage plane integrity, and stucco rework.
Mistakes specific to retrofit vs new-construction attachments
When attaching a deck through existing or new stucco, different challenges arise. Here are common mistakes and how to avoid them.
- Matching materials: Using incompatible materials can cause issues. For retrofits, match the existing stucco’s composition; for new builds, coordinate with your stucco contractor.
- Exposing hidden damage: Before attaching, inspect the existing wall for cracks or moisture damage. Ignoring these can lead to bigger problems later.
- Timing in new construction: Coordinate with your stucco contractor to ensure the ledger board is installed before the stucco goes up.
- Inadequate support: In retrofits, ensure the existing structure can support the added load. In new builds, follow building codes and consult an engineer if needed.
Understanding these differences helps you avoid pitfalls in both retrofit and new-construction scenarios.
When DIY is inappropriate and when to hire a pro
While some aspects of deck attachment through stucco can be DIY, certain conditions warrant professional help. Here are red flags indicating when to hire a certified stucco or structural professional.
Existing moisture: If you notice water stains, efflorescence, or soft/cracked stucco, there’s likely an underlying moisture issue that requires professional diagnosis and repair.
Structural complexities: If your deck attachment involves complex structural elements like cantilevers or load-bearing walls, consult a licensed structural engineer to ensure safety and compliance with building codes.
EIFS systems: Exterior Insulation and Finish Systems (EIFS) require specialized knowledge. Hire an EIFS-certified professional for any work involving these systems.
Cost Implications and Long-Term Value of Proper Installation
Discuss the upfront investment in proper flashing, corrosion-resistant fasteners, and alternative support methods as a baseline for long-term reliability. A professional inspection at installation can reveal hidden moisture paths and gaps that DIY checks might miss. The goal is to avoid expensive fixes later by getting the details right from the start.
Moisture management elements like drainage planes, weep screed, and sealants play a critical role in preventing water trapping. Compare potential long-term costs of repair versus the upfront work of correct detailing, factoring in the building’s age, stucco system, and observed performance history. Use a simple life-cycle mindset to weigh initial spend against ongoing maintenance needs.
Comparative outcomes: improper ledger attachment vs watertight alternatives
Improper ledger attachments can lead to water intrusion, rot, and mold. Over time, this can cause significant damage to your deck framing, leading to costly repairs or even replacement.
Watertight alternatives, like proper flashing, corrosion-resistant fasteners, and alternative support methods, might seem expensive upfront, but they’re a long-term investment. They prevent water intrusion, extend the life of your deck, and save you money in the long run.
For instance, using stainless steel or hot-dipped galvanized fasteners instead of cheap, unprotected ones can double their lifespan, saving you from early replacements.
When a moisture remediation assessment is worth the cost
A professional inspection before installing your deck attachment can save you big bucks in the long run. It’s like getting a check-up for your house.
Consider commissioning an assessment if you notice any of these signs: water stains on walls or ceilings, musty odors, peeling paint or wallpaper, or visible mold. Also, if your stucco system is older or hasn’t been inspected in years, it’s a good idea to get it checked out.
An inspector can identify hidden moisture paths, structural gaps, and ensure compatibility between your stucco system and deck attachment hardware. This proactive approach helps prevent costly repairs down the line.

Conclusion
Attach through stucco safely by planning for drainage, sealing, and support that won’t trap water. The goal is a deck that looks good, stays dry, and lasts many seasons without costly repairs.
Before you start, confirm the path: inspect for existing damage, verify flashing and sealants, plan a simple sequence, and test any new details in a small area first. Check that fasteners penetrate framing where possible, that there is a clear water path away from the stucco, and that any joints are sealed but breathable to prevent moisture buildup.
Avoid these traps: don’t run moisture behind rigid surfaces, don’t rely on sloppy gaps or improvised sealants, and don’t ignore signs of prior water damage. Keep safety top of mind: wear eye protection, use the right tools, and verify temporary supports won’t fail. If you’re unsure about flashing, roof-line details, or structural support, pause and call a professional for a quick assessment—it saves money and headaches later—and stay focused on a clean, inspected finish that sheds water instead of soaking it away.
FAQ
Can I attach a deck directly to stucco?
No. Stucco alone won’t hold a deck safely. You need a ledger on the framing behind the wall, with proper flashing and through fasteners as required.
What is a safe method to attach through stucco?
Attach to the wood framing behind the stucco, not the stucco itself. Use flashing to shed water and protect the wood. Follow local codes for fasteners and spacing.
How can I prevent water from trapping around the attachment?
Install proper flashing where the deck meets the wall and slope any roofs or surfaces away. Seal penetrations and use weatherproof fasteners. Don’t leave big holes unsealed.
What are warning signs of a bad attachment job?
Cracks or leaning near the deck, water stains on the stucco, or rusted hardware. If you see movement or unusual noise, stop and reassess with a pro.