
Introduction
Stucco at deck and porch connections is the moisture-control detail where stucco meets the deck to stop water from entering the structure.
It relies on flashing, proper joint gaps, and movement allowances to shed water and accommodate movement. Always check manufacturer instructions and local rules for flashing, sealants, and clearance requirements. For a practical DIY job, plan for drip edges, flashing under the edge, and a clean transition that can move with the deck.
Key takeaways
- Ensure WRB and substrate remain continuous through ledger and beam interfaces.
- Integrate flashing at ledger joints to shed water away from stucco.
- Maintain an unobstructed drainage plane and ventilated cavity behind stucco.
- Use appropriate movement and control joints at interfaces; sealants cure fully.
- Choose compatible fasteners, consider thermal and structural movement during seasons.
- Follow construction sequencing and safety protocols to prevent water intrusion and slips.
Table of Contents
- Introduction
- Key takeaways
- Overview: Why Deck/Porch Connections Are High-Risk for Stucco Systems
- Water-Resistive Barrier (WRB) and Substrate Continuity
- Flashing and Through-Wall Details at Ledger and Beam Connections
- Drainage Plane, Cavity, and Ventilation Behind Stucco
- Control Joints, Movement Joints, and Sealants at the Interface
- Fasteners, Ledgers, and Thermal/Structural Movement Considerations
- Tools and Materials Checklist; Material Specs and Standards Explained
- Construction Sequencing and Best-Practice Installation Checklist
- Conclusion
- FAQ
Overview: Why Deck/Porch Connections Are High-Risk for Stucco Systems
Deck and porch interfaces are natural water entry points if detailing is weak. Poor movement due to framing shifts and seasonal changes can drive cracks and leaks. Improper detailing at these interfaces often leads to hidden water paths and accelerated deterioration.
Set clear performance goals for durability, drainage, and maintainability from the start. Plan for a continuous drainage path and a barrier that tolerates slight movement without losing integrity. Align expectations with on-site realities and available assemblies.
Typical failure modes at stucco-to-deck interfaces
Stucco-to-deck interfaces are prone to several failure modes. Rot and corrosion often occur due to water trapped behind the stucco, unable to drain or evaporate.
Delamination, where the stucco peels off from the substrate, is another common issue. This happens when moisture gets into the bond between the stucco and the surface it’s applied to.
Staining on the stucco’s surface can indicate water migration, which may not be visible until it’s too late. Freeze-thaw damage occurs in colder climates as water expands and contracts with temperature changes.
Key design objectives for water control and movement
The primary goal is to maintain a continuous water-resistive plane behind the stucco. This prevents water from getting in but allows moisture vapor to escape.
Controlled drainage is crucial. Water should be directed away from the deck and porch, not trapped between them and the stucco. This can be achieved with proper flashing and weeps.
Accommodating movement is also vital. Decks and porches expand and contract with temperature changes. Stucco should be able to move with them without cracking or delaminating.
Lastly, the system should allow for accessible inspection and maintenance. This means being able to check for any issues behind the stucco without causing damage.
Water-Resistive Barrier (WRB) and Substrate Continuity
The WRB, flashing, and sheathing must work as a single drainage plane at deck and porch connections. When they tie together, water is kept from becoming trapped behind the stucco. A continuous plane helps reduce moisture risks in the wall assembly.
Always follow the WRB manufacturer instructions for terminations and overlaps. Verify that transitions are clean at deck edges and around penetrations. If in doubt, consult the product data sheet or the installer guidelines for the exact setup expectations.
Continuity of WRB and tying into stucco layers
The water-resistive barrier (WRB) must continue seamlessly from the wall to the deck or porch structure. Here’s how:
Overlap: Extend the WRB at least 6 inches up the ledger board and around posts. Fold it back on itself and staple securely.
Seal: Apply a generous bead ofWRB-compatible sealant along all overlaps, edges, and seams to prevent water intrusion.
Mechanical attachment: For added security, use WRB-specific staples or nails to secure the WRB to the ledger board and posts. Follow manufacturer’s guidelines for spacing.
Integration with sheathing and framing transitions
Different substrates require different approaches to maintain a continuous WRB:
Sheathing: If your deck or porch has plywood or OSB sheathing, extend the WRB over it. Ensure there are no gaps at the edges.
Masonry: For masonry structures, apply a self-adhesive WRB membrane directly to the wall before installing ledger boards and posts. Seal all edges.
Existing stucco: If you’re adding a deck or porch to existing stucco, remove any loose material first. Then, apply a new layer of WRB over the old stucco before installing ledgers and posts. Ensure no gaps are left at the interface.
Flashing and Through-Wall Details at Ledger and Beam Connections
Flashing around ledgers, beams, and support posts intercepts water before it reaches the stucco. Use properly lapped and sloped components to direct moisture out of the wall. Keep paths clear of obstructions that could trap water indoors.
Ensure flashing continuity behind all wall penetrations and at deck connections. Check that laps extend over the drainage plane and that any joints are backed by compatible sealants or tapes. If you cannot confirm these details, review manufacturer guidance or local code interpretations.
Flashing types, placement and sequencing
First things first, you need the right flashing. Use continuous head/ledger flashing to run along the top of your ledgers and beams. This stops water from getting behind the stucco.
End dams are crucial too. They go at both ends of your ledgers and beams, preventing water from sneaking in from the sides.
Kick-out flashings are a must where your wall meets the deck or porch. They direct water out and away from the wall.
Here’s how to sequence it all: Start with your WRB, then install the flashing, before finally applying your stucco base materials.
Ledger separation, back-priming and sacrificial layers
You need to separate that ledger from the stucco. A gap of at least 1/4 inch does the trick. This stops moisture from wicking into your ledger.
Back-prime your ledgers before you apply any flashing. This seals the wood and prevents moisture from getting in.
Use a sacrificial layer too. Apply a strip of housewrap or felt over the gap and up the ledger. This takes any water that gets behind the flashing and directs it out.
Remember, this layer is meant to be sacrificed if you ever need to inspect or repair your ledger.
Drainage Plane, Cavity, and Ventilation Behind Stucco
Drained and ventilated options help manage incidental water behind stucco. Rainscreen, furring, or direct-applied systems with weep provisions each have tradeoffs. Consider retrofit versus new construction when choosing the approach.
Ventilation behind the finish reduces moisture buildup and helps drying times. Evaluate how the cavity is vented and how it integrates with the WRB and flashing. For specific products and methods, check the manufacturer instructions or standards applicable to your project.
Creating a draining cavity or rainscreen
A drained and ventilated stucco system is your best bet for managing incidental water. Here’s how to create that behind your stucco:
Furring strips are the old-school method. They’re Z-shaped metal strips nailed to your sheathing, creating a 3/4″ gap.
Newer options include drainage mats and engineered clips. These provide a clear path for water to exit and air to circulate. They’re easier to install than furring strips too.
Vented vs. drained approaches and climate considerations
Now, should you prioritize ventilation, drainage, or both? It depends on your climate:
In wet climates, focus on drainage. You want that water outta there ASAP.
In dry climates, ventilation might be enough. Air can dry any incidental moisture.
But remember, it’s not one-size-fits-all. Check manufacturer guidance and local climate data before deciding.

Control Joints, Movement Joints, and Sealants at the Interface
Detail movement joints where decks and porches meet stucco to accommodate differential movement. Place joints near changes in plane and around penetrations to preserve the barrier. Proper spacing helps prevent crack transfer to the finish.
Sealants should accommodate anticipated movement without tearing. Verify substrate compatibility and service life with the sealant data sheet. If unsure, compare requirements with the manufacturer guidelines or local building rules before installation.
Joint types and recommended locations
Stucco needs room to move. That’s where joints come in. We’ve got three types:
Vertical Joints: Run up the wall, aligning with structural breaks like studs or floor lines.
Horizontal Joints: Go across the wall, usually at change-of-plane points – where walls meet floors or roofs. Follow manufacturer guidance here.
Isolation Joints: These are special. They separate different materials or areas with significant movement potential. Place them near penetrations and transitions.
Sealant selection, backing and tooling
Choosing the right sealant is crucial. It’s gotta stick to stucco, flex with movement, and hold up to weather.
- Adhesion: Look for high bond strength to stucco. Check manufacturer data sheets.
- Elasticity: Sealants need to stretch and compress without tearing. Aim for elongation of at least 200%.
- UV/Weather Resistance: Exposure to sun and elements can degrade sealants. Choose one with good resistance.
- Backer Rod: This foam strip supports the sealant, preventing it from being crushed or overstressed. Use a size that fills your joint gap.
- Tooling: A good sealant gun and proper technique ensure even application. Rentable guns are around $20-$30 per day.
Fasteners, Ledgers, and Thermal/Structural Movement Considerations
Fastener choice and corrosion resistance influence long-term performance where the deck bears on or penetrates the stucco wall. Use strategies that limit load transfer to the finish and accommodate movement. Consider isolation methods when attaching metal or timber components.
Ensure anchors and fasteners suit the framing and climate, and verify spacing and depth per guidance. If you cannot confirm these details, consult the fastener manufacturer instructions or project-specific structural notes for acceptable ranges.
Corrosion protection and substrate anchorage
Use corrosion-resistant fasteners to prevent early failure. Stainless steel, hot-dipped galvanized, or other coated fasteners are best. Check product data for compatibility with flashing and ledger materials.
Galvanic corrosion can occur if incompatible metals touch in the presence of moisture. Keep them separated using washers or sleeves.
Fastener length should match substrate thickness, plus extra for embedment into structural members. Too short, they won’t hold; too long, they’ll cause issues with stucco application.
Accommodating differential movement between deck and stucco
Decks move due to temperature changes, loading, or settling. Stucco doesn’t move much. Keep them separated with these methods:
Floating connections: Fasten the ledger to the band joist, but not the rim joist. This lets the deck move independently.
Slip joints: Use a flexible material like neoprene or rubber between the ledger and band joist to absorb movement.
Isolated bearings: Place bearing pads under the ledger, allowing it to move without transferring stress to the stucco. Keep them clean and dry to prevent deterioration.
Tools and Materials Checklist; Material Specs and Standards Explained
Prepare a practical checklist of tools and material categories such as flashings, WRB tapes, sealants, and drainage products. Having the right components on site helps maintain a clean workflow. Check that each item meets project needs and compatibility with other layers.
Focus on verifying material performance with manufacturer tech data and applicable standards rather than relying on generic labels. When in doubt, request the data sheet or spec sheet from the supplier and compare to project requirements.
Practical tools and onsite materials checklist
Before you start, make sure you have all the necessary tools and materials for a smooth detailing and flashing process.
- Tape measure: Essential for accurate measurements. Verify it’s in good working condition.
- Level: Crucial for ensuring proper alignment of flashings and WRB tapes. Check its accuracy before use.
- Chalk line: Helps mark out lines for cutting materials. Ensure the chalk is visible on your chosen surface.
- Utility knife: For cutting materials like WRB tapes and sealants. Replace blades regularly to maintain sharpness.
- Caulking gun: Required for applying sealants. Check it’s functioning properly before starting.
- Flashings: Various types are needed (e.g., J-trim, Z-flashing). Verify they’re compatible with your project and in good condition.
- WRB tapes: House wrap or other water-resistive barrier materials. Check for tears or damage before installation.
- Sealants: Silicone, butyl, or other sealant types. Ensure they’re within their shelf life and compatible with your project.
- Drainage products: Weep screeds, drainage mats, etc. Verify they match your project’s needs and are in good condition.
Quick rule: Always check tools and materials before starting to avoid delays and rework.
Interpreting product data sheets and standards
Understanding manufacturer technical data is crucial for selecting the right products for your project.
- Adhesion: Check the data sheet for adhesion properties. This ensures the product sticks well to the substrate.
- Elongation: Look for elongation data. High elongation means the material can stretch without tearing, crucial for movement joints.
- UV resistance: Verify UV resistance, especially for exposed areas. Poor UV resistance can lead to premature degradation.
- Listed approvals: Check if the product has relevant listings (e.g., ASTM, ICC-ES). This ensures it meets industry standards.
- Installer instructions: Follow manufacturer’s guidelines for installation. Incorrect installation can void warranties and lead to failures.
Quick rule: Always refer to the manufacturer’s data sheets and follow their installer instructions.
Visual checkpoints for material quality and compatibility
Before covering up, visually inspect materials to ensure they meet project specs and are in good condition.
- Tears: Check WRB tapes and other flexible materials for tears. Tears can compromise the water-resistive barrier.
- Corrosion: Inspect metal flashings and fasteners for signs of corrosion. Corroded components can fail prematurely.
- Material types: Ensure you’re using the correct material type as per project specs. Using the wrong material can lead to water intrusion or other issues.
- Compatibility: Verify that materials are compatible with each other and the substrate. Incompatible materials can cause adhesion failures or other problems.
Quick rule: Always visually inspect materials before covering up to ensure they meet project specs and are in good condition.
Construction Sequencing and Best-Practice Installation Checklist
Outline a step-by-step sequence from substrate prep to final finish, emphasizing critical inspection points. Schedule temporary protections during construction to guard vulnerable details. Use mock-ups to preview complex conditions before full installation.
Document key inspections and performance checks as you go, so deficiencies are caught early. If you are unsure about a step, reference the manufacturer instructions, local codes, or standard practice guidance for clarification.
Pre-installation inspection and prep
Before you start applying stucco, make sure your deck and porch connections are ready. Here’s a checklist to ensure everything is in order.
- Check framing plumb: Use a level to confirm walls and surfaces are vertical. Out-of-plumb surfaces can cause issues later on.
- Inspect sheathing tightness: Tighten any loose sheathing screws or nails. Loose sheathing can lead to cracking stucco.
- Verify WRB continuity: Ensure the water-resistive barrier (WRB) is intact and covers the entire surface. Tears or gaps in the WRB can allow moisture intrusion.
- Prepare rough openings: Make sure all windows, doors, and other penetrations are flashed properly to prevent water entry.
- Check ledger board anchorage: Ensure ledger boards are securely fastened with corrosion-resistant hardware. Weak ledger boards can cause stucco to crack or fall off.
- Inspect control joints: Make sure control joints are properly placed and cut. Missing or improperly cut control joints can lead to cracking.
- Check for proper drainage: Ensure there’s a clear path for water to drain away from the stucco. Standing water can cause damage over time.
- Verify fasteners are corrosion-resistant: All fasteners should be made of corrosion-resistant materials like stainless steel or hot-dipped galvanized metal. Corroding fasteners can cause stucco to fall off.
Quick rule: A thorough pre-installation inspection ensures a solid foundation for your stucco application, preventing costly repairs down the road.
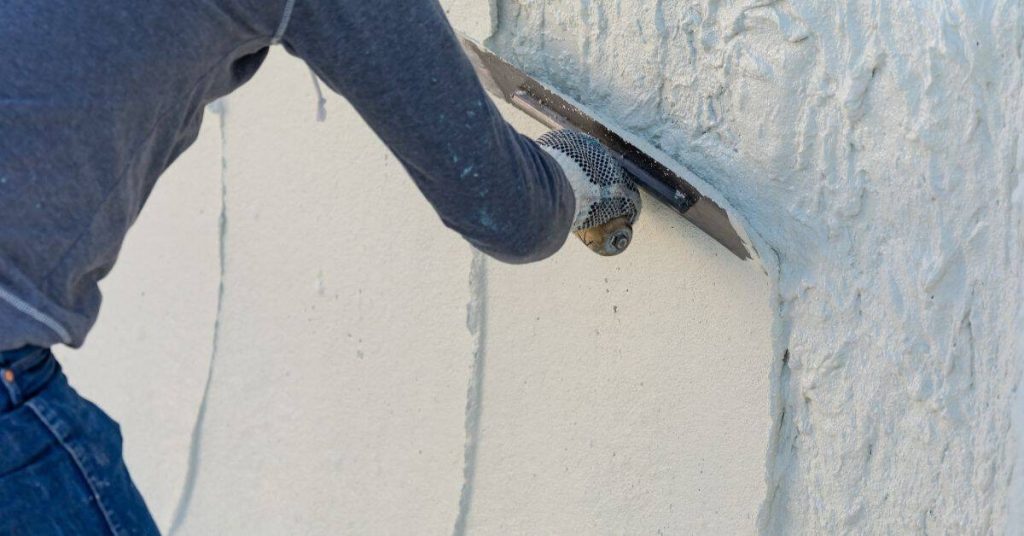
Step-by-step sequence for flashing, WRB, lath, and stucco
Follow this step-by-step guide to ensure a proper installation of your stucco system.
- Install WRB: Apply the water-resistive barrier according to manufacturer’s instructions. A continuous WRB prevents moisture intrusion.
- Install flashing: Flash all windows, doors, and other penetrations before applying stucco. Proper flashing directs water away from the stucco.
- Integrate fasteners and isolation: Use corrosion-resistant fasteners and isolation washers to secure lath to the substrate. This prevents moisture from wicking into the wall system.
- Apply lath: Install lath according to manufacturer’s instructions, ensuring it’s securely fastened and properly spaced.
- Apply base coat: Apply a base coat of stucco, following manufacturer’s instructions for mixing and application. A proper base coat ensures good adhesion and a smooth finish.
- Verify before each cover step: Inspect your work after each step to ensure it meets quality standards. Fix any issues before moving on to the next step.
Quick rule: Verification at each stage ensures a solid, durable stucco application that will last for years to come.
Final QA, curing, and maintenance instructions
Before you close out your project, follow this checklist to ensure a quality finish and long-lasting performance of your stucco.
- Inspect for cracks: Check the entire surface for any hairline cracks. Seal these with an appropriate sealant to prevent water intrusion.
- Verify proper curing: Allow the stucco to cure according to manufacturer’s instructions. Curing ensures the stucco reaches its full strength and durability.
- Protect from freezing: If you live in a cold climate, protect your newly installed stucco from freezing temperatures until it has fully cured.
- Clean up debris: Remove any remaining debris or dust from the surface. A clean surface ensures better adhesion of future repairs or touch-ups.
- Maintain control joints: Keep control joints free of debris and dirt. Regular cleaning prevents water from being trapped in the joint, which can lead to cracking.
- Inspect for signs of moisture intrusion: Regularly check for any signs of moisture intrusion, such as peeling paint or staining. Early detection allows for quick repairs before major damage occurs.
Quick rule: Regular maintenance and inspections ensure your stucco remains in top condition, prolonging its performance and lifespan.
Conclusion
Protecting deck and porch connections in a stucco system is about controlling water, movement, and load paths. Do it right and you get lasting durability, a clean look, and fewer costly fixes after weather takes its toll.
Begin by checking that the WRB and substrate are continuous, that flashing is properly integrated at ledger and beam joints, and that a proper drainage plane with ventilation is in place behind the stucco. Then sequence your work: confirm substrate flatness, install or repair flashing and through-wall details, establish movement joints and sealants at interfaces, and finish with correct fasteners and anchors sized for the load and climate. Work in small, testable steps and stop if anything looks abnormal or unsafe, then re-check before proceeding.
Common mistakes to avoid include skipping or improper sealing of the drainage plane and ventilation path, leaving gaps in flashing at ledger connections, and underestimating movement with too-tight sealants or wrong joint spacing. Do not seal every joint without considering expansion and contraction, and never fasten through a wet or damaged substrate. Always wear eye and hand protection, and test patches in a hidden area before committing to the full install.
If you encounter unfamiliar flashing details, a questionable substrate, or inconsistent movement behavior, call a qualified pro rather than forcing a DIY solution. Stay disciplined, follow the sequence, and the project will resist moisture, movement, and weather for years to come. You’ve got this—keep it steady and complete the work right the first time.
FAQ
How do I verify WRB continuity and substrate behind a deck ledger before stucco?
Check that the water-resistive barrier is continuous behind the ledger and wraps up behind any flashing. Look for clean penetrations and avoid gaps where water can sit. If in doubt, follow the manufacturer’s instructions and local guidance for laps and transitions.
What are practical flashing details at the ledger-to-wall interface to prevent water intrusion?
Install flashing that directs water away from the stucco and behind the ledger. Ensure the flashing overlaps the WRB and extends up behind any siding or cladding. Use manufacturer-recommended materials and follow proper termination at the top and edges.
How should movement joints and sealants be used where stucco meets the deck structure?
Plan for control or movement joints at this interface to accommodate thermal and structural movement. Use compatible sealants and backer rods as specified by the product labels, and avoid tying sealants directly to dissimilar materials that can trap water.
What should the drainage plane and gaps look like behind stucco near decks?
Maintain a continuous drainage plane with proper gaps and ventilation behind the stucco. Do not block weep routes or create dead air pockets where moisture can accumulate. If you’re unsure, check product instructions and local guidance for cavity details and venting.
What are the top mistakes to avoid at stucco connections to decks?
Avoid missing weep openings, skipping flashing at critical joints, and sealing movement joints with improper products. Follow material labels, confirm substrate compatibility, and don’t improvise with shortcuts that trap water or hinder movement.