

Introduction
Hempcrete retrofits for insulation are a breathable, lime-based mix used to insulate while letting moisture escape. This approach helps slow heat loss and reduce moisture traps if installed with proper detailing. Work with the material by keeping joints open to airflow and following manufacturer or local guidance.
Plan for surface prep, air sealing, and proper junctions to avoid damp spots. Follow product labels and local rules for curing times and compatible assemblies, and check what to do where moisture is a concern. If in doubt, consult the instructions or a pro on moisture management as you detail the retrofit.
Key takeaways
- Inspect hempcrete assemblies for moisture before retrofit and ensure fully dry.
- Wear PPE when handling hemp materials and ensure area is well ventilated.
- Use breathable, moisture-permeable finishes to avoid trapping humidity in walls.
- Detail joints with continuous drainage plane and proper flashing to shed water.
- Seal penetrations and openings with compatible hempcrete interfaces and caulk where needed.
- Establish sequential work plan and verify each stage meets moisture and air barrier goals.
- Monitor for signs of damp, efflorescence, or mold; address promptly with remediation steps.
Table of Contents
- Introduction
- Key takeaways
- Hygrothermal Basics of Hempcrete
- Common Moisture Risks in Retrofit Contexts
- Key Detailing Principles to Avoid Moisture Traps
- Junctions: Wall-to-Roof, Wall-to-Floor, and Openings
- Interfaces with Existing Materials and Substrates
- Installation Sequence, Quality Control, and Best Practices
- Tools, Materials Checklist, and Visual Checkpoints
- Monitoring, Maintenance, and Remedial Actions
- Conclusion
- FAQ
Hygrothermal Basics of Hempcrete
Hempcrete acts as a breathable composite rather than a rigid, air impenetrable shell. It buffers moisture by absorbing and releasing water vapor as conditions change. In retrofit work, its porosity and capillary action help manage humidity without storing excess liquid water.
Compared with some retrofit materials, hempcrete tends to moderate temperature swings and resist buildup of condensation within wall assemblies. Always check the label or manufacturer instructions to confirm breathability and moisture handling characteristics for your specific product and climate conditions.
Material properties that matter for detailing
Hempcrete’s unique material properties significantly impact how you detail junctions to avoid moisture traps and mold. Understanding these properties helps create durable, long-lasting retrofits.
- Porosity: Hempcrete’s open pore structure allows it to breathe, preventing trapped moisture. Look for high porosity ratings (e.g., 70-90%). Avoid materials with low porosity that can’t dry out.
- Hygroscopicity: Hempcrete absorbs and releases moisture from the air, buffering humidity levels. Specify materials with hygroscopic properties to maintain a stable indoor environment. Avoid materials that don’t absorb moisture, leading to condensation issues.
- Thermal mass: Hempcrete’s high thermal mass helps regulate temperature and reduces diurnal swings. Choose materials with good thermal mass for better comfort and energy efficiency. Low thermal mass materials may cause excessive temperature fluctuations.
- Capillary behavior: Hempcrete has low capillary rise, preventing moisture from wicking up the walls. Specify materials with low capillary action to avoid dampness and staining. High capillary materials can lead to moisture migration and damage.
- Bond strength: Hempcrete bonds well with common construction materials. Ensure chosen materials have compatible bond strengths for a robust, durable retrofit. Weak bond strengths may result in delamination and cracking.
Moisture balance and drying paths
Proper moisture management is crucial for hempcrete retrofits. Understanding vapor and air movement helps maintain a healthy, dry indoor environment.
Vapor diffusion: Hempcrete allows water vapor to pass through it, enabling walls to dry out. Ensure drying paths are uninterrupted by providing a vapor-open layer on the warm side of the insulation. Interstitial condensation can occur if vapor diffusion is restricted.
Air movement: Controlled air movement helps maintain moisture balance in hempcrete walls. Seal air leaks to prevent excessive inward or outward airflow, which can disrupt the wall’s equilibrium and lead to mold growth or excessive drying.
Proper detailing at junctions, such as roof-to-wall and wall-to-floor transitions, is essential for managing vapor and air movement. Incorrect detailing can trap moisture, leading to condensation and mold issues.
Common Moisture Risks in Retrofit Contexts
Moisture traps often form where existing assemblies have hidden cavities or abrupt changes in materials. Thermal bridging at studs or corners can create cold spots that promote condensation. Incompatibilities between new hempcrete layers and old membranes can block drying paths.
Detailing mistakes frequently occur at penetrations, junctions, and transitions where breathable layers are interrupted. Verify guidance from product data sheets or manufacturer instructions to ensure the intended vapor flow is maintained and not blocked by improper layering.
Thermal bridges and cold spots
When adding hempcrete to existing structures, you’ll create interfaces between new and old materials. These junctions can act as thermal bridges, allowing heat to escape faster than the surrounding areas.
Cold spots form at these interfaces because they lose heat quicker. This encourages condensation – moisture in the air cools, turns into liquid water, and gets trapped.
To avoid this, detail your retrofit carefully. Minimize thermal bridging by using continuous insulation where possible. Seal gaps and cracks to prevent cold air from entering.
Air leakage and driven moisture
Air can carry moisture deep into your retrofit assembly, wetting unexpected locations. This happens when there are gaps or holes in your air barrier – a common issue in retrofits.
Driven moisture can lead to mold growth and structural damage. It’s especially problematic with hempcrete because it loves to absorb water.
To protect your retrofit, ensure a continuous air barrier. Seal all penetrations – electrical outlets, plumbing fixtures, etc. Use compatible membranes that allow vapor diffusion but block air movement.
Key Detailing Principles to Avoid Moisture Traps
Keep junctions continuous with a clear path for vapor to migrate through the assembly. Prioritize breathable materials at the exterior face to avoid trapping moisture inside layers. Durability and serviceability should guide every connection and transition.
Plan for drying potential by avoiding sealed voids and rigid interfaces that resist movement. Check notes from the label or manufacturer instructions to confirm compatible material pairs and installation sequencing for your project.
Continuity of vapor-open layers and capillary breaks
Hempcrete breathes, so it needs to be able to dry out. Keep this in mind when detailing your retrofit.
Use breathable finishes like lime plaster or clay paint on the inside. These let moisture escape if it gets trapped.
On the outside, use a capillary break. This stops liquid water from getting in but lets vapor out. A simple way is to apply a thin layer of render or paint over the hempcrete.
Avoiding hidden cavities and isolated pockets
Enclosed voids behind hempcrete can trap moisture, leading to mold. Here’s how to avoid them:
- Through cavities: Don’t leave gaps between hempcrete and existing walls. Seal with expanding foam or a suitable adhesive.
- Back-ventilated reveals: Ensure reveals around windows and doors are open at the top and bottom to let moisture escape.
- Sealed ties: Use permeable ties for cladding, not sealed ones. Sealed ties can trap moisture behind them.
- Inspect during installation: Check for any gaps or voids as you install the hempcrete.
Regular checks and proper detailing will keep your retrofit dry and mold-free.
Junctions: Wall-to-Roof, Wall-to-Floor, and Openings
At roof junctions, maintain a continuous breathable envelope around the upper perimeter and avoid compressing hempcrete or backing membranes. For wall-to-floor transitions, ensure transfer details do not pin down moisture and keep paths open for drying. Openings should have properly detailed flashing that respects vapor openness on the correct faces.
Common failure modes include bridging gaps that trap moisture or creating rigid corners that crack and block airflow. Always verify that sealants, flashing, and supports align with breathable layer expectations per the product instructions or label guidance.
Wall-to-Roof Interfaces
The wall-to-roof interface is a critical junction where water ingress and moisture trapping can occur. Here’s how to manage it:
Insulation Continuity: Ensure the hempcrete insulation continues up into the roof, maintaining a continuous vapor-open layer.
Roof Overhangs: If your home has overhanging eaves, make sure they’re properly ventilated to prevent moisture buildup. Install baffles or create a vented airspace between the hempcrete and the roof sheathing.
Eaves Flashing: Use flashing at the wall-to-roof junction to direct water away from the hempcrete. This could be a simple drip edge or a more complex system depending on your roof design.
Windows and Door Reveals
Proper detailing at window and door openings is crucial to prevent moisture from being driven into the hempcrete zone:
Reveal Geometry: Design reveals with a sloped sill to facilitate water drainage. Avoid deep reveals that can trap moisture.
Flashing and Seals: Use flashing at the head, jambs, and sill of openings to direct water outwards. Seal around openings with breathable, flexible sealants to maintain the vapor-open layer while preventing air leakage.
Drainage Strategies: Ensure there’s a clear path for water to drain away from the hempcrete at the base of reveals. This could be a weep hole or a sloped sill that drains into a drip edge.
Wall-to-Floor and Basement Connections
The wall-to-floor junction is another potential moisture trap. Here’s how to detail it:
Hygroscopic Separation: If your home has a damp basement or slab, separate the hempcrete from these substrates using a capillary break like a polyethylene vapor barrier. This prevents moisture from being drawn into the hempcrete.
Slab Details: At concrete slabs, use a compressible foam or felt strip between the slab and the hempcrete to prevent capillary action while allowing for movement. Seal the top of the slab with a flexible sealant to prevent water intrusion.
Foundation Connections: If your home has a foundation, ensure there’s a clear path for any water that makes it through the foundation to drain away from the hempcrete. This could be a footing drain or a proper drainage plane at the foundation wall.
Interfaces with Existing Materials and Substrates
Compatibility between hempcrete and masonry, timber frames, or insulated panels can vary. Prepare surfaces to promote adhesion and avoid moisture pockets behind interfaces. Use checks such as edge conditions, flatness, and continuity of the breathable layer before committing to full installation.
Prep methods might include cleaning, priming compatible substrates, and confirming that any membranes or barriers allow vapor movement as intended. Rely on product data sheets or manufacturer instructions to guide substrate preparation and bonding choices.
Masonry and lime-based substrates
When hempcrete meets masonry or existing lime-based substrates, ensure a compatible interface to allow vapor movement. Here’s how:
Clean the substrate: Remove any dirt, dust, or loose material using a wire brush or compressed air.
Perform salt testing: Check for soluble salts in the existing masonry. If present, treat with a suitable salt inhibitor before applying render.
Use compatible lime renders: Apply a thin layer of lime-based render on both surfaces to create a uniform substrate and allow vapor movement.
Timber and metal frames
Hempcrete can be applied directly onto timber or metal frames, but proper detailing is crucial. Here’s what to do:
Fastener detailing: Use appropriate fasteners for the frame material (nails/screws for timber, screws/bolts for metal). Keep them well-spaced and drive them flush with the surface.
Apply corrosion protection: For metal frames, use a suitable primer or paint to protect against moisture-driven corrosion. For timber, apply a water-repellent preservative.
Install isolating layers: Use a vapor-open layer (e.g., breathable membrane) between hempcrete and the frame to prevent cold bridging and decay caused by trapped moisture.
Installation Sequence, Quality Control, and Best Practices
Outline a logical work sequence that preserves drying potential at each stage. Focus on clean, dry conditions before continuing and on minimizing disruption to existing moisture pathways. Implement on site checks that verify breathability at critical joints as you progress.
Quality control should emphasize staged drying and protection from weather during install. When in doubt, refer to the manufacturer instructions and label for recommended sequences and handling during interruptions.
Substrate preparation and moisture assessment
The first step is to ensure your substrate – the existing wall, floor, or roof you’re applying hempcrete onto – is ready. Here’s how:
Visual Check: Look for any signs of dampness, cracks, or loose materials. If found, address these issues before proceeding.
Moisture Assessment: Use a simple moisture meter to check the substrate’s moisture content. Aim for readings below 18%. If higher, wait until it dries out naturally or use dehumidifiers to speed up the process.
Application methods and compaction
Applying hempcrete correctly is crucial for a successful retrofit. Here’s how:
Placement: Use a suitable applicator tool to place the hempcrete mixture onto the substrate, ensuring it adheres well. Work from the bottom up.
Compaction Control: Compact the hempcrete gently but firmly using a hand tamper or similar tool. Avoid over-compacting as this can lead to voids and reduced insulation performance.
Avoid Voids: Keep an eye out for any air pockets or voids forming during application. Fill these immediately to maintain a continuous layer of hempcrete.
Weather protection and curing
Protecting your newly applied hempcrete from the elements is vital for proper curing. Here’s how:
Temporary Protection: Cover the hempcrete with a breathable membrane or plastic sheeting to keep rain out while allowing moisture vapor to escape.
Monitoring: Keep an eye on weather forecasts and adjust protections as needed. Avoid exposing fresh hempcrete to freezing temperatures or heavy rain.
Curing Time: Allow the hempcrete to cure for at least 28 days before removing any temporary protections. This gives it time to develop its full strength and insulation properties.
Tools, Materials Checklist, and Visual Checkpoints
Prepare a practical set of tools and materials that support careful layering and junctions. Include items that help you maintain clean edges, proper alignment, and continuous breathability at interfaces. Use visual checkpoints to confirm that each phase shows no gaps or trapped pockets.
Avoid brand endorsements; rely on the project’s product labels and data sheets to confirm compatible components. Stop and recheck if a joint looks sealed against vapor flow or seems to interrupt drying potential.
Tools and consumables
Before you start your hempcrete retrofit, ensure you have all the necessary tools and consumables at hand. This will save time and prevent delays.
- Tape measure: To accurately measure and cut materials.
- Level: To ensure walls are plumb and straight.
- Hammer: For tapping down hempcrete and breaking up old material.
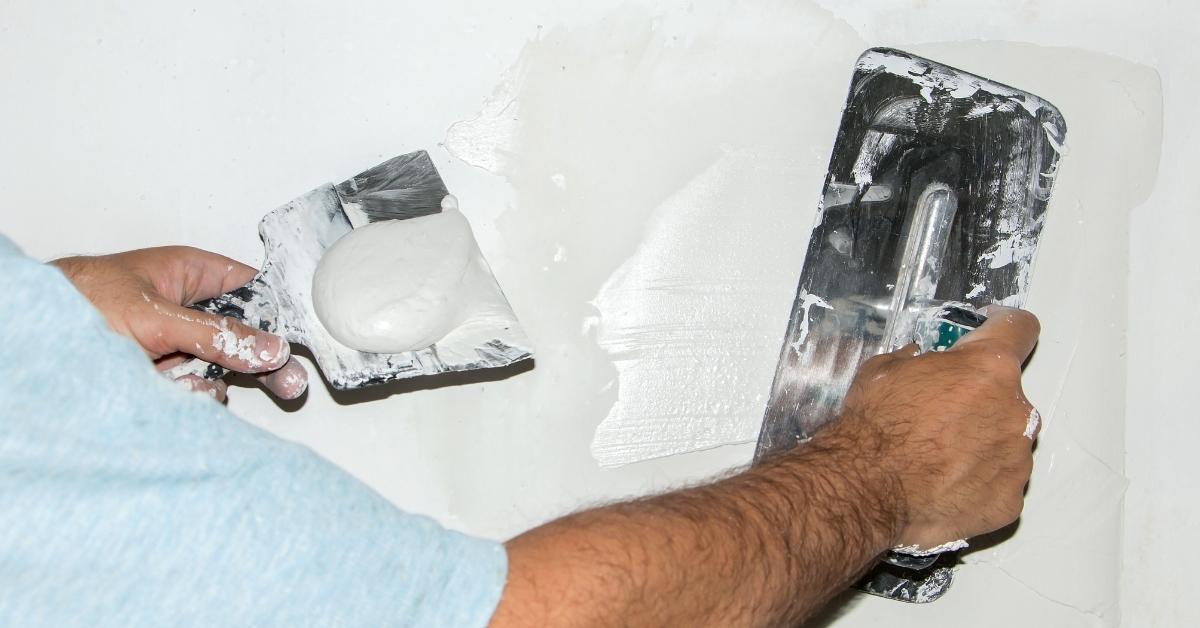
- Trowel: For spreading and smoothing the hempcrete mix.
- Gloves: To protect your hands from irritation caused by hempcrete.
- Goggles: To safeguard your eyes from dust and debris.
- Respirator: For protection against hempcrete dust.
- Wheelbarrow: To mix and transport the hempcrete mixture.
Quick rule: Always check your tools before starting work to ensure they’re in good condition. Missing or faulty tools can lead to poor workmanship and delays.
Visual checkpoints during construction
Regular visual inspections throughout the hempcrete retrofit process will help you identify potential moisture issues early, preventing mold growth and structural damage.
- Substrate inspection: Check for any signs of dampness or efflorescence on existing surfaces before applying hempcrete. What goes wrong if skipped: Moisture can be trapped in the wall system, leading to mold growth and reduced insulation performance.
- Hempcrete application: Ensure the mix is consistently applied at the correct thickness (around 50mm). What goes wrong if skipped: Inconsistent application can lead to cold spots and reduced thermal efficiency.
- Finishing stage: Check for any gaps or voids in the hempcrete that could allow moisture ingress. What goes wrong if skipped: Gaps can trap moisture, leading to mold growth and reduced insulation performance.
Quick rule: Always perform visual checks at key stages of construction. Early detection of issues saves time and money in the long run.
Monitoring, Maintenance, and Remedial Actions
Implement a sensible post install monitoring plan that flags rising moisture conditions early. Schedule periodic inspections and look for signs of condensation, staining, or unusual odors that may indicate moisture issues. Keep a simple log of observations for reference.
For maintenance, address any recurring moisture symptoms with non invasive remedial options first and verify effectiveness through follow up checks. Use non prescriptive remediation paths and consult product instructions or local guidance when choosing a course of action.
Signs of moisture and mold to watch for
Keep an eye out for these early warning signs that something’s not right with your hempcrete retrofit:
Musty odors can indicate mold growth, even if you can’t see it yet. Act fast – it could be spreading unseen.
Check for water stains or discoloration on walls, ceilings, or floors. These could signal moisture intrusion.
Feel your walls and floors. If they’re cold or damp to the touch, that’s a red flag. Hempcrete should be dry and warm.
Remediation strategies and temporary fixes
If you spot moisture or mold, act quickly to prevent further damage:
Contain the area using plastic sheeting to stop spores from spreading. Wear a mask and gloves for safety.
Use dehumidifiers and fans to dry out the affected area. Keep them running until moisture levels are back to normal.
For temporary fixes, consider using silver or copper antimicrobial paint to inhibit mold growth while you plan long-term repairs. But remember, this isn’t a permanent solution.
Conclusion
Protecting the structure and your investment comes down to doing the work safely, avoiding moisture traps, and keeping hempcrete performance visible in the long run. Focus now on clear, practical steps that prevent damage, improve insulation, and stay looking right for years to come.
First, check moisture risk and hygrothermal performance in the retrofit areas, then inspect all junctions—wall-to-roof, wall-to-floor, and openings—followed by interfaces with existing materials, and then confirm your installation sequence and quality control markers before final monitoring and maintenance. Do this in a steady, methodical order, test small areas first, verify airflow and drying potential, and document results with the visual checkpoints you’ve already set up.
Common mistakes to avoid are rushing the detailing at joints, skipping the protective barrier or proper drying paths, and assuming the hempcrete will self-seal leaks. Safety rules are simple: never work behind closed spaces without ventilation, never abandon moisture checks after a pass, and never cover up a suspect area without testing it again after remediation.
If the project would push past your comfort zone—especially dealing with existing substrates, complex junctions, or repeated damp spots—call in a professional. Ground yourself with a final, hands-on review, stay focused on safety, and move forward with confidence toward a durable, mold-free retrofit that looks right and performs well.
FAQ
What signs indicate hempcrete retrofit is trapping moisture and could mold?
Look for musty smells, persistent damp spots, or staining on walls. Bubble or peeling paint and soft, crumbly plaster near hempcrete joints also raise flags.
If you see condensation on surfaces that won’t dry out after a reasonable period, pause work and recheck ventilation and detailing. Do not prise open or dry out by guesswork; verify with a moisture meter and manufacturer guidance if available.
How can I avoid creating cold spots that condense moisture in hempcrete retrofits?
Seal joints and penetrations well, and keep interior air moving without blasting hot air directly at hempcrete surfaces. Use proper vapor and air barriers where the detailing calls for them as per manufacturer instructions or local rules.
Match rough openings and transitions with even backing and continuous layers so there are no gaps that trap humidity. If unsure, consult the product label or supplier guidance before proceeding.
What should I do about existing substrates that feel damp or have mold?
Address active moisture sources first and dry out the substrate as recommended by the product instructions. Do not bury damp substrate behind hempcrete layers without proper remediation.
Inspect for leaks, capillary rise, or poor ventilation and fix those issues. Use safe remediation steps and follow any local guidance or manufacturer directions for cleaning and treatment.
How do I verify I’m detailing penetrations and junctions correctly?
Plan and mock up key joints before embedding hempcrete. Use compatible sealants, tapes, and mesh as advised by the product instructions and substrate requirements.
Check that all penetrations—pipes, wires, and vents—are sealed to prevent moisture entry and that any flashing or edge details shed water away from the hempcrete. If in doubt, ask the supplier for installation notes.