
Introduction
Proper lath termination at stucco-to-wood interfaces prevents water intrusion and related damage.
This matters because stucco and wood respond differently to moisture and movement, so detailing must accommodate expansion, contraction, and flashing.
You will learn how to detail flashing, choose compatible sealants and fasteners, and apply practical steps to create a durable, energy-efficient transition.
Key takeaways
- Ensure lath terminates above grade and behind flashing to shed water.
- Use corrosion-resistant fasteners and compatible metals to prevent electrochemical issues.
- Install metal flashing with proper overlap and continuous sealant at transitions.
- Apply proper beads, reveals, and offsets to control movement and cracking.
- Plan for differential movement using flexible sealants and expansion joints.
- Retrofit approach: address existing stucco-to-wood with repair lath and flashing.
Table of Contents
- Introduction
- Key takeaways
- Overview and purpose of proper lath termination
- Materials and compatibility: lath types, fasteners, and accessory metals
- Flashing, moisture management, and sealant strategy
- Termination details and profiles (beads, reveals, and offsets)
- Allowing for differential movement and crack control
- Retrofit and repair strategies for existing stucco-to-wood junctions
- Installation step-by-step: a DIY-friendly procedure
- Inspection, maintenance, and longevity tips
- Conclusion
- FAQ
Overview and purpose of proper lath termination
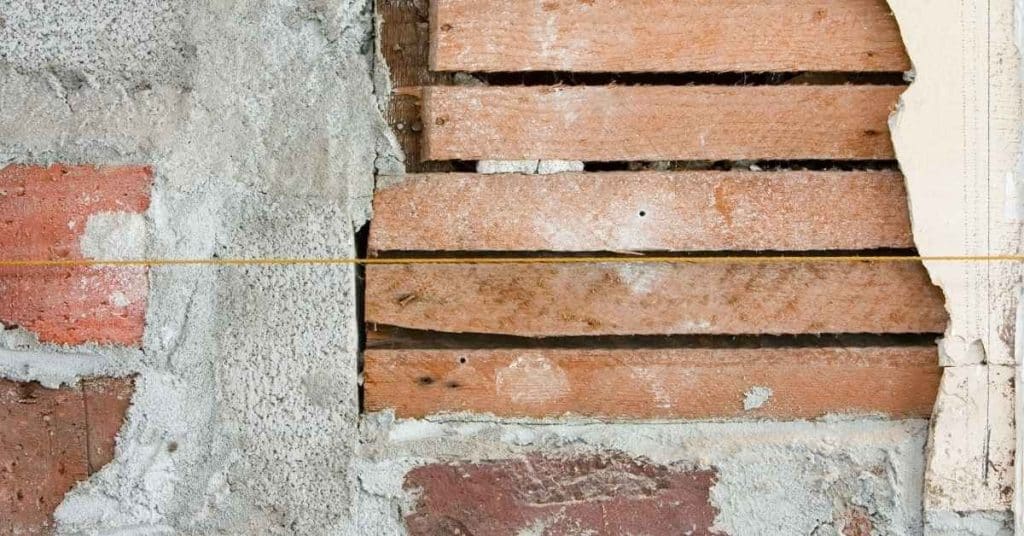
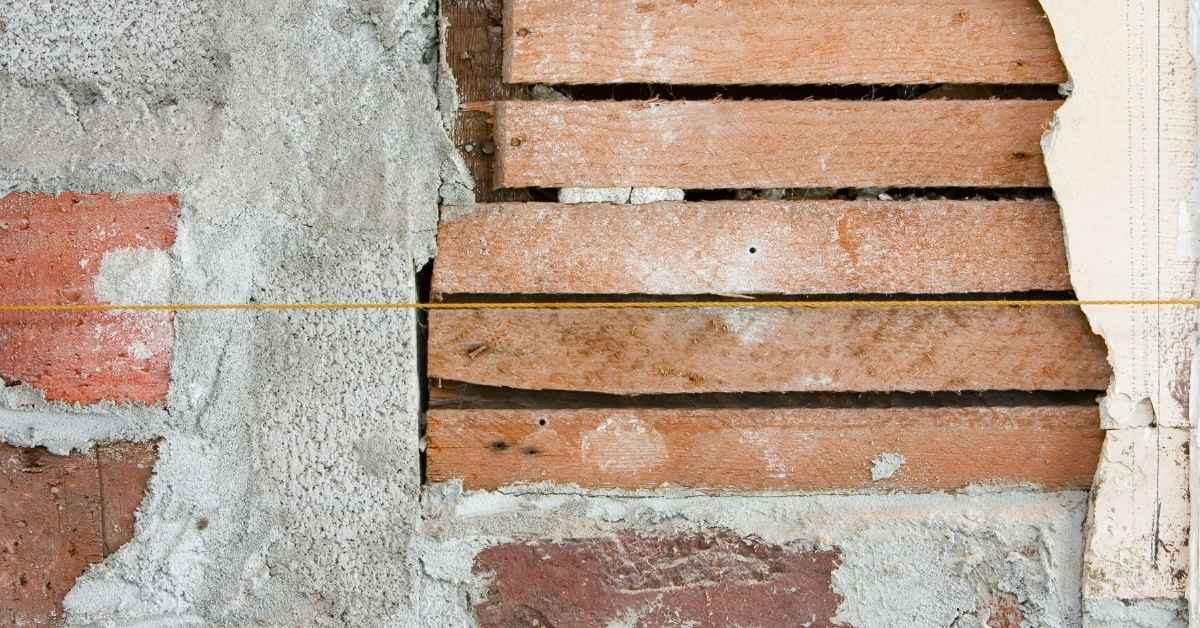
Lath termination is the correct stopping point where the stucco meets the wood frame and lath. If that edge is not properly finished, water can wick behind the stucco and freeze, causing cracks and loose stucco. A proper transition blocks moisture, prevents detachment, and keeps the wall durable.
This matters on a DIY jobsite because sloppy terminations invite rot, mold, and costly repairs. Stick to code requirements for flashing, weep systems, and a clean transition from stucco to wood. Good terminations save you time and money by keeping the wall durable and weather resistant.
Common failure modes at stucco-to-wood transitions
The area where stucco meets wood is a weak spot. You need to watch out for rusted fasteners, which can cause the whole thing to fall apart over time. Bond failure happens when the stucco doesn’t stick well to the wood due to poor preparation or bad materials.
Differential movement between stucco and wood is another big issue. Wood moves more than concrete as it dries out, so you need proper expansion joints to prevent cracks. Also, make sure there’s no capillary water entry where moisture can sneak in through small gaps, leading to rot or mold issues.
When transitioning from stucco to wood, always use the right lath and fasteners that won’t rust easily. Check your base compaction before you start, and ensure a good seal around any openings like windows or doors to keep water out.
When to consult code and a professional
If you’re working on a multi-story building, dealing with historic structures, or in areas prone to high winds, it’s crucial to check local codes. These conditions often require specific lath termination methods that aren’t covered by general DIY guides. Ignoring these can lead to serious structural issues.
Insurance requirements also play a role. If your project involves stucco-to-wood transitions and you’re unsure about compliance, it’s best to hire a professional. They know the ins and outs of local regulations and can ensure your work meets all necessary standards without risking insurance coverage.
Remember, proper lath termination isn’t just about aesthetics—it’s about safety. Don’t cut corners on this part; it could save you from costly repairs or worse down the line.
Safety and code notes for DIYers: • Wear eye protection, gloves, and a dust mask when cutting or fastening. • Use corrosion-resistant fasteners and lath ties appropriate to your climate and substrate. • Verify flashing overlaps, waterproofing barriers, and proper weep screed placement with your local building department or a licensed pro before starting. • Schedule inspections as required by your jurisdiction and keep documentation of products and methods used.
Code and maintenance snapshot: • Ensure weep systems are unobstructed and vented to allow moisture escape. • Flashing should extend behind the lath at openings and terminate above the stucco to shed water away from the wood. • Use a compatible waterproofing or barrier under the stucco where specified by local codes. • Maintain at least a 2- to 3-inch clearance above grade or planters to reduce moisture exposure to wood framing. • Regularly inspect for rust, cracks, or moisture intrusion after heavy rains or freeze-thaw cycles.
If you’re unsure about local requirements, contact your building department for a quick checklist relevant to your climate and wall assembly.
Materials and compatibility: lath types, fasteners, and accessory metals
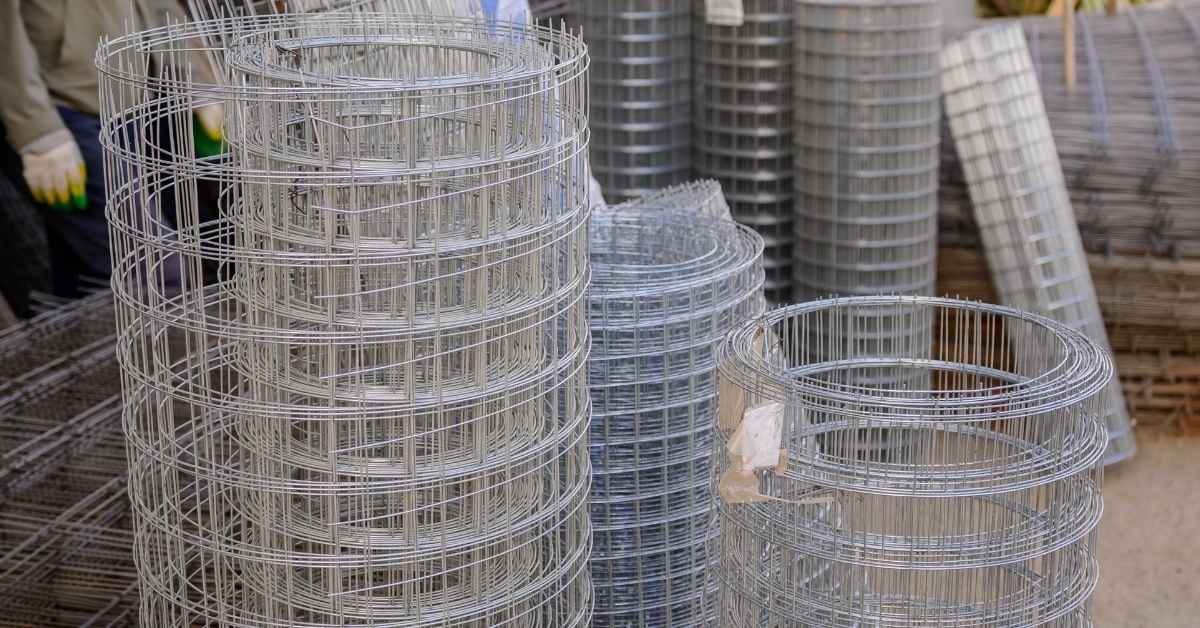
Use expanded metal or self-furring lath with corrosion-resistant fasteners for wood substrates. This setup keeps the lath secure and prevents rust or loose plaster later.
Choose accessory metals like termination beads and Z-flashing that match the system and wood coating you plan to use. Avoid mixing incompatible metals, and stay with compatible coatings to prevent corrosion and failure down the line.
Choosing the right lath for wood substrates
When it comes to attaching lath over wood, you’ve got a few options: galvanized, stainless steel, and zinc-coated. Galvanized lath is your go-to if cost is a concern; it’s cheaper but can rust faster in wet climates. For durability and longevity, especially in coastal areas or where salt spray might be an issue, stainless steel lath is the way to go—it won’t corrode easily. If you’re looking for something between the two, zinc-coated lath offers a good balance of cost and protection against corrosion.
Regardless of which type you choose, make sure it’s compatible with your wood substrate. Check that the fasteners you use are appropriate for both the lath material and the wood to prevent any issues down the line. Remember, proper attachment is key to ensuring a strong bond between the concrete and the underlying structure.
Fastener selection and spacing
Pick your fasteners wisely. Stainless steel is the best for durability, but hot-dipped galvanized will do in a pinch if you’re on a budget. Make sure they’re long enough to grip into solid wood without splitting or pulling through. For most lath, 1-1/2 inch fasteners should be fine.
Spacing is key. Don’t go overboard and hammer in too many nails; it’s a waste of time and material. A good rule is to space your fasteners every 6 inches along the edges and mid-span, but check with your lath type for specifics. Over-nailing can weaken the wood and make your job harder.
Remember, solid base means better hold. Before you start nailing, check base compaction. If the ground is soft or uneven, your work won’t last long. Take a moment to level things out and ensure everything’s stable before you begin securing lath.
Flashing, moisture management, and sealant strategy
Flashings must be continuous at the stucco-to-wood junction. Pair flashing with a weather-resistive barrier and proper sealants to shed water and allow drainage and venting. Do not skip this detail.
This setup matters on real jobs. It keeps wood dry, reduces mold risk, and saves you trouble later. Stick to the detail, and you’ll avoid leaks and bigger fixes.
Flashing details and installation order
Start with your water-resistive barrier (WRB) over the wood sheathing. Make sure it’s smooth and even, no wrinkles or gaps. Next, install flashing under the lath to catch any moisture that sneaks in.
The termination bead goes next, right where the WRB meets the edge of the wall. This seals off the top of your barrier so water can’t get underneath. Don’t forget to shingle layers as you go—WRB over flashing, then siding over WRB. This directs water out and down.
Remember, no shortcuts here. If you skip steps or install things backwards, you’re asking for leaks later on. Take your time and do it right the first time.
Sealants and backer materials
The right sealant and backer rod can make all the difference between a job that lasts decades or fails within months. Choose wisely to avoid costly repairs down the line.
- Silicone Sealant: Used for waterproofing joints, especially around windows and doors. Look for UV resistance on the label; it’s crucial in direct sunlight areas. Avoid using silicone where paint won’t stick well afterward. Pro tip: Use a caulk gun with a smooth trigger for better control.
- Silicone-Butyl Sealant: Great for metal and glass joints, offers flexibility and durability. Check the label for compatibility with both materials; it can be pricey but worth it. Avoid in areas prone to movement or expansion. Pro tip: Apply when temperatures are moderate (50°F – 90°F).
- Acrylic Sealant: Ideal for interior and exterior wood joints, easy to work with and paint over. Ensure the label states it’s mold-resistant; this is key in humid climates. Avoid using on porous surfaces like concrete without a primer. Pro tip: Mix small batches as needed since it dries quickly.
- Elastomeric Sealant: Best for large gaps and expansion joints, offers excellent flexibility. Look for high elongation ratings (at least 200%) to handle movement without cracking. Avoid in areas with frequent temperature swings; it can shrink or crack over time. Pro tip: Use a backer rod to ensure proper sealant thickness.
- SBR Sealant: A budget-friendly option for general-purpose sealing, works well on most materials except metal and glass. Check the label for UV resistance; it’s often lacking in cheaper brands. Avoid using where aesthetics matter since it can yellow over time. Pro tip: Store unopened tubes in a cool place to extend shelf life.
- Backer Rod: Used behind sealants to create the right depth and prevent excessive use of caulk. Choose foam or fiber types based on joint width; foam is cheaper but less durable. Avoid using too thick a rod, which can cause sealant failure over time. Pro tip: Cut rods with a utility knife for precise fit.
Pro tip: Always test sealants in an inconspicuous area first to ensure it matches your project needs and looks good after curing.
Termination details and profiles (beads, reveals, and offsets)
Termination details matter. Use the right bead or flash to seal stucco where it meets wood trim, soffits, or siding. J-bead, casing bead, stop bead, and Z-flash each have a purpose; choose based on which direction the water runs and where the trim sits.
The right profile stops water leaks and prevents cracking at joints. It makes the job last longer and saves you repairs later. Fit each bead or flash to the exact edge, and don’t skip this step.
Vertical and horizontal termination best practices
When dealing with vertical terminations at doors and windows, make sure you have a drainage gap of at least 1/4 inch. This prevents water from pooling around the edges. Also, ensure that your concrete is properly supported by checking base compaction before pouring.
For horizontal laps like sill lines, maintain a consistent slope to direct water away from the building. A minimum of 1/4 inch per foot drop is ideal for effective drainage. Avoid flat joints where water can sit and cause damage.
Remember, proper termination details are crucial for long-lasting concrete work. Don’t skimp on these areas or you’ll regret it later when leaks start to appear.
Handling trim, fascia, and architectural features
When you’re dealing with wood trim, fascia boards, or other decorative elements around your concrete work, make sure everything stays watertight. Remember the beads, reveals, and offsets we covered earlier? You need to apply those principles here too.
First off, check how well your base is compacted before you start installing any trim or architectural features. If it’s not solid, water will find its way in behind the wood and cause all sorts of problems down the road. Use a good quality sealant around these elements to keep moisture out and prevent rot.
Don’t forget about proper flashing techniques when working with vertical terminations. Flashing should be installed under your trim pieces so that water runs away from your concrete work, not into it. This is crucial for long-term durability and avoiding costly repairs later on.
Allowing for differential movement and crack control
Stucco and wood move at different rates. Thermal expansion and substrate shifts require movement joints and proper backer materials. Use control joints and movement joints to prevent cracks.
If you skip joints or pick the wrong backer, cracks show up fast and repairs cost more. Joints let each surface slide without tearing the stucco. Do it right on day one, or you’ll regret it later.
Placement and sizing of movement joints
Movement joints are a must for preventing cracks in your concrete slab. You need to place them every 40 feet, but check local codes as they might be stricter. Also, put joints at any point where the concrete meets other materials like brick or wood.
The width of your joint should match the thickness of your slab. For a 4-inch thick slab, aim for a 1/2 inch wide joint. This helps prevent water from seeping in and causing issues later on.
Don’t forget to place joints near doorways or other openings where stress points can form. Make sure your joints are straight and clean, using a jointer tool right after pouring the concrete while it’s still wet. And remember, proper base compaction is key before you even start laying down your slab.
Preventing cracking at the transition
When you’re dealing with transitions, like where a concrete slab meets a wall or curb, it’s crucial to handle them right. Don’t forget your joints and lath placement from earlier sections; they play a big role here too. Make sure you’ve got reinforcement bars placed at these points to help distribute stress.
At transitions, also check base compaction before pouring concrete. A weak or uneven base can lead to cracking down the road. If there’s any chance of differential movement between materials, like a wood deck and concrete, use an expansion joint to allow for that movement without breaking your slab.
Lath overlap is another key point. Make sure lath extends at least 4 inches into adjoining surfaces or over joints. This helps tie everything together and reduces stress concentrations where cracks are likely to start.
Retrofit and repair strategies for existing stucco-to-wood junctions
Retrofitting and repairing stucco-to-wood junctions starts with a careful inspection and solid temporary fixes, then a durable, proper repair. If the termination or siding is failing, don’t skip steps—seal, protect, and rebuild for a lasting junction.
Missing a good seal invites rot and costly fixes later. A proper approach keeps water out, preserves framing, and makes later stucco or siding work easier for you.
Diagnosing problems: what to look for
When inspecting your stucco-to-wood junctions, start by checking the staining and efflorescence. These are often early signs of water penetration. Look closely at corners and around windows where water tends to accumulate.
Bulging areas in the stucco or wood can indicate structural issues due to moisture damage or insect infestation. Pay special attention to nails; if they’re rusted, it’s a clear sign that water is getting in behind your stucco. This weakens the structure and invites more problems.
Inspect the wall sheathing for any signs of insect damage. Termites and carpenter ants love damp wood. Also, check the condition of your water-resistive barrier (WRB). If it’s compromised, water can seep into your walls causing major issues down the line.
Step-by-step repair approaches
This sequence will guide you through repairing stucco-to-wood junctions, ensuring a watertight seal and preventing future damage.
- Action: Remove old caulk around the wood frame.
Reason: Old caulk can trap moisture and cause rot.
Check: The area should be clean and dry, with no residue left behind.
Warning: If the wood is soft or discolored, stop and consult a professional to assess for decay.
Cure time: No wait needed. - Action: Install new flashing over the wood frame.
Reason: Flashing directs water away from the wood.
Check: The flashing should be properly positioned and securely fastened without gaps.
Warning: Improper installation can lead to leaks, so ensure it’s done right or seek professional help.
Cure time: No wait needed. - Action: Apply new lath over the flashing where stucco meets wood.
Reason: Lath provides a base for the stucco to bond properly.
Check: The lath should be evenly spaced and securely attached without gaps or overlaps.
Warning: If you notice any loose spots, address them immediately before applying stucco.
Cure time: No wait needed. - Action: Apply new caulk around the wood frame after lath installation.
Reason: Caulk seals gaps and prevents water intrusion.
Check: The caulk should be smooth, continuous, and properly sealed at both ends.
Warning: If you can see or feel any breaks in the seal, reapply immediately to avoid leaks.
Cure time: Wait 24 hours before applying stucco. - Action: Apply new stucco over the lath and caulked areas.
Reason: Stucco protects against weather damage and provides a durable finish.
Check: The stucco should be smooth, without cracks or gaps around the wood frame.
Warning: If you notice any imperfections that could lead to water penetration, correct them immediately or consult an expert.
Cure time: Wait 28 days before painting or applying finishes.
Pro tip: Always check for proper drainage and slope away from the wood frame to ensure water flows correctly. This prevents future issues with moisture buildup.
Installation step-by-step: a DIY-friendly procedure
This section walks you through terminating lath at wood in clear, step-by-step order. Start with prep, then WRB or shingles, then attach flashing. Finally secure the lath, install beads, scratch and brown coats, and seal.
Skip a proper wrap or uneven beads and you invite leaks and cracks. Following the sequence keeps water out and helps the finish last longer, especially for DIYers who work alone or on a tight schedule. Taking time to do it right saves you call-back work.
Step-by-Step Installation Process
This sequence will guide you through installing your concrete project, ensuring everything is done correctly and safely.
- Action: Lay out forms for the pour area.
Reason: Ensures the concrete has a proper shape and height.
Check: Forms should be level and plumb with no gaps or leaks.
Professional Call: If you can’t get your forms straight, call in help to avoid wasted materials. - Action: Pour concrete into the form and spread it evenly using a shovel.
Reason: Prevents uneven settling and ensures all areas are covered.
Check: Surface should be smooth with no visible air pockets or voids.
Professional Call: If you see large cracks forming, stop pouring and consult an expert. - Action: Use a screed board to level the concrete surface.
Reason: Ensures even thickness across the entire pour area.
Check: Surface should be flat with no high or low spots visible.
Professional Call: If you can’t get it perfectly straight, call in a pro to finish. - Action: Float and trowel the surface for texture and smoothness.
Reason: Creates the desired look while sealing the concrete against water damage.
Check: Surface should feel firm but not overly hard, with a consistent texture.
Professional Call: If you can’t achieve the right finish, it’s best to call in someone who can. - Action: Install control joints or expansion strips as needed.
Reason: Prevents cracking by allowing controlled movement of the concrete.
Check: Joints should be straight and evenly spaced according to your plan.
Professional Call: If you’re unsure about placement, seek professional advice. - Action: Cover the poured area with plastic sheeting or straw for curing.
Reason: Keeps moisture in to allow proper hardening of the concrete over time.
Check: Sheet should be tight and sealed around edges, no gaps visible.
Professional Call: If you’re unsure about the curing process, consult an expert.
Pro tip: Always check weather forecasts before starting your pour to avoid working in extreme conditions that could affect concrete quality.
Tools and materials checklist
Use this checklist before you start your concrete project to ensure you have everything needed for a smooth installation.
- Safety glasses: Check that they fit snugly over your eyes. What goes wrong if you skip this: You risk eye injury from flying debris.
- Hard hat: Ensure it fits comfortably and securely. Skipping this can lead to head injuries from falling objects.
- Masonry saw: Confirm the blade is sharp and securely attached. A dull or loose blade can cause poor cuts and accidents.
- Concrete vibrator: Test that it’s functioning properly by plugging it in and checking for vibrations. Skipping this check could result in weak concrete due to air pockets.
- Formwork materials: Verify the lumber is straight, free of knots, and fits your project dimensions. Poor quality formwork can lead to leaks or misshapen pours.
- Rebar: Check that it’s clean and rust-free with no sharp edges. Rusty rebar can weaken concrete over time; sharp edges are a safety hazard.
- Concrete mix bags: Ensure you have enough for your project, checking the bag weight against your planned volume. Shortage of materials means delays or extra trips to the store.
- Trowel and float: Confirm they’re clean and in good condition with no cracks or missing pieces. Damaged tools can leave marks on finished concrete.
- Level: Test that it’s accurate by checking a flat surface. An inaccurate level will result in uneven surfaces.
- Wheelbarrow: Ensure the tires are inflated and wheels turn freely without wobbling. A malfunctioning wheelbarrow can slow down your work significantly.
- Screed board: Check that it’s straight with no warping or damage. Warped screed boards lead to uneven concrete surfaces.
- Water supply: Confirm you have a reliable water source nearby and enough hoses to reach all areas of your pour. No water means no mix, leading to delays.
Quick rule: Always double-check safety gear and tools before starting work to avoid injuries or project setbacks.
Visual checkpoints during installation
Use this checklist to verify your work is up to snuff before moving on to the next step.
- Lath tightness: Ensure lath is securely attached and evenly spaced. Check by gently pulling at it; it should not move more than a quarter inch. Skip this, and you risk loose or missing lath causing cracks in your concrete.
- Bead alignment: Confirm beads are straight and level with each other. Use a level to check for accuracy. Misaligned beads can lead to uneven surfaces.
- Flashing overlap: Verify flashing overlaps by at least 3 inches. Measure the overlap; less than this invites water damage.
- Seam sealing: Inspect seams for proper sealing with caulk or sealant. Look for gaps and ensure they are filled completely. Unsealed seams can cause leaks.
- Rebar spacing: Check rebar is evenly spaced according to your plan. Measure the distance between bars; uneven spacing weakens concrete structure.
- Form stability: Ensure forms are stable and level. Tap them with a hammer to check for loose connections. Unstable forms can shift, causing misalignment.
- Concrete depth: Confirm poured concrete meets your specified depth. Use a ruler or measuring tape; too shallow means weak structure.
- Drainage slope: Verify the surface slopes correctly to direct water away from critical areas. Check with a level and ensure it’s at least 1/4 inch per foot of run.
Quick rule: If you can’t measure or see it, double-check your work before moving on.
Inspection, maintenance, and longevity tips
Seasonal and climate-specific considerations
This checklist should be used before each season to ensure your concrete surfaces are ready for the upcoming weather conditions.
- Freeze-thaw cycle check: Inspect joints and cracks. Confirm they’re filled with a sealant or expansion material. Skipping this can lead to spalling and cracking.
- Salt exposure test: Look for signs of corrosion around metal fixtures. Ensure concrete is sealed against saltwater splash. Neglecting this causes rapid deterioration in coastal areas.
- High-humidity inspection: Check for efflorescence (white powder) on surfaces. Confirm proper drainage and ventilation to prevent it. Ignoring this can lead to structural weakening over time.
- Winter prep: Apply de-icing salts sparingly or use sand instead. Verify that walkways are clear of snow and ice. Not doing so increases the risk of concrete damage from salt exposure.
- Spring cleaning: Clear out any debris from cracks and joints. Ensure proper drainage to avoid pooling water. Skipping this can lead to erosion and cracking during heavy rains.
- Summer maintenance: Inspect for signs of thermal expansion or contraction stress. Confirm that control joints are properly placed. Missing this step could result in large cracks forming.
- Fall preparation: Seal concrete surfaces before winter. Check for any repairs needed from summer use. Not sealing can expose the surface to harsh winter conditions.
- Coastal salt spray: Inspect areas near ocean for signs of corrosion or discoloration. Confirm that protective coatings are still intact. Neglecting this leads to premature concrete failure in coastal regions.
Quick rule: Always inspect and maintain your concrete surfaces seasonally to prevent costly repairs later on.
Documentation and warranty considerations
This checklist should be used immediately after completing your concrete project to ensure all necessary documentation is in order for future reference.
- Take photos: Capture installation steps. Verify by reviewing images for clarity and completeness. Skip this, and you won’t have proof of initial condition.
- Gather data sheets: Collect material specifications from suppliers. Confirm by checking dates and product codes match your project. Omitting these can delay warranty claims.
- Note dimensions: Measure all concrete elements accurately. Check with a tape measure for exactness. Mis-measurements lead to costly corrections later.
- Record dates: Document start and finish times of work. Confirm by cross-referencing calendar entries. No record means no timeline for warranty issues.
- Sign off on quality: Have a professional inspect your work before finalizing. Verify with signed inspection forms. Bypassing this step can void warranties.
- Keep receipts: Save all purchase and labor invoices. Confirm by organizing them in chronological order. No proof of payment means no warranty coverage.
- Store warranties: Keep copies of manufacturer warranties. Check that they are legible and up-to-date. Losing these documents can nullify your protection.
- Note any issues: Document any problems found during inspection. Confirm by writing detailed descriptions. Omitting details complicates future warranty claims.
Quick rule: Always document and store everything related to your concrete project for easy access when needed.

Conclusion
Get this right and your stucco-to-wood junction stays dry, looks sharp, and wears well for years. The core idea is sound lath termination paired with proper flashing, moisture control, and controlled movement so you don’t invite cracks or leaks.
Now, check and act in this order: confirm materials and fasteners are compatible, install the correct flashing and sealant strategy, set the termination profiles with proper beads or reveals, plan for differential movement, address any retrofit needs, follow a simple DIY installation step-by-step, and then inspect and maintain regularly to catch issues early.
Common mistakes to avoid are using incompatible metals or coatings, skipping flashing or sealant, ignoring movement gaps, and overtightening fasteners that pin the system. Safety rules are simple: work at a steady pace, test changes in a small area first, wear eye and hand protection, and don’t force components that don’t fit. If you’re unsure about moisture paths or complex connections, pause and reassess rather than press on blind.
If you encounter wood rot, large patches, high elevations without proper fall protection, or awkward geometry you can’t safely fix from ground level, call a pro. With careful work, clear steps, and proper components, you’ll finish strong and enjoy a durable, neat junction that resists water and movement for the long haul.
FAQ
Why do you need proper lath termination when transitioning from stucco to wood?
Different materials move and breathe at different rates. If you don’t handle the transition right, water gets trapped and rot starts fast. A clean, flashing-backed seam prevents leaks and wood rot.
What is the simplest way to seal stucco to wood without leaks?
Use a flashing strip and appropriate sealant at the joint. Tie the stucco to the wood with a compatible weather-resistant barrier. Don’t skip the flashing or you’re inviting water trouble.
Should I use metal lath or stucco mesh at the transition?
Metal lath stays rigid and seals better at a dissimilar material seam. If you’re unsure, a pro can advise, but avoid cheap substitutes. Proper lath finish means fewer call-backs for leaks and cracks.
What mistakes should I avoid during lath termination at this joint?
Avoid leaving gaps, not flashing the top edge, or using the wrong caulk. Don’t bond stucco directly to wood without a proper barrier. These mistakes lead to water infiltration and wood rot fast.