

Introduction
Cracks in a concrete driveway signal potential damage and should be evaluated and repaired to prevent further issues.
You’ll learn how to spot typical crack patterns, judge when a repair is necessary, and follow practical, step-by-step methods to fix them safely.
Key takeaways
- Identify crack type by width, pattern, and location to choose repair.
- Assess drainage and soil movement as root causes behind most cracks.
- Wear PPE, seal off area, and follow safety steps before starting.
- Use appropriate repair method per crack type to ensure durability.
- Compare DIY costs vs pro, including time, materials, and permits.
- Schedule seasonal maintenance to prevent future cracks and water damage.
Table of Contents
- Introduction
- Key takeaways
- Types of Driveway Cracks and What They Mean
- Common Causes — How to Diagnose Root Problems
- Assessing Severity: DIY Inspection Steps and When to Call a Pro
- Tools, Materials, and Safety Checklist
- Step-by-Step DIY Repair Methods (by crack type)
- Cost Guide & Time Estimates — DIY vs Professional
- Preventing Future Cracks — Maintenance, Drainage & Seasonal Tips
- When you need professional help
- Conclusion
- FAQ
Types of Driveway Cracks and What They Mean
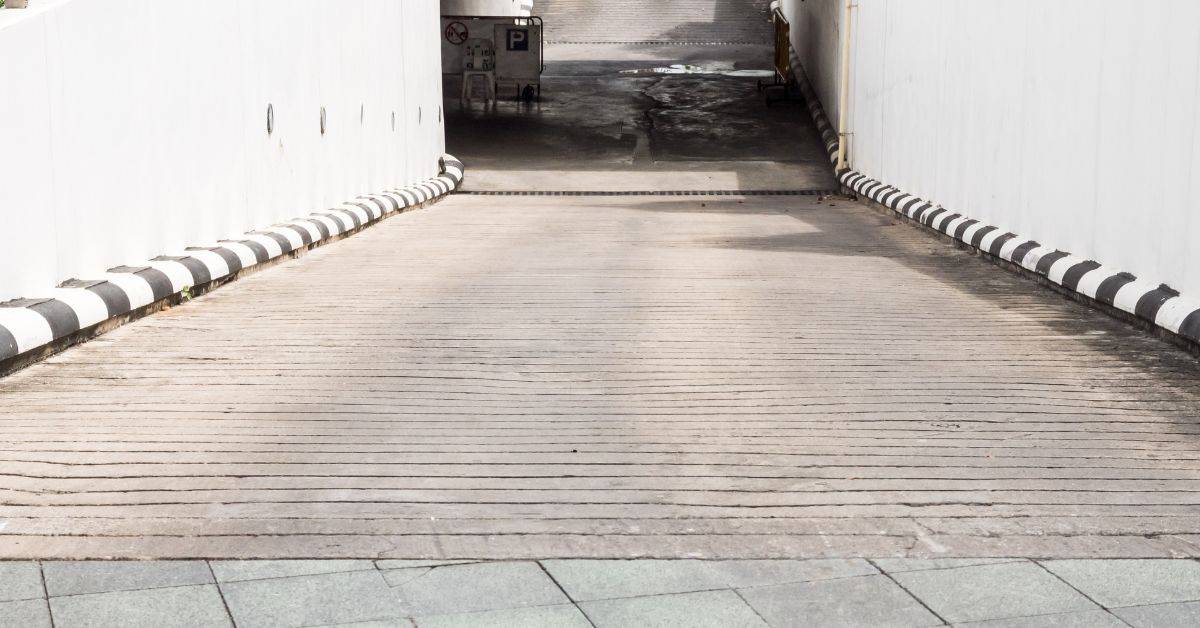
Driveway cracks come in a few clear flavors, and telling them apart matters for what you do next. Shrinkage cracks run across the surface as the concrete dried, settlement cracks tunnel along lines from soil movement, expansion or heave cracks push up or separate edges, and stair-step or diagonal cracks trace a pattern of blocks. Hairline cracks stay thin and often stay in one place, while wider cracks or those that keep widening signal more serious movement or load issues that deserve closer look.
Knowing the cues helps you decide if you can DIY a fix or need a pro. Start with simple, front-line actions for minor, non-progressive cracks—clean them and seal or use a simple filler—while keeping an eye on progression, width, and angle. If cracks are wide, stair-stepped, or spreading, note the pattern and talk to a professional for stabilization, epoxy or urethane injections, or full slab repair; along the way, address drainage, joints, and seasonal timing to prevent repeat trouble.
Hairline, Crazing, and Crusting Cracks
These are the fine cracks you’ll often see on a new concrete driveway. They’re usually cosmetic issues, but they can let water in and cause bigger problems down the road.
Their formation is mostly due to shrinkage as the concrete dries too quickly or unevenly, especially if it’s exposed to direct sunlight or wind. Crazing cracks are a network of fine lines that appear on the surface, while crusting happens when the top layer dries faster than the bottom.
While these cracks don’t usually affect structural integrity, they can still let water seep in and cause spalling over time. It’s best to clean them out thoroughly and seal them up as soon as possible to prevent further damage.
Shrinkage, Re-entrant Corner, and Surface Pattern Cracks
These cracks are common where concrete has dried unevenly or in corners that have sharp angles. They usually appear along the edges of your driveway or at re-entrant corners.
The main cause is shrinkage as the concrete dries, pulling apart at weak points like corners and edges. Surface pattern cracks can also form due to improper curing techniques or too much water on top layers.
Short-term, these cracks are mostly cosmetic but can grow over time if not addressed. They don’t typically pose a structural threat unless they start showing signs of movement or widening significantly. For now, focus on cleaning and sealing them to keep moisture out.
Structural, Settling, Heaving, and Overloading Cracks
These cracks are serious business. They indicate major issues like soil settling or heaving due to freeze-thaw cycles, overloading from heavy vehicles, or improper design.
If you see wide cracks with visible displacement, sinking sections of the driveway, or diagonal cracks that run across the slab, it’s time for a professional assessment. These signs mean there’s significant movement and potential structural damage.
Immediate action is critical here to prevent further deterioration. Temporary stabilization might buy some time, but long-term fixes often require epoxy injections or even full slab replacement by pros. Don’t wait—call in the experts if you spot these warning signs.

Common Causes — How to Diagnose Root Problems
Cracks tell a story on the slab or wall, so start by noting pattern, width, and length, then map those clues to likely root causes such as shrinkage, settlement, heave, thermal movement, overloading, or environmental cycles that stress the concrete over time.
Use a simple diagnostic checklist: record crack direction (vertical, horizontal, stair-step), whether they run along joints or reinforcement, and where they’re located relative to control joints, edges, and openings, then think about whether the cracks change with seasons or weather. Consider how installation and curing might have contributed—formwork quality, joint placement, presence of reinforcing bars, curing method, and mix issues like air content or water-cement ratio can influence crack development even before the load comes on it. So you can decide when to DIY or call in a pro, weigh whether the issue appears cosmetic or could affect structural safety, and plan your next steps without guessing.
Weather, Freeze-Thaw, and Temperature Cycling
Concrete driveways can crack due to the freeze-thaw cycle. When water seeps into tiny cracks or pores in the concrete, it expands as it freezes, causing pressure that can lead to cracking.
Another common issue is thermal expansion. As temperatures rise, concrete expands and contracts, which can cause stress on joints and weak spots leading to cracks. Look for stair-step patterns along control joints or vertical cracks near walls or curbs.
If you notice these types of cracks, especially if they appear seasonally, it’s likely that weather is the main culprit. Check your local climate data to see if there are extreme temperature swings or frequent freeze-thaw cycles in your area.
Poor Base, Compaction, and Installation Errors
Making sure the base is solid before pouring concrete is crucial. A weak foundation can lead to uneven settling or large cracks over time.
- Uneven surface: Large sections of your driveway are not level. This indicates poor compaction or a substandard base material.
- Cracks near joints: Cracks form at control joints prematurely, often due to improper joint spacing or lack of reinforcement.
- Settlement cracks: Vertical cracks appear in the middle of slabs. This is usually caused by inadequate compaction under high-load areas like garage entrances.
- Cracking patterns: Random cracking across the slab, often due to improper curing or water-cement ratio issues during mixing.
To avoid these problems, ensure proper base preparation and strict adherence to installation guidelines. Use a good quality subbase material and compact it thoroughly before pouring concrete.
Tree Roots, Drainage, and Ground Movement
Roots from nearby trees can lift or crack the driveway by pushing up against the concrete. Poor drainage around your driveway can also cause soil to shift and settle unevenly.
To check for root intrusion, look for cracks near tree trunks or where roots are visible. If you see signs of heaving or lifting in localized areas, it’s likely due to roots growing under the slab.
Inspect drainage around your driveway as well. Water pooling or running along the edges can undermine the base and cause cracking over time. Ensure proper grading so water flows away from the concrete surface.
Assessing Severity: DIY Inspection Steps and When to Call a Pro
Assessing severity means a practical, step‑by‑step DIY inspection: map the crack location, measure width with a simple gauge or calipers (or use a coin scale), install reference marks, and set a monitoring schedule to catch movement trends. Watch for slope changes, drainage issues, and any signs of active widening, vertical displacement, or multiple interconnected cracks that push you toward calling a pro.
This matters because clear thresholds help you separate DIY fixes from professional work, and a documented record makes the decision easy later. Collect photos, measurements, and time-stamped notes to track progress, and note indicators like displaced edges, stair-step patterns, spalling, loose concrete, or water intrusion that signal higher risk and the need for expert evaluation.
Measurements and Monitoring: What to Record
Use this checklist when you notice a crack that’s growing or changing.
- Width measurement: Use calipers or a coin scale. Skip if unsure of width; could miss critical changes.
- Depth check: Insert ruler vertically into the crack. Omitting this can hide structural issues.
- Photograph cracks: Take photos weekly for 1-2 months. Missing these shots means no visual record of change.
- Note location: Mark where each crack starts and ends with tape or chalk. Not doing so makes tracking tough.
- Install reference marks: Place stickers on either side of the crack for comparison. Skipping this leaves no baseline.
- Monitor slope changes: Check if driveway is leveling, sinking, or rising. Ignoring can lead to bigger problems.
- Check drainage issues: Look for pooling water near cracks. Overlooking can cause further damage.
- Note any spalling: Document flaking concrete around the crack. Missing this means ignoring surface integrity.
Quick rule: If you’re unsure about a measurement, take it anyway; better safe than sorry.
Red Flags Requiring Immediate Professional Help
Use this checklist when cracks are getting worse or showing signs of serious issues.
- Crack width >1/4 inch: Call a pro immediately. Ignoring can lead to major structural damage.
- Sinking sections: Look for areas that have dropped below grade. Missing this means ignoring stability risks.
- Puddling water: Check if cracks are holding water. Overlooking can cause further weakening of concrete.
- Multiplying cracks: Note when multiple cracks converge or spread out. Ignoring can mean bigger repair costs later.
- Cracks near foundations: Any crack within 5 feet of the house should be checked by a pro. Missing this means risking foundation damage.
- Garage floor issues: Look for cracks in garage floors that connect to driveway. Ignoring can mean structural instability.
- Sloping changes: Notice if your driveway is tilting or sinking. Overlooking can lead to uneven surfaces and more cracking.
- Spalling around edges: Check for flaking concrete near the edge of cracks. Missing this means ignoring surface integrity issues.
Quick rule: If you see any of these signs, don’t wait—call a pro right away to avoid bigger problems.
Quick Decision Flowchart (DIY vs Pro)
Use this checklist when you need to decide whether to tackle repairs yourself or hire a professional.
- Crack width: Less than 1/4 inch? DIY. Overlooking can mean bigger cracks later.
- Movement detected: Any widening or vertical displacement? Pro required. Ignoring means risking structural damage.
- Multiple cracks: More than one crack converging? Call a pro. Missing this means ignoring potential foundation issues.
- Water intrusion: Cracks holding water? Professional help needed. Overlooking can cause further weakening of concrete.
- Slope changes: Notice any tilting or sinking sections? Pro required. Ignoring can mean uneven surfaces and more cracking.
- Spalling present: Flaking concrete around cracks? Call a pro. Missing this means ignoring surface integrity issues.
Quick rule: If in doubt, err on the side of caution and consult a professional to avoid bigger problems down the line.
Tools, Materials, and Safety Checklist
This section walks you through a practical, DIY-friendly checklist of hand tools, concrete-specific tools, materials, PPE, and optional rental gear, plus quick safety reminders for a smooth project. It emphasizes a safety-first workflow with tips on ventilation, chemical handling, proper lifting, and keeping kids and pets away.
Keep a compact list of items to rent versus own, plus prep, measurement, and surface readiness steps so you mix and pour with the right expectations and clean surfaces. This matters because a solid setup saves time, reduces waste, and lowers the risk of accidents on the job, while checks like SDS and disposal guidelines help you stay on track and protect your landscape and neighborhood.
Recommended Materials and When to Use Each
Before you start, make sure you have the right materials for your specific crack type.
- Caulk/Urethane Sealants: For hairline cracks. Apply when dry; check sealant flexibility.
- Epoxy Resin: For deep structural cracks. Mix and pour evenly, cure overnight.
- Concrete Crack Filler: For surface cracks up to 1/4 inch wide. Fill and smooth with a trowel; check for proper adhesion.
- Resurfacer: For minor cosmetic issues. Mix according to instructions, apply thin layers; avoid overmixing.
- Bonding Agent: Before applying new concrete or resurfacer. Apply and let dry completely before proceeding.
- Sand and Aggregate: To mix with Portland cement for patching large cracks. Measure accurately to ensure proper consistency.
- Portland Cement: For mixing with sand and aggregate. Ensure no lumps; check water ratio.
Quick rule: Always use the right material for your crack type to avoid future issues.
Essential Tools and Optional Rentals
Having the right tools on hand is crucial for a successful repair job.
- Wire Brush: Clean out cracks before filling. Check debris removal; avoid loose particles.
- Chisel/Concrete Pry Bar: For breaking up old concrete or removing debris. Use safely, wear gloves and safety glasses.
- Trowel Set: For applying resurfacer or crack filler. Ensure smooth application; check for air pockets.
- Angle Grinder: To cut out cracks for deeper repairs. Wear protective gear; avoid overuse.
- Mortar Mixer: For mixing large quantities of concrete or patching material. Rent if needed, follow safety instructions.
- Plate Compactor: For compacting new concrete. Ensure even compaction; check for air voids.
Quick rule: Use the right tools and rent larger equipment as necessary to ensure a professional finish.
Safety & Environmental Precautions
Always prioritize safety when working with concrete materials.
- PPE Roster: Wear gloves, safety glasses, dust mask, ear protection. Check fit and comfort; avoid skin irritation.
- Ventilation: Ensure good airflow when using additives or sealants. Open windows or use fans to prevent inhalation hazards.
- Safe Disposal: Follow local regulations for concrete waste disposal. Use proper containers, label clearly.
- Low-VOC/Green Alternatives: Choose eco-friendly products when available. Check labels and SDS sheets; avoid harmful chemicals.
Quick rule: Always wear PPE and follow safety guidelines to protect yourself and the environment.
Step-by-Step DIY Repair Methods (by crack type)
We’ll lay out clear, step-by-step repair workflows for hairline, medium, and large/structural cracks, covering prep, fill, finish, and cure considerations. You’ll see how the approach changes with crack type and why choosing the right material matters. Safety, tools, and surface prep are woven into each method so you know what to check before you start.
This guidance helps you decide when DIY is appropriate and when to call a pro, using practical checkpoints like visible movement or wide or stepped cracks. It also shows how to monitor and prevent future cracks, with post-repair care and maintenance that matter for longevity. By the end, you’ll have a quick mental reference to pick the right workflow at a glance and avoid common pitfalls.
Step-by-Step Repair Process
This sequence guides you through the repair process, from prep to finish, ensuring a clean and effective fix.
- Clean the area around the crack thoroughly. Use a wire brush or pressure washer to remove dirt and debris.
Reason: A clean surface ensures better adhesion of materials.
Quick check: The concrete should be free of loose particles. - Apply any necessary primer if using epoxy-based products, following manufacturer instructions.
Reason: Primer helps the epoxy adhere better to the concrete.
Quick check: The primer is evenly applied and dry before applying sealant. - Choose your repair material based on crack size (hairline, medium, or large).
Reason: Different materials are suited for different sizes of cracks.
Quick check: Ensure you have enough material to cover the entire length of the crack. - Fill the crack with the chosen sealant or patching compound. Use a trowel or putty knife to spread it evenly.
Reason: Proper application ensures no air pockets and full coverage.
Quick check: The surface is smooth without any gaps or bubbles. - Cure the repair according to manufacturer instructions, typically 24-72 hours depending on conditions.
Reason: Curing time allows the material to set properly.
Quick check: Avoid walking or driving over the repaired area until fully cured.
Hairline & Surface Cracks — Cleaning, Sealing, and Curing
Cleaning is key for hairline cracks. Use a wire brush or pressure washer to remove dust and debris.
Reason: A clean surface ensures better adhesion of the sealant.
Select a self-leveling concrete sealer that’s easy to apply and dries quickly. Apply it evenly over the crack using a trowel or putty knife.
Reason: Self-leveling sealers fill small cracks without needing much preparation work.
Cure times vary based on temperature and humidity levels. Avoid driving or walking on the repaired area until fully cured, typically 24-72 hours.
Reason: Proper curing time allows the sealer to bond with the concrete properly.
Medium Cracks & Joint Repairs — Backer Rods, Caulk, and Patching
If necessary, widen the crack slightly to a V-shape using a chisel or grinder. This helps sealant adhere better.
Reason: A wider base provides more surface area for adhesion.
Insert backer rod into deep cracks before applying non-sag sealant. Use a trowel to spread the sealant evenly over the crack and around edges.
Reason: Backer rods prevent sealant from sagging, ensuring proper depth and width of the repair.
Cure times vary based on temperature and humidity levels. Avoid driving or walking on the repaired area until fully cured, typically 24-72 hours.
Reason: Proper curing time allows the patch to set properly without damage.
Large Cracks, Sinking Slabs, and When to Stabilize or Replace
For large cracks, consider temporary patching with hydraulic cement for immediate use. This is a quick fix but not permanent.
Reason: Temporary patches can hold until you decide on more substantial repairs.
If the slab has sunk significantly, mudjacking (injecting grout under the slab) or polyjacking (using expanding foam) might be necessary to stabilize it.
Reason: These methods lift and level sinking slabs without full replacement.
In severe cases where structural integrity is compromised, partial or full replacement of the concrete may be required. Consult a professional for assessment.
Reason: Severe damage can indicate deeper issues that need expert attention.
Cost Guide & Time Estimates — DIY vs Professional
Cost Guide & Time Estimates helps you see when DIY is feasible and when to hire a pro by outlining rough ranges for common materials and services, plus how long each repair typically takes from start to finish. You’ll compare DIY materials like sealants and patching products to professional services such as crack repair, slab leveling, or resurfacing, while accounting for crack size, location, access, and surface prep. Expect notes on prep time, cure or dry times, and how many visits a project might need, without guessing exact prices or code requirements.
This matters because it frames your decision: DIY can save money on simple, well-contained jobs, but bigger cracks, movement, water intrusion, or structural concerns usually push you toward professionals. Use it to ask the right questions, anticipate what the contractor will quote (materials, labor, equipment, contingency), and plan for safety, proper surface prep, and cure times. Always check product labels or datasheets for limitations, and if you’re unsure, verify with the manufacturer or local rules before committing.
Typical DIY Material Costs and Sample Budgets
The materials you choose can significantly impact the durability and appearance of your concrete driveway. Here’s a breakdown to help you estimate costs:
- Crack sealant: Ideal for hairline cracks; look for high-quality, flexible sealants that prevent water intrusion. Avoid cheap options that may crack or peel over time.
- Epoxy injection kit: Best for larger cracks up to 1/4 inch wide; ensure it’s UV-resistant and can withstand heavy traffic. Incorrect application can lead to weak spots.
- Polyurethane filler: Quick-drying option for medium-sized cracks; choose a product that bonds well with concrete. Over-application can cause uneven surfaces.
- Concrete patch: For repairing larger surface areas or deep cracks; opt for a high-strength mix to ensure durability. Poor mixing ratios lead to weak patches.
- Silicone caulk: Essential for sealing joints and preventing water damage; select a durable, weather-resistant formula. Cheap alternatives can deteriorate quickly.
Professional Service Costs and What Influences Price
The cost of professional concrete repair varies widely based on several factors. Extensive damage, difficult access points, or the need for additional work like slab leveling or drainage improvements can significantly increase expenses.
Patching: This involves filling cracks and holes with a high-strength concrete mix. The price depends on the extent of repairs needed and whether it’s just patching or also includes surface preparation.
Leveling: If your driveway has sunken areas, professional leveling might be required. This process can involve injecting grout under the slab to lift it back into place, which is more labor-intensive and thus costlier than simple patching.
Replacement: In severe cases where extensive damage or structural issues exist, full replacement may be necessary. This option is expensive but often essential for long-term durability.
Return on Investment & Longevity Expectations
The longevity of your concrete driveway repairs depends largely on the materials used and how well they are applied. Sealants typically last 2-5 years, while epoxy injections can endure up to a decade with proper application.
Full replacement offers the longest lifespan but comes at a higher initial cost. Regular maintenance, such as sealing every few years, can extend the life of your driveway and save money in the long run by preventing major repairs.
Maintaining preventive measures like regular cleaning and sealing helps avoid costly issues down the line. Properly addressing cracks early on prevents water intrusion that could lead to more severe structural damage later.
Preventing Future Cracks — Maintenance, Drainage & Seasonal Tips
Prevention starts by pinpointing the root causes of cracks before you seal or resurface, so you’re not fighting the same problem next year, and you know where to focus your effort. Check whether shrinkage, settlement, improper drainage, freeze–thaw, or repeated loading is driving the damage, and tailor your plan to that diagnosis rather than throwing on a coat of sealer, because a generic fix rarely lasts. Then lay out a concrete maintenance and sealing rhythm for cracks, joints, and surface sealers that fits your climate, traffic, and how hard you run the space, and write it down so you can actually follow it.
Get drainage working first—grade away from the slab, add downspout extensions, and establish proper swales so water doesn’t sit and push on the slab over time, especially after heavy rains or snowmelt. Plan seasonal timing for tasks: seal when temperatures are workable, avoid sealing in freezing or extreme heat, and schedule inspections in spring and fall and after major freeze–thaw cycles to catch small issues before they grow. For DIY readiness, handle routine hairline cracks and simple sealing; anything wider or rising should get a professional evaluation, and don’t ignore cracking that changes width or alignment over a season.
Sealing, Coatings, and When to Reapply
To keep your concrete driveway in top shape, sealing is key. Use a high-quality acrylic or silane sealer for best results. Apply it every two years if you live in an area with heavy rainfall or freeze-thaw cycles.
Before resealing, clean the surface thoroughly to remove dirt and debris. A pressure washer works great but be careful not to damage the concrete. Let the driveway dry completely before applying the sealer.
If you notice hairline cracks forming, address them first with a crack filler or sealant. This prevents water from getting under the slab and causing bigger issues down the road.
Drainage, Slope Corrections, and Vegetation Management
Maintaining proper drainage is crucial for preventing future cracks. Make sure water flows away from your driveway’s edges at a rate of about 1 inch per foot.
If you have low spots or puddles forming after rain, correct them by adding more concrete to level out the area. This prevents hydrostatic pressure and water saturation that can cause cracking over time.
Manage vegetation around your driveway carefully. Tree roots can lift slabs and cause cracks. Keep trees at least 10 feet away from the edge of your driveway. If you have existing trees, consider installing root barriers to prevent further damage.
Long-Term Maintenance Schedule & Visual Checkpoints
Use this simple yearly checklist to keep your concrete driveway in top shape:
- Inspect: Look for cracks, spalling, or heaving. Address any issues immediately.
- Clean: Remove dirt and debris with a broom or pressure washer.
- Seal: Apply sealer every two years to protect the surface from water damage.
- Repair small cracks: Fill hairline cracks before they become bigger problems.
Quick rule: Regular maintenance now saves big headaches later.
When you need professional help
Professional help is needed when cracks show structural risk indicators you can’t safely treat yourself—things like large, widening, or displacement cracks, stair-step patterns, or cracking that repeats after freezing and thawing, plus signs of foundation trouble such as sagging slabs, gapping doors or windows, or moisture-related spalling. If you’re seeing these, it isn’t a DIY job, and a trained pro should evaluate the scope before any repair or lifting is attempted. Plan to have a clear threshold in mind for when to stop and call in a contractor rather than chasing quick fixes along the way.
Before you call, do safe, simple pre-diagnostics: document cracks with dated photos, map their location, and note nearby trees, drainage, and any water pooling, plus potential safety hazards. A professional will check subgrade moisture, drainage and exterior grading, soil movement, footing integrity, and whether cracks are superficial or load-bearing, which will drive the repair method—epoxy or polyurethane injections, underpinning, slab leveling, or full replacement. Choose a contractor by requesting a site visit, a formal inspection report, and at least 2–3 bids, while verifying licenses, references, and clear timelines, permits, and post-repair care.
Red flags that mean you should call a professional
If your driveway has large cracks—more than 1/4 inch wide—or if they’re widening over time, it’s a clear sign to bring in the pros. Stair-step patterns, where the concrete breaks into steps, indicate significant structural issues that DIY fixes won’t address.
Sagging slabs or gaps around doors and windows can signal foundation problems beneath your driveway. Water pooling near these cracks means moisture is getting under the slab, weakening it further. This isn’t just a cosmetic issue; it’s a safety hazard that needs professional attention.
Repeated cracking after freezing and thawing cycles also points to deeper issues like poor subgrade or inadequate drainage. These conditions can lead to serious structural damage if left unaddressed. Document these signs with photos and measurements before calling in the experts for an accurate assessment.
How to prepare for a professional visit
To make your contractor’s job easier, start by documenting any cracks or issues you’ve noticed. Take photos and mark the locations on a map of your property. Measure crack widths with a caliper or crack gauge and note if they’re getting worse over time.
Check for signs of water intrusion around the affected areas—look for pooling water, spalling (flaking), or efflorescence (white salt deposits). These can indicate drainage problems that need to be addressed. Gather information on your driveway’s age, materials used, and any previous repairs done.
Before the contractor arrives, clear the area around the cracks so they have easy access for their inspection tools. Have a list of questions ready about repair methods, warranties, and cost estimates. This will help you make informed decisions when choosing who to hire.
Conclusion
Assessing and fixing cracks now protects safety, preserves value, and helps you avoid bigger, more costly repairs down the road. Stay practical, follow the steps, and you’ll keep the driveway durable and looking solid.
First, check the crack type and whether water or dirt is getting in, assess severity and movement, gather the right tools and materials, clean and dry the area, test your chosen repair in a small spot, follow safe application and curing times, and then seal and monitor for future movement. Use the answers from your DIY diagnosis to pick the repair method, and never skip safety steps or curing periods.
Avoid common missteps: don’t patch while the crack still moves or water stands behind it, don’t use the wrong patch material for the crack type, and don’t rush curing or overbuild the patch. Also avoid cutting corners on drainage and seasonal maintenance, and never work without proper eye and skin protection. Safety first means test in a small area, follow product directions, and stop if conditions are too unstable.
If the crack is wider than a half inch, shows active movement, water is pooling behind it, or you see structural shifts in the slab, call a pro. For all other typical cracks, you can push ahead with careful, measured steps and expect solid results. You’ve got this, and the driveway will reward your careful work.
FAQ
What causes cracks in a concrete driveway?
cracks form from settlement, temperature changes, and small ground shifts. Heavy vehicles and poor prep can make cracks worse. Look for cracks that keep growing year after year.
Can I fix cracks myself with DIY methods?
You can fix small, non-structural cracks with crack filler or epoxy. For wide or active cracks, or if water leaks through, stop and call a pro. Bad fixes will cost you more in the long run.
What tools and materials do I need for a simple repair?
You’ll need a chisel, wire brush, concrete cleaner, and a filler or epoxy. A stiff trowel helps smooth the surface. Follow the product instructions exactly for best results.
When should I call a pro for my driveway cracks?
If cracks are wider than a quarter inch, or you see hollow sounds under the slab, call a pro. Slab movement or repeated water intrusion means a bigger issue. Don’t ignore it and don’t DIY past your limits.